How To Clean Evaporator Coil Without Removing?

Published on: 27 February 2023 Last Updated on: 30 January 2026
how to clean evaporator coil without removing

If you want your air conditioner to perform well at all times, you will need to ensure that you maintain and clean the parts of the air conditioner on a regular basis. If you schedule your maintenance as per the requirement of the AC, then it is great. However, in some cases, people like to clean their AC themselves. If you are one of them, you might be interested to know how to clean evaporator coil without removing it when you have a dirty evaporator coil.

In this article, we will basically talk about why you need to clean your AC’s evaporator coil and how to clean evaporator coil without removing the coil from the AC. Before that, you will also know about what happens to the air conditioner when the evaporator gets dirty.

What Happens When Your AC Coil Gets Dirty?

What Happens When Your AC Coil Gets Dirty?
Image Source: lirp.cdn-website.com

If the evaporator coil of your AC is unclean, it puts your AC at risk. It compromises the safety and working efficiency of the AC in general. In the first, an unclean evaporator coil slows down the speed at which the air blows through the AC, as it blocks the flow of the air. If the evaporator coil contains other materials and particles like pollen and dust, it limits the efficiency of the flow of air.

The following things happen when there is an unclean evaporator coil inside the air conditioner:

1. If the evaporator coil is dirty or clogged with particles, then it reduces the flow of air into your home. If there is a reduced flow of air inside your home, it will lead to a lowering of the efficiency of the cooling system of the AC. Your room takes a lot of time to cool than it normally takes, probably your evaporator coil needs cleaning.

2. There might be some cases where your room is not achieving a good level of cooling, despite running the AC for hours at a stretch. In such cases, the problem is probably more than a delay in the cooling performance of the AC. Basically, it is a negative effect on the AC’s cooling capacity.

3. Another great issue that happens when the evaporator coil of your AC gets dirty is that the operating pressure increases. This increases the temperature level of the AC, as the unit is working at hotter levels. This is not good for the AC as it damages the components of the AC.

4. An unclean evaporator coil creates wear on the AC system. If one important part of the AC fails to work properly, the other parts follow suit. This is because there is more pressure on the other components of the AC. Hence, the other parts are more likely to get damaged due to the failure of one part. Therefore, you will end up with a damaged AC altogether, and repairing it will be quite expensive for you.

5. If your AC’s evaporator coil gets compromised and does not work properly, then it affects the performance of the other parts of the AC. Hence, your AC unit will have a shorter life. If you want your AC unit to perform well and serve your home for a long time, you will need to ensure that every part of your AC is clean, especially the evaporator coil.

Why Do You Need Your Air Conditioner Coil Clean?

Why Do You Need Your Air Conditioner Coil Clean_
Image Source: www.cleanairprotx.com

You will not need to spend a lot on the repairs of the AC. Regular maintenance will keep out the issues from the AC that need repair. Before any problem turns into a bigger one, you can fix it with regular maintenance. Apart from that, if you keep your evaporator coil clean always, it will not accumulate dust and hence will perform better as a result.

How To Clean AC Coils? – Things You Need?

How To Clean AC Coils? – Things You Need
Image Source: phyxter.ai

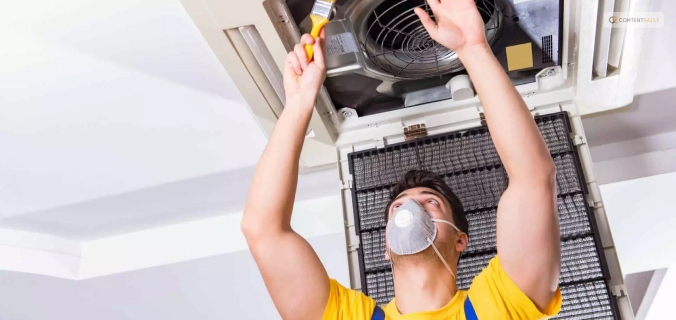
The first thing you will obviously need for your AC cleaning is an air conditioner coil cleaner. Apart from that, you will need a cotton cloth for cleaning the coil. For your own protection, wear protective goggles, and wear gloves on your hand for better protection. Furthermore, ensure that you are following the instructions properly while you are cleaning your AC’s evaporator coil.

How To Clean Evaporator Coil Without Removing?

How To Clean Evaporator Coil Without Removing?
Image Source: snyderac.com

The evaporator coil basically captures all the heat present in your home to condition the air inside. Apart from the evaporator coil, there is a condenser coil in the AC, which removes the air from the AC to the outside of the house.

This is the way in which the AC works in colling the house. Since an evaporator is an important part of your air conditioner, hence keeping it clean will enable you to keep your air conditioner always efficient. However, if your question is, “How to clean AC evaporator coils inside house?” then you need to read the next subsection of this article.

Read More: Here’s What Makes Package Units Better than the Other ACs

AC Coil Cleaners – How To Clean Evaporator Coil Without Removing?

AC Coil Cleaners - How To Clean Evaporator Coil Without Removing
Image Source: img.fruugo.com

The following are the ways in which you can clean the evaporator coil of your AC without removing it from the AC:

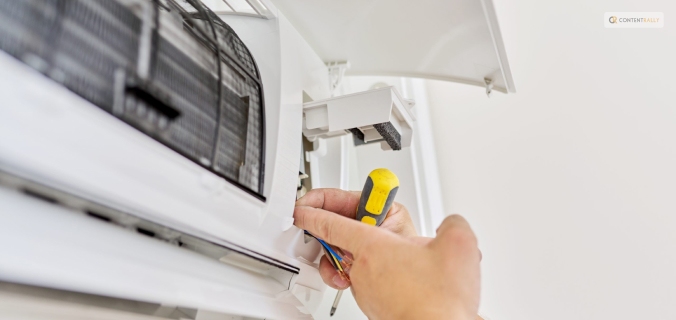
Step 1: Turn down the power of the AC, and unplug the machine from the electric port. You will not need an electricity risk for yourself while cleaning.

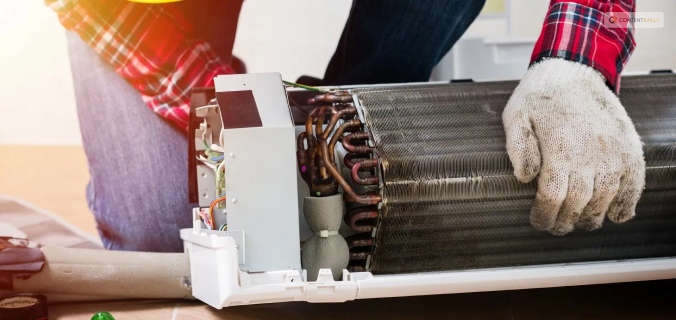
Step 2: Remove the access panel from the AC to see the evaporator coil clearly. Go over the manual of the AC, if required. The manual has instructions on where you can find the access panel.

Step 3: Take the access panel off, and remove the screws from the AC. Keep the screws in a safe place.

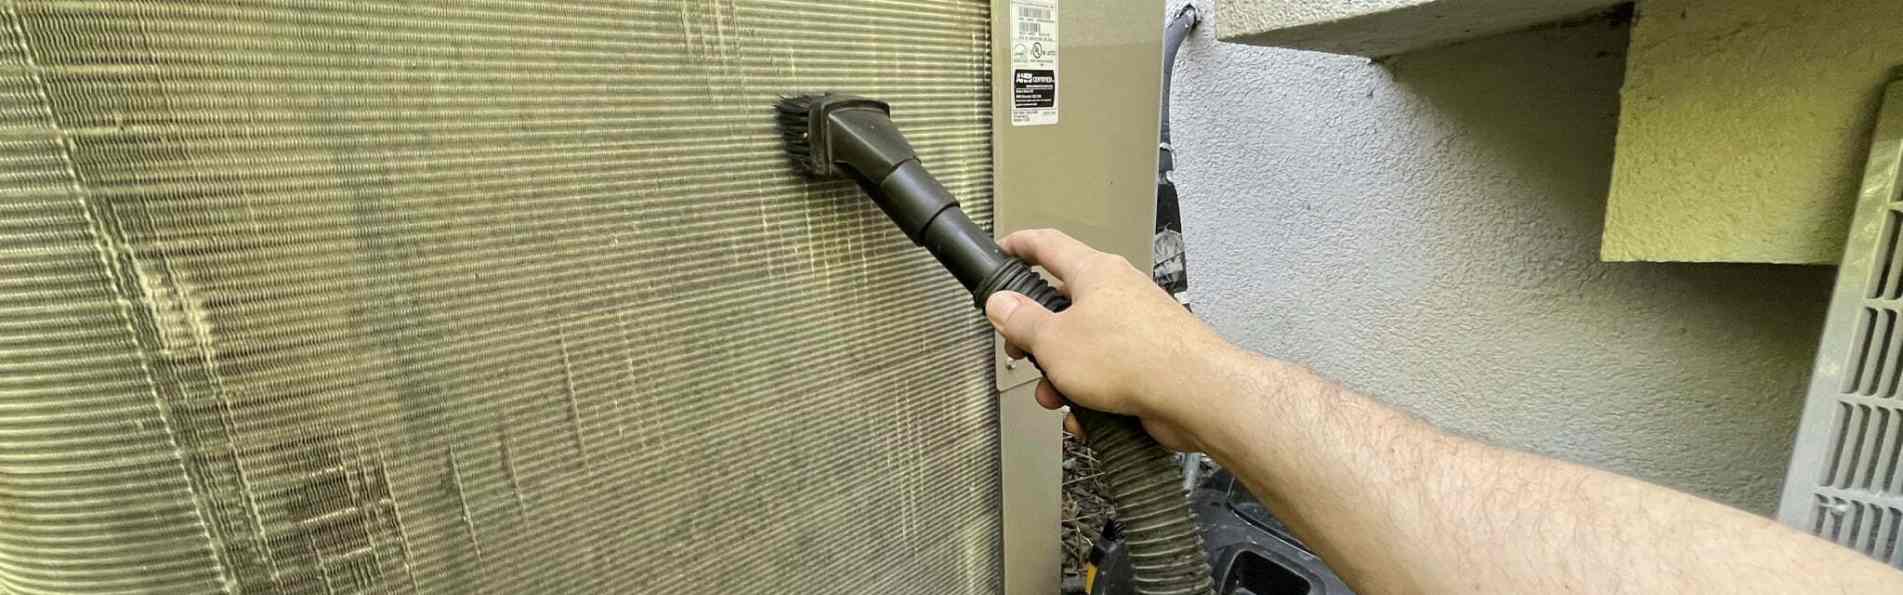
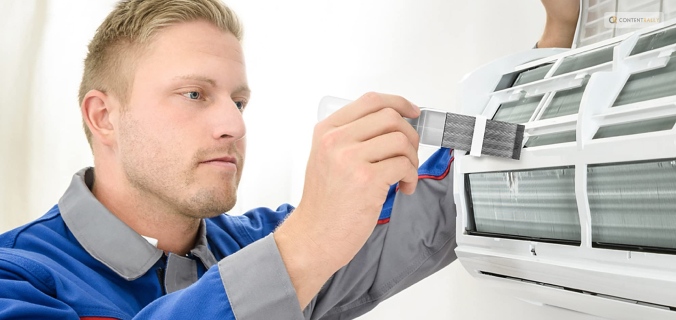
Step 4: To blow the unclean particles off, try using a compressed air canister. This will help you to easily loosen the dirt on the evaporator coil.

Step 5: Put back the screws, as well as the access panel. Your evaporator coil is clean.

Summing Up

Hope the article helped you in knowing how to clean evaporator coil without removing it from the AC. Cleaning your AC is a part of the maintenance operation of the AC. If you maintain your AC on a regular basis, it will offer you a lot of benefits. There will be less hassle and issues on your AC as a result of regular maintenance and cleaning. If you clean the parts of your AC, your AC will look and perform as if it is fully new.

Read Also:

A passionate writer and an avid reader, Soumava is academically inclined and loves writing on topics requiring deep research. Having 3+ years of experience, Soumava also loves writing blogs in other domains, including digital marketing, business, technology, travel, and sports.

View all posts

Leave a Reply

Your email address will not be published. Required fields are marked *

Related

Your House

How To Keep Your House Clean – A Beginner’s Guide

Starting the process of tidying up and arranging your home might feel overwhelming, but it's incredibly rewarding. A clean, organized space not only brings a sense of calmness but also sets the stage for enjoyable moments with loved ones.  This beginner's manual on cleaning and organizing equips you with the essentials to kickstart your journey towards a serene living environment. So, let's get started with it. Step - 1: Begin Your Journey with Something Small Beginning with a small area can help alleviate the overwhelming feeling of cleaning and organizing your home. For example, starting in just one room or a tiny section within a room can reduce the stress associated with the task.  Once you've tidied up and organized that small space, it tends to inspire further progress.  It's like a chain reaction— as soon as you initiate the process, you'll often find the motivation to continue. The sense of accomplishment from cleaning that initial space acts as a catalyst, propelling you to tackle more cleaning and organizing tasks. Step - 2: Declutter Your Rooms. All of Them! Before diving into organizing, it's crucial to declutter thoroughly.  Start with a smaller space like your fridge. Empty its content, discarding expired or inedible items. Clean all of the surfaces using a damp cloth and your preferred all-purpose cleaner.  When clearing out various areas in your home, prioritize keeping only the things you truly need or cherish. If it's challenging to part with certain items, remember they might serve someone else while giving you more room at home.  Consider donating or selling belongings you no longer adore. Discard broken, incomplete, or heavily worn-out items. Items that are no longer in use—like old toys, baby gear, clothes, or furniture—can find new homes through donation or sale.  This decluttering not only creates space for other purposes but also makes it easier to access and appreciate the things you genuinely value and use. Step 3: Get a Cleaning Caddy for Yourself Before starting your home cleaning routine, it's helpful to prepare a portable cleaning kit that you can easily carry around.  You don't need a multitude of cleaners or tools—just include what you'll actually use. Your cleaning kit can be as simple as a bucket, plastic bin, canvas bag with handles, or any larger container that suits your convenience.  Whether store-bought or homemade, the key is to have a portable solution that suits your needs as you move from room to room. Step 4: Keep the Surfaces Clean After completing the decluttering process, it's crucial to tidy up the space before organizing. Quickly cleaning the area will impart a fresh feel, enhancing the likelihood of maintaining its cleanliness for an extended period. Here are some cleaning tips that you might need… Create a cleaning caddy for easy access to supplies.  Then clean from higher surfaces downward to catch falling debris as you progress.  Utilize a vacuum attachment to clear drawers, shelves, cabinets, or closets of any remaining debris.  Use a damp microfiber cloth to wipe surfaces, ensuring thorough cleaning. Remove any items that don't belong in the cleaned area. Step - 5: Organize Everything The crucial element in home organization is to gather similar items together.  Whether it's your refrigerator, pantry, kitchen cabinets, bathroom, living room, kids' rooms, closets, or garage, arranging items of the same kind is essential for easy access and visibility. Scattered items make it difficult to locate what you need and can lead to clutter.  By grouping similar items, you create a clear system that helps in both finding items and guiding your family when it comes to tidying up. I: How to Organize Your Kitchen? It's beneficial to begin organizing your kitchen by focusing on a small area first, as this can inspire you to tackle other spaces. The kitchen often serves as the hub of a home and sees frequent use, making it a great starting point.  Once you've sorted out your kitchen, the task of taking care of the rest of your house becomes more manageable. A smart step in this process is to begin with your refrigerator. Streamlining your fridge organization can serve as a catalyst for organizing other areas. II: Organizing Your Fridge Arranging your refrigerator involves categorizing similar food items–together for better organization. With adjustable shelves and doors, along with additional bins, you can optimize the space quite easily. Clear plastic bins are particularly helpful as they allow easy visibility of their contents. They're convenient for accessing snacks, packing lunches, and planning meals.  Here are examples of foods that should be grouped together either in bins, on shelves, or in drawers for a more organized fridge... Bagged fruits and vegetables  Cheeses and lunch meals  Fresh vegetables and fruits Sauces and condiments  Salad dressings III: Organizing the Other Parts of Your House After you've sorted one area, take the same approach to the rest of your house.  Use the refrigerator organization tips as a template for each room: clear out unnecessary items, tidy up, and then arrange everything neatly.  Remember, the key is to tackle each room gradually to avoid feeling swamped, following the same method each time. If there are any similar types of items available in your house, group them together. Clean the area once you are done with the former step. Get rid of anything and everything that you don't want to use. Step 6: Disinfect the Surface Areas and Countertops Clean the hard surfaces around your home thoroughly, including countertops, appliances, cabinets, doorknobs, light switches, TV remotes, and phones.  Disinfect surfaces that are commonly touched to reduce the spread of germs.  Create a natural disinfectant by combining one-fourth to half a cup of white or apple cider vinegar with one cup of water. They'll work like magic for you. Make It a Group Activity Collaborating as a team is a top-notch method for swiftly tidying up a house. Plan ahead with your family for a designated time and distribute specific chores among everyone.  Joining forces not only injects some enjoyment into the cleaning process but also ensures a sparkling home in no time. You can also opt for a reputable cleaning service that can help you with the process. It can seem a little more expensive than usual, but it's much more sustainable per see. Read Also: Vancouver House Cleaning Services with Local Home Cleaners Near You What You Need to Look for When Hiring House Cleaning Service 5 Hotel Housekeeping Tricks You Need To Clean Your Bathroom

READ MOREDetails
Apartment

6 Types Of Signs Every Apartment Resident Should Know About

Signage plays a crucial role in communicating important information and guiding residents and visitors at apartment complexes. From practical wayfinding signs to eye-catching banners advertising available units, the right signs can make all the difference.  This blog explores the array of sign options that apartment managers have at their disposal to effectively convey messages, improve accessibility, and enhance curb appeal. We’ll look at everything from illuminated “Vacancy” signs to inform potential renters of availability to parking designation signs that help maintain order in lots. Metal laser cut signage like building and unit number markers also make it easier for emergency responders, delivery drivers, and visitors to navigate complexes. Plus, promotional banners can attract interest from passersby. With a thoughtful signage strategy, managers can ensure their apartment community puts its best face forward while helping residents and guests seamlessly get where they need to go. Effective Safety Signage for Apartment Complexes Strategic safety signs are a must for any apartment community, helping to mitigate risk and give residents peace of mind. Required by law in many cases, these symbols and warnings serve an important function by alerting residents and visitors to potential hazards, emergency resources, and proper protocols.  Exit signs with directional arrows provide critical guidance in the event of a fire or other emergency evacuation. Highly visible hazard signs denoting slippery floors or wet paint caution people to avoid dangerous conditions. Signs indicating the locations of safety equipment like fire extinguishers and defibrillators can save critical seconds in an emergency. Parking and traffic signs help maintain order in complex lots and garages. Warning symbols for loud noises, falling objects, or other construction hazards around work zones keep passersby safe. When properly placed around an apartment community, these simple but essential signs convey a message of preparedness and attention to safety that gives residents confidence in their building management. Contemporary Signage for an Inviting Apartment Atmosphere An apartment community's signage makes a strong first impression on prospective residents. To keep pace in a competitive market, modern, stylish signs are a must in showcasing an up-to-date, inviting atmosphere.  Sleek, backlit LED signs at a complex's entrance identify the property while seamlessly blending contemporary aesthetics. Likewise, stylish building IDs with minimalist lettering and colors that pop evoke modern tastes. Parking signs with clean lines and high-visibility reflective vinyl or thermoplastic lettering also exude a contemporary vibe.  Inside leasing offices, wayfinding signage with intuitive pictograms, sans-serif fonts, and bright accent colors speaks to today's sensibilities. Outdoor banners sporting vibrant images, short impactful phrases, and a distinctive modern style attract the gaze of passersby. Signs with polished, contemporary finishes appeal aesthetically and communicate professionalism and quality. By partnering with an innovative sign company, apartments can keep their image fresh, memorable, and inviting for new generations of renters. Promotional Signage for Apartment Events Special events help apartment communities build a sense of togetherness and camaraderie among residents. To generate buzz and boost participation, targeted signage is an invaluable promotional tool. Eye-catching vinyl banners prominently displayed at a complex's entrance build anticipation and awareness of upcoming holiday parties, poolside barbecues, and other resident events. Sandwich boards stationed in high-traffic common areas like mailrooms spread the word on everything from movie nights to fitness classes. For events like trick-or-treating or a pet parade that will draw outside visitors, roadside signs posted nearby grab attention from passersby.  Temporary signage like corrugated yard signs, A-frame sidewalk signs, and posters hung in common spaces ensure residents receive frequent reminders leading up to each event. The vibrant, festive designs set a fun tone. After an event concludes, a thoughtful "Thank You" sign shows appreciation for those who participated. With the right signage strategy, apartment managers can generate buzz and bring their community together around special activities and gatherings year-round. Clear Identification Signs for Apartment Buildings A clear signage strategy is essential in any apartment community to help residents and guests easily identify buildings, units, and common spaces. Proper identification guides traffic, minimizes confusion, and improves the overall living experience.   Illuminated building numbers and address signs ensure emergency responders can quickly locate the correct structures. Unit number signs on floors and doors give each residence a sense of identity. Room ID signs labeled with easy-to-read text and icons help differentiate laundries, fitness centers, lobbies, and other shared amenities. Custom room name signs add personality to spaces like game rooms or theaters.  Well-designed identification signage also reinforces security. Authorized access signs for private lobbies or gated garages deter unwanted visitors. And placards labeling restricted areas like electrical rooms or roof access help keep people safe.  Finally, a clear wayfinding signage strategy with directionals pointing to different building exits or parking areas simplifies navigation. With thoughtful placement and durable materials, identification signage provides clarity, security, and convenience for years of daily use. Accessible Signage for ADA Apartment Compliance In apartment complexes, proper ADA-compliant signage is a legal requirement to accommodate residents and guests with disabilities. Following ADA guidelines help ensure equal access and inclusion for all. Signs must have high visual contrast between lettering and background without glare or shadows. Grade 2 braille placed below the text provides accessibility for the blind and visually impaired. Raised characters and pictograms allow signs to be interpreted non-visually by touch.  Accessible signs use simple, intuitive icons that transcend language barriers. Directional signs assist with wayfinding. Room signs identify amenities. Informational signs indicate accessible routes, entrances, exits, and areas of rescue assistance. Stairway signs guide users towards ramps.  By law, permanent spaces like unit entrances and common rooms require ADA signs. Temporary signs like parking warnings should also follow recommendations. With a thoughtful sign plan incorporating contrast, braille-raised characters, and icons, apartment complexes demonstrate their commitment to creating a welcoming, navigable environment for all residents and visitors. Intuitive Wayfinding Signage for Apartment Complexes A clear wayfinding signage strategy is essential for any apartment community, allowing residents and guests to seamlessly navigate between buildings, amenities, and parking areas. Intuitive signs reduce frustration and reflect thoughtful management. Directional signs posted at complex entrances and key intersections point visitors toward leasing offices, guest parking, and specific buildings. Trailblazer signs on main walkways provide ongoing orientation. Arrows, international symbols, and maps further aid navigation at junctions.  Building directories found in main lobbies centralize location information for amenities like fitness centers, pools, and business centers. Illuminated unit number signs outside stairwells and elevators confirm users are on the correct floor. Parking signs with color coding and space numbers help distinguish lots and spaces.  With thoughtful placement and highly visible reflective materials, wayfinding signage ensures visitors quickly find their destination. This cuts down on circling, enhances first impressions, and communicates a resident-focused environment. Simply put, good wayfinding equals good management. Conclusion An effective signage plan is invaluable for any apartment community, serving practical and aesthetic purposes. From illuminating building numbers that assist emergency response to wayfinding signage guiding foot traffic, signage provides orientation, security, accessibility, and visual appeal. Managers must consider permanent signage needs like room IDs and ADA compliance and options for changeable messaging to promote leasing availability or resident events. The finishes and design details of all signs should align with the complex's contemporary style and branding. Utilizing sign types from digital displays to sidewalk A-frames provides flexibility. With the help of an experienced sign company, managers can develop a comprehensive signage strategy tailored to their complex's specific spaces, needs, and aspirations. From influencing first impressions to sustaining long-term functionality, signage positively impacts apartments in countless ways. When thoughtfully designed, fabricated, and placed, signage cements an apartment community's identity as an inviting, navigable place residents are proud to call home. Read Also: How to Make Your Student Apartment Feel Like Your Own House? Things You Can Do to Your Apartment to Raise Its Value 5 Interior House Painting Tips

READ MOREDetails
Gardening

Best Gardening Tips For Beginners: Adopting A Relaxing Hobby

Gardening is a delightful hobby that requires patience and perseverance. Everyone can make mistakes while planting, whether you're a seasoned grower or a novice.  However, with careful planning, you can avoid these common errors. As the spring season approaches, now is the perfect time to start planning your garden and prepare for planting.  Gardening is not only a fun pastime. It also rewards you with fresh, homegrown produce and a fragrant outdoor space to enjoy your meals. Therefore, find a neighborhood nursery, get your favorite plants, and start an amazing journey amidst nature! While knowing when and how to begin your gardening journey might be challenging, the outcome is worth the effort. In this article, we shall help you with some major tips to help you on this green journey. Keep reading! Gardening Tips For Beginners A relaxing hobby can help you cope better with the stress and disappointments in life; gardening is the best solution. Therefore, gardening can be one of the best ways to channel your time in a positive direction. When you plant a sapling and watch it grow over time, it helps you connect with the innocent joys of life. It stimulates the nurturing nature within you. Therefore, gardening helps you heal mentally and enhance your well-being. Given below are some of the most important tips that you will need to follow at the beginning of your gardening endeavors— 1. Select The Right Spot To get your vegetable garden off to a good start, selecting the perfect area is crucial.  This spot must receive a minimum of six hours of sunlight each day. Insufficient sunlight can lead to stunted growth and reduced crop yields.  When choosing your garden location, take note of areas that receive the most sunlight. Next, you must try to situate your garden bed near a water source.  Therefore, your plants can easily access the necessary nutrients for healthy development.  By considering these factors, you'll be on your way to a successful and thriving garden. 2. Choose The Right Plants It is often difficult for beginners to understand what plants are right for their garden. There are several factors that affect the type of plant you must consider— Weather conditions: To choose the right plants for your garden, consider factors like temperature, humidity, and sunlight at your place. Moreover, the weather conditions also affect the soil type and maintenance requirements. Water availability: When selecting plants for your garden, it's important to consider their water requirements. Moreover, your garden’s drainage ability can also affect the growth of plants.  Attention and care requirements: Consider attention and care requirements when choosing plants for your garden. Some plants need more maintenance than others.  Therefore, assess the time and effort you are willing to invest and choose accordingly. Knowing the specific care needs of different plants will help them thrive in your garden. Start with low-maintenance succulents and cacti if you're new to gardening. These plants need little attention and help you get hooked on the hobby.  These plants store water in their leaves or stems. Therefore, they are perfect for those who regularly forget to water their plants.  Succulents come in different shapes and sizes, while cacti range from small, round shapes to tall, columnar forms. 3. Choose Between Seeds And Saplings When starting your gardening journey, you must choose seeds or saplings.  Seeds are the most cost-effective option and offer a wider variety of plant choices. However, they require more time and effort to grow. Moreover, seeds will need proper conditions for germination and nurturing.  On the other hand, saplings are pre-grown plants that can be directly planted into your garden.  Saplings are more expensive than seeds. However, they save you time and effort as they are already established and have a higher chance of success.  Therefore, the choice between seeds and saplings depends on your personal preferences, budget, and level of gardening experience. Related: How To Arrive At The Perfect Choice Of A Potting Bench For Your Gardening 4. Know How To Make Your Soil More Fertile It is important to enhance the structure of your soil and improve its drainage and moisture-holding capacity.  Therefore, you can improve the health of your soil by using compost, leaf mold, or well-aged manure, which is a great option.  These organic materials act as a sponge and help retain water and nutrients, ultimately benefiting plants' growth.  However, it is important to avoid using fresh manure. It can harm your plants. Moreover, fresh manure might contain harmful bacteria and pathogens. These pathogens can cause serious diseases, and their high nitrogen content may burn the plants' tender roots.  Therefore, it is recommended to compost the manure for at least 6 to 12 months before using it on your plants.  This breaks down the harmful bacteria and pathogens and also makes the nutrients in it more available to the plants. 5. Select The Right Pots If you don't have enough space for gardening, you might want to try container gardening. It's a fantastic way to grow a wide variety of plants, including fruits, vegetables, herbs, flowers, berries, and shrubs.  However, when you opt for container gardening, you must select a pot that's big enough for your plant to grow in. Moreover, the pot should also have enough room for the roots to spread out and grow comfortably.  Also, it's highly recommended to use potting soil specifically formulated for plants grown in containers. This soil type has all the nutrients and drainage that potted plants require to thrive.  Additionally, it helps prevent problems such as over and under-watering, which can be common when gardening in containers.  By following these tips, you'll be able to enjoy the benefits of a thriving container garden, even if you have limited space for traditional gardening. Happy Gardening! As you look ahead to the future, don't forget to plan for moments of relaxation and enjoyment in your garden.  Picture yourself sitting in a cozy seating area, surrounded by lush borders and colorful blooms. Imagine the laughter and conversations you'll share with friends and family over a meal or a cup of tea.  Anticipate the joy of watching birds flock to your feeder and delight in their playful antics. Therefore, with a little planning and effort, your garden will become a haven of beauty and tranquility for the future. Read Also: Does Organic Gardening Improve Soil Quality? How To Choose The Right Containers For Your Container Garden The Top Four Reasons Why You Could Certainly Benefit From A Garden Shed

READ MOREDetails