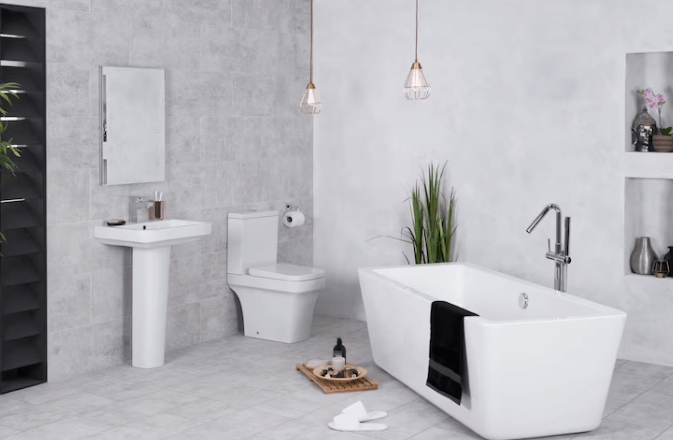
How To Keep A Bathroom Timelessly Elegant

Bathroom

When it comes to bathroom design, new trends emerge year after year. If these are always followed, however, this can become quite expensive in the long run.

Those who don’t want to invest a lot of money in redesigning their bathroom after just a short time are therefore much better off with a timeless style in the bathroom. But what interior design tips should actually be considered for this and what options are basically available? The following article shows.

Timeless bathroom design – the basics

With regard to a timeless bathroom design, some principles can be identified. These include the fact that the focus should be on basic colors. In addition, the functionality of the interior should be given the highest possible priority.

Another valuable tip is to follow the well-known motto “less is more” when designing the bathroom. Despite a high level of functionality, however, aesthetics should not be neglected – after all, you should be able to feel good all around in the bathroom.

Use basic colors

In timeless bathrooms, people hardly ever go for shades like a bright turquoise or a gaudy red. Such splashes of color are only suitable for accessories and bathroom accessories, such as towels – after all, if necessary, these can be replaced in no time at all.

Much more suitable are basic colors, such as black, gray, cream, sand, or white. Such muted colors will still be considered modern and contemporary in 20 years. In addition, brown tones also provide a high feel-good factor and a cozy ambiance, whether in the area of furniture or tiles. You can discover marble look tiles on this website.

The tiles, by the way, play an extremely important role when it comes to the timeless design of the bathroom. Accordingly, basic colors should be used here as well. In addition, modern tiles have meanwhile been showing themselves as large-format for several years.

Less is more

A timeless bathroom is hardly characterized by the fact that the design always immediately catches the eye as soon as the room is entered. Current trends can be completely out again in just a few months. To prevent the design of the bathroom from soon being judged as a tasteful misstep, it is therefore much more advisable to prefer more inconspicuous and restrained designs.

If the essentials are placed in the focus of the interior, the chances are good to be satisfied with the bathroom design for many years.

Choose tried and tested classics

There can be a very fine line between modern and antiquated – this is true not only in the world of fashion but also in bathroom design. When it comes to putting together new bathroom furnishings, it is therefore essential to proceed with caution.

Many furnishings can be identified that have already proven themselves over many years. The chosen products should still give pleasure when entering the bathroom in ten years.

Functionality in focus

A timeless interior means, above all, that it will be enjoyed for a long time. However, if the functionality in the bathroom is neglected, this is quickly tarnished – a beautiful appearance is hardly enough in this room.

Thus, awkward-to-use faucets, a too-small sink, or slippery floor tiles are taboo. A bathroom can only be truly timeless if its usability is guaranteed for many years. It also makes sense to address the issue of accessibility in the bathroom at an early stage.

Additional:

Content Rally wrapped around an online publication where you can publish your own intellectuals. It is a publishing platform designed to make great stories by content creators. This is your era, your place to be online. So come forward share your views, thoughts and ideas via Content Rally.

View all posts

Leave a Reply

Your email address will not be published. Required fields are marked *

Related

Driveway

Updating the Driveway on Summer Time: What You Need To Know

Does your driveway look worn out? Or is it starting to fade and crack? If that’s the case, you should note that your driveway can affect the curb appeal of your property. Sadly, most people hold on to repairing their driveways until they start noticing major issues like water drainage problems and potholes. However, this should be the case. You should always schedule periodical driveway upgrades—especially during the summertime. Generally, summertime is the perfect period to update your driveway and address some of these issues. With that said, let’s look at some of the things to keep in mind when upgrading your driveway. Paving material The first thing you need to consider is the paving material. While concrete comes in various options, it can be quite difficult for you to find a pre-fab material that perfectly matches your budget. Here are some of the most common materials used when upgrading driveways: Asphalt pavement - This paving material tends to be less expensive than other types. However, asphalt can fill up with water rather easily, leading to drainage problems down the road. On the upside, asphalt pavements come in various textures and designs, allowing you to choose a layout that best fits your property. Pea gravel - Though this option is slightly more expensive than asphalt pavements, it’s far more durable. However, it also tends to be less aesthetically appealing. Concrete pavement - This paving material is typically the most expensive and durable choice for your driveway—especially since you can customize the layout and design as you like. On top of that, concrete comes in a wide range of textures and colors—so it’s easier to find something that perfectly matches your property. Drainage solutions If there are no major drainage issues on your property, then you’re all set to begin work on updating your driveway. However, before you start this process, it’s important that you first mark where each water outlet is located—such as drains and downspouts. This step isn’t 100% necessary; however, it makes sense because it can help prevent any work from happening near these areas—which could ultimately cause damage to both outlets and the new surface of your driveway. Also, note that if there’s stagnant water anywhere on your property after setting up temporary markers, then this means that there are some drainage issues on your property. Lastly, if you’re experiencing major issues with water drainage on the property—such as pooling or puddles—after completing updating your driveway, then it may be time to get in contact with a professional who will help encourage the proper flow of water throughout your property. Even though there are ways to fix these drainage problems on your own, it is best to leave these issues up to a professional. This is because they usually have more advanced tools at their disposal—which can make solving these types of problems much easier for them from the very beginning. Sealer Once you have marked the location of all necessary outlets, it’s time for you to mark off where new layers will be placed—which includes marking off where any new edges need to be placed around your driveway. Also, you should use spray paint or chalk to draw out how much space is required between each layer—this step helps ensure that you don’t accidentally apply any materials on top of one another during this part of the process. Then after applying the sealer, it needs at least 24 hours to dry up before applying any additional layers of paint. Add layers As mentioned before, you should create some space between each layer as you apply them on top of your existing driveway. If anything overlaps, then this could cause issues with both texture and color—and may even lead to added expense if extra materials need to be purchased for re-applying the materials properly onto the surface of your driveway. This is the main reason why you must use a large enough tarp to ensure that all materials are applied at a safe distance from one another. Once everything is dry or completely hardened, it’s time to add additional material around the edges of your property—this step helps ensure that water doesn’t run off the sides of your driveway when it rains. To make this part of the process easier, you should use a garden hose to help draw out where the edges will be placed to learn how much materials are needed. Then once that’s finished, it needs at least 24 hours (ideally longer) for everything to completely dry up before applying any sealer. There’s one more thing you need to know about updating your driveway. If there was ever a time when you experienced foundation damage on your property from natural elements—such as water, weeds, or vegetation—then get rid of all grass and weeds near the affected area before adding any new surface layers on top of paint on its own. The reason being is that these things will probably grow out of control on top of your driveway, which can lead to additional maintenance problems. Bottom Line According to the Florida asphalt paving experts from ABC Paving, upgrading your driveway around summertime doesn’t always need to cost a lot of money. Sometimes, it can be as simple as making sure you use the proper materials for protecting your existing driveway before adding new layers on top. Suppose there are any issues with drainage or standing water after doing so. In that case, getting in contact with a professional is usually the best solution—and this also applies regardless of whether you live in an urban area or rural location because everyone will benefit anyway. Read Also: Asphalt Pavement Maintenance Tips Floor Cutting Using Diamond Saw: What You Need To Know All You Need To Know About Concrete Repair Solutions And Services

READ MOREDetails
Outdoor Kitchen

Five Essential Components For Your Outdoor Kitchen

Outdoor dining continues to gain popularity, with more people seeking kitchen convenience beyond the walls of their homes. Planning a patio kitchen requires mindful consideration of how the space will be used and its desired features tailored to individual needs. From grills to countertops and shelves, plenty of options are available so that your outdoor cooking experience is just as comprehensive as indoors. Checkout Five Essential Components For Your Outdoor Kitchen Here are a few essential outdoor kitchen components that your home must have. 1. Grill The centerpiece of any outdoor kitchen is the grill. Without a grill, an outdoor kitchen isn't an outdoor kitchen. It's just a space with some appliances in it. When deciding on a grill for your outdoor kitchen, think about the size, power output, and fuel type that best suit your needs. Do you want something small enough to fit on a countertop or large enough to cook meals for large groups? Would you prefer gas or charcoal? You can visit orchardovens.co.uk to help narrow your choices, so you find the perfect grill for your home. 2. Cabinets Cabinets are an absolute must when planning an outdoor kitchen. Not only do they provide extra space to store essential cooking items, but they also add a chic touch to your outdoor cooking area. When shopping for cabinets, make sure you opt for ones that can withstand extreme temperatures and other weather conditions. Also, installing additional drawers in the cabinets will give you more organized storage options and enable easy access to any needed items. 3. Sink When designing your perfect outdoor kitchen setup, it's important not to overlook the sink. A corrosion-resistant material like stainless steel is a great choice to ensure the unit retains its durability despite being exposed to the elements. Be sure to consider how much counter space you have so you can choose a sink size that is both functional and fits well within your layout. 4. Kitchen island A kitchen island is another great addition to any outdoor kitchen setup. Not only does it provide extra counter space, but it adds visual interest to the area as well. Look for island designs that feature built-in cabinets or drawers to store utensils and other cooking essentials within easy reach while cooking outdoors. If seating is important, look for islands with barstools attached so family members and guests can sit down during meal preparation or serving time. 5. Task lighting Task lighting is an essential part of any outdoor kitchen set up for entertaining amidst dimmer natural light or preparing food during nighttime. When selecting lighting options to suit your needs, select ones that project both adequate brightness and a soft hue. Lights that are too bright might prove irritating or uncomfortable when using the area at night, while lights that are too faint might compromise vision when moving around the kitchen area. Pick fixtures fit to fulfill both illuminating and decorative purposes. Conclusion These five components are essential when designing an outdoor kitchen space, but don't forget smaller details like seating areas or tables. With careful consideration of each design element, you can create a functional yet stylish backyard getaway that provides hours of entertainment with family and friends. Read Also: Know About The Type Of Kitchens According To Different Size How To Choose the Right Brass Range Hood for Your Kitchen 5 Types Of Kitchen Cabinets

READ MOREDetails
Mold Growth At Home

Mold Growth At Home: What You Should Know And What You Can Do

Molds are common problems in many homes. They can cause more than just unpleasant smells, though. These notorious fungi can also expose you to several health risks and damage your home's structure. Although their effects may not be noticeable at first, molds will eventually make their presence felt. By this time, however, the damage they have wrought could already be irreversible. What Is Mold?   Molds belong to the fungi family. They can be found in both your home and out in the natural environment. Outside, molds play a crucial role in the ecosystem by breaking down animal and plant matter. Molds inside your home, however, are a different story. These can cause serious health problems. This is especially true for people with vulnerable conditions like asthma. Where Do Molds Grow? Certain areas of your home are more susceptible to mold growth than others. The following should be included on your mold watch list: 1. Bathroom   According to deepwaterco.com, molds love the bathroom because the place is always damp, and many don't have adequate ventilation. Bathrooms practically have everything that mold spores need to grow and multiply. 2. Kitchen   Molds can attach themselves to kitchen surfaces such as countertops and sinks. Dishes that aren't washed properly are also good breeding grounds for molds. In the refrigerator, expired food items can likewise attract mold, so regularly check your fridge for any food that should already be thrown away. 3. Ceiling   Molds can grow anywhere in your home, and the ceiling is hardly an exemption. Mold growth in the ceiling, however, can be somewhat hard to determine, although if this has an earthy odor, it's a good sign that the fungus is present. What to Do With Molds at Home If you notice signs of early mold growth in your home, it's best to contact a mold removal specialist. Other than that, you can do the following:  1. Check for Leaks   Mold growth is primarily driven by moisture. Given this, you should inspect your home for water leaks from time to time. If you find one, it is important that you have it fixed immediately. This should stop molds from growing and cut down on your water bills at the same time. 2. Reduce Home Humidity   Mold growth is also affected by excess humidity in your home. To reduce this, you can open the windows, use a dehumidifier, turn on your exhaust fans, and hang the laundry outside. Additionally, the Environmental Protection Agency (EPA) recommends that your home's humidity levels should be set between 30% and 50% but should not go over 60%. 3. Limit Condensation   When the air cools to its lowest point, it can produce moisture and promote the growth of molds. You can prevent this by reducing the number of times that condensation takes place. To do this, you can open a window whenever you cook. It will increase the rate of airflow and also create better ventilation. 4. Maintain a Dry Bathroom   Molds thrive in moist areas like the bathroom. Work on keeping this part of your home dry and clean to ensure molds don't flourish here. The Role of Mold Damage Repair Experts At first, glance, removing molds from your home seems like a relatively easy job. This is not exactly correct because there's a proper way of getting rid of these fungi. It's best to let the professionals handle the job for the following reasons:  1. Mold Management Expertise   Mold damage experts have the knowledge and skills to determine the extent of fungi damage, the source, and the type of mold involved. For every mold type, a different approach is needed. 2. Proper Equipment   Dealing with molds requires proper handling, including using the correct tools. Mold experts have all these, along with the necessary protective gear and cleaning equipment. They will not only clean mold-infested surfaces but also remove mold spores from the air. 3. Effective Treatment   Mold remediation experts are completely trained to handle these fungi. They follow a thorough and rigorous process to ensure the problem doesn't get out of control. 4. Prevent Future Issues   Mold cleaning experts address the root cause of the problem to protect you and your property from the harmful effects of molds. This gives you the assurance that the same problem will not happen again. Key Takeaway   Molds are common household problems, but many are not aware that they have these fungi living inside their homes. The realization often comes only after serious damage or family members start to feel sick. If you believe you have molds at home but are unsure, there are several places you can check. Any home area rich in moisture is a potential mold breeding ground, with the kitchen and the bathroom being prime candidates. Contact companies that provide mold removal services if you find mold growth in these places. They are in the best position to resolve a nagging mold problem. Additionals: 5 Different Kinds Of Wood Used To Make FurnitureWhat You Need To Know Before Buying Grass CarpetsTop Useful Tips On How To Make Your Home Allergy-FreeMore Motivation, Less Distraction: How To Pack For Temporary Storage

READ MOREDetails