Ideas for Modern Flooring Designs for Home Improvement Plans

Published on: 10 February 2021 Last Updated on: 12 August 2022
Modern Flooring Designs

It is essential to make the right decisions when coming up with the design for a modern home. On the other hand, it is easy to transform old houses by the type of floor you decide to use. Most people will probably overlook it when planning for their house. The main reason is that homeowners do not know what they can choose for their homes. However, herringbone flooring can alter the floor’s architectural design in your house to make them adaptable to your lifestyle.

There are various types of materials that a person considers for flooring in buildings. The suitability of each option changes according to the room needs. For example, spaces where people visit a lot, like corridors and living rooms, can have wooden floors as they are resistant to wear. The bedrooms can differ from the rest of the house by using cozy materials for flooring.

Ideas for Modern Flooring Designs

The design of floors will mostly depend on the appearance that a homeowner wants. It will also depend on the budget for the home improvement plan. Here are some popular types of flooring systems;

Wood

Wood

Modern houses will utilize wooden floors for main rooms. It is an ancient technique that does not go out of style and remains a choice for many. Hardwood floors are durable and stylish. The raw material comes from indigenous trees like oak, maple, and walnut. Maintaining wooden floors is easy as you need to dust the spaces and use a recommended wood cleaner. Avoid exposing the floor to water as it can destroy the material if left wet. However, other artificial ones incorporate acrylic in making the floor resistant to water and moisture.

Tiles

Tiles

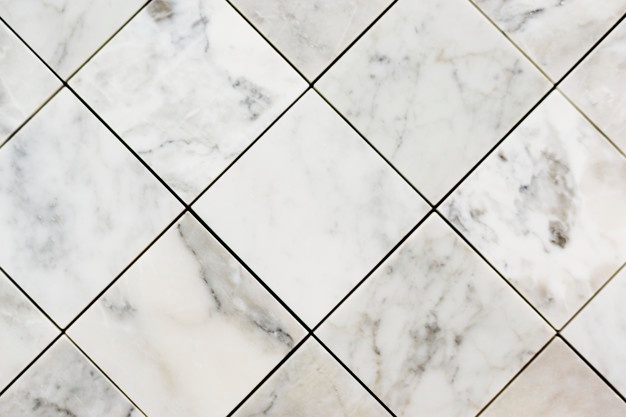
Ceramic tiles are standard features in houses. It is a versatile material that is available in different colors to suit other preferences. There are different kinds of tiles, and it is crucial to ensure you purchase one to use on floors and not walls. The material is easy to clean and maintain. However,  it makes the house cold compared to other forms of flooring systems. Laundry spaces and the bathroom are ideal rooms for tiling.

While there are many brands that you can choose form, few will be able to give you the quality, style, durability, and affordability as Zia’s ceramic tile collection. They have options to suit everyone’s budgets. Depending upon the wall color and the décor of the room, you can mix and match the tiles.

Concrete

Concrete

These types of floors have been existing for a long but are still adaptable to new house designs. They are ideal for contemporary houses as one can polish them to get an elegant appearance. Modern building techniques refine concrete to come up with patterns as decorations.

Vinyl

PVC is the raw material for the Vinyl flooring system. Walking on the floors is much more comfortable than the other forms above. It also aids in keeping the house warm, and it is resistant to the negative impact of moisture on flooring systems.

Laminate

Laminate

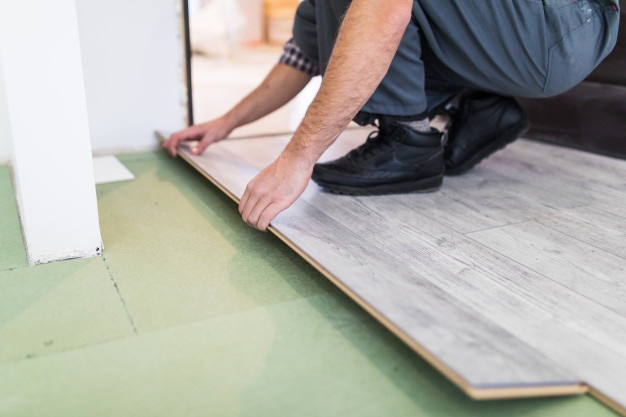
It uses fiber and plywood to develop a veneer that technicians install together to form the flooring system. Laminate floors have a plastic coat that can resemble wood or concrete.

Conclusion

Apart from the above types of flooring techniques, there are other options available. They include the use of bamboo and cork in flooring. You can also carpet the space.

Read Also:


Content Rally wrapped around an online publication where you can publish your own intellectuals. It is a publishing platform designed to make great stories by content creators. This is your era, your place to be online. So come forward share your views, thoughts and ideas via Content Rally.

View all posts

Leave a Reply

Your email address will not be published. Required fields are marked *

Related

What to Know About Your Furnace Filters

What to Know About Your Furnace Filters

When you breathe in the fresh air coming from your ventilation system, you have air filters to thank for the clean smell. The air goes through the air filters in the systems that continuously keep the flow clean in a tight mesh weaving. The airflow is kept clean while any allergens or pollutants are trapped or absorbed over time. This process continues throughout the air system in your home, including the furnace system. The furnace system needs air filters in order to prevent irritants from dirtying it up and affecting your home. The Use of Furnace Filters : The way that it works is that air is brought in by your systems first, pumped into the furnace system to be heated. After the air is properly warmed to the appropriate temperature, it then travels through the filters where it is cleaned up. The fresh, warm air then travels through the system and into your home where it raises the temperatures inside. This process involves the use of the air filters tight mesh weaving. Furnace air filters consist of a tight mesh weaving that is ergonomically designed to allow heated airflow to pass through without difficulty. Without the air filters, then any number of particles will be able to make their way into your home. Your air systems may become dirtier over time too, which is a prime way to attract pests and diseases. You need air filters to keep the air inside clean and prevent any problems with the air outside from coming in. However, the filter is only able to capture and absorb so many. Eventually, the air filters will need to be replaced or the problems they cause will affect your home as a whole. Dirty Furnace Filters : The filters in your home affect the indoor air quality of your home over time when they become dirtier and less able to process fresh airflow. The trouble has to do with the fact that dirty air filters are unable to properly process airflow due to all the captured particles. Over time, the furnace filters become worse for the system and you need to swap them out for new ones. If you don’t, then the lack of fresh air and strain on the system become a serious problem. The airflow coming through your filters needs to come through without issue or there will be a series of problems throughout your home. First of all, the air will not be able to come in, which leads to temperature problems when your home is not being heated. This heated air is also trapped in the furnace, which causes temperatures to rise over time and eventually damaging the system itself with the heat. Your systems will also use more energy in an effort to push past the blockage. The efforts will cause an increase in energy billing over time and you will see costs go up the longer the dirty air filter is left in place. Avoid this issue by installing new furnace filters regularly. Read Also : Choosing The Right Roof For Your Home – Types To Select From Additional Ways To Keep Your Home Warm 5 Ways A Home Maintenance Plan Can Prevent Disaster

READ MOREDetails
Iron Clothes

How to Use Iron Clothes With Steam

Believe it or not, the amount of people that don’t know how to iron clothes is amazing. There’s no shame on it since most of us were thrown into society without really practicing skills that would definitely help us fight back as we become independent. These skills include things like cooking a proper meal before going to work, knowing what groceries to buy without spending all our money on unnecessary things, being able to pay bills accordingly without becoming a mess, cleaning the house every now and then, and of course, knowing how to use steam irons and what to do to properly iron our clothes to not look like folded toilet paper. Don’t worry though! In this guide, I’m going to teach you the essentials of how to iron, and how to deal with different types of fabric. To be honest, ironing is not something as complicated as many think. It’s all about knowing what to do, which is what most people lack. The process may require a little preparation and patience, though, so be prepared to practice with different pieces of clothing to get the main idea. One thing is sure, though. You have to be careful when using an iron because they can be harmful if dealt with without precautions! How to Prepare for It The first thing you’ll need is a flat surface where you can prepare your clothes to be ironed. Try to have everything neatly organized to avoid possible accidents, and if you can, try to do it on an ironing board. Some clothing is too delicate for the heat produced by the heated metal of the device, so have a piece of fabric to protect these. Read more: A Complete Guide on Using IRON on Transfer Paper Connect the Iron Irons can take some time before they are ready to be used. They usually show a sign that they are ready, so be sure to be attentive about them while you take care of the next step. Never try to do it before its ready, since it’ll lead to a slower and far less efficient process. Know the Differences Between Materials, and Sort Them Beforehand Depending on the type of fabric you are dealing with, you might want to change your approach while ironing. You can’t deal with a silk piece the same way you would deal with a cotton one, for example. Some pieces of clothing will require you to use the lowest setting of heat possible, while others may require even more heat. Separate silk, wool, rayon, and acetate to be dealt with the lowest settings. Wool clothes may require the protection of another piece of fabric that was previously dampened, so take that in mind! For polyester, go with the medium heat setting, and for cotton, you can go either medium and high heat setting. Both of them should be dampened to be protected from the heat. Before the iron is ready to go, you should have them sorted out. How to Iron Clothes When you deal with shirts with a collar, you should start with it. You can start with a pattern that follows the inside part of the collar, starting from the center of it, until you reach the edges. Then, fall back to the center, and keep moving between both sides. Once you’ve finished with it, you can work the outside. Lay down the shirt in a way that you can flatten it with the iron with simple movements. After that, you have to work your way down, slowly moving the shirt. Then, work the sleeves then the cuffs. Pants are much easier than shirts with a collar. You just have yo lay them down in a way that you can work both legs at the same time. Start with the waist, gently work with the pockets, and go your way down. Repeat the process until you are satisfied with the results, but make sure to be gentle and careful with the heat and the ironing. Considering that there are way too many types of clothing to teach all of the proper methods and techniques to iron them accordingly, you should check this guide on how to do it without fail. Safety Recommendations Ironing can be a pretty dangerous process if you are not attentive while you do it. If you don’t take safety measures, you might harm yourself or others, so make sure to pay attention to this part of the guide. The very first thing you should always make sure is that the iron is unreachable for children. Children can be curious and do things without knowing, so you will be the one to blame if you allow them to get closer while they are heated up. This is important even after you’ve finished ironing. These devices tend to remain heated up even after disconnecting them, so you should still be attentive to any possible situation. I recommend you to wait at least 10 minutes before taking your guard off. Remember to check just in case. While it rests, don’t leave it face down. You might burn something or damage the iron if you do. If an accident happens and you burn yourself or someone else gets burned, treat the burn with cool water for as much time as you can. 20 minutes should be more than enough. Don’t use things like butter or oil, since it might infect the injury. if the burn is too big, you should check yourself with a doctor. Read Also: How To Choose A Washing Machine? How to Pack Clothing Properly for Shipping Choose The Latest Collection Of Women Clothing For a Stylish Look 6 Benefits Of Buying Clothes Online – Why People trust online shopping

READ MOREDetails
Toilet Flush Button

Toilet Flush Button: Understanding The Nuts And Bolts

Though our bathrooms play a critical role in daily life, they're often forgotten until a problem arises. Of all its components, one that stands out is the toilet flush button's use - and understanding. This article looks closely at its workings, maintenance needs and replacement considerations. The Fundamentals Of The Toilet Flush Button What Exactly Is A Toilet Flush Button? A toilet flush button is the mechanism responsible for initiating the flushing process in your toilet system. Situated on the tank's exterior, we press or push this component when using our toilet to flush out its contents into the sewage system. By activating this flush button, we begin an action chain within our bathroom that sends water from its tank into our bowl to flush away its contents into sewer lines. How Does The Flush Button Work? The magic of the toilet flush button lies in its ability to control a more complicated mechanism. Pressing it lifts a lever connected to a chain inside the tank; that chain connects to a flapper (or flush valve seal), covering up drain holes at the bottom. When the flapper is raised, water stored in the tank begins rushing from its source into the bowl through its drain hole and siphon tube into the sewage system. As soon as this process completes, however, the flapper falls back down, sealing off its drain hole once more - and replenishing its supply in readiness for another flush cycle. Maintenance Of The Toilet Flush Button Regular Cleaning Regular cleaning of your toilet flush button is vital to its optimal operation, as dirt can clog the switch and make it less responsive, leading to inconvenient situations for users. A non-abrasive cleaner and soft cloth should be used for exterior cleaning; internal components should be checked regularly to avoid build-up and potential mechanical problems. Checking For Wear And Tear Given how often flush buttons are used, wear and tear are inevitable. Look for signs of damage, such as cracks or looseness. If the control becomes less responsive when pressed or sticks down without returning up when released, this may indicate internal components need to be reviewed for potential problems. Troubleshooting Common Problems Is The Button Hard To Press, Or Is It Sticking A toilet flush button that is difficult to press or sticks down often points to a problem with the connected lever or chain inside the tank. It could be that the chain is too tight or too slack, or the lever needs to be aligned or fixed. A careful inspection and adjustment of these components usually solve the issue. The Button Doesn't Activate The Flush If the button doesn't activate the flush, the issue could be that the switch is no longer effectively connected to the lever, or the flapper isn't lifting. A look inside the tank should reveal the issue. The button, lever, or flapper may need to be replaced. Replacing The Toilet Flush Button When Should You Replace The Button? As with any mechanical component, toilet flush buttons have a finite lifespan. Over time and through regular use, their controller may wear out or become damaged, requiring replacement. Signs to replace it include physical damage to its housing and sticky buttons or ones that no longer activate flushing actions. Looking for a portable toilet rental might also be necessary if you need to fix your toilet for a couple of days. Toilet Flush Buttons: More Than Meets The Eye Though seemingly simple, toilet flush buttons are critical in maintaining sanitation in homes and public spaces. Understanding their inner workings helps us better appreciate their importance, maintain them properly, and effectively troubleshoot any potential issues with them. So next time you press one, remember its critical function while giving it some love and consideration. Conclusion: Understanding how a toilet flush button works may initially seem complicated, but understanding its mechanics is crucial to efficient bathroom operations and sanitation practices. Knowing their inner workings could save us from future inconvenience or repair costs. Maintaining the toilet flush button regularly is vital to prolonging its lifespan and guaranteeing reliable performance within a plumbing system, thus streamlining home maintenance. By periodically inspecting it for signs of wear and tear, individuals can identify and address potential issues early on and prevent more significant ones from developing into larger problems later. By taking proactive measures like this one, individuals save both time and money on costly repairs and ensure an effortless toilet operation experience. Maintaining a flush button is an accessible DIY project for anyone, provided they possess basic knowledge and the appropriate tools. Even if it eventually succumbs to wear or damage despite regular maintenance efforts, replacing the button remains straightforward, making this an achievable DIY project for homeowners. Read Also : Mirror Decorating Ideas To Style Your Bathroom Using Feng Shui In Your Bathroom Design The Different Kinds Of Toilets

READ MOREDetails