How to Use Iron Clothes With Steam

Iron Clothes

Believe it or not, the amount of people that don’t know how to iron clothes is amazing. There’s no shame on it since most of us were thrown into society without really practicing skills that would definitely help us fight back as we become independent.

These skills include things like cooking a proper meal before going to work, knowing what groceries to buy without spending all our money on unnecessary things, being able to pay bills accordingly without becoming a mess, cleaning the house every now and then, and of course, knowing how to use steam irons and what to do to properly iron our clothes to not look like folded toilet paper.

Don’t worry though! In this guide, I’m going to teach you the essentials of how to iron, and how to deal with different types of fabric.

To be honest, ironing is not something as complicated as many think. It’s all about knowing what to do, which is what most people lack. The process may require a little preparation and patience, though, so be prepared to practice with different pieces of clothing to get the main idea.

One thing is sure, though. You have to be careful when using an iron because they can be harmful if dealt with without precautions!

How to Prepare for It

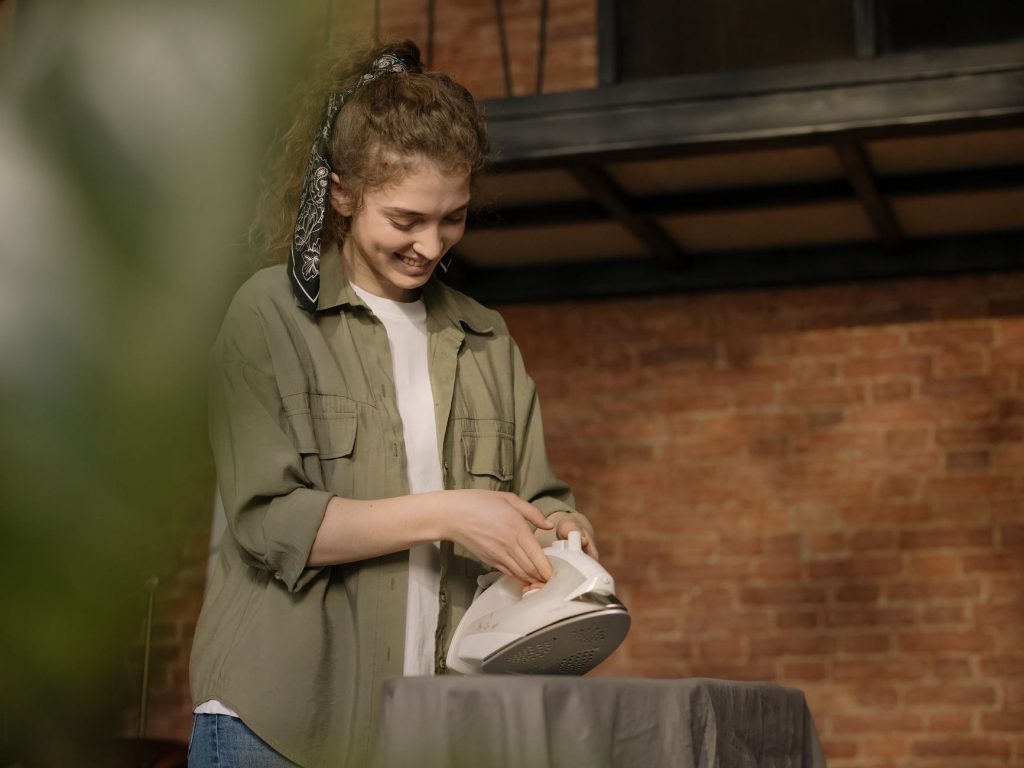
The first thing you’ll need is a flat surface where you can prepare your clothes to be ironed. Try to have everything neatly organized to avoid possible accidents, and if you can, try to do it on an ironing board.

Some clothing is too delicate for the heat produced by the heated metal of the device, so have a piece of fabric to protect these.

Read more: A Complete Guide on Using IRON on Transfer Paper

Connect the Iron

Irons can take some time before they are ready to be used. They usually show a sign that they are ready, so be sure to be attentive about them while you take care of the next step. Never try to do it before its ready, since it’ll lead to a slower and far less efficient process.

Know the Differences Between Materials, and Sort Them Beforehand

ironing

Depending on the type of fabric you are dealing with, you might want to change your approach while ironing. You can’t deal with a silk piece the same way you would deal with a cotton one, for example. Some pieces of clothing will require you to use the lowest setting of heat possible, while others may require even more heat.

Separate silk, wool, rayon, and acetate to be dealt with the lowest settings. Wool clothes may require the protection of another piece of fabric that was previously dampened, so take that in mind! For polyester, go with the medium heat setting, and for cotton, you can go either medium and high heat setting. Both of them should be dampened to be protected from the heat.

Before the iron is ready to go, you should have them sorted out.

How to Iron Clothes

When you deal with shirts with a collar, you should start with it. You can start with a pattern that follows the inside part of the collar, starting from the center of it, until you reach the edges. Then, fall back to the center, and keep moving between both sides.

Once you’ve finished with it, you can work the outside. Lay down the shirt in a way that you can flatten it with the iron with simple movements. After that, you have to work your way down, slowly moving the shirt. Then, work the sleeves then the cuffs.

Pants are much easier than shirts with a collar. You just have yo lay them down in a way that you can work both legs at the same time. Start with the waist, gently work with the pockets, and go your way down. Repeat the process until you are satisfied with the results, but make sure to be gentle and careful with the heat and the ironing.

Considering that there are way too many types of clothing to teach all of the proper methods and techniques to iron them accordingly, you should check this guide on how to do it without fail.

Safety Recommendations

Ironing can be a pretty dangerous process if you are not attentive while you do it. If you don’t take safety measures, you might harm yourself or others, so make sure to pay attention to this part of the guide.

The very first thing you should always make sure is that the iron is unreachable for children. Children can be curious and do things without knowing, so you will be the one to blame if you allow them to get closer while they are heated up.

This is important even after you’ve finished ironing. These devices tend to remain heated up even after disconnecting them, so you should still be attentive to any possible situation. I recommend you to wait at least 10 minutes before taking your guard off. Remember to check just in case. While it rests, don’t leave it face down. You might burn something or damage the iron if you do.

If an accident happens and you burn yourself or someone else gets burned, treat the burn with cool water for as much time as you can. 20 minutes should be more than enough. Don’t use things like butter or oil, since it might infect the injury. if the burn is too big, you should check yourself with a doctor.

Read Also:

I enjoy writing and I write quality guest posts on topics of my interest and passion. I have been doing this since my college days. My special interests are in health, fitness, food and following the latest trends in these areas. I am an editor at Content Rally.

View all posts

Leave a Reply

Your email address will not be published. Required fields are marked *

Related

Small Spaces

6 Tips to Make Small Spaces Look Bigger

Some people choose to live in a small home, rental room, or apartment. This could be for a lot of reasons, like financial constraints or personal preferences. Small is beautiful after all and, nowadays, highly practical too! However, living in a small space doesn’t have to equate to feeling cramped or uncomfortable. Indeed, it’s very easy to create a warm and cosy atmosphere when you have a smaller area to work with. However, if you want to bring an airy, spacious feel to your home or room’s limited acreage, you can turn to colour, lighting, and the right furniture to achieve your goal. Here are some simple tips to make a small space look and feel bigger. Draw the Eye Up : Most people choose to paint their ceilings a safe, light colour like white, beige, or cream, which indeed helps bounce the light around a small room. However, to create the illusion of a taller space, using bolder colours will help draw the eye up and achieve this effect. Reds and oranges are the obvious choices, but you can also go for dark blues and violet for more drama. If you are hesitant to try dark colours on your ceilings, decorate it instead with interesting patterns or a simple geometric mural. Use Reflective Surfaces : Using mirrors instead of paintings on your walls will help reflect the light better and open up space in a jiffy. But mirrors aren’t your only options. You can also use furniture that has glass, clear plastic, silver, chrome, and other shiny, reflective elements. Switch out your wooden coffee table with a glass one and see how your space instantly looks bigger. Where possible, you should also incorporate accessories that can reflect light. For example, you can install a wall fountain with a silver, gold, or stainless steel backing, so both the water and the backing can help bounce the light around. The fountain can also serve as a piece of artwork, so you don’t have to fill your space with extra accessories. You can also try focusing a light onto the fountain to further increase the amount of light in your home. Get Big Key Pieces of Furniture : You might be tempted to get several smaller pieces of furniture, but this would likely end up in a cluttered-looking and therefore smaller-looking space. It’s better to get a few key pieces -- like your bed room and dining table -- in standard or bigger sizes with simple, clean lines. According to Ritely, there are many ideas that will help you to make the room appear more organized and comfortable. Use a Monochromatic Color Scheme : A monochromatic colour scheme makes your space look coherent and put-together. The actual colour doesn’t matter as long as they are in the same family, although cool colours like blue and green and subtle warm colours like yellow and peach are great choices for evoking that open feel. Use these colours on your walls, furniture, and other accessories like throw pillows and vases. Hang Curtains High : Hang your curtains close to the ceiling and let them fall right down to the floor to make any room look taller. If it makes things easier, install the rods or tracks on the ceiling for more height; the fabric will also fall more artfully this way. Keep the window treatments in the same colour scheme, ideally in the lighter end of the spectrum, to achieve a seamless look. You should also veer away from thick, heavy drapes and instead opt for lighter curtains in fabrics like cotton, linen, or even lace. Roman shades also work well for this purpose. If privacy is not an issue, you can opt for valances instead of full-length curtains so that you still have window trimmings that at the same time allow more natural light to filter in. Opt for Lamps Instead of Overhead Lights : When you use top-down lighting fixtures, the light is focused in one space. This draws the eye toward that are, making the entire room look constrained. Opt instead for various kinds of lamps to spread the light. Slender, elongated designs work best as these also give the illusion of height. If you opt for floor or desk lamps, choose styles that have a small base that matches the colour of the shade. With these simple design tips, you don’t need to break down walls to create more space -- or at least the illusion of it -- in your small home. Try them now and let us know which ones work the best for you! Read Also : Best 5 Designer Secrets To Make The Most Of Small Spaces 5 Ways To Make A Big Statement In Small Bedroom Office Spaces – Which One Is Right For Your Business?

READ MOREDetails
Disinfection

Disinfection and Cleaning Strategies for Reopening Commercial Buildings

Cleaning and Disinfection have never been more important than amid the COVID-19 pandemic. And, with quarantine restrictions beginning to loosen, many businesses that were shuttered during lockdown will start resuming operations. As this happens, the biggest challenge for commercial building owners is being able and ready to return buildings to use swiftly and safely. Reducing the risk of exposure by cleaning and disinfecting is an integral part of reopening commercial buildings as the safety of occupants remains a key priority. With this rising demand for clean environments, commercial buildings will have to come up with safe and effective cleaning strategies that will assure occupants of their safety even as the threat of the virus continues to linger in our minds. With so much uncertainty surrounding the spread of the coronavirus and how people can protect against it, it's not worth it to take any risks. You can find professional cleaning, sanitizing, and disinfecting services at www.excelpestservices.com. Cleaning and disinfecting commercial buildings for reopening will involve developing a plan, implementing the plan, as well as maintaining and revising the plan. Develop Your Disinfection Plan: There's no one-size-fits-all cleaning and disinfection plan as commercial buildings are structured differently and for different purposes. You will need to evaluate your building to determine the surfaces and materials that make up that area. This will guide you in choosing the appropriate cleaning and disinfection method suitable for each. Implement Your Plan: Once you have the right cleaning and disinfection plan for your building, it's time to put it into action. We have mapped out a few key strategies that will help you navigate this issue and ensure optimal cleaning and disinfection service. Without further ado, let's get started: Wear appropriate PPE (personal protective equipment): Whether you are contracting a cleaning service or using in-house janitorial staff, the cleaning crew must wear appropriate PPEs like gloves, masks, goggles, and so on. That's because they are at a higher risk of being exposed to COVID-19 (given that it can stay on surfaces for days) and the toxicity of cleaning/disinfecting products. Not wearing PPEs also means asymptomatic carriers could spread pathogens to clean areas. It's also important for the cleaning crew to receive training on the proper use of PPEs, cleaning equipment, and cleaning products to ensure efficiency. Apply normal routine cleaning on visibly dirty surfaces: It's important to clean surfaces and objects with soap and water before disinfecting. And, be sure to clean soft and porous materials according to the manufacturer's instructions. Determine what you need to disinfect: While some surfaces and materials are cleaned with just soap and water, others must be disinfected. Scientists have proven that coronavirus can also live on various surfaces for up to a couple of days. People can contract it by touching contaminated surfaces and then touching their eyes, mouth, or nose. Start by disinfecting high-touch surfaces as they are the main source of spreading pathogens. This includes doorknobs/handles, elevator buttons, restroom facilities, trash can lids, faucet handles, floor surfaces, light switches, tables/countertops/desks, handrails, and so on. Additionally, areas unique to your building may also require disinfecting. For instance, retail occupancy will require disinfecting shopping cart handles and payment touchpads while offices will need to disinfect computer monitors, keyboards, conference tables, etc. Soft and porous materials in high-traffic areas like carpets, upholstery, and curtains can be germ reservoirs and will need to be disinfected as well. Use EPA-Approved cleaning/disinfectant products: Not all cleaning products are suitable for removing pathogens, particularly traces of COVID-19, from building surfaces. It's important to look at EPA's suggested products as they are both effective and non-toxic. If EPA-approved disinfectants are not available, you can use a diluted solution of household bleach or 70% Isopropyl Alcohol (IPA). Use products effectively: It's important to follow the directions on the label with regards to the application method (concentration and dilution), contact time, as well as any other precautions to take when applying like good ventilation and appropriate PPE to wear. This will ensure the effective and safe use of cleaning and disinfecting products. Avoid mixing cleaning and disinfection products as this can result in very dangerous fumes that could cause serious injury or even death. Avoid over-disinfection: It is possible to over-disinfect surfaces while trying to ensure no pathogens are left behind. And although these products are great at removing pathogens, their overuse can have serious side effects in humans. Disinfectants can pose an immediate risk to some people, including those who are asthmatic or suffer from migraines, allergies, suppressed immune systems, or immune disorders. They may experience symptoms like headaches, nausea, and vomiting, irritability, difficulty breathing, mood swings, memory loss, seizures, etc. Outdoor areas require normal routine cleaning: Many outdoor surfaces will not be touched; as such, disinfecting them is a waste of supplies. However, some areas like bars and restaurants will require disinfecting. Pools and other water play areas must also be well-maintained, for example disinfecting with chlorine or bromine. What about an unoccupied building? Properties that have not been occupied for over 7 days will do with normal routine cleaning, meaning there's no need for disinfecting. That's because the coronavirus cannot survive on surfaces for longer than this time. But once you reopen, you will have to develop and implement a disinfection plan to keep everyone safe. Work in zones: It's important to separate areas in the building by how likely they are to contain pathogens. Then start with low-risk zones moving into high-risk areas to help avoid cross-contamination. Maintain and Revise the Plan: Once you reopen, it's important to maintain the above disinfection strategies to minimize the risk of contracting COVID-19 and other pathogens. This should be done in conjunction with other safe practices like social distancing, wearing masks, frequent hand washing, and more. Be sure to revise and update your cleaning and disinfection plan based on the current circumstances (level of COVID-19 exposure in your building) and updated guidance by the local and federal governments. Read also: 10 Tactics To Maintain Clear Windows 5 Hotel Housekeeping Tricks You Need To Clean Your Bathroom How Cleaning Helps Us Feel Better and Why We Don’t Do It

READ MOREDetails
Swimming Pool Cleaning and Maintenance

Swimming Pool Cleaning and Maintenance: Cheap Online Pool Supplies

When the summer heat starts kicking in, doesn’t it feel good to jump into the pool? Spending hours in the soothing water, swimming, and having a relaxing time takes all the summer heat away. And if you have a pool in your backyard, you can go swimming anytime you want, right? The only problem is, keeping the pool clean and hygienic to swim. If you are getting inside the water, it’s essential to make sure the water won’t harm your skin or hair. Pool cleaning and maintenance are almost as important as taking a bath every day. The easiest way is to follow a certain procedure and regular practices to keep the water clean. You might also want to buy some cleaning chemicals. While pool cleaning can get a bit costlier, there are some easy-to-use and cheap online pool supplies available to save your day. Here is how you can maintain the pool and enjoy a swim round anytime in a day. Pool Maintenance Basics - Maintaining a pool is a three-step process and is pretty easy once you get used to it. Step 1: Water Circulation As much as the water keeps circulating, the pool is going to stay healthy. The water will carry any invisible dirt and debris towards the filters to keep itself clean and harmless. Ideally, the pool filters and pumps should keep the water running all the time. But considering the electricity situation, that might not be possible. It will be cheaper if you follow a certain timetable to keep the water running. The best solution would be to turn on filters and pumps during the night hours till the morning. A good 8-hour routine would be enough for water circulation. Step 2: Cleaning The Pool and Equipment The circulating water will carry and trap any debris into the pump baskets and filters. To maintain those tools functioning, clean all the pump baskets and filters. You might have sand filters or cartridge filters. Cleaning both the filters is easy and doesn’t need a lot of work. There are some automatic, robotic vacuum cleaners and filters that can do the cleaning themselves so that you can invest in that as well. Now, to clean the pool, first, pick up the skimmer and get all the visible debris out. Then brush and clean the walls, steps, ladders to get rid of any collected dirt that might harm the water. Brushing on alternate days would be a good idea. Cleaning can never be enough, be more generous in this step. Shine the pool and the water. Step 3: Pool Chemistry Pool Chemistry might sound tricky and complex to understand for beginners. But it isn’t. A couple of sanitizers and chemicals are going to help you maintain the pH of the water. Ideally, the pH of the pool water should be between 7.2 to 7.6, and the alkalinity range should be 100-150 ppm. Get some pool test strips to test these ranges and use the chemicals accordingly. Have pool chlorine and dispensers in handy all the time. If you have a saltwater pool, then you can get salt supplies at a cheaper rate online at Watson’s. Test the water every other day to make sure it’s safe to enter. Final Words: Pool cleaning and maintenance activity is actually as fun as swimming. Once you understand and sync into the whole process, it’s quite easy to do it at least once a week. Get into the cleaning mode, and your pool will stay functional for a longer time. Next time you host a party, your pool will be shining with crystal clear water. Read Also: Top 5 Tips in Designing Your Swimming Pool Renting a villa in Malta with a private pool 5 Hotel Housekeeping Tricks You Need To Clean Your Bathroom

READ MOREDetails