What You Need to Know About Jaguar E-Type?

Published on: 01 August 2018 Last Updated on: 08 August 2019
Jaguar E-Type

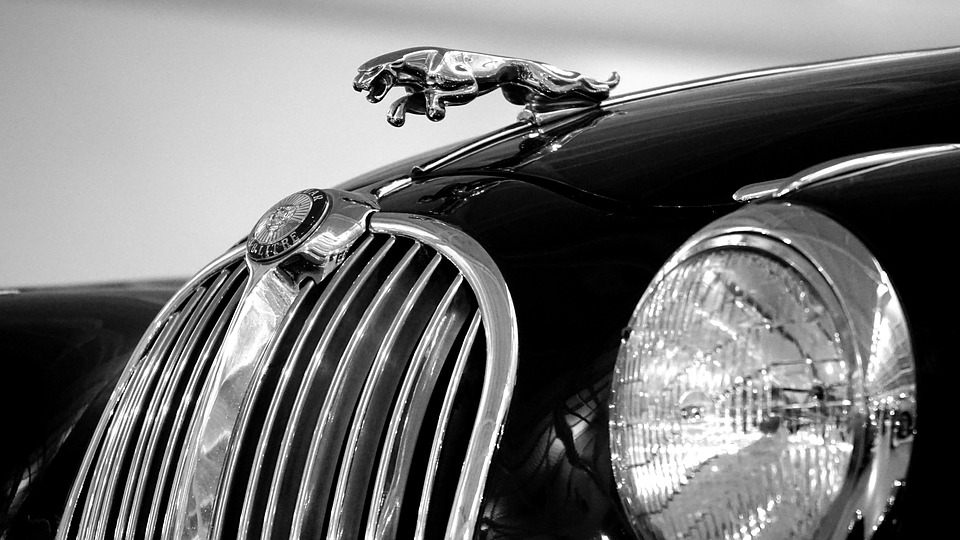
The Jaguar E-Type model sports car debuted in 1961 when the top speed for vehicles clocked in at around 70 MPH. With a top speed of 150 MPH, this vehicle blew expectations out of the water and quickly built a reputation of class and sophistication. The car was so well-built it was considered to be the most beautiful car in the world for a time. An E-type Jaguar was considered perfect from every angle, and even today stands as a supercar model for excellence.

The Power of the Type :

The E-type was a unique model of car that boasted 265bhp 3.8-liter engine by the final renditions of its design. The car was a marvel of 20th-century engineering and its independent rear suspension design would help define the Jaguar brand for decades to come. The car would grow larger and more reliable over its production lifespan with a greater emphasis on speed and precision. When the series finally reached the point where it could hit 60 MPH in less than seven seconds, people began to take notice and the model exploded in popularity.

The Composition of the Vehicle :

The E-type is a classic lightweight model, but it did not start out that way. Rather, the aluminum body and monocoque were added later as a replacement to steel construction methods. The new designs held up out on the track and would help solidify the lightweight design as a Jaguar line staple even into the 21st century.  Racing was a big focus for the company at the time and eventually, a 5.3-liter engine was put in to increase torque and make the car more competitive.

E-Series History :

The history of the E-series is intertwined with racing and saturated with the stories of people who pushed the car to its limits. The series was actually never meant to race, there was no need for a public show of speed and the car did not have the engines for it. It was not competition worthy until the GT category for production sports cars was created with fitting requirements that matched the series specs.

The E-Type would go on to win race after race like in places like Goodwood, Silverstone, and Brands Hatch. However, Ferraris would continue to dominate the racing scene with their powerful engines. Seeing that the E-type was falling behind, the company decided to create the lightweight series to push for a more competitive angle. The resulting lightweight E-Type models had an aluminum body with a 350bhp version of the 3.8-liter XK straight-six engine and a five-speed gearbox. The model was so successful that it had other companies scrambling to create newer models just to compete.

The lightweight models would go on to participate in international racing circuits for years after their introduction. Eventually, the E-type production slowed down only to resurge again in the ’70s. The car’s performance solidified it as a classic supercar exuding style and class that has it still see demand today.

Read Also :

Content Rally wrapped around an online publication where you can publish your own intellectuals. It is a publishing platform designed to make great stories by content creators. This is your era, your place to be online. So come forward share your views, thoughts and ideas via Content Rally.

View all posts

Leave a Reply

Your email address will not be published. Required fields are marked *

Related

Car Battery

A Comprehensive Guide on How to Charge Your Car Battery

Does your car’s battery always experience low battery power? For example, you have to buy something in convenience stores and bump you into a friend which you have enjoyed chatting with for hours, without even thinking that you forgot to turn off the lights of your car. Car battery can make things work properly in your favor.  Surprisingly, you will find out that you can no longer start the car. Well, you don’t need to purchase another battery to replace that. Yes! You’ve read that right! Even if it is low on power, the way you charge it can save you from spending more! There are ways that you can charge your car’s battery for better performance. However, you need to consult or read the manual instructions given for your battery and for the battery’s charger. Now if you’re still confused after reading the manuals, you don’t have to worry a thing! We’ve got you covered! We have compiled all the necessary things you to do when charging your car’s battery. You can check them out below! What Are the Things to Consider Before Charging Your Car Battery? There are a lot of things that you have to consider before you can start charging your car battery. These are essential for you not to damage anything from the battery or the charger. Check the battery terminals if they are free from corrosions. If the battery is too dry, don’t charge it. You can just add water above the plates so that you charge them afterward. It would be best that your battery is not connected to the electrical system of your vehicle, to reduce the risk of overvoltage. So, if it is possible, remove or disconnect the battery from your car. You have to know well the battery’s positive and negative terminals to ensure that you are connecting the right charger leads. Check the user manual of your battery and the battery’s charger for more instructions. How to Charge Your Car Battery? 1. Determine the Type of Battery: You have to be sure about the type of battery you have for your car. For example, if your car is powered with start or stop technology, then you will be needing a smart charger. Surely there are a lot of conventional car chargers available on the market today, but they can not cater to all types of batteries. So, it is better to check the type of your battery first to avoid further damage. 2. Check Your Battery: Once you’ve already determined the type of battery you have, it is now time to check your battery if they are free from dirt or corrosion. Your battery should be cleaned right before you charge them. 3. Detach Your Car Battery: As mentioned above, it is your choice if you want to attach or detach your car’s battery to your while charging. However, we recommend best to detach your battery after you’ve cleaned them. Just don’t forget the things that might be reset if you detach your car’s battery. The number one rule in detaching your battery is that the negative terminal must be disconnect first and connected last when you have to attach them back. Furthermore, you can disconnect the battery by loosening the bolt of the clamp and connect them back by tightening the bolt. Don’t forget this rule to avoid terrible shocks. 4. Connect the Charger: In connecting the charger to your car’s battery, it will now be easy to connect the car’s battery to the charger using the clamp from negative to negative and positive to positive. Once you connect to the charger, you will no longer have to do anything other than wait for the battery to become full. Other chargers have an automatic function of disconnecting your car’s battery when fully charged. Furthermore, you can check out the manual of your car’s battery and charger to check the required hours needed for charging. You can even use a Scondar connector designed for a great flow of current charges. You need to be extra careful in connecting the plugs so that it won’t turn out wrong which can further damage your car’s battery. 5. Follow the Manufacturer Instructions: Last on our list is the checking and following of the manual or instructions given by the manufacturers. In this way, you can have total peace of mind in connecting your batteries for safe charging. Conclusion: Once you have a car, being expert and well-informed about car battery charging is very important! You only need to follow the comprehensive guide we have provided above on how to charge your car battery, and you will surely get back on the road well-prepared! Read Also: How To Ship A Car Made Easy: 5 Tips To Keep In Mind Why You Should Have A Code Reader For Your Car How Car Detailing Can Keep Your Vehicle In Top Shape Get Cheap Car Insurance For Young Drivers

READ MOREDetails
Dangerous Intersections

Most Dangerous Intersections in Fort Lauderdale

Driving in Fort Lauderdale can be pretty intimidating and for good reason. Broward County is repeatedly found to be one of the most dangerous places to drive in the country, with a total of 41,755 accidents reported in 2016, which resulted in 245 deaths and 25,361 injuries. There are a lot of reasons that this could be the case, but the intersections of Fort Lauderdale might play at least some role in these numbers. Who hasn’t been uncomfortable sitting at a massive intersection, paying attention to the left turn, right turn, and straight green or red lights trying to figure out when it’s safe to go? Fort Lauderdale’s Zero Vision movement is an effort to reduce injuries and fatalities across the city for drivers, pedestrians, cyclists, and everyone else who shares these roads. Take a look at some of the most dangerous intersections, and tell us what intersections you think are worth mentioning in the comments below. A1A and Las Olas Blvd In 2015, this intersection had more than 1,000 accidents that caused injuries. That means that this doesn’t even include fender-benders where nobody was injured. Many accidents at this intersection are from one car rear-ending another, which can cause serious problems like whiplash. For personal injury firms like Friedland & Associates, this intersection is well-known due to the high number of injury cases that begin there. Sunrise Blvd and Andrew Avenue A lot of the accidents at this intersection comes from people either trying to race through yellow lights. When a driver decides to try to beat the light, they quickly realize how wide the intersection is, and may not be across completely before the other drivers begin to move through their now-green lights. For those who think that yellow means “speed up,” Florida’s intersections are a simple proof of why this is a bad idea. NE 26th Street and Federal Highway Depending on the side and direction of the street you are traveling on, this intersection has both 3- and 4-lane roads that either direct drivers to go straight, left, or right. This can often lead to confusion, especially for tourists who are unfamiliar with such large intersections or are just getting familiar with their rental vehicles as they cause an accident in one of the many lanes. Of course, we can’t pin all of the blame on tourists, so make sure you keep an eye out when you are coming through this intersection as well Not Just Concerning for Drivers Intersections can cause serious problems for drivers, but they can cause serious problems for pedestrians and cyclists as well. When traveling on foot, some intersections require pedestrians to cross eight full lanes of traffic before they are safe to the other side, which is just one reason that Broward County is so dangerous for pedestrians. Florida has the highest rate of pedestrian deaths in the country. In addition to foot traffic, cyclists must navigate these roads while sharing lanes with drivers who are either inexperienced with interacting with cyclists, or simply not expecting them on such busy streets. Read Also: Windscreen Replacements Are You Thinking About Buying Quad Bike For Your Kid? Honda Cars In Watertown NY: 8 Things To Check Before Buying A Second Hand Car

READ MOREDetails
RV's Black Tank

Navigating The Long Haul: Maintaining Your RV’s Black Tank

Embarking on a long journey in your RV promises adventure and the comforts of home on the road. One of those comforts is the convenience of an on-board bathroom. However, this amenity comes with the responsibility of maintaining the RV's black water tank, a crucial component that, if not properly cared for, can lead to unpleasant odors and costly repairs. Let’s explore the best practices for keeping your black tank in optimal condition during extended travels. The Essentials Of Black Tank Upkeep The black tank in your RV is designed to store wastewater from the toilet until you're able to dispose of it properly at a designated dump station. Regular maintenance is key. This includes routine flushing to clear out waste and prevent buildup, monitoring for leaks, and ensuring the tank's sensors are clean and functioning correctly for accurate readings. It’s also essential to use RV-specific toilet paper that breaks down quickly and doesn’t contribute to clogging. Embracing RV Black Tank Treatment Solutions An effective RV black tank treatment is crucial in managing waste and odors. These treatments are designed to break down solid waste and toilet paper, reducing the chance of clogs and maintaining a more sanitary system. They often contain enzymes or beneficial bacteria that digest waste and neutralize odors. Some treatments also include deodorants to keep the air inside your RV fresh, making them a welcome addition to your tank management routine. Comparing Black Tank Treatments When selecting a black tank treatment, consider the following options and their benefits: Treatment TypeOdor ControlWaste BreakdownEco-friendlinessChemicalHighModerateLowEnzymeModerateHighHighBio-ActiveHighHighHighDIY SolutionsLowVariableHigh The Role Of Consistent Tank Monitoring Regularly monitoring your black tank levels is critical, especially on long journeys. Overfilling the tank is not only a health hazard but can also lead to backups and damage to your RV's plumbing system. Keep a close eye on the tank's gauge, and never let it reach full capacity. It's best to empty the tank when it reaches two-thirds full to prevent issues. A Clean Practice: Flushing And Cleaning The Black Tank Flushing and cleaning the black tank should be part of your routine after every emptying. Dedicated black tank flushing systems or external flush hoses can be used to rinse the inside of the tank, helping to remove residual waste and prevent the buildup of solids. Regular cleaning will ensure that your black tank sensors remain accurate and that the next leg of your journey is odor-free and sanitary. Smart Usage: Preventing Black Tank Issues Before They Start Prevention is always better than cure, especially when it comes to RV black tank maintenance. Smart usage habits can significantly reduce the risk of black tank problems. This includes minimizing the amount of water used with each flush and ensuring that nothing other than waste and RV-safe toilet paper enters the toilet. Educating all passengers about these practices is essential, as one oversight can lead to blockages that could disrupt the tranquility of your travels. Tackling Tough Tank Troubles Even with meticulous maintenance, sometimes you may encounter more stubborn tank issues. Should you face a particularly resistant blockage or sensor malfunction, it's crucial to address these problems head-on. Specialized tools like tank wands or backflush valves can be employed to clear blockages, while sensor cleaners can resolve inaccurate readings. In extreme cases, professional RV maintenance services may be required, but with diligent care, such situations can often be avoided, ensuring smooth sailing throughout your journey. In conclusion, taking care of your RV's black tank is a critical part of ensuring a pleasant and hassle-free long journey. By utilizing appropriate treatments, monitoring levels, and maintaining a regular cleaning schedule, you can avoid the common pitfalls associated with black tank maintenance. With these steps, you'll ensure that your home on wheels remains just as comfortable and welcoming as the day you set off, no matter the distance traveled. Learn More About: A Guide To Choosing The Best N54 Engine For Sale Tire Shopping Made Easy: A Comprehensive Buyer’s Guide A Comprehensive Guide To Powertrain Warranty Coverage

READ MOREDetails