Efficiency & Durability Comparison: Pipetite vs. Traditional Sealants

Published on: 09 January 2024 Last Updated on: 17 February 2026
Pipetite

Efficiency and durability are two critical factors when evaluating sealants for building and construction.

Traditional sealants, such as silicone, polysulfide, and polyurethane, have been used for many years and are known for their adhesive properties and range of applications. 

When comparing traditional sealants to options like Pipetite, it is important to consider the ease of installation, the ability to maintain a sanitary seal, and the long-term performance under various environmental conditions.

Manufacturers of innovative sealing solutions claim enhanced performance, boasting features like a high elastic recovery rate and strong bonding properties, which could result in reduced maintenance costs and longer service life.

Analyzing these claims through comparative studies can provide a clearer picture of which solutions stand up to the rigors of modern construction and which may fall short.

Key Takeaways

  • Sealant efficiency and ease of installation are critical in construction.
  • Innovative sealants may offer advantages over traditional options.
  • Comparative studies are necessary for informed decisions on sealant durability.

Comparative Analysis of Sealant Efficiency

The efficacy of sealants in commercial construction largely depends on their ease of application, bond strength, and resilience to environmental conditions. Contractors must choose products that not only promise longevity but also facilitate a straightforward application process.

Ease of Application and Maintenance

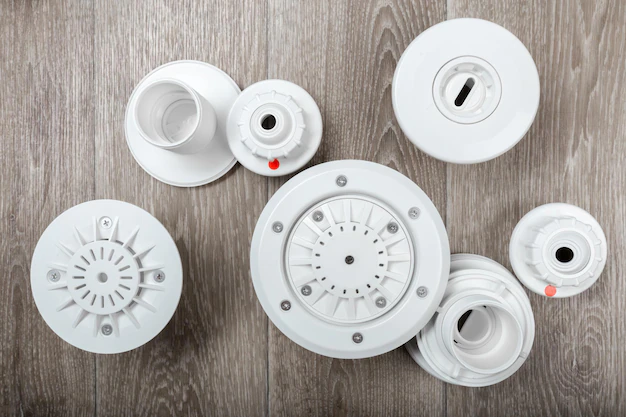
Pipetite products facilitate a sanitary, flexible seal around pipes and tubes, designed for easy installation without wall plates or caulking. In contrast, traditional sealants often rely on meticulous surface preparation and precise application to ensure proper adhesion. The maintenance of CSI pipetites is minimal, owing to their inherent design, which allows for movement while maintaining a seal, reducing the frequency of repairs and replacements.

Adhesion and Bond Strength

The bond strength of a sealant is critical to its performance. Pipetite’s sealing solutions adhere securely even in the presence of movement. Traditional urethane and silicone sealants require a dry field for optimum adhesion, which can be compromised by applicator error or unfavorable conditions. Elastomeric sealants, by nature, can offer excellent adhesion and flexibility, but they must be applied correctly to achieve their full potential.

Climate Resilience and Environmental Exposure

An ideal sealant withstands outdoor weathering, temperature fluctuations, and exposure to solar radiation. Silicone sealants offer impressive resilience to ultraviolet light and temperature extremes but may degrade under constant outdoor weathering.

In comparison, materials like Pipetite are engineered to endure harsh environmental conditions, including high humidity and accelerated weathering, without significant degradation, ensuring an extended service life and sustained efficiency under varying climatic stresses.

Durability Assessment of Sealant Options

Durability is a critical factor when comparing Pipetite to traditional sealants. This assessment focuses on longevity, tolerance to movement, and strategies to prevent failure, ensuring the sealed joints maintain integrity over their service life.

Longevity and In-Service Performance

Traditional sealants, including silicones and other chemistries, are formulated to withstand various environmental conditions over an extended period. In the context of durability, long-term performance is a vital measure, as it indicates how well a sealant will hold up under normal in-service conditions.

Literature suggests that accelerated testing can approximate the durability of sealants like those used in structural sealant glazing systems. Similarly, Pipetite’s design aims to offer lasting effectiveness, though its service life may vary depending on environmental exposure and material composition.

Impact of Movement and Stresses on Performance

Sealed joints are subjected to stress and movement, including cyclic movement, which can challenge a sealant’s integrity. The performance of a sealant is heavily influenced by its modulus and stiffness, factors that dictate how it responds to these forces.

Traditional elastomeric joint sealants typically offer flexibility to absorb such movements, whereas Pipetite relies on its unique, mechanically-sealed design to manage movement without compromising the seal. The durability under these conditions can predict potential premature failure or deterioration.

Failure Analysis and Prevention

To prevent failure, it’s crucial to understand the modes of deterioration and cohesion loss within sealant systems. Failure analysis is the process of investigating breakdowns, often leading to improved formulations and application methods.

Traditional sealant failures are commonly due to loss of adhesion or cohesive breakdown, whereas Pipetite’s design minimizes reliance on adhesive qualities, theoretically reducing failure risks. Continuous development and improvement through research guide advancements in traditional and modern sealing solutions like Pipetite, aiming to enhance their repair profiles and extend their service life.

Conclusion

Pipetite’s innovation offers distinct advantages in flexibility and adaptability compared to traditional sealants, contributing to its efficiency and durability. The economic aspect also favors sealant-free solutions, which can yield long-term cost savings with less frequent replacements and reduced downtime.

It is crucial for industries, particularly those with systems experiencing extreme conditions, to consider the long-term performance and sealing efficiency of these options. Choosing between Pipetite and conventional sealants hinges on the specific needs for maintenance, environmental resistance, and overall longevity that the application demands.

Read Also:

Ankita Tripathy loves to write about food and the Hallyu Wave in particular. During her free time, she enjoys looking at the sky or reading books while sipping a cup of hot coffee. Her favourite niches are food, music, lifestyle, travel, and Korean Pop music and drama.

View all posts

Leave a Reply

Your email address will not be published. Required fields are marked *

Related

Radon Test

What Is A Typical Radon Test Fee? Understanding Costs And Factors

When considering the safety of your home, radon testing is a crucial step. Radon is an odorless, colorless, radioactive gas that can pose serious health risks if present at high levels. To determine if your home is at risk, professional radon testing is advised. The cost for this service can vary based on several factors, including the size of your home and the complexity of the testing required. The fee for a radon test typically ranges from $146 to $716 for a professional inspection. This range factors in the methods used for testing, the size of the area being tested, and whether additional diagnostic tools are required. Understanding these costs is essential, especially considering the potential health implications of radon exposure. Keep in mind that while DIY test kits are a less expensive initial option, ranging from $10 to $50, they often include laboratory analysis fees.  However, it is recommended to use professional test services as they include requirements about the placement of tests, analysis, and recording and including proper test conditions for a final risk assessment For those seeking the most accurate assessment of radon levels in their home, hiring a professional is generally the most reliable option.  Understanding Radon Testing Radon testing plays a crucial role in maintaining a healthy indoor environment, as radon exposure is a known health risk. This section will detail the significance of radon testing and outline the typical process involved. The Importance of Radon Testing Testing for radon is essential because this odorless, colorless gas is the second leading cause of lung cancer after smoking. Radon naturally emanates from the decay of uranium in the soil, and without testing, there's no other way to determine if your home's levels are safe. Regular radon testing ensures that any dangerous concentration is identified and mitigated promptly, protecting you and your family from the associated health hazards. How Radon Testing Works To conduct radon testing, various devices are available, ranging from passive kits to sophisticated radon monitoring solutions. Passive devices, like charcoal canisters, collect radon samples over a specific period. In contrast, active devices like the Model 1028 XP: Professional Continuous Radon Monitor continuously measure levels, providing more dynamic data. These active monitors are preferred for their ability to deliver real-time measurements and create detailed reports, informing you about fluctuations in radon levels and allowing for a comprehensive understanding of your indoor air quality over an extended period. Factors Influencing Radon Test Fees When you're looking to test your home for radon, various factors will determine the cost. Understanding these can help you budget more effectively for a radon test. Test Duration The length of time a radon test takes can affect the price. Short-term tests may last from 2 to 90 days, while long-term tests exceed 90 days; the latter typically being more expensive due to the comprehensive data they provide. Type of Test You have options between DIY radon testing kits and professional radon testing services. While an at-home kit can cost between $10 and $75, professional service includes the necessary expertise and equipment, incurring higher fees. Test Location The price of a radon test can vary depending on your geographic location. For instance, tests conducted in regions with known radon prevalence may involve additional precautionary steps, potentially increasing the cost. Professional Expertise Opting for a certified radon inspector adds value as they bring specialized knowledge and accuracy. The complexity of your home's structure can also necessitate more time-consuming and thus, costlier, inspection methods. Average Cost of Radon Testing When exploring radon testing for your home, you'll find that prices can vary widely based on location and the type of test you select. Understanding these costs is essential for planning your budget effectively. By Region The cost of radon testing can differ depending on the region due to factors like demand, the prevalence of radon, and labor costs. In some areas, testing can be as affordable as $100, while in others it might reach up to $1,200. For example, homeowners can expect to pay an average of $420 for a radon inspection. By Test Type Radon testing varies not only by price but also by the methodology and duration of the test. Short-term tests may range from $10 to $30 for home test kits, whereas professional long-term testing or the use of a continuous radon monitor could cost significantly more. Tools like a continuous radon monitor might incur higher upfront costs but provide more detailed information over time. Additional Costs and Considerations When budgeting for radon testing, it's important to factor in not just the base cost but also potential additional expenses. These can vary depending on several factors, including whether you require a more thorough inspection or if follow-up testing is necessary. Mitigation System Inspection If your property already has a radon mitigation system in place, you'll need to include the cost of an inspection to ensure it's functioning correctly. This typically involves checking the system's components like the fan and the vent and can add to your overall expenses. Follow-Up Testing After the initial radon test, follow-up testing may be recommended, especially if levels are close to or above the EPA's action limit. You may need short-term follow-up tests for a quick verification, or long-term tests for a more accurate assessment, impacting your total testing costs. Home Size and Test Complexity The size of your home and the complexity of the test required can also affect the cost. Larger homes or those with multiple foundations may need several test kits or longer testing periods, potentially increasing expenses. Remember, these costs are on top of the typical radon inspection fee which can range from $146 to $716, with an average of around $420. Your specific costs will vary based on these additional factors and the options you choose. Choosing a Radon Testing Provider When faced with the task of selecting a professional to conduct your radon test, focusing on their expertise and the variety of services offered will ensure you receive a reliable and thorough assessment of radon levels in your home. Certifications and Qualifications Certifications: Make sure the provider you choose is certified to perform radon testing in your state. The National Radon Proficiency Program (NRPP) and the National Radon Safety Board (NRSB) are two leading certification bodies. A certified tester will have a sound understanding of radon testing protocols and state-specific requirements. Qualifications: Beyond certifications, assess the provider’s experience and training. Years in the field and specialized knowledge can greatly influence the accuracy of your radon test results. Experienced professionals will also be adept at using the most current and effective testing methodologies. Service Comparisons Range of Services: Compare different providers based on the scope of services they offer. Some may only conduct tests, while others provide comprehensive services including radon mitigation. It's crucial to understand whether follow-up services are available, should your test results show high radon levels. Test Types: Ensure they offer both short-term and long-term testing options to suit your specific needs. Equipment Used: High-quality, calibrated equipment yields more accurate results. Verify the type of devices used in testing. Pricing: Prices can vary, with professional radon inspection costs ranging between $146 to $716, with a common average being around $420. While cost is a factor, it shouldn't be the sole criterion. Lower prices may not always guarantee the same level of service as providers charging industry-standard fees. Interpreting Test Results Before you proceed with any steps following a radon test, it's crucial to accurately interpret the results. The test reveals the radon concentration levels in your home, allowing you to make informed decisions on necessary measures. Understanding Safe Levels Radon levels are commonly measured in picocuries per liter (pCi/L) in the United States. The Environmental Protection Agency (EPA) states that there is no completely safe level of radon exposure. However, levels less than 2 pCi/L are considered acceptable, while readings between 2 and 4 pCi/L suggest a moderate risk that warrants your attention. It's important to know that some organizations, like the World Health Organization (WHO), suggest more stringent action if levels surpass 2.7 pCi/L. Low radon levels: (<2 pCi/L) Moderate radon levels: (2-4 pCi/L) High radon levels: (>4 pCi/L) Conclusion Professional radon testing can vary in cost, generally ranging from $146 to $716 with a national average of around $420. Factors that can influence your radon inspection fee include the size of your home and the type of test conducted. For those preferring a more economical approach, DIY radon test kits are priced between $10 and $50 and include lab analysis. It's important to ensure accurate results, which might lead you to opt for a professional inspection over a DIY approach. Read Also: How Pests Control Maintains The Aesthetic Appeal Of Your Home Guide To Making Your Home Guest-Ready On Time Exploring Ideas For A Biophilic Home Design

READ MOREDetails
Safety Systems

Construction Safety Systems: Promoting A Safer Industry

Safety is a critical factor in any construction site. However, some construction workers and management overlook safety until an accident happens. Working at a construction site is one of the most dangerous professions since many accidents occur, leading to injuries. Therefore, employers and professionals managing construction projects should use safety systems for ethical and financial reasons. They should also ensure that the workers understand the risks and are cautious when working in hazardous situations. This is because accidents and injuries in construction sites lead to medical bills, project delays, lost work hours, compensation lawsuits, and headaches for human resource departments. This piece highlights how construction project managers can promote safety and prevent workplace accidents. What Is Construction Site Protection?  Construction site protection is nothing but keeping yourself and others from construction-associated activities like injury, disease, and even death. It is often a hazardous endeavor where site employees are exposed to potential risks. For instance, a worker is working at a height or relocating machinery which is extremely heavy. The resulting causes of a construction site fatality include electrocution, falls, and crush injuries. Common Hazards Taking Place At A Construction Site Hazards taking place at a construction site have caused deaths and injuries all across the world. When hazard identifications fail, it is either due to a lack of safety systems or improper training. Before we delve into the ways of maintaining construction-place safety, let us first discover what are the common hazards that take place in a site: Falling From Heights One of the most common fatal injuries that site workers experience is falling from height. According to HSE, 47% of employee fatalities are caused by falling from heights. Every employee who operates at height requires proper training and the right set of equipment. Although safety harnesses are important at every construction site, some do not wear them and, as a result, fall from height.  Trips, Falls & Slips Another very common construction hazard is trips, slips, and falls. Construction sites usually have uneven terrain and unchanged terrain. Hence, trips, falls, and slips are no surprises at all. More than seven thousand construction workers are either injured severely or die due to a major trip or fall. It is the duty of managers and site supervisors to manage the site effectively to ensure the safe movement of workers.  Tremendous Noise A lot of workers have complained about prolonged hearing problems and deafness when they work around loud and repetitive noises. They are also a dangerous distraction that distracts a worker from his job and results in accidents. A comprehensive assessment stating noise risk must be highlighted to avoid noise-related construction site hazards.  Steps To Maintain Safety In A Construction Site Workplace safety is a significant consideration- irrespective of where you work. But when it comes to construction, particularly, one must always be careful. Even the smallest mistake can result in a life-altering consequence. Thinking about how to do so? Here are a set of steps that might help you: Create Awareness About Safety Hazards Ignorant workers are among the most significant dangers because they could make terrible mistakes, putting everyone at risk. Construction site managers should ensure the workers understand the possible hazards before they set foot on a construction site. Understanding the risks ensures workers stay alert to prevent and respond to accidents. Therefore, employers should use OSHA safety guidelines to equip workers with the necessary knowledge to enhance safety. Only workers or visitors aware of the dangers of a construction site should be allowed access. Quality Equipment Workers need quality equipment and a spacious workplace to perform their tasks without causing accidents. Wrong or faulty equipment increases the chances of accidents and injuries. Therefore, construction managers should pay attention to equipment maintenance schedules and provide quality safety systems. They can also seek help from Doka and other companies that provide safety systems and equipment. It is also crucial to prevent exposure-related issues such as dehydration by providing water and using personal protective equipment. Training Workers Some construction workers gain skills on the job, but safety training is best offered before accessing the site. The authorities concerned with workplace safety often publish resources to help construction companies train their workers. For example, they provide worksheets, pamphlets, training videos, and sometimes one-on-one training. Safety training is important not just for new workers but also for experienced workers. Therefore, construction firms should organize training to ensure all the workers gain or refresh their safety knowledge. The safety training can focus on simple things such as using a ladder or fall protection to ensure all the workers are well informed. Documentation Proper documentation is crucial for workplace safety. Construction sites must meet certain legal and safety standards before construction work begins. Therefore, construction firms should only commence operations with relevant licenses and documents. Contractors undertaking specific tasks such as blasting must provide relevant certification before accessing the site. Documentation protects the construction firm and helps prevent accidents and public scrutiny. Effective Communication Accidents usually happen when the workers are unaware of what to do or expect in a certain situation. However, sharing information about construction goals, objectives, and daily activities can reduce surprises or mistakes that could cause harm. Besides, the construction management should provide communication devices and tools such as headsets, walkie-talkies, and smartphones to ensure effective communication about workplace hazards. Effective communication ensures everyone is informed, enhancing operations and reducing safety risks. Supervision Construction employees should always follow the relevant safety guidelines and institute mitigation measures. However, since not all workers will follow the relevant procedures, supervision can help identify loopholes and enforce safety standards. For example, supervisors should keep tabs on all workers and ensure they have relevant safety gear. The workers should report any safety concerns to the supervisor for appropriate mitigation measures. The Bottom Line… Stay Safe! Construction companies should build quality structures while minimizing accidents, injuries, deaths, and related lawsuits. The hope of reducing accidents in construction sites lies in raising awareness, safety training, effective communication, supervision, documentation, and quality equipment. These simple things can help reduce accidents, enhance safety, and prevent legal issues associated with workplace accidents. Read Also: Senior Staircase Safety: What You Need to Know Construction Safety – What you didn’t know! Top 7 Safety Tips For Road Construction

READ MOREDetails
Value Of Your House

How To Learn The Value Of Your House

There are many reasons to want to value a house. A new addition to the family may need additional rooms, a work promotion in another location, or even just time for a change may require the home to be sold. Another reason to value a property is to identify a person’s current financial position. This may be necessary for those starting a business or needing additional finance. How do people learn the value of their houses? Here are three ways. Top 4 Ways Of Learning The Value Of Your House 1. Online Valuation Tools One of the easiest ways to get a valuation is to use one of the many online valuation tools available. They use public data to price your home. These tools use the automated valuation model (AVM). The valuations are based on data retrieved from public records like deeds of ownership, property transfers, and tax assessments. A mathematical formula is also applied, taking data from recent sales in the area. The challenge with relying on AVMs is that they’ll value every property, regardless of the available data, possibly giving an inaccurate value. To effectively use an AVM, do it from a real estate site that also includes a ‘confidence score.’ This value means a professional has checked the result from the AVM and given a score based on how close it is to market value. Any AVM plus a confidence score over 90% can be considered. 2. Comps One of the most common ways to get a current value for a house is to check out recent sales in the same area. Take a look around the neighborhood at comparable homes. These are known in the industry as ‘comps.’ When made public, the results of these sales can be an easy predictor of the values in the area. An ‘apple for apples’ approach needs to be applied here. If the house next door is a little more run-down but has an additional bedroom, that value isn’t a good comparison. If one down the road, with an equal number of rooms, was renovated around the same time, that’s a closer valuation. The way to get the best valuation for your home is to find four comps — two at the higher price range and two at the lower. Go for something that’s somewhere in the middle. Remember that values change quickly; any sale over three months ago may not match the current market. 3. Professionally Appraised The most expensive but arguably the most accurate way to value a home is to get it professionally appraised. These people have seen hundreds to thousands of comparable properties and can give you a correct value. A 2018 survey revealed that ¼ of US homeowners valued their properties this way. Lenders will require an appraisal before approving a mortgage; however, they’ll want it done by their own appraisers. Appraisers may even suggest changes that can be made to increase the property value. A professionally presented pre-purchase appraisal by a reputable appraiser makes it easier for the potential buyer to decide. This is one task that they don’t have to do. Appraisers are independent contractors. They get paid per appraisal; they don’t earn commission and therefore offer unbiased opinions. 4. House Valuation Made Easy Using an AVM is the most convenient way for a person to value their home; however, it’s possibly the least accurate. Spending the time to compare recent sales on comparable properties in the area is a closer way to get a more accurate price. Choosing a value mid-range of these is the best way. Unbiased professional appraisers will provide the most accurate value, but at a cost. Whether using an AVM, checking out local comps, or hiring a professional, there is one surefire way to know the value of a house. The value is whatever someone else is willing to pay for it! Additional: 5 Ways A Home Maintenance Plan Can Prevent Disaster How You Can Increase the Value of Your Home with Stone Veneers 6 Easy Ways To Make Your Home More Appealing To Buyers What Qualifications Do I Need to Have to Get a Home Mortgage?

READ MOREDetails