A Guide To Process Painting And How It Benefits Women’s Mental Health

Process Painting

Expressive arts therapy, such as process painting, serves as a bridge between the conscious and unconscious mind.

Its primary focus is to shed light on blocked or stagnant areas in therapy. By emphasizing the creative process rather than just verbal communication, it unveils new insights or meanings that traditional talk therapy might not uncover. 

The best thing about them is that they’re suitable for people of almost any age, as it has the core potential to improve your —

  • Emotional, 
  • Spiritual, 
  • Cognitive, and 
  • Physical wellness. 

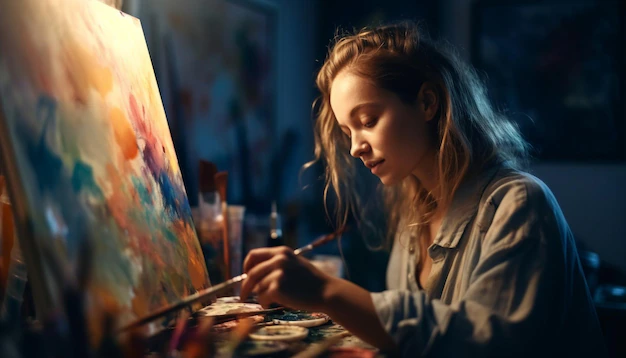
You wouldn’t need artistic talent, but within this therapy, various methods intensify and enrich the experience — especially for an emotionally troubled woman. 

But what is a process painting group? 

How do they operate? 

What are the positives they can have on you?

We have answered all of these questions elaborately through this article. So, without any further ado, let’s get started with the same right away.

What is Process Painting?

“Process painting” is all about focusing more on how you paint rather than just the final picture. 

Instead of caring a lot about being really good or making something perfect, it’s about enjoying the act of painting itself. In this approach, the canvas works like a playground for expressing yourself without worrying about being skilled or getting a perfect result.

Process painting sets you free from the stress of being perfect, or meeting set rules. Instead, it’s about enjoying making art without worrying about how good it looks. 

You let your feelings and ideas guide your painting without judging yourself. It’s like a journey where each stroke and color helps you explore your thoughts and emotions.

While this type of mindful activity can be done alone, doing it with a group of people can boost its benefits even more. Move on to the next section to learn more about it.

The Benefits of Process Painting

Benefits of Process Painting

Process painting can open a new window of spark and mindfulness in your mind and assist you in thinking better or more efficiently. Let’s keep reading to know more about it.

1: It Can Encourage Your Unfolding Unconscious

When people use creative activities like painting, dancing, or making sculptures, hidden thoughts and feelings can surface without them realizing it. Unlike just talking about things, these activities help bring out stuff that might otherwise stay hidden. 

For example, looking at a picture might remind someone of a forgotten memory, or making a mask might help someone understand a new side of themselves. 

Whether someone uses the art materials or their own abilities like singing or moving, these activities help bring out thoughts and feelings that might be hard to explain with words.

2: It Creates a Line of Communication between You and Your Therapist

Expressive arts therapy helps people communicate deeply, both in what they say and what they create. When someone expresses themselves through art or movement, it mostly brings out new emotions and thoughts. For instance, making a dance piece might bring up unexpected feelings that can then be talked about with a therapist

The art itself, like a painting representing grief, can add more layers of meaning and become a starting point for a conversation about the colors, lines, and symbols used.

3: Helps You Get Control Over Yourself and the Therapeutic Process

Creating a physical representation of your thoughts or emotions can help you feel more in control. For instance, drawing how you feel something can reveal things you might not realize consciously. It also lets you step back and observe your feelings from a distance, which can be really helpful, especially with tough memories. 

Like watching a movie, talking about your experience as an observer can help you detach from any painful feelings at the moment.

4: It May Give a Spark to Your Therapy

Expressive arts therapy helps people imagine and discover new things. It’s like a lightbulb moment where you find something new or understand something in a different way. 

It can help you get unstuck, uncover hidden feelings, and understand the past better. It gives you a new way to express yourself, especially when words don’t capture what you’re going through.

5: It Can Support Integrative Learning

Encouraging people to explore unknown knowledge within themselves is usually boosted by experiencing things through different senses. When we combine these experiences, they create new thoughts, feelings, and images that we wouldn’t typically have. 

For instance, asking someone to focus on the sounds around them can lead to uncovering emotions or sensations they hadn’t noticed before, like hidden pain.

Process Painting – The Procedure

Process painting, as a therapeutic procedure, usually follows a set of rules or steps. We’ve given a glimpse of the same here. However, if you want to know more about it, be sure to join one of the process painting groups. This will give you a practical experience of the same.

1: Set the Space for Process Painting

Setting up the right environment is essential for the painting process. A calm, brightly lit area with enough space to move around enables artists to completely engage in the creative process. 

Supplies like acrylic or tempera paints, different brush sizes, canvas, paper, and other preferred tools are arranged, encouraging free exploration without constraints.

2: Begin without Any Expectation

Individuals start by selecting a color or dipping a brush into the palette without predetermined notions. Once the brush touches the canvas or surface, the painting journey begins. 

The focus, in general, is on embracing the present, enabling colors to mix freely, and allowing organic shapes and forms to take shape spontaneously.

3: Embracing the Flow

During the painting session, people engage with the artwork as it develops, trying out different colors, strokes, and techniques to explore textures and dimensions. They prioritize the creative process over the final outcome, embracing a free-flowing approach without criticism.

Read Also:

Ankita Tripathy loves to write about food and the Hallyu Wave in particular. During her free time, she enjoys looking at the sky or reading books while sipping a cup of hot coffee. Her favourite niches are food, music, lifestyle, travel, and Korean Pop music and drama.

View all posts

Leave a Reply

Your email address will not be published. Required fields are marked *

Related

Nutritious Eating

7 Meal Prep Tips For A Week Of Nutritious Eating

If you've ever found yourself scrambling to put together a meal or settling for that oh-so-tempting takeout after a long day, trust us, you're not alone. But what if we told you that with a dash of planning, a sprinkle of effort, and our trusted tips, you could sail smoothly into a week of nutritious eating? Buckle up, folks; it's time to dive into the wondrous world of meal prep! 7 Meal Prep Tips You Should Know Healthy eating is the key to healthy living. And in order to eat mindfully, we need to follow this life-saving meal preparations tips. Not only are they super easy, but they also have ingredients readily available in your kitchen. Let's have a deeper look: #1 Let's Get Organized: The Meal Plan Blueprint 📝 Every culinary adventure begins with a well-constructed plan. Start by sketching out a weekly meal plan. Consider: How many meals do you need each day? If you're aiming for three full meals and two snacks, jot that down. Dietary restrictions or goals: Whether you're vegan, low-carb, or trying to incorporate more fiber, these guidelines will shape your choices. Ingredients already in the pantry: No need to buy another bag of quinoa if you've already got one. Having a visual representation streamlines your grocery shopping, reduces waste, and discourages impulsive, unhealthy choices. Tip: Use apps or printable templates to make this process even smoother! #2 Quality Containers: Your Meal's Protective Shield 🛡️ The right containers can be the difference between a soggy salad and a crisp one. Good quality, airtight containers Keep food fresher for longer Prevent messy spills Aid in portion control. We're huge fans of glass containers. They're eco-friendly, microwave-safe, and honestly, your meal just looks more inviting in them! Mistake to avoid: Using damaged containers. Even a small crack can let air in, compromising your food's freshness. #3 Embrace the Batch Cooking Bonanza 🥘 Designate specific days as your cooking days — maybe Sundays and Wednesdays. Prepare large batches of versatile basics such as: Grains: Quinoa, brown rice, or bulgur Proteins: Grilled chicken, tofu, beans, or lentils Veggies: A mix of steamed broccoli, roasted bell peppers, and blanched spinach. These foundational elements can be repurposed into different meals throughout the week. For instance, that quinoa can become a stir-fry, a salad base, or even a breakfast porridge! #4 Sauces & Dressings: The Flavor Magicians 🍶 A meal can be transformed with the right sauce or dressing. Imagine A zesty lemon dressing for your salads A spicy tomato sauce for those pasta nights A rich pesto for that extra zing. Having a variety ensures your meals remain exciting. And here's a twist: ever tried a CBD-infused dressing? CBD edibles have gained popularity, and adding a few drops of CBD oil to your dressings can combine the potential calming effects with the vibrancy of your meal. So see more about their use and experiment! #5 Go Raw Before the Big Thaw 🥦 Some produce shines best when cooked just before eating. Foods like snap peas, cherry tomatoes, or certain fruits are best stored raw. When mealtime comes, a quick sauté or a simple addition to your meal ensures they maintain their natural essence. Tip: For berries, wash them only just before consumption. This prevents mold growth and keeps them fresher. #6 Breakfast Boost: Overnight Success 🌙 The morning rush is real, but that doesn't mean you should skimp on the most important meal of the day. Overnight oats are a savior: Combine rolled oats, milk (or a milk alternative), and a touch of sweetener Add in flavors like vanilla or cinnamon Leave in the fridge overnight. Come morning, top with fruits, nuts, or even a sprinkle of cocoa nibs for a hearty, nutritious breakfast. #7 Stay Hydrated with DIY Infused Waters 💧 While meals take center stage, hydration plays a crucial supporting role. Enhance your water with delightful infusions: Cucumber-mint for a refreshing burst Lemon-ginger for a touch of zing Strawberry-basil for a fruity, herbaceous blend. Apart from making your hydration game strong, these infused waters can offer gentle nutritional boosts. And remember, water isn't just about quenching thirst; it plays a vital role in digestion and nutrient absorption. Bonus Bites: Trio of Nutritious Quick-Fixes for Hectic Weeks 🍽️ Life gets busy, and sometimes we need straightforward, nourishing recipes that won't eat up our time. These three dishes are designed with simplicity in mind, ensuring you fuel up without fuss. From breakfast to dinner, we've got your back! Morning Kick-Starter: Chia Berry Parfait Ingredients: Chia seeds: 3 tbsp Almond milk: 1 cup Mixed berries (blueberries, raspberries): ½ cup Honey or maple syrup: 1 tbsp Granola: a handful Instructions: Mix chia seeds with almond milk and sweetener of choice. Let it sit in the fridge for at least an hour or overnight. In a glass, layer the chia pudding, berries, and granola. Repeat the layers, top with a few more berries, and enjoy! Lunch on-the-go: Chickpea Spinach Salad Ingredients: Cooked chickpeas: 1 cup Spinach leaves: 2 cups Cherry tomatoes: ½ cup, halved Feta cheese: 50 grams, crumbled Lemon vinaigrette: to taste Instructions: In a large bowl, toss together chickpeas, spinach, and cherry tomatoes. Drizzle with lemon vinaigrette and give it a good mix. Top with crumbled feta, and it's ready to pack or eat! Dinner Delight: Teriyaki Zucchini Noodles Ingredients: Zucchini: 2, spiralized into noodles Teriyaki sauce: 3 tbsp Tofu or grilled chicken: 100 grams, diced Red bell pepper: 1, thinly sliced Sesame seeds: for garnish Instructions: In a pan over medium heat, sauté tofu or chicken until slightly browned. Add bell peppers and stir for 2 minutes. Toss in zucchini noodles and teriyaki sauce. Cook for 3-4 minutes, ensuring the zucchini remains slightly crunchy. Serve hot, garnished with sesame seeds. *** There you have it — three recipes that promise maximum flavor with minimal effort. Here's to nutritious, delicious, and efficient eating! In Closing... Remember, meal prepping is not about stringent rules; it's about making life simpler and eating healthier. The initial effort you put in pays off generously throughout the week. So, don your apron, channel that inner chef, and embark on a week of fuss-free, nutritious eating. And as always, we're here, cheering you on every bite of the way! 🍴🌱🎉

READ MOREDetails
Vocal Rest

How Long Should I Take For Vocal Rest?

Vocal fatigue is one of the most common problems singers face. While you may be able to sing through some of your most demanding performances, there’s a good chance you’ll need a vocal break before the next big show. For every singer, this time is different. This is the reason many of the singers are asking how long should i be on vocal rest. You must take care of your voice and rest it correctly. Resting is an important aspect of your singing training. Many famous singers such as Adele, Celine Dion, and Julie Andrews have suffered from vocal trauma.  Most vocal injuries are caused by singing too much, without taking enough breaks, using too much vocal fry, or belting. Many well-trained singers are developing problems from singing correctly too often, and overcoming single vocal trauma is a serious activity. Hence if you leave this issue untouched, it can be a career-ending injury.  Whether you have an upcoming gig or just want to take a vocal rest from a particularly grueling rehearsal, you’re in luck! We’ve got all the info you need about vocal rest, including tips on getting it and what to expect during your recovery.  What Is Vocal Fatigue? If you’ve ever experienced the feeling that your voice is tired during a performance, you’ve likely had vocal fatigue. It’s a natural response to the stress of singing, and it’s usually temporary.  There are lots of different reasons for vocal rest why you may want to take a vocal break, but here are some of the most common ones:  1. You Feel Tired  You’re working hard to move your vocal cords when you start singing. After a while, the physical effort of singing can begin to get to you. You might feel exhausted or even lightheaded. This is called “vocal fatigue”, and it happens to everyone eventually.  Vocal fatigue occurs because your voice is an instrument you use to express yourself. Singing uses all of your body in ways that other activities don’t.  When you sing, your face muscles tense, your throat muscles tighten, and your jaw muscles clench. These movements create tension in your neck and shoulders, leading to headaches and sore throats. Singing takes a lot out of you, so if you notice that you’re feeling exhausted or lightheaded after singing, it could be a sign that your voice needs some vocal rest TLC. 2. You’re Having Trouble Producing The Notes It’s normal for your voice to lose some strength after a while. This is especially true if you’re constantly performing at high volumes or over extended periods. You may need a break to let your voice rest and recover.  Do you know how long Justin Timberlake vocal rest time going on.? He injured his vocal cords, and for almost ten days, he could not speak, and his vocal test was going on. How often should you take a break? The frequency you take breaks will depend on how often you perform and how much volume you use. If you perform every day, you should take a break at least once. It’s also essential to take a break at the end of each performance. If you perform once or twice a week, you can probably take a break once every two or three days.  3. You’re Losing Your Range  You’re naturally using up some of your vocal rest range as you continue to sing. This means that the higher notes will be harder to hit, and the lower notes will be harder to hit. It’s essential to take a break now and then so that you don’t lose your ability to hit notes.  You should ensure a backup plan if your voice starts to give out. If you’re in a live performance or you’re singing on stage, you’ll need to be able to go back into your pre-recorded song. It’s also imperative to practice your backup plan if you’re going to be singing at a karaoke bar or if you’re going to be doing covers.  4. You Feel Like You’re Running Out Of Breath  Your vocal cords are constantly working to produce the vocal rest and notes you sing. They have to do this while you’re breathing in and out. After a while, your lungs may start to get tired. As a result, you may have trouble hitting notes at the ends of your range. A vocal break allows you to catch your breath and recharge your lungs.  Research has found that taking a vocal break can be an effective way to improve your singing voice.  5. You’re Worried About Your Performance  While you’re out taking a vocal rest, you may notice that you’re getting more nervous. This is perfectly normal. However, it’s important to remember that your nerves won’t affect how well you perform once you get back on stage. When you return from a vocal break, your voice will be in the same state as when you left it. You may need to warm up your agent before you sing again. However, this doesn’t mean you need to do all the exercises you did before leaving for the break. In fact, you should be able to just jump right back into singing. Once you start warming up and warming down, you’ll be fine. Just remember to take breaks between sets of songs so your voice can recover. Wrapping It Up:  There are many other reasons you may want to take a vocal break. However, the most important thing to remember is that you should only take a vocal rest if you need to. You want to be sure you’re ready to go when you get back on stage. So what is your opinion about vocal rest? You can share your opinion through the comment section. Additionals: Smooth Discharge before Period All You Need To Know About Bark Collar 5 Ways To Use Medicinal Mushroom Extracts

READ MOREDetails
wall pilates free

An Ultimate Wall Pilates Free Workout Plan for Beginners

To start your Pilates workout, all you need is a wall. With wall Pilates free workout, you can blend traditional Pilates with home exercise. This workout can be helpful for you whether you are a beginner in Pilates or have been practicing Pilates for a few years. Consider starting out with wall Pilates if you want to transform your fitness journey. In this article, you will get a Wall Pilates workout plan. Apart from that, you will also get a general overview of what a wall Pilates exercise is as well as its benefits. Moreover, this article will also set a Wall Pilates free workout plan. Finally, you will also get essential tips to perform this exercise. Hence, to learn more, read on to the end of the article. What is Wall Pilates? Wall Pilates is a form of Pilates training. It is a low-impact exercise where you have to use a wall for support and resistance. Basically, the wall provides support for your back, shoulder, and hips. Hence, you can use it as a resistance to perform exercise. Generally, when you perform traditional Pilates, you have to exercise on a mat or a reformer machine. Here, you use your body weight or the machine for resistance. However, with wall Pilates, you press your body and its parts against a wall. You make movements by exerting force on the wall and by using it as a support. Actually, in this exercise, you have to do the same repetitive movements that you practice during a mat. Some examples of wall Pilates are single-leg stretch, criss-cross, the hundred, etc. Benefits of Wall Pilates Free Hand Exercises The following are some of the major benefits of Wall Pilates that you must: By performing wall Pilates daily, you can strengthen your core muscles. As a result, this will help you prevent injuries and maintain a good posture. With time, you will improve your flexibility with wall Pilates. Additionally, it also helps you to improve your coordination and balance. As you are using a wall for your support, the stable surface can help you maintain the right form. Thereby, with time, you will get a better spinal alignment, which will ensure a lower risk of injury. With wall Pilates, you engage your full body for the exercise. This way, you can target all muscle areas of the body. Moreover, Wall Pilates free hand exercises are also effective in reducing blood pressure. Hence, if you do it regularly, you lower your risk of heart attacks and strokes. Wall Pilates also involves mindful movement, which can help you work on your mental health. People of all ages and fitness levels can perform wall pilates. This is because it is a low-impact exercise. Apart from all these benefits, one of the biggest factors to consider Wall Pilates is that it is a budget-friendly exercise. All you require here is a wall. Who is Wall Pilates Good for? Since Wall Pilates is a low-impact exercise, it will not be physically demanding and exhausting. Hence, this form of exercise is good for people of all ages and fitness levels. Moreover, this exercise is also good for pregnant and injured people. Furthermore, if you are someone who finds it difficult to lie on your back, you can even do Wall Pilates. Generally, traditional Pilates, like mat or reformer Pilates, are difficult to perform. This is especially true for people who have physiological issues or injuries. Hence, if you want to perform a light exercise to stay fit, Wall Pilates is one of the best options to consider. 15-Minute Wall Pilates Free Hand Workout To start a Wall Pilates workout, you need an open wall and a yoga mat. Here are the steps you must follow to perform your Wall Pilates workout: Start your warmup with a Cat-Cow pose and Thread-the-Needle stretch. Warm up for 2-3 minutes. Once you complete your warmup, start your wall Pilates exercise. Here, make sure to have consistency with the reps for each move. Once you complete the five Pilates exercises, repeat the circuit twice more. The next section consists of 5 back-to-back exercises that you must perform in each circuit. 5 Wall Pilates Free Hand Exercises Here are the Wall Pilates exercises you must perform to complete each circuit: 1. Single-Leg Knee Crunch The following are the steps to follow if you want to perform a single-leg knee crunch: Sit one foot away from the wall. Then, lie down on your back. After that, place your feet on the wall so that your legs look like a tabletop, horizontally. Stretch your left leg diagonally so that your toes are just touching the wall. Then, extend your arms over your head. Meanwhile, be sure to press your lower back into the floor. This way, you can engage your core. Pull your left knee toward your chest and curl your shoulders, hands, and your head towards your core. Then, slowly, go back to the initial position. Repeat these fifteen times to complete one set. 2. Wall Bridge and Calf Raise The following are the steps to follow if you want to perform the wall bridge and calf raise exercise: Sit one foot away from the wall. Then, lie down on your back. After that, place your feet on the wall so that your legs look like a tabletop, horizontally. Press your feet on the wall. This way, you can engage your glutes and your hamstring. Then, lift your hips off the floor. However, do not arch your back in the process. Moreover, when your body makes a straight line from the knees to the shoulder, lift your heels for a calf raise. This will balance out the movement. Then, return to the starting position to complete one rep. Repeat these fifteen times to complete one set. 3. Reach Backs The following are the steps to follow if you want to perform reach-backs: Start with a high plank by pressing your feet on the edge of the wall. Here, ensure to keep your feet apart by shoulder-width. Also, be sure to place your shoulders directly over your wrists. Moreover, your body must be in a straight line from your heels to your shoulder. Use it as your starting position. Then, lift your hips up. When you are lifting up, touch your left foot with your right hand. Then, come back to the starting position. Do the same with your left hand by touching your right foot. Again, come back to the starting position. Make sure to repeat this 10 times for one set. 4. Marching Bridge The following are the steps to follow if you want to perform a marching bridge: Sit one foot away from the wall. Then, lie down on your back. After that, place your feet on the wall so that your legs look like a tabletop, horizontally. Then, press your feet to lift your hips off the floor. Here, make sure to form a straight line from your knees to your shoulder. However, make sure not to arch your back. Consider this as your starting position. Then, lift your left foot and bring your knee toward your chest. Meanwhile, make sure to keep your hips still. Here, maintain the same bend in your knee and stop when your thigh is at a right angle to your torso. Then, come back to your starting position by reversing the movement. This is one rep. By performing 10 reps, you complete one set of the marching bridge. 5. Wall Sit and Calf Raise The following are the steps to follow if you want to perform the wall sit and calf raise exercise: Become a human chair: Stand with your back against a wall and take your feet about a foot forward. Then, lower your hips down to a position such that your knees are perpendicular to your hips. Also, make sure your ankle is perpendicular to your knees. Then, extend your arms horizontally so that it is perpendicular to your torso. This is your starting position. Hold the squat position to raise your arms, and reverse the movement to the starting position. Simultaneously, raise your heels to do a calf raise and reverse the movement. This is one rep. Perform 12 reps to complete one set of Wall Sit and Calf Raise. Tips for Effective Wall Pilates Practice Here are some useful tips if you want to perform Wall Pilates free hand exercises effectively: Don’t over-exert yourself with your exercises. Basically, start with simple exercises and gradually increase your intensity. Make sure to breathe steadily and have control of your breathing. Use good-quality mats to support your back and hips. There is no substitute for a professional instructor. Hence, consult with an instructor to perform your exercises correctly. Do you have more suggestions on how to perform Wall Pilates free hand exercises? Please share your experiences and opinions in the comments section below.

READ MOREDetails