9 Essential Tips For Post-Sinus Surgery Recovery In Houston

Published on: 08 March 2024 Last Updated on: 05 September 2024
Post-Sinus Surgery Recovery

Sinus surgery can be a life-changing procedure for chronic sinus issues. However, recovery is crucial for ensuring optimal results and minimal discomfort. If you’ve recently undergone sinus surgery in Houston, Texas, or are planning to do so, understanding how to navigate the postoperative period is essential. Explore nine essential tips to help you recover smoothly.

1. Follow Your Surgeon’s Instructions:

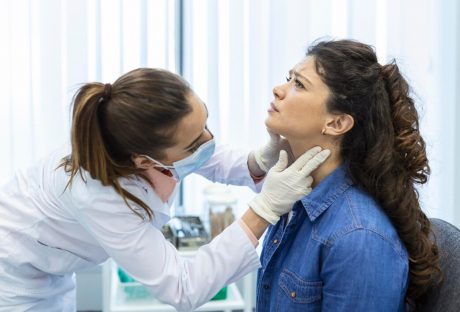
Your sinus and snoring specialist in Houston will provide personalized post-operative instructions based on the specifics of your surgery. This guidance may include details about medication schedules, wound care techniques, and activity restrictions. Following these instructions diligently is paramount for a successful recovery. Your surgeon’s expertise and recommendations are tailored to optimize your healing process and minimize the risk of complications. Adhering to their guidance can promote faster healing and improve your overall outcome.

2. Take Rest Seriously:

Take Rest Seriously

After sinus surgery, your body needs ample time to recuperate and heal. While it’s natural to feel eager to resume your regular activities, prioritizing rest is crucial during the initial stages of recovery. Avoid strenuous physical exertion and heavy lifting, as these activities can strain your healing tissues and impede recovery. Instead, allocate sufficient time for rest, allowing your body to redirect its energy towards tissue repair and regeneration. You can facilitate a smoother and more expedited recovery by honoring your body’s need for rest.

3. Keep Your Head Elevated:

Maintaining an elevated head position is key to minimizing post-operative swelling and promoting optimal drainage of nasal secretions. Whether resting or sleeping, ensure your head remains elevated above your heart level. Utilize additional pillows or invest in a specialized wedge pillow to achieve a comfortable angle. Elevating your head can alleviate discomfort, reduce nasal congestion, and enhance overall breathing comfort. This simple yet effective strategy supports healing and contributes to a more comfortable recovery experience.

4. Stay Hydrated:

Adequate hydration is essential for supporting your body’s healing mechanisms and optimizing recovery following sinus surgery. Drink plenty of water throughout the day to keep your nasal passages moist and facilitate the clearance of mucus and debris. Opt for plain water or non-caffeinated beverages, as caffeinated and alcoholic drinks can contribute to dehydration and nasal irritation. Maintaining proper hydration levels can promote tissue healing, prevent post-operative complications, and enhance overall well-being throughout the recovery period.

5. Use Nasal Irrigation:

Nasal irrigation, also known as nasal saline or nasal lavage, is beneficial for promoting nasal hygiene and accelerating post-operative recovery. Your sinus surgeon may recommend a saline solution or provide you with a nasal irrigation kit for home use. You can gently flush your nasal passages with a saline solution to remove excess mucus, blood, and debris, reducing congestion and promoting optimal healing. As your surgeon directs, incorporate nasal irrigation into your daily routine to maintain clear nasal passages and support a speedy recovery.

6. Avoid Blowing Your Nose:

Avoid Blowing Your Nose

Following sinus surgery, you must refrain from blowing your nose forcefully, as this can disrupt delicate healing tissues and increase the risk of complications. Instead, adopt gentle nasal hygiene practices, such as dabbing or wiping away nasal discharge with soft tissues. If you experience the urge to sneeze, do so with your mouth open to minimize pressure within the nasal cavity. By avoiding forceful blowing and adopting gentle nasal care techniques, you can safeguard your delicate nasal tissues and promote optimal healing in the postoperative period.

Read Also: From Gym To Workplace: A Complete Guide To Lead A Healthy Lifestyle

7. Attend Follow-Up Appointments:

Regular follow-up appointments with your sinus and snoring specialist in Houston are integral to your post-operative care plan. These appointments allow your surgeon to assess your progress, monitor healing, and address any emerging concerns or questions you may have. Attending all scheduled follow-up appointments can give you personalized guidance, adjustments to your treatment plan as needed, and reassurance regarding your recovery trajectory. Open communication with your surgeon ensures that any issues or complications can be promptly identified and addressed, promoting a smooth and successful recovery journey.

8. Gradually Resume Activities:

8. Gradually Resume Activities:

As your recovery progresses, it’s natural to feel eager to resume your normal activities and routines. However, it’s essential to approach activity resumption gradually and cautiously to avoid undue strain or setbacks. Begin with light activities such as short walks or household chores, gradually increasing the intensity and duration as tolerated. Listen to your body’s cues and avoid pushing yourself beyond your comfort level. Steer clear of activities that involve bending over or straining, as these actions can increase pressure within the sinuses and hinder the healing process. By gradually reintroducing activities into your routine, you can safely regain your strength and stamina while supporting optimal healing.

9. Listen To Your Body:

It’s crucial to tune in to your body’s signals throughout the recovery process and respond accordingly. Pay close attention to any changes or symptoms you experience, such as increasing pain, swelling, or nasal congestion. If you notice any concerning signs or symptoms, don’t hesitate to contact your sinus surgeon for guidance and assistance. Trust your instincts and prioritize your health and well-being above all else. By advocating for yourself and seeking prompt medical attention when needed, you can ensure that any issues or complications are addressed promptly, facilitating a smoother and more successful recovery from sinus surgery.

Conclusion:

Navigating the post-sinus surgery recovery process in Houston, Texas, requires careful attention and adherence to expert guidance. Individuals undergoing recovery are encouraged to prioritize self-care and follow their surgeon’s recommendations for optimal healing. These nine essential tips are valuable guidelines to minimize discomfort and promote a smooth recovery journey. For those needing specialized care from a sinus and snoring specialist or allergy treatment in Houston, there are reputable clinics, including the Houston Allergy Clinic, offering expert services and personalized treatment options. Prospective patients can explore these options by scheduling an appointment with a trusted provider. To begin your journey to better sinus health today, visit this website and schedule an appointment.

Read Also:

Ankita Tripathy loves to write about food and the Hallyu Wave in particular. During her free time, she enjoys looking at the sky or reading books while sipping a cup of hot coffee. Her favourite niches are food, music, lifestyle, travel, and Korean Pop music and drama.

View all posts

Leave a Reply

Your email address will not be published. Required fields are marked *

Related

First Aid Tips

15 Must-Know First Aid Tips For Everyday Situations

Unexpected accidents and injuries might occur, leaving you feeling unprepared and powerless. Having a basic understanding of first-aid procedures might help you deal with emergencies much more effectively. Whether you’re at work, home, or in the wide outdoors, this useful first aid advice will help you act quickly and effectively, perhaps even saving a life. 1. Cuts And Scrapes Use soap and water to clean the wound carefully. After that, dab on an antibiotic cream and wrap it in a sterile bandage. Remember to watch out for any indications of an infection, such as growing discomfort, redness, or swelling. 2. Burns Apply cool water to the burned area for ten to twenty minutes if it’s minor. After that, dab on some aloe vera gel or sterile gauze. Severe burns should also be treated medically, as they may need to be handled by professionals. 3. Choking When someone chokes, the Heimlich maneuver may save their life. Standing by someone suffering in this circumstance is one thing you can do to support them. Then, to free the obstruction restricting their airway, put your arms around their waist and shove inward, right below the ribs. 4. Sprains And Strains Remember RICE, which stands for Rest, Ice, Compression, and Elevation, to treat sprains and strains immediately. These factors are essential for treating these wounds and avoiding more discomfort. It would be best to refrain from placing any weight on the injured area before using this procedure. To lessen swelling, apply cold packs, compress with a bandage, and keep the affected area elevated. 5. Fractures If you think you may have a fracture, get medical help right away and immobilize the affected area with a splint or sling. Moving the person should only be done when essential to prevent the injury from worsening. 6. Heart Attacks Understand the warning indications of a heart attack, which include upper body discomfort, shortness of breath, and chest pain. Make an instant call to emergency services if this occurs. Additionally, to help thin the blood, have the conscious person chew and take aspirin. 7. Strokes To determine whether someone is having a stroke already, remember the acronym FAST. Face drooping, arm weakness, speech impediment, and time to call emergency assistance are collectively referred to as FAST. In this kind of scenario, time is of the essence in reducing the possible harm that could result from a stroke. 8. Bleeding Using a clean cloth or bandage, apply direct pressure to the cut and raise the affected region. Seek emergency medical assistance if the bleeding is extreme or doesn't stop. 9. Allergic Reactions If an epinephrine auto-injector is available, use it if someone has a severe allergic reaction. In addition, make an emergency aid call and keep an eye on the person’s breathing and level of consciousness. 10. Poisoning If you suspect poisoning, contact the Poison Control Center right away. Additionally, you have to make an effort to identify the chemical you used and adhere to the advice of professionals. 11. Heat-Related Emergencies Learn the warning signs and symptoms of heat stroke and exhaustion, particularly in the sweltering summer months. Move the individual with a heatstroke as soon as possible to a cooler location, give them some water, and use a cool compress to bring down their body temperature. 12. Hypothermia And Frostbite Become familiar with the signs of frostbite and hypothermia, particularly during the winter. Preventing future difficulties can be achieved by learning how to treat frostbite properly or how to gradually warm and rehydrate a person suffering from hypothermia. 13. Seizure Response One can guarantee the safety of the person experiencing a seizure by knowing how to support them during the event. It would be best if you timed the length of the seizure, cleared the area around them, and cushioned their head as some of the first actions you do. 14. Animal Bites And Stings By being aware of the proper first aid protocols for various animal bites and stings, one can lessen the likelihood of infection and allergic reactions. It is imperative that wounds be cleaned properly and that medical treatment be sought if necessary. 15. Drowning Incidents Learn the fundamentals of being safe in the water and preventing drowning. Acquiring knowledge of water rescue techniques and fundamental life-saving measures can greatly increase the likelihood of a drowning victim’s successful resuscitation. Essential Life-Saving Skills To Learn For Emergencies These two approaches are regarded as the most important to master while learning first aid skills and techniques since they have the potential to save a lot of lives. CPR (Cardiopulmonary Resuscitation) When a person has a cardiac emergency, knowing CPR can be quite helpful in preserving their life. Until expert medical assistance arrives, proper chest compressions and rescue breaths can maintain the flow of oxygenated blood to crucial organs. AED (Automated External Defibrillator) Use Understanding how to use an AED can significantly increase the chances of survival for someone experiencing sudden cardiac arrest. Many public places, such as schools, airports, and shopping malls, are equipped with AEDs for immediate use. Important Aspects Of First Aids And Life-Saving Methods Aside from applying the necessary first aid for any physical injuries, there are also other important aspects to learn as you deal with first aid and various forms of life-saving methods. Emotional Support Recognize the significance of providing emotional support to people in distress. Being empathetic, reassuring, and calming can significantly aid the recovery process for those affected by an emergency. Emergency Preparedness Planning Encourage the creation of an emergency preparedness plan for households and workplaces. This plan should include vital information, such as emergency contacts, evacuation routes, and the location of first aid kits and AEDs, to ensure swift and organized responses during crises. Mental Health First Aid Acknowledge the importance of mental health first aid and the need to understand the signs and symptoms of mental health crises. Encouraging open communication and directing individuals to appropriate professional resources can provide crucial support for those struggling with mental health challenges during stressful situations. Learn Life-Saving Skills By having a basic understanding of these first aid tips, you can provide timely assistance during critical situations. Remember, remaining calm and focused is crucial in delivering effective aid. Regularly refreshing your first aid knowledge and attending a certified and cheap first aid course can further boost your confidence in handling emergencies. Make it a personal responsibility to equip yourself with these must-know first aid skills. Your swift action might be the beacon of hope for someone in distress. Additionally, stay informed, stay prepared, and be the difference when it matters the most. Read Also: Achieving Aesthetic Excellence: How Skin Clinics Deliver Beautiful Dermal Results Self-Care Deficit Nursing Theory In Adult Gerontology Nursing How to Use Practice Analytics to Improve Your Dental Practice

READ MOREDetails
Muscle and Strength

Top 10 Muscle and Strength Building Exercise at Home

All exercises are not treated equally. Some exercises are meant for building muscle and strength and most of us think that the only way we can do that is by picking up a pair of heavyweights at the gym. But the truth is you can build muscle and strength at home too and without picking any weight, just picking up your own body weight can notch up your muscle-building strength way higher! Yes, we know that most of us do not have enough time to exercise at the gym, “I am just too busy.” That’s the excuse we all give, but what if you can exercise your whole body with simple body moves? Just a few minutes of your daily routine and you are pretty much sorted. Try this ultimate muscle and strength building workouts to get a lean and ripped body. These 10 moves are all you need! Ultimate Muscle and Strength Building Exercise – 10 Mean Moves 1. Pushup: The push-up is a great bodyweight exercise and works on a lot of muscles altogether such as the shoulders, the chest, and triceps muscles. Here is how you do it : Drop down to all fours keeping your feet together, keep your hands under your shoulders and keep your body aligned straight from the head to ankles. With your elbows tucked in, lower down your body until your chest is close to the floor but does not touch it. 2. Deep Squat: Deep squats help in overall muscle development in the lower body working on a lot of muscles together such as quads, glutes, and hamstrings for overall muscle growth. Here is how you do it: Keep your feet at least shoulder-width apart and extend your arms straight out. Push your hips back and squat as much as you can. 3. Planks: Planks are a great way to strengthen all your core muscles, some of the muscles worked are the rectus abdominis, the adductor complex the external oblique muscle, and the glutes. Here is how you do it: Drop into a push-up position on the floor. Bend your elbows and balance your weight on your forearms. Keep the alignment of your body right from shoulders to ankles. Brace your abdominal muscles while inhaling and exhaling slowly. Hold this position for another 20-40 seconds and keep at it for as long as you can. Lower yourself to the ground. Repeat this for at least 3 or 4 times. 4. Squat Jack: Squat Jacks are a great lower-body exercise that works on a number of muscles such as quads, glutes, and hamstrings. Here is how you do it: Put your feet together and use your hands to touch the sides of your ankles. Now get into a standing position and raise your head and jump into your sides. 5. Mountain Climber: Mountain Climbers are a great exercise to move your heart rate up and working up most muscle groups in the body such as the chest, obliques, deltoids, biceps, triceps, quads, abdominals, hamstrings, and hip abductors. Here is how you do it: Get down to a pushup position. Bring your right foot and bring it as close to your chest as possible, touching the floor with the help of your right foot. Repeat the entire exercise with your other leg That completes 1 rep. 6. Single-Leg Hip Hinge: The single-leg hip hinge works your glutes and hamstrings and it boosts your foot and ankle strength to a great extent. It also improves your balance and stabilization. Here is how you do it: Stand on your right leg and raise your left foot behind you, keep your arms by your sides. Next, while you push your hips back try and reach for the floor as you lower your upper body and raise your left leg. Try and go for 10 movements per leg. 7. Skater Hop: The skater jump works your quads, your hamstrings, glutes, and calves. This workout tones your entire leg. Stand on your right foot with your left leg crossed behind you. When you land on your left foot try to cross your right leg behind you. Keep hopping from one leg to another. 8. Bridges: The bridge is an exemplary exercise that works all your core muscles that includes your abs, lower back, and also tones your glutes. The Bridge also stretches out your chest, neck, spine, and hips and helps with pain in your back, head, and knee. Here is how you do it: Lie down flat on your back. Bend your knees while keeping your feet on the floor and keep your arms relaxed right beside you. Lift the butt off the floor all the while tightening your glutes and abs. Hold this position for a minute and reprise your original position. 9. Lunge: The lunge is a great functional exercise.  It works your glutes in your hips and butt and also works the hamstrings and quadriceps in your thighs beside the calf muscles in your legs. Here is how you do it: Keep your feet shoulder-width apart all the while keeping the upper body upright and look forward. Take a step forward with one foot, then bend the front knee at a 90-degree angle. Ensure that your front knee is right below the ankle when you perform this exercise. 10. Jump Squats: The jump squat specifically works the legs and midsection. The specific muscles it works are the hamstrings, gluteus maximus, abdominals, quadriceps, and calves, by continuously stretching and contracting the muscles. Here is how you do it: Keep your feet hip-width apart and rest your arms at your sides. Squat low all the while keeping your back straight and core all braced up. Use your hips, knees, and ankles to explode up. Use your hands to get the extra momentum. Land with a soft jump keeping your bent knees aligned with your hips and ankles. Land and immediately go for your next jump. There, how difficult can it be to do all the exercises? You can do these exercises in a HIIT format or interval training format. Do at least 5-10 minutes of warm-up exercises before starting. That means 30 seconds of work with 60 seconds of rest. This will give you great results in a short time! Try out all these exercises and let me know if you have felt the difference. Happy working out! Read Also : What Are Popular Mind And Body Exercises Available At A Gym? How Activity Mirrors Add Value To Exercise Place! The Best Way In Relaxing Your Feet

READ MOREDetails
Marijuana Urine

Passing A Marijuana Urine Drug Test- How To Pass Pee Narcotics Tests

Most people who have a job, have taken a drug test. Prior to the mid-80s, it was just about unheard of, employers believed more in lie detector tests for pre-employment. Since drugs have taken over society, it is imperative for companies to give drug tests. They aren’t only for pre-employment, but usually, companies test their employees randomly after being hired. Of course, there are employees that aren’t on any drugs unless they are prescribed to them. Then, some employees choose to quit the use of illegal drugs because they don’t want to take the chance of losing their jobs. Then, you have those employees that just don’t really care if they lose their job. If an employee is hurt on the job, they are immediately tested at the hospital. However, any other time that they are drug tested, they use one of the many ways that exist to pass the test. If they didn’t use one of these alternatives, they would literally burn a hole in the cup. Usually, the random tests are announced, that way everyone can be ready just in case their name is chosen to actually be tested. There are several different ways to do a drug test. The urine drug test is the most common. How long a drug can be detected in urine varies with each drug. Saliva tests are basically more recent drug use, it usually only detects the last few days. Blood tests determine drug use at that very moment. Then, the test that truly tells the tale is hair follicle tests. They tell which drugs have been used for up to 90 days. Honestly, with marijuana or cannabis, the question of how long it stays in your system depends on your usage. The THC in the drug stays in your system longer because of the way it stores itself in your body. One single use can show for three days, while a regular smoker can take up to 90 days to get out of your system. Cannabinoids that break down from the THC are lipids, which means they store in a person's fat cells, not blood. Hence, why they don’t show so easily in a blood test. They can excrete through urine, but since they are fatty molecules, they are usually cleared by stool. So, how do you pass a urine drug test after smoking marijuana? Well, common sense says that the best way is to not use marijuana in any way. However, if you insist on continuing use and needing to pass a test, there are several ways to do it. The next way to pass a urine drug test is to get someone who doesn’t use drugs to P for you and then try to sneak it in today testing facility. Remember, the urine has to be 98.6°F, which is a person's normal body temperature. This is the most effective way, but only if no one is watching you. Also, you can buy synthetic or fake pee. Make sure that it has Uric Acid in the ingredient when you buy it, some labs test for it, to make sure it is real. It usually comes with a heating pad so you can make sure it’s the right temperature. Since the THC is stored in fat cells, doing exercises that help burn fat can help get rid of the cannabinoids. Don’t do any of the exercises the day of the test. Green vegetables are full of iron and other vitamins and minerals. These can help to get that metabolism going, which will make it easier to burn fat. Be careful listening to your friends about how to pass a urine test. There are more stories than there are remedies and it would be horrible if you went through a bad experience and still failed the test. First of all, do not drink bleach, it can kill you easily. Don’t chew denture cleaner, pretty sure all you are going to do is puke! Other things that just aren’t going to help you pass a urine test for THC are cranberry juice, vinegar (you are NOT an Easter egg), creatine, zinc, Goldenseal, and Niacin (although this is nature’s best antibiotic). Drink lots of water for a few days before the test. This could possibly dilute the urine enough to get went to have a light level below the level that makes for a positive test. Be careful to not drink too much water, it will show diluted urine and send out red flags that you were trying to hide something. No matter which process you choose, be sure to stay hydrated, eat properly, exercise and don’t smoke anymore in there I want to chill after the test. Casual smokers are easier to detox or mask then heavy smokers. Another way to pass a urine drug test is Sure-Jell. It’s the easiest and cheapest when compared to other things that are ingesting to pass the test. Just makes a pack from the grocery store we had a 32-ounce bottle of Gatorade. Drink out of it three or four hours before test time. Be sure to P3 or four times before the test also. There’s a one day detox that comes with pills, liquid, and fiber. It has vitamins, and minerals and herbs, making it all natural. It dissolves in your system, get rid of the THC and can’t be traced in any way. The one specific for the person with a higher THC level comes with six capsules that are taking 12 to 24 hours before the test. They drink 20 ounces every two hours, it will take effect went to five hours later. Be careful because it wears off, so you have to time it just right. Learn More I will tell you what beats all of these concoctions, try delaying the test. Most drugs can’t be traced after a few hours in blood or saliva. So, if you could Delay it for just a day, your results could be different. When you think you've read, all you should get a home test and take it to check the results. This way, if your chores didn’t work, you’ve got time to try another way. Every person‘s chemistry is different, so it might work for your friend, but not work for you. Also, it couldn’t hurt to educate yourself. Eight minutes won’t get you anywhere, but knowledge might get you off the hook. Each state has different drug testing laws that dictate how both applicants and employees can be tested. Read Also: Marijuana Addiction Treatment: 5 Steps To Avoid Relapse How Does Recreational Marijuana Affect Your Sex Life Is CBD Oil & Edible Treats Safe For Pets – Dogs & Cats

READ MOREDetails