Top myths about PVC

by

16 September 2019

Home Improvement

PVC

Impact of PVC vs non-PVC towards the environment:

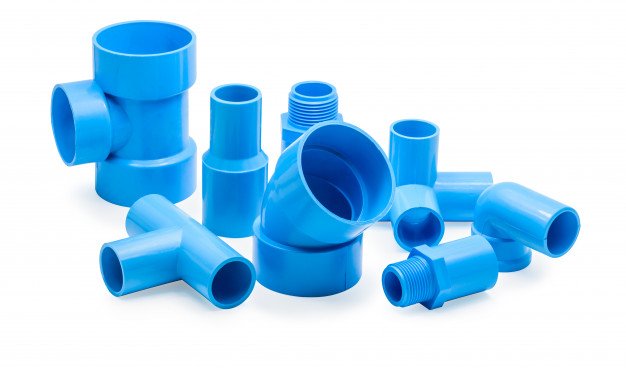
Polyvinyl chloride, also known as PVC or simply as vinyl, is a plastic composed of carbon, chlorine, and hydrogen. It’s a common material found frequently in packaging, wire coatings, furnishing, construction materials, pipes, electrical wires, and also in the graphics industry. The reason that PVC is such a popular material is that it’s incredibly versatile. It’s also resistant to UV rays, chemicals, weathering, and flame resistant.

Many people, however, believe that PVC has a negative impact on the environment and avoid using any products that contain this material. It’s true that there are many complaints about PVC and its effect both on people and the environment, so let’s take a look at the main issues, both for and against.

1. The manufacturing process releases highly toxic carcinogenic dioxins into the environment:

There are two main pieces of evidence that debunk this belief. First is that over the past 30 years, the production of PVCs has increased 300%, whilst at the same time the amount of dioxins in the environment has reduced. Therefore, if the manufacturing process was the major cause of dioxins in the environment, you would expect that the number of dioxins would have increased accordingly. In fact, if we stopped producing PVC, the levels of dioxins in the environment wouldn’t noticeably diminish. Second, that the main cause of dioxins in the environment is not the inefficient combustion of PVC, it’s mainly due to landfill fires and to a lesser degree, the inefficient combustion of medical and urban waste.

2. When incinerated or burnt in house fires, PVC releases dioxins, chlorine, and other carcinogenic chemicals into the air:

First of all, PVC doesn’t burn very well, in fact, if the source of fire is removed, PVC doesn’t continue to burn, because it contains a fire-resistant polymer. Also, many PVC products are treated with additional flame retardants after the manufacturing process and release less smoke and less heat when combusted, compared to other plastics. Second, when PVC is correctly combusted the number of toxins released into the environment is insignificant. In fact, the most harm derives from the release of carbon monoxide, which is released from numerous other materials when burnt.

3. PVC can’t be recycled therefore it accumulates as plastic waste:

In most scenarios, PVC is actually highly recyclable and can be recycled many times over without degrading. In fact, many plastic products in use today contain components of recycled vinyl; some proponents believe that due to its high recyclability, PVC is actually a zero-waste material.

Also, since PVC lasts longer than other materials, it doesn’t need to be replaced as often and hence, appears in landfills less often than comparable materials. In addition, the durability of PVC has led to it being used to line landfills with no evidence that the vinyl breaks down and releases toxins into the groundwater. In the graphics industry, however, PVC is currently difficult to recycle due to contamination from adhesives, additives, and print. Avery Dennison is looking to overcome this with innovative technology to separate products into raw materials, through their Liner Recycling Program.

4. PVC is expensive to manufacture:

PVC is made from chlorine and ethylene, both of which are inexpensive to a source (chlorine comes from salt and ethylene from natural gas), resulting in a very inexpensive manufacturing process. In fact, when you consider that PVC products are very cheap to buy, between the retail cost of the product and the profits made by the manufacturer and reseller, the actual production costs are minimal. The result is that vinyl products consume less energy, generate fewer emissions, and save more energy during the manufacturing process than many other products.

Why is PVC popular in the graphics industry?

All the benefits of using PVC in the graphics industry have been stated above however, more specifically, PVC is extremely cost-effective when compared to alternative polymers. Its long life, durability, resistance to the elements and flame retardance are also major factors, but for our customers, the lower costs are a huge benefit. One of the most popular applications is for car wraps, where the vinyl provides maximum versatility.  Vehicles can look like a work of art after being wrapped with a vinyl film.

The fact that PVC is readily available is another factor that cuts down costs, as well as its versatility because we can manufacture numerous products using the same materials. PVC is also an ideal material for use across all print platforms, both porous and heat stable.

In summary, PVC is not the villain that it has been made out to be. Many companies manufacturing it are not only committed to sustainability but focused on using innovative techniques combined with the responsible sourcing of materials, to reduce the impact of their operations and supply chain on the environment.

Read Also:

I enjoy writing and I write quality guest posts on topics of my interest and passion. I have been doing this since my college days. My special interests are in health, fitness, food and following the latest trends in these areas. I am an editor at Content Rally.

View all posts

Leave a Reply

Your email address will not be published. Required fields are marked *

Related

curtains

Everything you need to know about glamming your home with curtains

Considering drapes or curtains but stuck on which style and design to choose? Well, this article is for you. We shall delve into all the details that you ought to know when looking for curtains for your home. Sheer curtains The sheers are made from a translucent fabric that softly filters light. These curtains do not darken the room, but they allow plenty of natural light to fill it. The sheer curtains also ensure that passers-by cannot get a glimpse of your house hence protecting your privacy. It is for this reason that sheers make great living room curtains. Pair your sheers without blackout curtains for an unmatched level of privacy. The custom curtain combination gives you complete control over light levels and helps in regulating room temperature due to the insulating blackout fabric. Curtain fabric The fabric is the first to consider when purchasing curtains. The choice of fabric will determine their functionality in your home. You should choose various fabrics for different rooms. The patio curtains offer the best fabric. Blockout curtains These curtains are also referred to as blackout curtains and are primarily predominant in Australian homes. These curtains prevent light from entering through the windows hence resulting in a darker room. They also help in insulating your home. During the winter months, the thick-lined fabric gets your home warm, while during the hotter ones, the fabric prevents hot air from passing via the windows. Linen curtains It is regarded as one of the best fabrics you can select for your home despite being overlooked. These fabrics have several practical advantages. For starters, linen is a durable and robust fabric making it a worth trying investment. It has an anti-bacterial fabric with hypoallergenic features and is exceptionally absorbent. For this reason, it is the best for anyone in the family who is prone to allergies. Curtain length One of the essential steps in getting suitable curtains is ensuring you have the correct measurements. Poorly installed or ill-fitting curtains will make even the most stylish of rooms look unattractive and disorganized. Walk with an expert to determine the length of your curtain. You will have a sit down with him to know what you want to achieve in your home. Provide a sense of height to a room by hanging a fabric higher than the window. For a classic look, go with curtains that skim the floor. Curtain color Take all the time when choosing a color for your curtain since it is an investment for your home. There are a variety of drapes and curtains with different beautiful colors that can you can select. The living room area should have bright colors since it the eyes of everybody. White and grey curtains are the most popular choices. Summary Curtains literally “add life” to your home. Get a professional who will guide you in determining all the above-shared information, and you will bring happiness to your home. Read Also: Remodeling Tips for New Homeowners How to Keep Your Bathroom Clean All the Time How Do You Match Sofas With Accent Chairs?

READ MOREDetails
Install Cabling

Practical Guide to Install Cabling in Your New House

Cable installation is a complex process that requires a licensed contractor for successful completion. Doing it yourself is risky, as it may lead to faulty wiring. Proper planning will save you extra work, money, and time. Use the guide below to comfortably install cabling in your house. 1. Prepare high-quality cable products Before cable installation can commence, you need to source cable products. Currently, numerous companies make cables for sale. However, if you want the best quality cables, you need to consider Infinity Cable Products. These cable products are durable and contain more copper and material compared to others. 2. Contact a reliable company When installing cables in your new house, efficiency is critical. Cables supply communication services and vital electrical power, hence requiring great attention and time from the contractor. Ensure you contact a highly reputable company that is well-equipped with the necessary tools for installation. This will increase the accuracy, reliability, and durability of the cables. 3. Draw a wiring diagram It is crucial to have a plan for the cable installation process. Draw a wiring diagram that shows a clear and practical path of the cables to all outlets. The design will provide a reference point for the contractor as they work. 4. Install conduits Be sure to have the contractor install cable conduits in every place that may require wires. Cable conduits will allow you to run video cable, speaker wire, and network cable in the house. The best way to avoid wasting conduits is by running the longest wires in the walls first even if you don’t expect to use them immediately. Each wire should be set from upstairs and pulled through to the basement. This way you will avoid using a ladder to push the cables up between floors. An experienced contractor will know to leave at least a foot of extra wire to make it easier for you in case you want to change your house arrangement later. 5. Determine your outlet count Identify how many switches and outlets will extend to each circuit. This will aid in purchasing sufficient Infinity cable products for your new home. It is advisable to have six outlets per 110-voltage circuit in the living area. However, the kitchen has appliances with more wattage; hence requires not more than two outlets per circuit. 6. Drill cable holes Ensure you know what is on the other side before drilling through a wall to avoid damaging water pipes, ductwork, or more. The drilled holes provide a path that the cables will travel for connectivity throughout the house. Remember that more outlets provide for a safer home. 7. Pull the cables to the outlets Once the holes are drilled pull the cables to the outlets in the house. When attaching wires to outlets, use wire strippers to cut out the outer plastic coating. Infinity cable products come with instructions to help make the process easier. Are you prepared to install cabling in your new house? Now that you have read through the guide on how best to install cables in your house, you can begin the process. Remember to have the job tested after completion of the installation to ensure it is done to perfection. We wish you well as you convert your house into a comfortable home. Read Also: What’s a Good USB Cable? What is type c cable, and is it worth buying How Fiber Optic Cables Are Used

READ MOREDetails
Organized After A Move

Tips To Unpack, Stay Organized After A Move

So you have finally moved into the house of your dreams. What next? Once your belongings are unloaded, you must figure out how to get organized after a move. This includes unpacking and organizing all of that stuff! Of course, this whole process can be a little too overwhelming. But Austin maid service has some organizing tips that might come in handy. Tips for Organizing a Move Before moving in, make sure the new home is completely spruced up to welcome its new members. This includes wiping down shelves, countertops, cabinets, and floors. The bathroom and kitchen should be completely clean and smelling good. Once you have stepped into your new home, it’s time to unbox the essentials first. Forget everything else and unpack the essentials box that carries important stuff that you cannot do without. Little steps first Of course, you want to organize your new home right away. After all, it is your dream house and you wish to start enjoying your stay quickly. But it can be quite messy initially. If you try to start with organizing all rooms together, you may end up making no significant progress at the end of the day. So what next? Well, you must start with one room first and unpack your stuff accordingly. For a family of small kids, you may start with unpacking the nursery. Try to maintain a sense of normalcy so kids do not find moving overwhelming. Setup their rooms first and you can easily create a safe haven for them, where they can play and rest while you organize the rest of the space. After the kid’s room, you can start with the kitchen and your bedroom. Other rooms can still wait. Give rooms a purpose In order to stay organized after a move, the next step is to plan how to store your belongings. In this regard, you can assign different purposes for each room, including pantry, basement, garage, hallway, and bathroom. Now start unpacking things and assign everything a new home. Start with larger items Bulky stuff takes a lot of space. So start with arranging larger items. You do not want to hit a bed or dressing table every now and trip and fall. Move dining table, bed, dressers, and solid pieces of furniture to their respective rooms. This should clear up space and make you feel a little relaxed. It’s absolutely fine to delay organizing the smaller stuff. Take some rest and then unpack smaller items, including books, clothes, utensils, and accessories. Install all larger kitchen appliances first. This includes the fridge, dishwasher, stove, food processor, washer, and dryer. Tackle the kitchen When looking for tips to organize home after a move, your priority should be to unpack the kitchen stuff. What is the most essential cookware? What else is most commonly used in the kitchen? You want to organize the essentials first. Organize those in easily accessible drawers. This includes pots and pans, coffee mugs, cereal bowls, and plates. Keep all dishwashing soaps and sponges handy. Do not forget the kitchen cleaning supplies as well. Unpack remaining rooms Once your most important rooms are in order, it’s time to organize the remaining space. Tackle one room at a time and then move to the next. It is a good idea to keep the task of organizing storage areas for last. Since home organizing after the move is a huge task that may take days, this will ensure you have clean uncluttered space for dining and resting. The storage space can still wait. Don’t forget the entryway Organize this space once you are done with the cleaning aspect of all major rooms. If you continue to ignore this area, it might turn into a complete mess with a pile of stuff that you have been delaying organizing. So when you wish to get organized after a move, place a small basket by the door. This should collect all of the mail that reaches your new home. Bring some hooks to organize items that can be easily lost. This includes keys and dog leashes.  When installing hooks at the entryway, keep a few points for coats, jackets, and umbrella. You don’t want this type of stuff to crowd your chairs and sofas. Place a shoe rack at the entryway. You do not want any viruses to enter your new abode with shoes, right? In these coronavirus times, it becomes even more important to drop your shoes at the door. Place a rug or mat at the entryway to avoid bringing dirt, snow, and slush into your abode. These tips for organizing after a move can make life a little easier for you and your family. You can always rely on dependable professional services for the job if the task seems a little overwhelming. Read Also: 10 Steps to Move in Your New House Moving home checklist: What you need to know Factors To Consider While Preparing For A Move

READ MOREDetails