Keeping The Truck Clean After Off-Roading Trip – Effective Tips

Published on: 06 September 2022 Last Updated on: 19 February 2025
Truck Clean

Off-roading can make your truck extremely dirty. You might see mud, dirt, and small rocks stuck in different places. Cleaning the truck immediately after the trip is extremely important if you want to avoid rust and any permanent damage to your vehicle.

Most people act lazy and end up working harder than required to truck clean. Sometimes you may have to take it to professionals for stubborn stains.

Checkout Four Simple Ideas Help You To Truck Clean After Off-Roading Trip:

Truck Clean Tips

If you want to avoid extra expenses, here are some effective tips to truck clean after an off-roading tour.

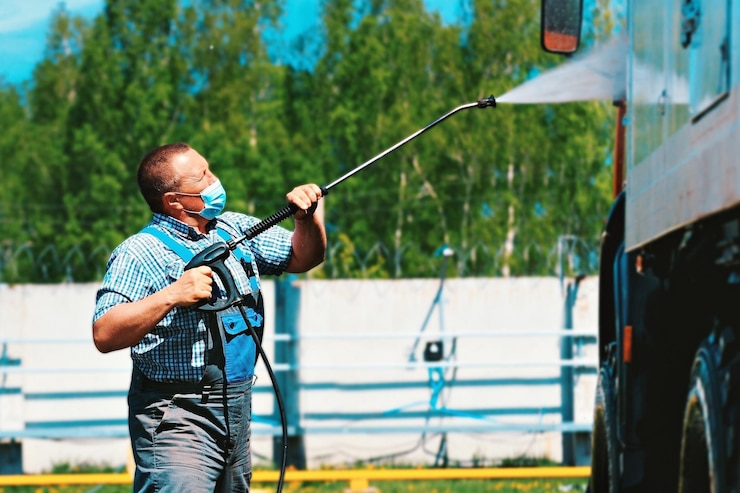
1. Pressure Wash As Quickly As Possible

When you get back to the road after an adventurous trip in the rough terrain, make sure you take your truck for a pressure wash. You can do it yourself at home or take your truck to the cleaning station where professionals will thoroughly truck clean.

Pressure washing will remove the dirt, mud, and debris from every nook and corner. A regular wash might not be as effective as a pressure wash. If you keep your truck covered with mud and dirt for too long, its body may be damaged and you might end up increasing your expenses.

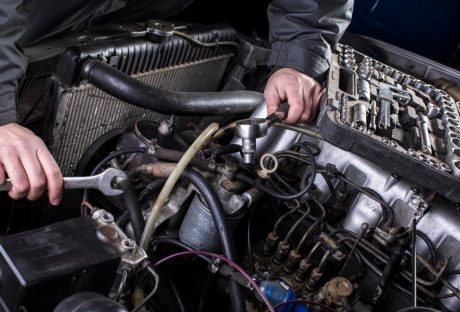
2. Inspect The Vehicle Thoroughly

After the pressure wash, you will be able to see a neat and truck clean. Now you can inspect your truck thoroughly.

Make sure you check the underbelly, the exterior body of the truck, engine, and radiator, and other sensitive parts that might have a chance of damage in rough terrain.

This thorough inspection can help you fix the problems before they become bigger issues. You might have doubted some trouble during the trip, now would be a good time to get it checked and fixed before it gets worse.

3. Use Surface Protectant

Pressure washing your vehicle is not enough. You need to polish the entire body of the truck with a surface protectant. You can explore the market and look for the perfect sealant for your truck before you take it on another adventure.

When choosing the surface protectant, check out its ingredients. A silicon dioxide formula would be great for window shields, paint, and wheels. It also lasts longer than simple wax. Apply the seal on cold and wet surfaces. Clean with a microfiber towel to avoid water marks.

4. Clean The Interior Completely

Cleaning the interior of your truck is just as important as the exterior. When you are on an off-road trip, the majority of your time is spent inside the truck. You might eat and sleep in the truck. Therefore, it might get dirty.

Oil, sweat, and food crumbs can make the interior dirty and smelly. You can vacuum clean the interior by yourself. Make sure that you are using car floor mats rubber instead of carpet.

Rubber mats are much easier to clean and they look as good as new after every wash. Moreover, they will not trap any smell as a carpet does.

Read Also:

Arnab is a professional blogger, having an enormous interest in writing blogs and other jones of calligraphies. In terms of his professional commitments, He carries out sharing sentient blogs.

View all posts

Leave a Reply

Your email address will not be published. Required fields are marked *

Related

Motorcycle

Things To Consider Before Buying Your First Motorcycle

It’s easy to get excited as you buy your first-ever motorcycle after learning the motorcycling basics and passing a motorcycling safety course. However, don’t rush and buy just about any motorcycle that you see. Here are things to consider before buying your first motorcycle. 1. Your Needs When it comes to buying a vehicle, your needs should be your priority. Consider all your needs when choosing a motorbike to purchase. This includes the traffic on the route that you take every day as well as the distance that you cover on a daily basis. By taking your needs into account, you can save yourself from feelings of regret later. 2. Your Type There are many different types of motorcycles. Choose a certain type of motorcycle that fits your style of driving. If you just want a regular type of bike, choose the standard type of motorcycle. Although they don’t have big buildings and super-sized machines, they’re great because they’re flexible and approachable. If you’re a professional car driver who wants to outrun cars on the road, you might want to go for sports bikes, like a Harley-Davidson livewire. However, they’re not the best choice for beginners. If you want a bike but still want the comforts of a car, touring bikes could be great for you. These types of cars have some of the features of a car, such as GPS, windscreens, stereos, automatic transmissions, and carrying capacities. The above-mentioned types of motorcycles are only a few of the many of them. It will be great for you to do your research before finding a bike to purchase. 3. Your Size This one is a no-brainer. Motorcycles come in different sizes and shapes. Choose one that fits your size and build. Don’t choose one that is too small or too big for you; this will only get in the way of your comfort. To be sure, try a motorcycle on for sizing, or if possible, take it for a short ride. This will give you a clue about the ergonomics of a bike and how it fits the figure of your body. 4. Your Options There can be thousands of different motorcycles on the market today, and each has different features that may or may not attract you. Because you have a long list of options, you may have a hard time making your final buying decision. To save time, only pay attention to the ones that could be the most beneficial to you and your needs. 5. Your Long-Term Budget When buying a motorcycle, you’re spending money not only on purchasing the vehicle but also on maintaining it on a regular basis. This is why it’s so important to estimate all the expenses associated with owning a bike like car cover, protectors, luggage, etc. Your total expenses may include the cost of your safety gear. The Moto Expert has a variety of high-quality helmets, jackets, pants, and gloves that you can choose from. The cost of regular maintenance may also add up to your total outlays. You might also want to consider your oil consumption every day. While it may not be that costly, it can greatly affect your economic stability in the long run. The idea is to be able to assess yourself whether you can handle all the financial responsibilities of owning a vehicle. 6. Your Preferences After taking all the necessary considerations, it’s time to think of your own preferences. What brand, color or shape do you want? The level of engine performance does you prefer? What parts and accessories do you want your bike to have? Since this will be your first-ever motorcycle, don’t think twice about giving yourself exactly what you want. Although your needs come first, you shouldn’t forget about your wants. Things To Consider Right After Buying Your First Motorcycle Now that you've bought your first motorcycle, the excitement is real! But wait! Don't get ahead of yourself just yet. There are a few things you need to handle to make sure you're fully prepared for the road. Let’s go through some key steps you should take right after purchasing your bike. Get The Right Gear Safety is a top priority, and that means getting the right gear. A high-quality helmet is non-negotiable. It’s the most important piece of safety equipment you’ll own. Make sure it fits snugly and meets safety standards. Beyond that, invest in a good jacket, gloves, and boots to protect you in case of an accident. You might be tempted to skip some of these, but it’s always better to be safe than sorry. The right gear doesn’t just protect you; it also adds comfort during your rides. Insurance And Registration Next up, don’t forget to get your motorcycle registered and insured. Many places won’t even let you hit the road without the proper paperwork in place. Insurance can save you a lot of headaches in case of damage, theft, or accidents. So, ensure you compare policies and choose one that fits your needs and budget. Plus, having your registration updated ensures you’re riding legally. This is a quick step, but super important if you do not want to get into any legal trouble later! Learn The Bike You’ve got the basics down, but now it’s time to truly understand your bike. Spend some time getting familiar with how it handles. Practice slow turns, quick stops, and general maneuvers in a safe, open space before hitting the busy streets. Every bike is different, and the more you know your own, the better rider you’ll become. Plus, it’ll boost your confidence and make your rides more enjoyable! Maintenance And Care Finally, regular maintenance is key to keeping your bike in great shape. Check your tire pressure, oil levels, and brakes frequently. Keeping an eye on these small things can prevent bigger (and more expensive) problems down the road. It might seem like a hassle at first, but trust me, getting into a maintenance routine will save you time and money in the long run. Enjoy your new ride, but always stay prepared! It’s all about being safe, smart, and ready for the adventures ahead. Read More: 5 Signs Your Car Needs a Tune Up How to Choose the Right Motorcycle Tires for the Motorcycle Choosing the Right Anti-Theft Devices For Your Car In Houston TX

READ MOREDetails
LED Light Bars

LED Light Bars: Are They Worth It?

If you have to travel a lot and mostly at night, you must know how frustrating it is when you pass through dimly lit roads and areas and are unable to see the roads correctly. Other than being very irritating, frustrating, and difficult, improper lighting lowers your vision of the road and makes it very unsafe for you to drive. To recover from these types of problems, LED light bars are a great savior of the situation. You will not be able to see the speed breakers or animals, or obstacles on the road. This is why most road accidents occur at night, due to less visibility. Moreover, the lack of proper vision increases the chances of you running into mud puddles, trash dumps, or excavation in the earth. This means great damage to your vehicle as well. A quick and easy solution is getting LED light bars installed on your vehicle. What Are The LED Bars? With the advancement in technology, the automotive industry strives to provide the best vehicle technology. One such new and rapidly growing advancement is the LED light bar.  LED bars are basically rows of LED light bars to provide better illumination benefits to vehicles such as cars, racing cars, trucks, boats, and other heavy vehicles. Even now, many led light bars for trucks are easily available in the market. So do not hesitate to buy the lights which will go to satisfy your car need. Mostly, LED bars are mostly found on trucks and cars nowadays. If you want to buy an LED bar for your truck, we suggest you buy 20 inches LED light bar online from Sunyee.  Sunyee will not disappoint you with its efficient, strong, long-lasting, and unbeatable products at stunning prices. Check them out for products at prices you will not be able to find anywhere else. Related: Why You Should Invest In Custom LED Light Signs For A Space Are LED Light Bars Worth It? The biggest question that pops in your head when you learn about LED bars is, are LED bars really worth it? The answer is yes! There are several reasons that make LED bars worth the money. Maybe you already know where to buy led light bars? But before selecting the light bars, always know their purposes first. 1. Better Visibility A very obvious reason, but the major function of an LED bar is to provide the driver with extended vision. LED bars allow a wide, better, extended, and much brighter beam of light that illuminates the road much better than standard headlights. As compared to halogen lights, LED lights have a much better result and brightness as well.  Moreover, LED lights give a white light, while other options, such as halogen lights, give a yellow beam. Even during natural calamity situations like rainfall and ice fall, these LED light bars are functioning. And ensure better visibility for the drivers. 2. Efficient And Long Life LED bars are a game changer due to their amazing results. LED bars have a much better result than other alternates. They have a lifespan that is twenty times more than that of halogen bulbs.  This means that a halogen headlight will give you a 1000-hour lifespan while an LED bar will give you a 20,000-hour lifespan. This is the reason why LED lights have taken over the industry rapidly. 3. Safe To Use With a brighter and wider vision that LED bars allow you to have, driving at night has become safer. Even when you go to roads that are scarcely lit, and the road might have obstacles in the way, you will safely be able to get through without causing harm to yourself or anything else. Halogen lights are heavy and relatively fragile compared to LED light bars. So if you are thinking of making your journey safer, always select these light bars. 4. Energy Saviour  LED light bars are incredibly efficient and durable. Every light bar's lifespan is almost 20 times longer than the regular car halogens. : LED light bars also do not consume a large amount of energy. So there is no chance of the excess consumption of energy. The draining will be much lesser, so only 260 percent of the car battery drainage is possible. These batteries consume less amount of energy, and it’s also very long-lasting. Nearly all individual LED light bars can stay up to 20,000 hours. So if you like to have long-lasting energy savior light bars, this will be your perfect pick. Related: How to Choose LED Lights for Every Room in Your Home Save Energy! With Car LED Light Bars The LED light bars are making the work easy for individual drivers. The facts are if you want to have a long-lasting light bar, then these bar lights will be perfect. The light coverage areas will be much higher. So your visualizations will improve. What are you thinking? Are you thinking we are missing out on some of the points? Do not forget to share your opinion through the comment sections. Additionals: Tips To Buy The Best Honda Car5 Proven Tips To Keep Your Car in Perfect ConditionHere Are A few Of The Benefits Of The LED Strip Lights

READ MOREDetails
Bad Transmission Valve Body And How To Fix It

Signs Of A Bad Transmission Valve Body And How To Fix It

For vehicles with an automatic transmission, you want to ensure the valve body will work, especially since this important equipment serves as the main control center of the vehicle. The process works by directing the pressurized transmission fluid to a network of valves that will assemble the right clutch packs. The valves will then draw on the pressure from the various hydraulic signals to determine the gear set to use. When it stops working, there can be some issues with your vehicle. Modern automatic transmission valve bodies will come with their own sensors. This helps to measure the different aspects of the transmission, including the engine load, throttle position, pedal position, brakes, and speed. It will then send this information to the onboard engine management computer, which helps the rest of the vehicle perform properly and alerts you when there is a significant problem with the transmission. It is essential to know the signs that your transmission is going bad. Recognizing some of the main signs of a bad transmission allows you to get it to a mechanic to fix it long before you are stuck on the side of the road. With the proper fix, your vehicle will shift gears, which can lead to a stall-out when on the road. What Are The Signs Of A Bad Transmission? The first items to explore are common indicators that your transmission is not working correctly for you. These signs are often noticeable, even if you do not realize that the transmission is the main problem that is causing them. Some of the common signs of a bad transmission include: You hear banging or knocking noises in the vehicle, especially when applying pressure to the brakes. The car slows down when you put it into reverse or try to drive backward. The shifting stick will often slip when you try to change the gears. When you downshift the vehicle, you may notice that the transition is not smooth. You face problems when it is time to change the gears to drive or go in reverse. The vehicle's transmission tends to get stuck when you put it into neutral. When you notice any of the signs above, getting the transmission checked out immediately is important. Ignoring the problem can make it worse and result in an expensive vehicle repair. Diagnosing And Replacing Your Transmission When you notice some of the signs above, it is time to look at diagnosing the problem and then getting the transmission replaced as soon as possible. Your local automotive mechanic will have the necessary diagnostic tools to check whether the transmission is the problem. You can take it to the body shop and have them run a test to see whether the transmission is the issue or not. They can also see whether it is an electronic or a mechanical failure and provide the right solution for your vehicle. The average cost for a transmission valve body piece is between $200 to $1000, depending on the type of vehicle. This can make the total cost of valve body work to range from $400 to $1500 for most vehicles. You will need to add in the labor cost of having the mechanic do the work, which can range from two to four hours, depending on their tools and experience. While this is an expensive vehicle component, keeping you safe is worth the investment. While it is possible to do the work on your transmission by yourself, this can take time, and many car owners worry they need to gain the skills to get it done. Working with a certified mechanic may be expensive. Still, it can help complete the work quickly and prevent further vehicle problems. How To Replace The Transmission? A few steps are necessary to help replace the transmission and ensure it continues working well in your vehicle afterward. The steps include: The vehicle is raised up and supported well. After you have positioned the jack stands to ensure proper safety and support, lower them so the vehicle rests securely. Remove the vacuum hose leading from the intake manifold to the transmission modulator valve. Pull the hose off here and check whether any transmission fluid is inside. If you find some in there, this is a significant indication that the manifold is defective. Remove your modulator valve. You can do this by carefully removing the bolts from the bracket that is holding them into place. Install the new transmission modulator valve. You can do this by placing the actuating rod into the hole of your new valve. Then take your time to insert the valve into the receptacle hole too. Reinstall the bracket on the modulator, taking the time to secure it with bolts. Reconnect your vacuum hose to the transmission modulator valve and the intake manifold. When you feel confident that everything is in the right place, remove the jack stands -- you are free to once more enjoy your vehicle. Replacing this part can help ensure the transmission is in good working order, and you will have no further problems. If you do not feel comfortable doing the work on your own, you can take it to an auto body shop, and they can help you replace your transmission too. The Bottom Line Your transmission is responsible for many functions within the vehicle. When it works well, you can enjoy a smooth ride that will take you anywhere. But when something is wrong with the transmission, you need to fix it immediately. The cost of fixing this issue will depend on the cost of the broken part and how much the mechanic you choose will require as a labor fee to get the work done. Getting the transmission fixed quickly will help your car last longer and can stop some of the harmful side effects of driving with a faulty transmission. Whether you do it yourself or trust the professionals, fixing the transmission can extend the life of your vehicle. Read Also: Useful Tips About Mobile Car Detailing To Avoid Any Costly Maintenance And Repair Issues Car won't Start After Getting Gas – How To Fix This Problem? What Do You Need To Change Car Rims?

READ MOREDetails