Tools to Turn Unruly Seafood Into Dinner

by

09 March 2022

Food

Seafood

The number of people who enjoy delicious seafood is consistently expanding all around the world. Its adaptability and nutritional value have made it a household favorite.

While cooking and serving chicken, turkey, lamb, and other meats are easier, seafood requires a lot of technique, even if it takes less time to prepare.

Most fish and seafood meals don’t require any special equipment or cookware, but even simple pan-fried salmon filets taste better when cooked in a pan or skillet with low edges that allow you to easily turn the fish.

Additionally, having kitchen tools dedicated to fish and seafood is more hygienic—a spatula used frequently for fish can acquire a strong odor that you don’t want on your French toast. As a result, purchasing specific utensils and cookware for fish and seafood is a good idea.

Each sea creature has its unique set of culinary challenges. While shrimp can readily be peeled from their shells, crabs and lobsters must be cooked in their shells before being cracked apart.

Fish must be scaled and peeled (certain fish) by fishbone tweezers at Fish Me. As you can see, seafood preparation necessitates the use of specialist equipment.

1. A-parts Multipurpose Seafood Scissors Are the Best Shrimp Deveiner

1. A-parts Multipurpose Seafood Scissors Are the Best Shrimp Deveiner

Although you can buy peeled and deveined shrimp these days, it’s always a good idea to have a tool on hand. Since it’s designed for multiple activities, this tool won’t get forgotten in the back of a drawer waiting to be used.

 When peeling shrimp, it works in the same way as other deveiners, by slipping the tip beneath the shell and then opening the scissors to remove the shell quickly.

The scissors movement isn’t merely for leverage like it is with other deveiners. These are really cute, so they may be used to easily serve lobster shells or crab legs. The blades are composed of robust, food-safe stainless steel, and the handles are comfortable to hold.

2. Fishbone tweezers

2. Fishbone tweezers

Fish contain a large number of microscopic pin bones that can be easily removed with a set of fishbone pliers or tweezers. These are extremely useful for removing pin bones from filets of fish.

What else to look for in Seafood and Fishing Tools

What else to look for in Seafood and Fishing Tools

1. Cookware

Seafood recipes are frequently prepared on the stovetop and finished in the oven or broiler. Look for the oven- and broiler-safe cookware, which eliminates the need to transfer the dish to another pan, which might break apart delicate shellfish and leave you with more dishes to clean. A microwave-safe seafood pan is also available.

2. Dishes to Serve

Consider what you’ll most likely use it for and whether the dish is large enough to accommodate it, such as when serving a whole fish.

The food looks misplaced and cools fast on big serving platters. If you’re unsure, go with a smaller serving dish—you can always refill it.

3. Tool Use

If you shuck oysters at least once a week, a tool with a particular purpose, such as an oyster knife, makes the most sense. Other tools are more versatile and can be used for a variety of shellfish as well as other items like almonds.

Final words

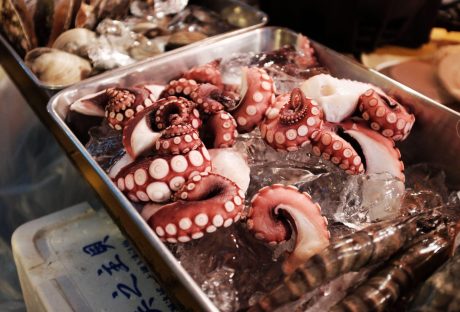
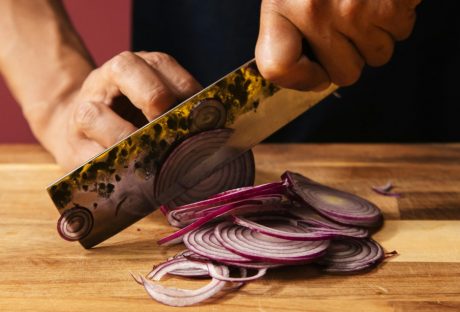
Purchase some beautiful caviar spoons if you’re serving caviar. A rolling pin, tongs, kitchen scissors, knives, and a chopping board are also required for making octopus.

Simpler kitchen tools can be used to replace some of the items. So, if you believe you have a better idea, go ahead and try it. Alternatively, to make things easier, you can buy a kit. Furthermore, if you know someone who enjoys seafood, consider giving them a set of these items as a gift.

Read Also:


Sumona is a persona, having a colossal interest in writing blogs and other jones of calligraphies. In terms of her professional commitments, she carries out sharing sentient blogs by maintaining top-to-toe SEO aspects. Follow more of her contributions in SmartBusinessDaily

View all posts

Leave a Reply

Your email address will not be published. Required fields are marked *

Related

Baking

8 Baking Essentials For The Home Cook

Getting into baking as a home cook can be pretty daunting, especially when faced with a plethora of options and tons of confusing advice. You might just be standing in the store staring at the different products wondering whether you're supposed to buy a mixing bowl or a souffle dish. Believe us; you wouldn't want to end up with drawers full of unuseful stuff. So if you are a newbie looking for some advice for your baking journey, besides taking up some bakery courses, continue to read on and learn about some essentials you need. List of Top 8 Lucrative Baking Equipment For Home Cook 1 - Measuring Cups This one might be a no-brainer, but many people skip the basics when starting with baking. If you're wondering why you can't save some money by just using the same cup to measure everything - well, there are different measuring cups for wet and dry ingredients. Mixing those will make accurate measuring difficult and mess up your whole recipe. For sticky ingredients like honey and peanut butter, you can look into adjustable measuring cups, which are super convenient and prevent product waste. 2 - Spatulas There are varying uses of spatulas when it comes to baking. Whether scraping, stirring, or lathering, you'll find yourself repeatedly reaching for this handy tool. All the options might confuse you, so let's narrow it down to the basics. Ideally, you need spatulas that are: a) flexible and b) heat resistant. Even within those categories, there are many different options you can explore. So if you want to get into more detail, you can find out about the different kinds of spatulas here. As for between wooden and rubber spatulas, we'd recommend rubber. There are specific rubber spatulas that are meant to be heat resistant. So you get the best of both worlds. But if you are looking for more of an eco-friendly option, wooden spatulas are also great. 3 - Baking Pans Pans work as the base on which you start building up your dish, there is no baking without pans, and you can't get away with just getting one and calling it a day. But that doesn't mean you have to start buying every type of pan you can get your hands on. So again, we'll focus on the essentials. Muffin tins are a must and versatile since they can be used to make much more than the usual cupcakes. You can start with a smaller 6-cup pan or go up to 12 if you work with the smaller goodies more often. Loaf tins are also very important to have, and it's a purchase you won't regret. The possibilities are endless, and we recommend going for a non-stick one on the lighter side. 4 - Mixers Mixers are tools that can be a bit heavy on your wallet, but it's definitely worth the price. Many consider stand mixers the best option and have many pros: they're fast, thorough, and all-around convenient. The con? They can't fit into everyone's budget. If a stand mixer doesn't fit your budget, handheld mixers, specifically electric ones, are certainly not a bad choice. They don't hurt your finances and are easy to store as well. While not as fast as stand mixers, they still get the job done fairly quickly. 5 - Kitchen Scales Regarding accuracy, there is no tool better than digital kitchen scales. While you can certainly go for manual ones, the accuracy won't quite compare to digital ones. Measuring weight proves to be much more accurate than measuring volume. Whether your top priority is appearance or taste, accurate measurements are essential for both. It also cuts down a lot of the work you have to put in after you're done baking by decreasing the number of dishes used. If you're an experienced baker, a digital scale is a must since almost all professional bakers use it. 6 - Pastry Brushes Pastry brushes might seem like something you should skip over, but they're an essential item, and you'll regret not getting one. Pastry brushes are best used for tasks that require a more delicate touch, like glazing, coating with melted butter, and greasing pans. They can even be used to clean your dish by brushing off excess coating. They're fairly easy to use and don't make a mess, as the bristle soaks up liquids. 7 - Sifters If you're working with flour and sugar, you need a sifter or a sieve. The fine mesh allows you to sift sugar and flour, which is an important step in making brownies and cakes. Many recipes require your flour to be super fine, and the sifter is the perfect tool for achieving it. Dusting the tops of cakes or similar baked goods with icing sugar also becomes super easy when you have a sieve. Plus, it's very affordable and can last for years. 8 - Rolling Pins Getting a rolling pin seems fairly straightforward, but a fair amount of options are available for different preferences and types of recipes. Rolling pins with no handles and tapered edges are preferred because they can give you super smooth and even dough. These are called french style pins. Pins with handles are great for speed since you have better control over your movements. Going for more than one size will be helpful if you work with a lot of icing. Mini pins help when you need to be more careful and work with an intricate design. When it comes to material, wood is the best way to go since the flour sticks to it, making the process a lot easier. Conclusion So here's our list of baking essentials you need if you're a home cook! We understand how stressful it can be to be faced with so many options and wanting the best while trying to stay within budget. Still, if you stick to the basics, you're already equipped for most recipes. You can add to your tools as the need arises, and that's how you make sure you aren't getting things that will do nothing but take up space. We hope you found this helpful and happy baking! Additionals: Which Edible is Right for You?Garlic Butter Baked Chicken Thighs Recipe

READ MOREDetails
Caviar

What Spoon To Use For Caviar?

When preparing starters, salads, and other dishes using delicacies, it is necessary to remember the taste qualities and the rules of serving and etiquette. The rules of the caviar club https://bestercaviarstore.com/pages/caviar-club state that it is crucial to choose the right spoon so as not to spoil the taste of the exquisite dish. It is necessary to take into account the material of the tableware. For example, metal items have a characteristic flavor that spoils the delicacy. Bester Caviar experts will recommend the best caviar spoon material, considering all the features. Why avoid using a metal spoon to eat caviar? It is better to refuse such utensils because they will interfere with the taste of caviar. Especially when it comes to a device made of one material. There are often spoons with a high concentration of the following metals: nickel; silver; bronze; aluminum. All of them are not suitable for specialty products. For example, cookware made of alloys will not affect the taste. However, there are more suitable materials for such products. The main problem with caviar metal spoons is oxidation. As a result, there is a change in the structure of the product on a chemical level. A delicacy is a very sensitive ingredient. Such transformations will have a negative impact not only on the taste but also on the structure. That is why tasters never use silverware. Types of Caviar Spoons to Use Even the most expensive silverware is not suitable for tasting. Furthermore, using such utensils when serving delicacies is considered a violation of etiquette. Therefore, it is better to opt for appropriate kitchen utensils: The turtle shell is an exclusive material that is considered very scarce. It cannot be bought in a regular cookware store. In many countries, the sale of such items is considered a violation of the law. However, such utensils were used by monarchs in the organization of receptions. Many manufacturers make analogs, creating with the help of plastic and biomaterials something similar to a tortoise shell; bullhorn is another option, inspired by the traditions of past times. It was very often used for serving the festive table, on which many delicacies appeared. The material has a discreet color has maximum durability. It is distinguished by its environmental friendliness and is considered an excellent analog of mother-of-pearl utensils; wood is a less popular option for aesthetic reasons. Wood makes the delicacies visually cheaper but does not affect their taste. Such products quickly absorb moisture. The wood is stained beforehand. Before serving the dish, it is better to oil the cutlery in caviar oil; glass – the aesthetics of this material has always attracted the attention of gourmets with its smoothness and fragility. The structure is excessively delicate, which is more of a disadvantage than an advantage. Many people are deterred from this option by the transparency of the glass; Gold is the only metal that is used when serving delicacies. This serving will allow the host to emphasize his status. Caviar will color the spoon’s surface green, indicating the original origin of the precious metal. However, there are other options. A. Mother-of-pearl Such kitchen utensils appear on the table in movies and TV shows when a table with caviar appears in the scene. It is an original material that combines two opposites – organic and inorganic. Pearl spoon caviar is made from clam shells.  The creation of a vivid contrast is another unique feature. The spoon shimmers when the grainy delicacy appears on it. Despite its smoothness, the product is characterized by maximum durability and reliability. Such cutlery will not affect the taste of the treat. B. Plastic This option may seem too cheap to many people, especially in the context of serving with caviar. However, disposable plastic spoons are used quite often, not only in everyday life but also in expensive restaurants. First, plastic utensils are very cheap, and it is possible to give each visitor a separate spoon. After use, they are disposed of, which is quite hygienic. Secondly, plastic in no way affects the taste of the delicacy. Conclusion Caviar dishes are interesting not only for their gastronomic properties. The popularity of this delicacy testifies to the continuity of generations and respect for traditions. But, of course, everyone wants to plunge into luxury. The exquisite dish will help, but only if the table is laid correctly. Unfortunately, metal cutlery demonstrates bad taste when serving a delicacy. Read Also: Tools to Turn Unruly Seafood Into Dinner What dressings Are Good For Vegans – Mimi’s Laphet 5 Best Vegetables You Should Try Growing In Your Garden

READ MOREDetails
Baked Chicken Thighs Recipe

Garlic Butter Baked Chicken Thighs Recipe

These days, all the love goes to boneless skinless chicken breasts. Maybe because they cook quickly, they are healthy and they are cheap. Baked Chicken Thigh Recipe is very delicious. How about making a case for skin-on bone-in chicken thighs, because honestly, they are all-around better. Thighs are better because they contain more fat and as you know fatter means more flavor. Skin-on together with dark meat is a bit more extra fat, which makes a huge difference in the flavor. Is there really any delicacy more delicious than a crispy chicken skin? Chicken thighs are not difficult in cooking, but compared to chicken breasts, they need a little more style especially if you want to bake them. Just follow the below simple rules and you will never have to sit through a single boring chicken dinner. Baked Chicken Thigh Recipe Procedure You Need To Follow  Pat the chicken thighs dry: This easy procedure makes a big difference when going through a garlic butter baked chicken thigh recipe because while baking, moisture forms steam that will provide you pale, flabby skin rather than delicious golden skin. Pick up a couple of paper towels and dab the thighs on each side. Let the chicken thighs come to room temperature: Placing out your chicken thighs to reach room temperature delivers huge things as the end result. Basically, if you bake your chicken cold, the outside cooks quicker than the inside which is colder, and the outside will be overcooked by the time the piece at the center reaches up to room temperature. Basically, it is simple to overcook chicken thighs when they are cold, therefore forming dry meat. The process does not take long, so you do not need to worry. Chicken thighs are quite tiny, so they will only take about thirty minutes to arrive at room temp. If you take them out at a similar same time as you preheat the oven, you will be good to go! Generously season the thighs: In a baked chicken thigh recipe, the thighs are better when seasoned generously. Season each side using salt and remember to not season the inside. While the thigh cooks, the salt will dissolve its way inside it, thus entirely flavoring every piece. Salt assists the meat in maintaining its moisture, making the thighs more juicy and plumper. Garlic Butter Baked Chicken Thigh RecipeIngredients One unsalted butter maintained at room temperature One lemon zest Ground black pepper Five minced cloves garlic Kosher salt One tablespoon freshly chopped parsley, for garnish One tablespoon fresh thyme leaves One lb. quartered baby potatoes Three lb. bone-in, skin-on chicken thighs One lemon, slit into rounds Garlic Butter Baked Chicken Thigh RecipeDirections: Preheat your oven up to 425 degrees and pat the chicken thighs dry using a paper towel. Season the meat using pepper and salt. Stir thyme, lemon zest, garlic, and butter together inside a medium bowl. Rub the butter mixture on the chicken thighs. Put chicken thighs, potatoes and lemon rounds inside a 9"-x-13" baking dish. Bake the thighs until it registers 160°F on an instant-read thermometer, about thirty-five minutes. Read Also: 7 Surprising Benefits Of Alkaline Foods 6 Tips To Improve Your Cooking Overnight 10 Best Protein Shake Recipes For Weight Loss

READ MOREDetails