Top 4 Natural Combination for You to Eliminate Blackheads

Published on: 21 February 2017 Last Updated on: 30 October 2024
Blackheads

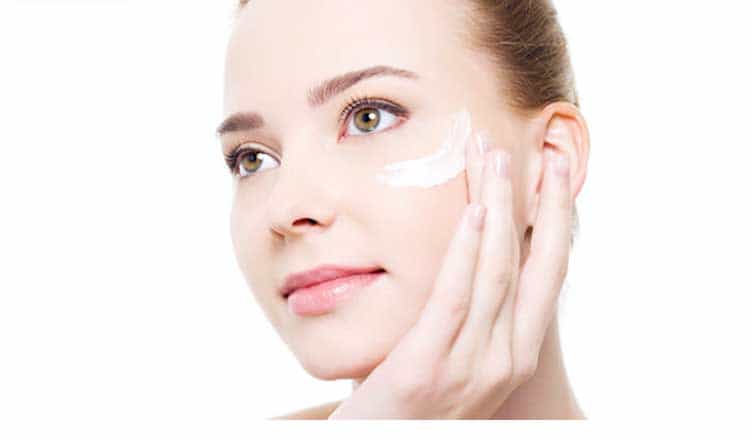
Having a bright glowing and flawless skin is one short way to bring you confidence when communicating with others. But let’s face it; it is a very difficult task since our skin is exposed to many pollutants, dirt, sunlight and countless other harmful factors. One common skin problem to be named is blackheads which are annoying and potentially stressful to deal with.

Many people resort to cleaning strips to pull out those annoying blackheads, but they also bear the risk of irritated or dried skin, not to mention the fact that these products are pricey and painful to remove.

In this article, we provide some natural ways you can try to get rid of blackheads. One common feature of these formulas is that they all use all-around, simple, natural and safe ingredients.

1. Egg White Mask

Egg white, also called glair gained its popularity as number one blackheads remover thanks to its ability to wipe off dirt, dead skin cells. Plus, egg white can visibly tighten your pores and whiten your skin tone.

How to use:

  • Prepare an egg white, add 1 teaspoon of honey for better moisture.
  • Apply one thin layer of egg white to your face, place a strip of tissue paper to your face.
  • Allow it to dry completely then gently peel the mask. The peeling will pull out the blackheads.
  • If you want a thicker mask, apply the second and third layer using the same method. The key point is to let it dry properly.

2. Turmeric and Mint

The benefit of turmeric to blackheads removal can be attributed to its powerful antibiotics, antiseptic and anti-inflammatory properties. It can easily absorb excess oil, eliminate dead skin cells and brighten the tone; while mint can soothe the skin with its cooling effect.

How to use:

  • Make a mixture of 2 teaspoon of turmeric powder and 3 teaspoons of mint juice to create a paste.
  • Apply the mixture and keep it on for 15-20 minutes before rinsing your face with water.
  • Perform twice a week for best result.

3. DIY Peel off Mask with Clay

As it turns out, those expensive peeling masks they sell out there are not hard to make. You can totally make yourself a peeling mask to get rid of blackheads with some charcoal powder and glue. This mask can sweep away all the dirt and impurities that block your pores and dry out excessive oil.

How to make:

  • Mix one tablespoon of activated charcoal powder with enough glue to make a thick yet spreadable paste.
  • Open the pores by dabbing with a warm cloth in your face about 1 to 2 minutes.
  • Apply the paste on blackhead affected areas. Let it dry completely and slowly peel off the mask.

4. Baking Soda

This versatile ingredient never fails to surprise us. The antiseptic quality not only makes it an excellent exfoliant that can sweep away all the dead skin cells and impurities that cause blackheads. It is also a great tool to neutralize the pH of the skin.

How to use:

  • Make a paste from baking soda and some water.
  • Apply the mixture on your face and let it dry for about 15 minutes before rinsing with water.
  • Perform this formula once or twice a week, you will find those ugly blackheads disappear in no time.

5. Lemon and salt

Lemon deserves a spot in this list because it can remove the deepest blackheads. The acid citric in lemon makes it a good exfoliant and brighten the skin tone by burning the topmost layer of skin cells; while salt which antibacterial properties help fight against germs and bacteria worsening the situation.

How to use:

  • Mix ½ teaspoon of lemon juice, 1 tablespoon of sea salt and 1 teaspoon of honey.
  • Use this mixture to massage your face, and then wash with cool water.
  • It is safe to perform this action twice a week. The change you see is incredible. However, don’t forget to apply sunblock every day.

Read also:

Top 4 Natural Combination for You to Eliminate Blackheads (Infographics)


Blackheads

Content Rally wrapped around an online publication where you can publish your own intellectuals. It is a publishing platform designed to make great stories by content creators. This is your era, your place to be online. So come forward share your views, thoughts and ideas via Content Rally.

View all posts

Leave a Reply

Your email address will not be published. Required fields are marked *

Related

Caviar

What Spoon To Use For Caviar?

When preparing starters, salads, and other dishes using delicacies, it is necessary to remember the taste qualities and the rules of serving and etiquette. The rules of the caviar club https://bestercaviarstore.com/pages/caviar-club state that it is crucial to choose the right spoon so as not to spoil the taste of the exquisite dish. It is necessary to take into account the material of the tableware. For example, metal items have a characteristic flavor that spoils the delicacy. Bester Caviar experts will recommend the best caviar spoon material, considering all the features. Why avoid using a metal spoon to eat caviar? It is better to refuse such utensils because they will interfere with the taste of caviar. Especially when it comes to a device made of one material. There are often spoons with a high concentration of the following metals: nickel; silver; bronze; aluminum. All of them are not suitable for specialty products. For example, cookware made of alloys will not affect the taste. However, there are more suitable materials for such products. The main problem with caviar metal spoons is oxidation. As a result, there is a change in the structure of the product on a chemical level. A delicacy is a very sensitive ingredient. Such transformations will have a negative impact not only on the taste but also on the structure. That is why tasters never use silverware. Types of Caviar Spoons to Use Even the most expensive silverware is not suitable for tasting. Furthermore, using such utensils when serving delicacies is considered a violation of etiquette. Therefore, it is better to opt for appropriate kitchen utensils: The turtle shell is an exclusive material that is considered very scarce. It cannot be bought in a regular cookware store. In many countries, the sale of such items is considered a violation of the law. However, such utensils were used by monarchs in the organization of receptions. Many manufacturers make analogs, creating with the help of plastic and biomaterials something similar to a tortoise shell; bullhorn is another option, inspired by the traditions of past times. It was very often used for serving the festive table, on which many delicacies appeared. The material has a discreet color has maximum durability. It is distinguished by its environmental friendliness and is considered an excellent analog of mother-of-pearl utensils; wood is a less popular option for aesthetic reasons. Wood makes the delicacies visually cheaper but does not affect their taste. Such products quickly absorb moisture. The wood is stained beforehand. Before serving the dish, it is better to oil the cutlery in caviar oil; glass – the aesthetics of this material has always attracted the attention of gourmets with its smoothness and fragility. The structure is excessively delicate, which is more of a disadvantage than an advantage. Many people are deterred from this option by the transparency of the glass; Gold is the only metal that is used when serving delicacies. This serving will allow the host to emphasize his status. Caviar will color the spoon’s surface green, indicating the original origin of the precious metal. However, there are other options. A. Mother-of-pearl Such kitchen utensils appear on the table in movies and TV shows when a table with caviar appears in the scene. It is an original material that combines two opposites – organic and inorganic. Pearl spoon caviar is made from clam shells.  The creation of a vivid contrast is another unique feature. The spoon shimmers when the grainy delicacy appears on it. Despite its smoothness, the product is characterized by maximum durability and reliability. Such cutlery will not affect the taste of the treat. B. Plastic This option may seem too cheap to many people, especially in the context of serving with caviar. However, disposable plastic spoons are used quite often, not only in everyday life but also in expensive restaurants. First, plastic utensils are very cheap, and it is possible to give each visitor a separate spoon. After use, they are disposed of, which is quite hygienic. Secondly, plastic in no way affects the taste of the delicacy. Conclusion Caviar dishes are interesting not only for their gastronomic properties. The popularity of this delicacy testifies to the continuity of generations and respect for traditions. But, of course, everyone wants to plunge into luxury. The exquisite dish will help, but only if the table is laid correctly. Unfortunately, metal cutlery demonstrates bad taste when serving a delicacy. Read Also: Tools to Turn Unruly Seafood Into Dinner What dressings Are Good For Vegans – Mimi’s Laphet 5 Best Vegetables You Should Try Growing In Your Garden

READ MOREDetails
Alkaline Foods

7 Surprising Benefits Of Alkaline Foods

When it comes to the workings of these wondrous human bodies of ours, we truly reap what we sow. What we choose to put into our bodies has a profound effect on how it chooses to support us and perform for us. Our modern convenience food diets are riddled with acidic and overly processed foods that are harmful to our health. Things that we may have grown up with---meats, dairy, and coffee---are robbing us of our strength and vitality at every meal. Dangers of acidic foods: Our bodies strive to maintain a delicate PH balance throughout the day; this eliminates the acidic ash that can take its toll on bones, tissues, and organs that might otherwise function to support us. A body that is placed in a chronic, highly acidic state is more prone to disease, weight gain, and even a shorter life span. An alkaline diet rich in fresh, whole, organic foods becomes the very lifeforce of the body as it rebalances the PH and gives the body a chance to heal and regenerate itself. While it may seem at first that making the switch from acidic foods to alkaline foods is going to saddle you with culinary limitations and all sorts of unpleasantness, the feeling you will experience when you give your body a chance to "sigh" will be worth any comfort foods that you will be giving up for this new lifestyle. Whether you have been recently diagnosed with a chronic illness, or you simply want to improve your quality of life you owe it to yourself to give alkaline foods a chance. Here are some ways they can benefit you and your marvelous body: 1. Alkaline foods eliminate fatigue issues: An excess buildup of acid in the body depletes its natural store of oxygen; as a result, the body feels fatigue and so do you. Cells don't function as they should, and every system is working harder than ever to dump toxins and breathe once more. Switching to snacks that are alkaline in nature will reduce acidic buildup and release life-giving oxygen back into your system once more. 2. Alkaline foods strengthen the immune system: An imbalance in your PH levels weakens your body's ability to fight off disease and infection. Bacteria and viruses thrive in an anaerobic, or low-oxygen environment. Increasing your intake of alkaline foods brings more oxygen back into the body, battling disease and viruses and strengthening all systems. 3. Alkaline foods reduce inflammation: An acidic body is an inflamed body; when you have a buildup of acid in your body, you are prone to the development of chronically acidic and diseased states such as heart disease, arthritis, and even cancer. Bringing alkaline rich foods into your diet will reduce your risk for the development of these diseases and bring inflammation under control. 4. Alkaline foods strengthen bones and tissues: As we age, our bodies naturally pull calcium and other minerals from bone material to balance our body's PH. As a result, we grow gradually weaker and more prone to illness and injury. Consuming alkaline foods puts much-needed calcium back into our bodies and restores our strength and vitality in natural and healthy ways. 5. Alkaline foods can prevent the occurrence of cancer: Cancer cells thrive in an anaerobic environment, and by bringing alkaline foods into your diet, you increase the healing properties of vitamins, minerals, and vital oxygen that makes it difficult for cancer cells to multiply and grow. When you give your body the natural tools that it needs, the wonderful self-healing mechanisms present in your makeup go to work on their own, bringing your body into a state of balance once more. 6. Alkaline foods can help you lose weight...and keep it off: Giving your body the vital nutrients it needs through nutritious, whole foods is always preferable to the Standard American Diet, or S.A.D., for short. When you replace high-calorie acidic items like pizza, chips, cookies, and soda with high-quality fruits, vegetables, whole grains, and legumes, the equation is so simple. You'll experience permanent and lasting weight loss and you'll feel great! 7. Alkaline foods improve your quality of life: There are the whole brain, whole body benefits to eating alkaline foods--they heal and repair body tissues at a cellular level, they help to flush out harmful toxins that might slow you down, and they provide the energy necessary to lead a healthy and active life well into your later years. Alkaline foods can improve how you look, how you feel, and what you experience as your body gives back to you based on the wonderful, life-giving foods that you feed it with. Is An Alkaline Diet Right For Me? No matter what diet you choose to follow, it has to be manageable and sustainable in order for it to work. If you are going to derail yourself two weeks after starting an alkaline diet with a cheeseburger and fries, then perhaps going all in isn't for you right now. Making small, deliberate changes to your diet and assessing how you feel will help you create healthy habits for long term success. Many people become overwhelmed at the thought of having to replace everything in their diets; finding some tried and true alkaline diet snacks that you can use for a quick and healthy pick me up in between meals is one way to begin establishing new habits that will move you toward better health. Examples of healthy alkaline snacks include: fresh veggie sticks and hummus celery sticks with almond butter avocados with fresh salsa green juices smoothies nuts, seeds, and berries lara bars chia pudding with fresh berries Once you see how tasty and filling these new foods can be, it will become easier and easier to incorporate healthy, life-giving foods into your diet. Are you ready? Get ready! You are about to embark on an exciting journey to delicious food and better health. You'll experience vibrant energy, improved mood, and you'll feel better than you have in years. Don't look at all the things that you "can't" have on your new journey, focus instead on how much better you'll look and feel with a few simple changes and a whole new positive outlook on your health. Best of luck to you on your alkaline journey! Read Also: You Can’t Out-Diet Your Training 9 Magical Benefits Of A Vegetarian Diet Easy Diet Tips To Summer Six Pack Abs Foods To Eat On A Low-Carb Ketogenic Diet Choosing A Diet Based On Your Personality Type 11 Foods You Must Incorporate Into Your Diet For Great Skin Featured Image: istockphoto.com

READ MOREDetails
Hummingbird Food Recipe

Hummingbird Food Recipe: How To Make Hummingbird Nectar?

It always feels good to see a hummingbird in your garden. To see more of them in your garden, you can keep hummingbird nectar/food in a jar in your garden. In fact, with a simple hummingbird food recipe, you can make their lives easier. All you need is a few simple ingredients. In this article, you will learn how to make hummingbird food with simple ingredients. Apart from that, this article also discusses hummingbird nutrition and the steps you can take to set up your bird feeder. Finally, you will learn how to attract more hummingbirds to your garden. Hence, to learn more, read on to the end of the article. Understanding Hummingbird Nutrition There are a variety of food options a hummingbird needs to meet its nutrition. Although they are one of the smallest birds in the world, they burn a lot of their calories by fluttering their tiny wings. Generally, a hummingbird flutters its wings 90 beats per second to maintain its momentum. Hence, you can see that hummingbirds need to eat a lot. In fact, to satisfy their daily calorie requirements, these birds even consume half of their body weight. Basically, they feed on bugs and nectar every 10-15 minutes. Also, they visit 1000-2000 flowers per day. The following are the things that hummingbirds feed on: 1. Nectar: This is the primary food source of hummingbirds. Basically, it consists of 20% sugar and 80% water. Generally, hummingbirds get their nectar from cardinal flowers, bee balm, salvia, and petunias. 2. Insects: For their protein needs, hummingbirds feed on insects. This is also a source of fat and salt for hummingbirds. In fact, nectar does not provide those nutrients. Basically, hummingbirds hunt insects by finding them from flowers, leaves, or tree bark. Sometimes, they also attack insects midair or pluck them from sticky saps. 3. Spiders: Generally, hummingbirds also feed on spiders for protein. However, they are generally small spiders. 4. Tree Sap: When the amount of nectar is low, hummingbirds drink tree sap from tree bark. Generally, woodpeckers drill wells on tree barks to get tree saps. Hummingbird Food Recipe Basically, by offering hummingbird nectar, you can help them with their post-workout meal. Hence, follow the below hummingbird food recipe to make nectar: Ingredients The following are the ingredients you need to make hummingbird nectar: Filtered Water: 4 Cups Regular White Sugar: 1 Cup (If possible, use organic sugar for the recipe) Procedure Here are the steps you must follow to make hummingbird nectar: 1. Get four cups of water in a saucepan and bring it to a boil. 2. Once the water reaches the boiling point, take the water off the heat. Add sugar to the boiling water. 3. Stir the mixture until the sugar completely dissolves in the water. 4. The nectar is ready. Now, you must let the nectar cool completely. 5. Get a hummingbird feeder and place the mixture inside the feeder. Make sure to hang the hummingbird feeder outside (in your garden) to attract hummingbirds. Essential Factors To Consider The following are some of the major factors you must consider before you start making nectar with the hummingbird food recipe: Make sure to change the nectar every four days with a new nectar. This will ensure that the nectar is fresh. Also, remember not to use food coloring in the nectar. Let it be as natural as you can. Regularly check the bird feeder every time you change the nectar inside it. Look whether there is a gray mold inside the feeder base or not. Also, check whether any ant has crawled inside the feeder to consume sugar water. If you check any dirt or ants inside the hummingbird feeder, throw the bird food away. Basically, it is not good for the birds to drink dirty nectar. In fact, there is a high chance that the birds will not feed on the nectar anyway. To clean the feeder, rinse it with warm water. Then, put some bleach into the water inside. This will allow you to clean the feeder with a brush easily. Once you clean the feeder, rinse it thoroughly with fresh water. Moreover, allow the water to dry. After that, please fill up the feeder with food and place it outside. Enhancing The Hummingbird Experience Enhancing the hummingbird experience, you can attract more hummingbirds to your garden/balcony/porch. The following are some of the steps you must follow if you want to enhance the hummingbird experience: 1. Change The Food Regularly Make sure to change the food every 3-4 days. This is because nectar spoils quite fast, especially when the weather is hot. In fact, if the weather is above 30 degrees Celsius, make sure to change the nectar regularly. Also, make sure to keep the feeder in the shade. This will prevent the sugar from fermenting. 2. Use The Right Amount Of Ingredient You can make hummingbird nectar with just water and sugar. However, you must ensure the water-to-sugar ratio is 4:1. Then, boil the water and add the sugar. After that, mix them until the mixture is perfect. After that, you must let the mixture cool before you add it to the feeder. 3. Avoid Honey Generally, honey can ferment fast and becomes a great place for mold to grow quickly. Moreover, they can be sticky and get on the feathers of hummingbirds. Hence, it is better to avoid honey. 4. Add Another Feeder Although hummingbirds are small and cute, they can be incredibly aggressive and territorial when confronting other hummingbirds. Hence, to avoid conflict among hummingbirds, it is better to add a second feeder if you want to ensure every hummingbird gets the opportunity to have the nectar. 5. Clean The Feeders Make sure to clean the feeders every week. Moreover, if you have hot weather around, clean the feeders twice every week. While you clean, ensure the vinegar-to-water ratio is 1:4. Also, rinse the feeders well before you refill. Furthermore, while rinsing, do not use dish soap. This is because they can leave harmful residue on the feeders. Setting Up Your Hummingbird Feeder The following are the steps you must take to set up your hummingbird feeder: Make the nectar by checking the hummingbird food recipe in the previous section. Hang the feeder in your garden at the start of spring. Generally, hummingbirds migrate through your area in the spring. Also, leave the feeder up after the hummingbirds migrate in the fall. Hang the feeder in a place where it is visible for hummingbirds to see. Also, make sure to place the feeder in an area where you can have a good look. Clean the nectar every 3-4 days and clean the feeder thoroughly each time you change the nectar. This way, you can prevent dust and mold from getting into the feeder. Sugar water is safe and helpful for hummingbirds. Basically, it is quite similar to the natural nectar that hummingbirds find in flowers. If you want to make your own feeder, use an old spice container, bottle, mason jar, or wine bottle. Attracting More Hummingbirds Here are some of the major ways you can attract hummingbirds to your garden: 1. Offer Hummingbird Food/Nectar: If you make sugar water and keep it in a feeder in your garden, you can attract many hummingbirds in your area. To make this item, you can see the hummingbird food recipe above. 2. Keep Water: Generally, hummingbirds also like to bathe. Hence, you can keep some water in a pot/jar to allow hummingbirds to access water for bathing and drinking. 3. Perch Area: You can leave small branches and sticks on your trees and plants. This will allow hummingbirds to perch on. 4. Plant Flowers: There is no alternative to pure nectar that flowers have. Hence, this attracts hummingbirds a lot. For instance, you can use hummingbird sage, honeysuckle, bee balm, and more. Also, you can add other types of flowers to your garden. 5. Keep Other Animals Out: If you have a pet cat/dog in your home, keep them inside. This is because they can bother hummingbirds or even end up killing them. 6. Avoid Pesticides: Pesticides are repellants for hummingbirds as well as insects. Hence, make sure not to use them or use them minimally. Make Your Hummingbird Food Now Now, you can make hummingbird nectar with the help of the hummingbird food recipe in the article. However, make sure to change the food every 3-4 days. Also, ensure to clean the jar every time you change the food. This way, you can ensure clean food for hummingbirds. Do you have more suggestions on how to make hummingbird food? Please share your ideas and opinions in the comments section below. Additional Resources: Is Indian Food Healthy? – Major Nutritional Benefits of Indian Cuisine 15 Healthy Mexican Food Items With Immense Health Benefits The Importance Of Proper Cutting When Preparing Meals

READ MOREDetails