Published on: 08 June 2021
Last Updated on: 21 December 2024
You may not expect that it is necessary to do yard work in the winter, but it is more important than you think. Properly preparing your lawn in the beginning months of cold weather and even though snowy conditions will ensure you have the best-looking lawn come springtime. These four tools are essential in maintaining a healthy yard during the winter.
4 Essential Tools For Maintaining Your Winter Garden
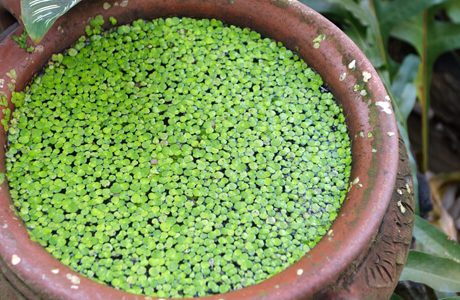
When you love to spend your leisure time in front of your lawn. The maintains of your garden is quite an important task to preserve the beauty of your favorite garden. Every time seeking professional help is costly so better look at how you can maintain a garden in winter using some simple tools.
However, you need to understand that maintaining your garden during winter can be a tough affair. Not only will freezing temperatures deter you from engaging in outdoor work, but the tools and machines can become non-operational. This is why a good idea would be to engage an expert to do the needful. Tree Service Round Rock can maintain your garden during the winters and ensure that you stay safely and cozily within the warm confines of your home.
Here are the names of four tools to maintain a garden in the winter season.
1. Aerator:
Cool-season grass, which is the most common type, should be aerated in the early spring and late fall. For those of you that may not be familiar with this machine, it digs small plug-like holes out of the ground. This helps the grassroots have access to more water, nutrients, and air. The point of this is to make the roots deeper and healthier so the grass has a stronger foundation to grow.
Use this equipment on a day that the ground is slightly moist, maybe the day after rain, for the best results. It will relieve the soil from compaction that causes the roots to be starved and suffocated. Making sure your grass gets all the nutrients it needs before it is covered in snow will help it grow back better when the weather warms up.
2. Chainsaw:
Pruning your trees and bushes during the wintertime is an essential part of a healthy yard. Plants will waste too much energy trying to send nourishment to dead limbs which affect the living ones. Investing in a chainsaw would be beneficial so that you can cut down the dead branches.
If you are a seasoned expert, you will know to not only trim dead branches but also cut any that are rubbing together. Damage to the tree from the rubbing can create an entry for bugs to get inside. When it comes to finding a good quality chainsaw, get this it works! The better the quality of equipment, the less risk when it comes to the safety and wellbeing of your yard.
3. Drop Spreader:
Fertilizer is the basis for giving your lawn what it needs to look its best for next year. There are winterizing products that slowly release nitrogen during the offseason. Using a spreader makes this task time-efficient and well done. It allows you to evenly distribute the fertilizer throughout the lawn, maximizing the benefits of this product.
Putting grass seed down at the beginning of the winter can help maintain your yard as well. You will use the same drop spreader to put this down, but you’ll want to make sure you set the amount it is releasing slightly less than recommended. In doing this, you can overlap your passes, so nothing is missed, and you still have enough to do the whole yard. As a pro tip, it is encouraged to spread a thin layer of compost before laying the seed. Combining the seed and the compost keeps your grass moist and germinated during dry and cold weather.
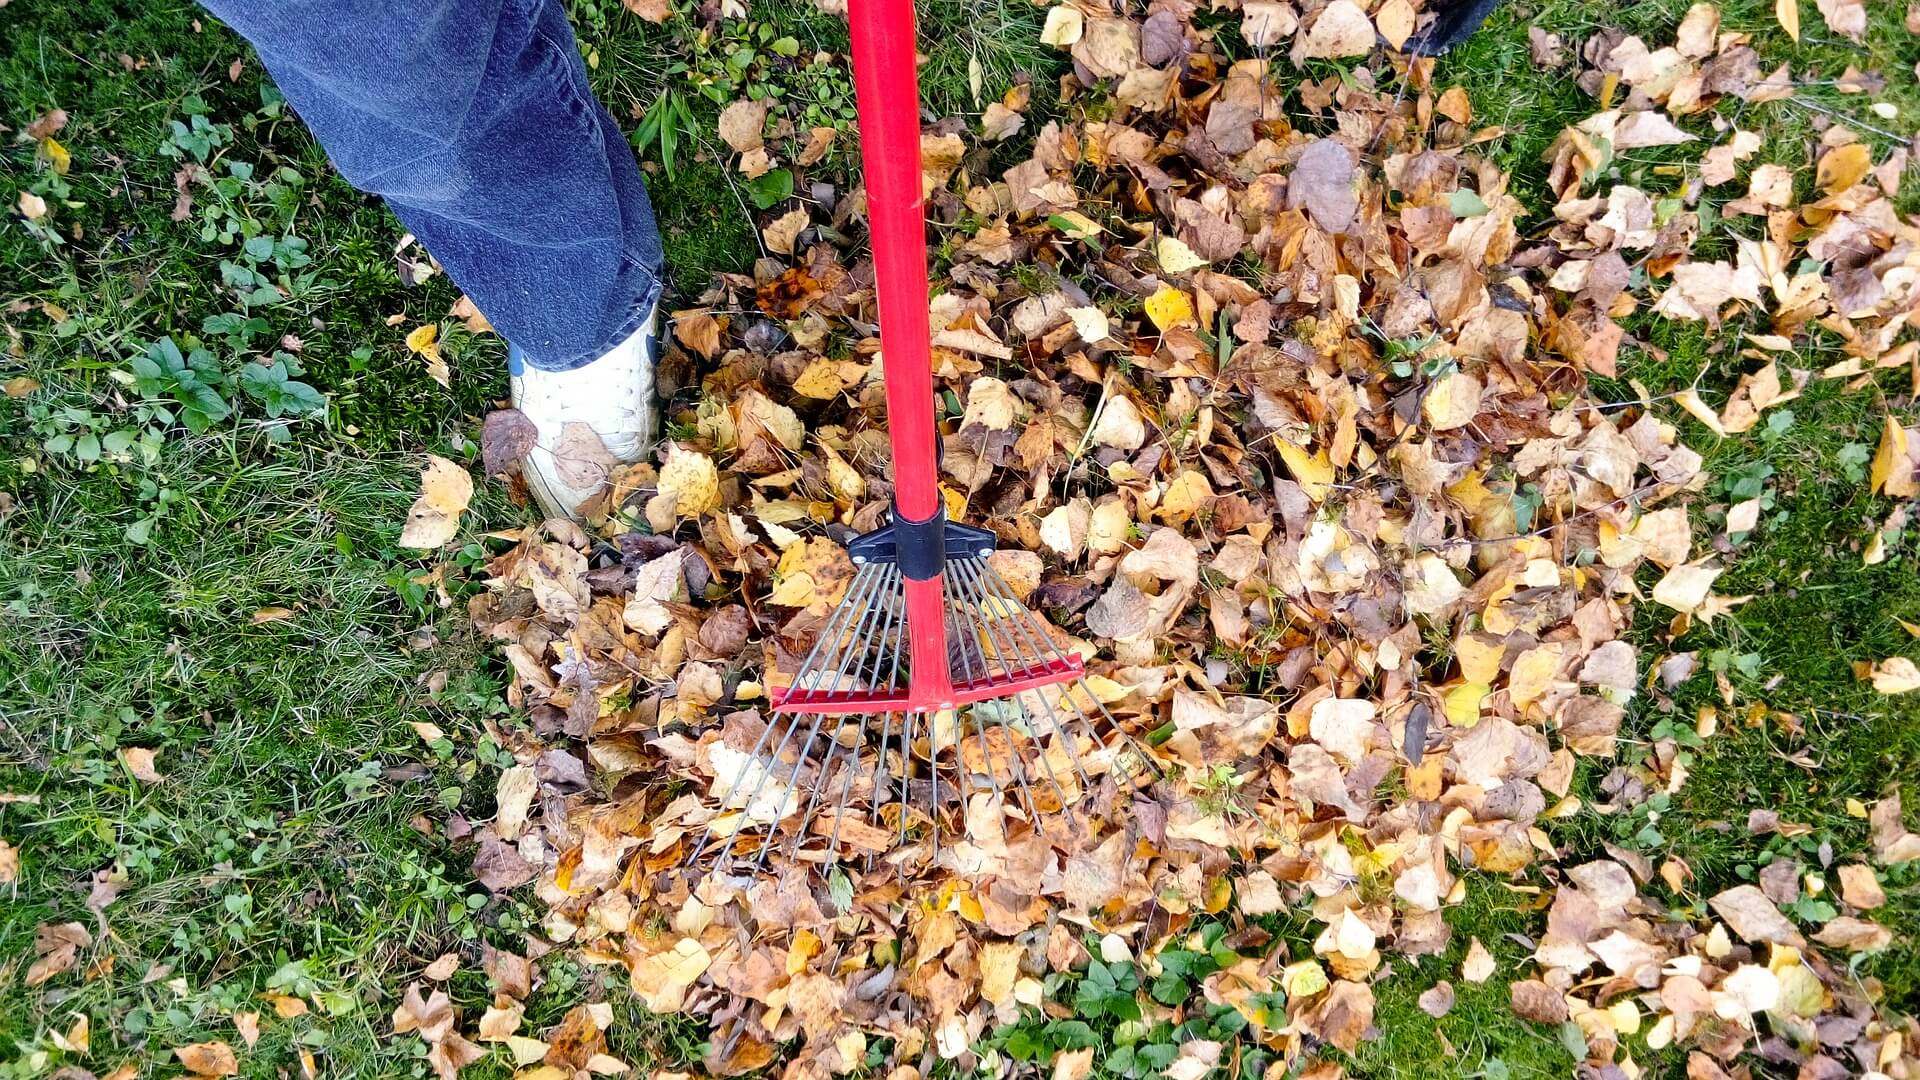
4. Rake:
Before a snowfall, it is crucial to clear your yard of any leaves, branches, or debris. When this waste sits on your grass all winter it will cause these patches to brown or die. Simply raking every once in a while will prevent dead spots and inconsistency in height and color. Raking will also help mix in any seed or fertilizer you have laid down in the soil previously.
Something to keep in mind is to make sure you are not raking when the ground is frozen. The protective layer in the frozen blades of grass gets destroyed from the pressure of footsteps. While this will not kill the grass, it may cause it to be brown when it grows back in.
Get a leg up on those who do not know to still maintain during the winter months. Investing in these tools will ensure you have the lushest green grass on the block come spring and summertime.
Wrapping It Up:
Maintain Garden is simple when you are already having the essential tools to do the job. But the professional touch every time required. When you already have these tools your hard work related to garden maintains in the winter is becoming a much easier process. So what is your opinion? Are you going to maintain your garden on your own? Or do you seek professional help? Do not forget to share your opinion with us.
Content Rally wrapped around an online publication where you can publish your own intellectuals. It is a publishing platform designed to make great stories by content creators. This is your era, your place to be online. So come forward share your views, thoughts and ideas via Content Rally.
Wallpaper is a versatile material. Its use is not restricted to simply covering walls so that home interiors can look more presentable. Home interior can be made fabulous when you are using the interior wallpaper.
In a young adult novel by Judy Blume, a character named Rachel Robinson presented a clever hack with wallpaper — she used it as a beautiful cover for her school notebooks. Indeed, similar to this example, there’s no shortage of ways to get creative with wallpaper.
So, if you are looking for an affordable way to update the look of your home, provided below are 10 exciting ways wallpaper can help you achieve this.
Different Ways Your Home Interior Can Make Things More Attractive
Multiple ways you can make your home interior look gorgeous is illustrated in this article broadly explained
1. Create an accent wall
If you like the look of your painted walls, but you want one particular wall to draw attention, cover it with wallpaper or multiple designs of wallpaper. You can create a splash of color or bring in a luxurious texture just by using this stick-on wall cover, and you can even get this makeover project done in a day.
2. Create wall art
Wallpaper comes in a wide range of designs, and you will find that some patterns look beautiful enough to be framed and displayed on a wall. Home Interior can be beautiful if the wall art makes sense with your requirement.
If you feel like being extra creative in turning wallpaper into framed art, you can create a mosaic pattern by combining different designs. A clever Pinterest DIY-er even suggests using wallpaper on decorative plates, and it works.
3. Cover your tables
If you like the look of continuity in the interior design of your home, how about using your wallpaper to cover the different tables throughout the house?
This is a breeze to do. You just need to cut your preferred wallpaper to size and glue it on tabletops. If your tables have a glass top, you can just lay the wallpaper on the table and let the glass hold it in place.
4. Give drawers a fresh look
Banged-up drawers can gain a fresh and more contemporary look if you cover them up with wallpaper. This is a popular trick you will find in Country Living, Martha Stewart, and other lifestyle magazines.
Some people even like to use luxe fabric-like textured wallpaper; they are perfect not only as a cover-up but also for supporting the structural makeup of the drawers.
5. Replace old lampshades
Again, if you want a look of a consistent or uniform theme in your home interior, use extra pieces of your wallpaper to decorate other home fixtures and features.
Covering lampshades with wallpaper is another easy project that can elevate the appeal of your home further.
6. Jazz up your stairs
If you have an eclectic style, consider creating funky stairs by covering the risers of your stairs with different designs of wallpaper. This is a quick and simple project that can instantly bring color and fun to your home interior.
Another way to do this is by creating a stair runner using thick wallpaper with Afghan, baroque, and romantic designs.
7. Cover books on display
Old hardbound books can look like new by merely covering them up with scraps of wallpaper. These make fancy decorative elements for offices and grand rooms.
You can line them up on shelves, stack them to add height to vases and other decors, and even use these upgraded tomes to create floating shelves.
8. Decorate doors
Give plain doors a more artistic and elegant vibe with wallpaper.
Framed and panel doors, for example, can have a bit more personality or pizzazz if you lay wallpaper that’s been cut to size on the panels.
Kamiseta Hotel in the Philippines decorated many of its doors this way, and it’s definitely one of the reasons why it’s been voted the prettiest boutique hotel in the country.
9. Create a new chair backrest
Want to spruce up the design of an antique dining set? This is easy to do with a fresh coat of paint and wallpaper. You can wrap the slats of the backrest with wallpaper, or cut wallpaper to size to cover rectangular or circular backrests.
10. Line shelves and bookcases.
Finally, if your shelves and book cabinets tend to blend into the background because of their color, you can turn them into complete eye-catchers by lining their interior with bright wallpaper. The impact is so charming and pretty.
These wallpaper ideas are more than enough for your home design upgrade, but there are more than you can consider trying out. You truly are only limited by your imagination.
So, keep a collection of your favorite wallpaper designs handy and, for sure, you will find new ways to use them for the improvement of your home interior.
Read Also:
5 Health Benefits Of A Clutter-Free Home
Find The Right Painters For Your Ann Arbor Home This Painting Season
How To Choose LED Lights For Every Room In Your Home
Thanks to some home appliances such as air conditioners, fans, air coolers, inverters, and of course refrigerators; we can tolerate the summer easily.
During the summer season, the amount of power used is directly proportional to the temperature. With an increase in mercury, the need for cooling appliances also goes up and so is the electricity bill.
Talking about the fridge, it is not only storage for storing perishable items but also a savior during the summer season.
Right from cold water to chilled shakes to ice creams to fresh fruits and juices, ice cubes, and more, it provides us with all.
Nonetheless, with all this, it also leads to an escalation in the monthly electricity bill. A great example is with the residents of Texas for taking care of their electricity bills.
They are able to choose the best and cheapest electricity plans from the most reputable electric companies in comparison websites such as HomeEnergyClub, where they can compare Texas energy plans side by side.
In the same context, here are some simple tips that will not only increase the efficiency of your refrigerator but even help save power. Read on!
Follow these Tips to Make your Fridge Efficient
Want to make your refrigerator even more efficient, and sustainable for use? Follow these following steps.
1. Set the Temperature right
Do you know that keeping the fridge at a high temperature consumes more energy, leaving you with a higher power bill?
Hence, to make your fridge’s compressor work easily, keep the temperature lower between 0 and 5 degrees.
2. Don’t Let Your Fridge Face the Heat
It is recommended to keep your refrigerator away from direct heat such as sunlight, oven, or stove heat. It is because the fridge will then use more energy to adjust the continuous heat on it to maintain the chill.
On the other hand, if you place it under a shadow with proper ventilation, it will help in the reduction of energy.
Proper ventilation is needed in smooth heat flow produced from the fridge.
3. Defrost the fridge often
The defrost button on your refrigerator could be a lifesaver for it! Doing that on a frequent basis will help your fridge to maintain efficient cooling!
Also, you will be able to save up to Rs.10 per day on the electricity bill.
4. Storing open containers is a no-no
If you keep the already opened food containers and bottles in your fridges, then the internal moisture level will rise to force the compressor to work hard.
It will reduce your fridge's efficiency and increase the power bill.
5. Regular fridge maintenance is a must
It should be your duty to clean your refrigerator on a frequent basis if not daily. It can help the compressor to work even more efficiently.
You only need to spare 30 minutes out of your busy schedule to do it, and your fridge will thank you by working powerfully.
Also, you should ensure to get the condenser coils of your fridge cleaned at least once a year.
You can do that by unplugging the unit and brushing or vacuuming the coils carefully. It will help to enhance the fridge’s efficiency by up to 30%.
If you are unable to do that, you should get it done by a trained professional once a year.
6. Make room
You should also make sure that there are a few inches of space between the wall and the fridge to maintain good circulation. It will also help your refrigerator to run without issues and proficiently.
7. Practice some smart habits
You can also practice some smart habits so that your fridge gets some rest. Have a look:
Try to open your refrigerator less frequently
Cool the hot foods before keeping them in the fridge
Cover foods
Label the leftovers
Ensure to keep your freezer full
Buy a new fridge this summer and grab savings and cashback
You can continue having your refrigerator working for years at its optimal level if you can follow the tips discussed.
If you are ready to buy a brand-new refrigerator, then you don’t have to stretch your budget by paying the entire amount of your purchase in one go.
Instead, you can divide the cost between a tenor; pay only a fixed amount and nothing extra. This way, you won’t need to handle paying additional charges other than EMI and save more.
The easy EMI facility is offered by Bajaj Finserv EMI Network across India. Bajaj Finserv is also here to offer the Special Summer Offer on refrigerators and more.
This way, you can buy an LG fridge, Godrej fridge, Haier fridge, Hitachi fridge, and more on easy EMIs to indulge in a hassle-free shopping experience.
Tips for First-Time Renters on Using a Refrigerator Efficiently
First-time renters, especially those new to managing a home, might find it tricky to keep their energy bills low. All the while keeping their fridges running efficiently.
While the original tips are great for everyone, this section is specifically for renters likely dealing with space constraints, older appliances, or tight budgets!
Here are some additional tips and tricks to keep your fridge in good shape and your energy costs down!
Adjust the Fridge According to Your Space
Renter-friendly kitchens are often small, and sometimes, you must make do with what you have.
Also, suppose your fridge is fully cramped in a tight space next to a heat-generating appliance (like an oven or microwave).
In that case, it works harder than necessary because of the proximity and exertion of excess heat.
If possible, make sure your fridge has some space between the wall and other appliances to allow for good air circulation.
Keep the Fridge Balanced
Believe it or not, an unlevel fridge can impact how well it runs. Often, rentals are equipped with old or slightly wobbly fridges.
If your fridge is tilting one way or the other, just use simple shims or small pieces of cardboard to level it out.
A balanced fridge guarantees that the doors seal properly and that the cold air doesn’t escape. In fact, it also helps alleviate extra stress on the compressor, decreasing its energy consumption over time.
Therefore, keeping it on a good stand is important. If you cannot buy a new fridge, at least buy the right equipment for it.
Organize Smartly for Efficiency
When you rent a home or an apartment, specifically if you choose to live in shared apartments, you don’t have an entire fridge for yourself.
So, it is crucial to keep it clean but also to be able not to keep the fridge open for that long.
I use little baskets or containers within my fridge so I can easily grab things without having to have the whole front spend open for too long.
Use Electricity at Non-Peak Times
If your rental has smart meters or time-of-use rates, then try to use the electricity that isn’t charged at a premium rate.
Running the defrost cycle, cooling hot foods, or restocking the fridge during non-chargeable hours also helps.
Insurance or Maintenance Plan on Rental Appliances
Most landlords have maintenance plans, but it’s something renters tend to overlook.
Before you start calling a technician over minor issues such as a cracked door seal or noisy motor, find out if your lease includes repairs/maintenance or insurance on the appliances.
A well-functioning fridge also consumes a lot less electricity.
Temporary Fridge Fixes for Old Units
Rentals often come with older appliances. If your fridge lacks modern energy-saving features, there are small tricks you can apply.
For example, adding a seal strip around the door can improve insulation. A simple thermometer can also help you keep the internal temperature just right—no need to run it colder than necessary!
Be Mindful of Sharing Fridge Space
If you’re sharing a rental with roommates, make sure everyone understands fridge usage.
An overstuffed fridge can cause airflow problems, which means the food will cool unevenly and the appliance will use more energy.
Also, ask others to keep things clean and remove old food when necessary.
Final Thoughts for First-Time Renters
Sure, everything has a learning curve, and running a home is no different. But hopefully, these extra tips will help you avoid energy-draining mistakes.
(I’m talking to you, not throwing out anything that’s expired).
Little choices can add up—your fridge will run more efficiently, and so will your wallet!
Read Also:
Important Things To Know Before Starting A Home Improvement Project
Home Sweet Home Improvement: How To Find The Best Home Improvement Loans
10 Tips To Pick The Best Table Saw For Home Improvement Projects
Since lettuce plants grow best in cool growing seasons, most lettuce varieties are classified as spring or fall greens. However, if the longer days are keeping your lettuce plant producing leaves well into the summer and it hasn't bolted yet, here are some excellent tips to follow to maximize your harvest.
Taking individual leaves off the plant is one way to increase its yield. Alternatively, you could sow in succession every two weeks in the early spring or fall to continue the harvest. To offer lettuces shade and protection from the hot summer sun and high temperatures, a third method is to interplant with a taller crop. Lastly, cultivators should seek out cultivars known for their slow bolting, like the looseleaf varieties "Slobolt" and "Sierra."
Here is how to harvest lettuce so you can eat some leaves right away and encourage the plant to continue growing more.
How To Harvest Lettuce?
If you want to harvest lettuce and do not know how to go about it, here are all the details. Follow the steps closely to get the healthiest and crispiest lettuce for your salads and sandwiches.
Plant Looseleaf Varieties
Your lettuce variety should be ready to harvest in 35 days, according to the seed packet, which means you should have large enough leaves to pick a little more than a month after planting. By regularly picking the outer leaves, you may be able to extend the harvest until late June if you sow seeds in March or April.
Begin Harvesting Early in The Season
Young lettuce plants will be harmed by light frost, but mature plants can withstand it. If you live in an area where there is no winter frost, you can plant early and begin harvesting the outer leaves when they get to be 4 or 6 inches long. Your harvest can last up to 30 days longer if you plant and harvest early.
Pick Lettuce in The Morning
It is ideal to harvest lettuce early in the day to avoid the leaves wilting due to the intense heat. The leaves are crispest and flavorful in the morning because they contain the most water.
Look For Plants with Large Outer Leaves
The center of the crown is where the new growth starts on the lettuce. You must remove the largest, oldest leaves that are about 4-6 inches long. You will find these leaves on the outside of the plant.
Cut or Pinch The Outer Leaves
At 1/4 to 1/2 inch from the base, pinch off each outer leaf. To break the leaf off the crown, apply just enough pressure with your thumb and forefinger. Another option is to use a sterile, sharp scissor or snipping tool, though there is disagreement about whether doing so accelerates the browning of cut edges.
Harvest Until it Flowers
When older, mature leaves are consistently removed, the lettuce plant is encouraged to grow new leaves in their place. Harvesting individual leaves is possible until the plant produces a flower stalk, which indicates that it is ready to bolt and set seed. Lettuce turns bitter once it bolts.
When to Harvest Lettuce?
As soon as the lettuce is large enough to pick, it can be harvested. A seed packet will typically tell you how many days it will take to harvest. For the "cut and come again" method of harvesting loose leaves, standard-size varieties are the most effective. When outer leaves are 4 to 6 inches tall, that's the best time to begin harvesting.
There are many varieties of lettuce seeds available, including blends and mesclun mixes. The best varieties to plant for a continuous harvest are called bi-colored, spotted, or loose-leaf lettuces in green and red or burgundy tones. The following are some varieties you might want to try:
Black Seeded Simpson
Green Salad Bowl
Freckles
Lolla Rossa
Gourmet Mesclun Blend
Deer Tongue
Garden Leaf Blend
Loose leaf lettuce varieties yield the best results from the cut-and-come-again method. Red, green, and oak leaf lettuce are a few examples. Additionally, you can wait to pick until a full head has matured or harvest early leaves from loose-heading varieties like butterhead and romaine.
When and How to Gather Lettuce Heads
The growth habit of head lettuce is akin to that of cabbage. In order to form a dense, rounded, or clumped shape, younger leaves emerge from the center, and older leaves form layers. There are two types of head lettuce: loosehead (similar to romaine) and crisphead (like iceberg).
Let the crisphead varieties mature for a single harvest and keep an eye on them in accordance with the days to harvest specified on the seed packet. When the heads are dense and the appropriate size, they are ready to be picked.
If you remove the outer leaves once or twice, loosehead lettuces will still head. However, the size of the fully mature head may decrease as a result. These lettuces can produce a head of looser layering or wrapping leaves (butterhead) or a clump of tall, straight leaves (romaine).
Remove crispheads by chopping off the stem just below the center. Loose heads can be trimmed similarly or removed, with roots and subterranean stems cut back to the leaf base, depending on size.
What Happens If a Flower Stalk Bolts
A lettuce plant will eventually shoot up a flower stalk in the center, a sign that it has reached the end of its life and is ready to bolt, or bloom, and set seed. Though they might still be edible, the lettuce leaves are starting to get tough and bitter. There is no stopping flowering once this process has begun. Throw away the plant and plant again if the weather permits.
Types of Lettuce
There are four types of lettuce you can choose from when choosing which to grow: leaf, butterhead (loosehead), romaine, and head lettuce.
When it comes to cultivation and harvesting, the main distinction is that leaf lettuce crops yield several harvests, whereas head lettuce varieties, such as iceberg, romaine, and butterhead, only yield one harvest. Leaf lettuces are, therefore, a favorite among home gardeners since you can grow them in raised beds, on the ground, or in patio containers.
Keep in mind that lettuce is a cool-season crop, so you should schedule your harvest for the spring when the temperature is still cool. Such temperatures are usually around 70 degrees. Find out when the first frost occurs in your area each fall and plant appropriately. Starting fall crops from seed indoors and moving them outside as the weather cools down may be the best option.
Seek out head lettuce cultivars such as Crisphead and Iceberg that you can grow from seed. In roughly six weeks, the lettuce will reach maturity and be ready for harvest after the seeds have germinated in 10 to 21 days.
One loose butterhead variety that you can grow from seed or seed tape is called Buttercrunch. It takes 65 days to be ready for harvest.
Vivian is one of the romaine varieties that yields soft, flavorful leaves. Directly sow seeds in the garden in the spring. Start seeds indoors in the fall and transplant them to your garden.
Varieties of loose-leaf lettuce grow quickly and are enjoyable to experiment with in salads, sandwiches, and other culinary creations. Look for mesclun mixes and heirloom cultivars such as "Black Seeded Simpson." Many come in simple-to-grow seed tapes that can be harvested in roughly seven weeks.
How to Harvest Leaf Lettuce?
When the weather gets chilly, you can harvest salad from a leaf lettuce crop in your home garden whenever you're ready to eat. You can harvest an entire crop of lettuce at once by waiting for it to mature. However, cutting fresh lettuce leaves off as they grow is the easiest way to prepare them for consumption at any time.
Depending on the variety, lettuce leaves should be harvested when they reach a length of 3 to 6 inches. Gather leaves continuously until the lettuce plant "bolts." This indicates that the plant has focused its energy on developing seeds and flowers, and as a result, the leaves typically develop tough stems and a bitter taste.
How to Harvest a Full Head of Lettuce?
A lettuce plant can continue to grow until it produces a full head of leaves. Use the "one and done" approach when harvesting head lettuce. Just make a clean, above-soil knife cut across the entire head of lettuce at the base of the plant. For this, a harvest knife comes in handy.
Remember the seed packet and note the maturity or harvesting days. As your plants get bigger, keep an eye out for indicators of maturity, which are typically firm, full heads. Harvest in the spring before it gets too hot, usually when the daytime highs hit 70 degrees Fahrenheit. The bitter taste of the leaves and the mushy head of lettuce can result from warm weather.
How to Store Lettuce?
When the lettuce is inside, you can use a colander to wash the leaves and thick cotton towels to dry them so you can use them in salads and sandwiches. In case you cultivate a lot of lettuce, investing in a salad spinner would be wise. It helps dry and wash Lettuce quickly.
Lettuce leaves without water should be refrigerated. For most greens, store the leaves in a loose plastic bag for approximately a week. When the salad greens are ready to be eaten, give them a good rinse in several runs of cold water and then pat dry.
How to Harvest Lettuce Microgreens?
Microgreens are incredibly simple to harvest! When the first true leaves appear, after ten to fifteen days of planting the seeds, they will be ready. When the microgreens are two to three inches long, harvest them if you are measuring them by height.
Investigating the flavor profiles of the microgreens at various heights is enjoyable. Cut the entire plant ½ inch above the soil line with a pair of scissors or grass shears. If you need more inspiration, check out our many other interesting gardening tips for growing microgreens, like growing lettuce microgreens!
How to Harvest Romaine Lettuce?
The leaves of romaine lettuce (also known as cos) have the perfect amount of crunch or crispness. The lettuce plant's outer leaves can be harvested as it grows. The leaves can be chopped off one to two inches above the ground. Gathering these tender green leaves now will give the lettuce more time to ripen before full plants can be harvested.
Before Romaine lettuce reaches maturity, it can take 55–70 days to grow from seed. To determine when the lettuce is ripe, examine it directly. When the romaine lettuce leaves are 6 to 8 inches tall, the ribs are firm and juicy, and the leaves have formed a tightly compacted head, the lettuce is ready for harvesting. To test if the lettuce head is firm, squeeze it.
Overripe head lettuce will be tough, while young head lettuce will be soft. Harvest by making a cut an inch above the ground, saving the crown for a subsequent harvest. You can harvest the lettuce head by digging up the entire plant if it is nearing the end of its garden lifespan.
Read More: Everything You Need To Know About Harvesting Basil!
Loose Leaf lettuce
The harvest window for leaf lettuce varieties is quite broad. After planting, the young, baby lettuce leaves can be harvested 25 days later, and the plant will mature fully in 50–60 days. Make sure your crop is harvested prior to it bolting.
Since you can harvest loose-leaf lettuce more than once during the growing season, it's ideal for repeated harvesting. You can chop the entire lettuce plant 1-2" above the soil line once the leaves reach 4". In 10 to 15 days, fresh leaves that have sprouted from the base will be ready for harvesting again if the crown is left intact. Try spreading out your seed sowings and doing multiple sowings to ensure a consistent harvest all season long.
If you want to preserve the crisp flavor of the young baby greens, you should sow them again. Another method of harvesting involves leaving the inner leaves to grow while pruning the young leaves on the outside of the head for greens. When the plants are 4 inches tall, you can begin harvesting lettuce by cutting them just above the soil line.
Crisphead Lettuce
When grown locally, crisphead or iceberg lettuce makes for incredibly tasty salad greens. You might not get a whole head of lettuce, but this can be a cut-and-come-again harvest. A single harvest is more appropriate for this green lettuce. After planting, there is a 50 to 75-day window for harvest.
Iceberg lettuce can be harvested as soon as the head appears before the outer leaves turn brown and as soon as the center feels firm, and the leaves are compacted tightly. Before the crisp lettuce starts to open and the seed stalk starts to form, harvest it. More importantly, if you see the lettuce beginning to bolt—a common issue in hot weather—or the seed stalk, harvest it right away.
Harvesting iceberg lettuce is best done by digging up the entire plant and then cutting off the stalk. Because of its thick stem, this lettuce plant can be challenging to harvest while it is still in the ground. If you decide to harvest the lettuce while it's still in the ground, please take care not to harm it. You can cut the stem just below the leaves by lifting the lettuce upwards.
Wrapping Up
Nothing compares to the sheer satisfaction of harvesting and regrowing fresh, new lettuce from the same plant. You are far superior to other lettuce owners if you can figure out how to harvest lettuce correctly so that it keeps growing.
Thus, if you want to become a rich lettuce farmer, make sure you constantly and meticulously follow all the above steps! If you have thoughts to share or questions to ask about how to harvest lettuce, then please leave a comment below. We would love to hear from you.
Read Also:
Some Facts You Need to Know About Rainwater Harvesting
Asparagus 101: When, How, And How Often To Harvest?
Exploring Ideas For A Biophilic Home Design
All Comments
Ailey
I curious more interest in some of them hope you will give more information on this topics in your next articles.