7 Cheeses Everyone Should Know About

Published on: 20 April 2018 Last Updated on: 25 July 2024
Cheeses

The fact that there are at least 650 types of cheeses means that there are types that even cheese lovers have not heard of before. These cheeses can be found in different parts of the globe from the cold, temperate regions of Canada to the snow-capped mountainous rural areas of Switzerland to the warm, tropical fields in South Asia.

For those who want to know more about the lesser-known types of cheese, these are seven that you should try out soon:

Cotija :

You may not have heard of cotija cheese before but you may have already tasted it as it is a mainstay on taco and salad recipes. It is derived from cow’s milk, which is aged for three months.

Originally from Mexico, it has been compared to feta though it acquires a tangier taste and drier texture as it ages. It is used in its home country as an addition to the soup. Other cooks also mix it in with guacamole and use it to top beans and casseroles.
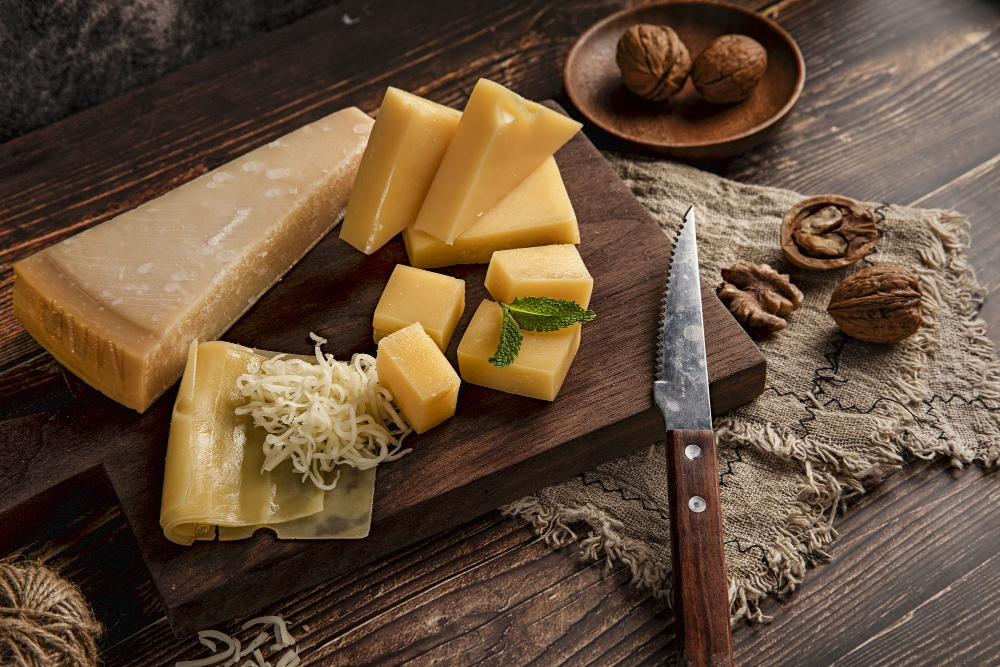
Emmental :

A lot of people call it “Swiss cheese” but its name is actually “Emmental.” Emmental is the type of cheese typically featured in cartoons with holes in them. Emmental is especially perfect for fondue and grilled cheese.

What is most interesting about Emmental is the process by which it is made. Cows are made to graze in the mountains of the Alps in the southern regions of Switzerland so that they can produce milk later on. The milk curds are the ones used to make Emmental by pressing them firmly together. What is the reason for the bubbles you say? These are actually bubbles of carbon dioxide that were made by bacteria that are consuming the lactic acid.

Camembert :

The camembert may be one of the most widely produced cheeses in France but it is barely known outside Europe. This is due to the fact that the aging period is only at over three weeks, making it difficult to mass transport in batches to other parts of the world.

Camembert is characterized for its mild, almost mushroom-like aroma. It is sometimes eaten as is or deep-fried. A few even do breaded camembert snacks.

Manchego :

This Spanish cheese is made from milk produced from the Manchega sheep. It has a varied color, depending on the aging period it has, which can range from ivory to yellow. Young manchego cheese can be characterized as creamy and rich though it becomes salty as it ages. It is usually served as is though it is popularly paired with the Spanish membrillo for snacks.

Feta :

Feta is unusual as cheese as it is among the few that is a combination of two types of cheese. Seventy percent of feta is made from sheep’s milk, with the remaining parts coming from goat’s milk. It mainly comes from Greece and is moist and brined. It tastes great when it is used as a spread on bread.

Monterey Jack :

This cheese is one of the few kinds of cheese that originated from the United States. It is unique in the sense that it has one of the shortest aging times – only one month. Made from cow milk, it has a mild but buttery flavor. Due to the high level of butterfat in it, it melts right away, which makes it a great way to make cheese dip. It is also sometimes used over chili and casseroles.

A thing that you may not realize about Monterey Jack is that it is usually the cheese that is mixed with hot pickled peppers to come up with Pepper Jack cheese.

Chèvre :

In France, the word “chèvre” mainly refers to any type of goat milk. In fact, the word is literally translated as “goat.”

The use of “chèvre,” however, has evolved through time as it moved to other places. Now, the aging time of chèvre has become so varied. For example, in America, chèvre is what people call fresh goat’s milk that is not aged and is served and eaten right away after it is done. French variants of chèvre, on the other hand, are described as lemony and slightly acidic.

When you see chèvre sold in markets, you will see that it comes in vacuum-sealed logs, with a few spices and herbs added.

Conclusion :

If you want to make these popular cheeses, you should have one of the best cheesemakers available in the market. In addition to having a cheesemaker, you may also need a yogurt strainer bag. So, go ahead and have all you need to make these popular cheeses and enjoy the amazing tastes and flavors of cheeses you like.

Read Also :

Content Rally wrapped around an online publication where you can publish your own intellectuals. It is a publishing platform designed to make great stories by content creators. This is your era, your place to be online. So come forward share your views, thoughts and ideas via Content Rally.

View all posts

Leave a Reply

Your email address will not be published. Required fields are marked *

Related

How To Freeze Dry Food

How To Freeze Dry Food At Home Fast? – Steps To Follow

How to freeze dry food? - To freeze-dry your food, you need first to freeze your food and then dry it under pressure to remove water content. This process is called lyophilization. In fact, it is one of the best methods to use if you want to dry your food. Actually, it is a common practice in both the pharmaceutical and food industries. In this article, you will learn how to freeze dry food at home with simple methods. However, before that, you will also understand the freeze-drying process and the types of food you can freeze-dry. Moreover, you will also learn the benefits of freeze-drying and essential tips to freeze-dry your food successfully. Hence, to learn more, read on to the end of the article. Understanding Freeze Drying Freeze drying is a process where you remove water from a food material by freezing it. Then, you turn the ice into vapor by putting the item under pressure. Hence, you can see that this process is a dehydration technique where you sublimate the water in a product. It means that the water content in your product changes from a solid state to a gaseous state (sublimation). Here, the water does not turn into liquid. Generally, this method is helpful when you want to preserve any perishable materials. Here, the goal is to extend the shelf life of the material. In this case, you freeze the material and reduce the pressure. Then, you add heat to allow the frozen water in the food (material) to change directly to vapor. How Does Freeze Drying Work? Freeze drying consists of three stages: freezing, sublimation, and desorption. Here is an explanation of the three stages: 1. Freezing This process involves freezing the food at a very low temperature. Generally, you have to freeze to -30 to -50°F. 2. Sublimation (Primary Drying) In this stage, you have to pass mild heat over the frozen material while the material is under vacuum. Hence, the ice crystals vaporize into water vapor. After that, you remove the water vapor with the help of a vacuum pump. 3. Desorption This is the second stage of drying. Here, you have to remove all the remaining moisture from the surface of the food. Benefits Of Freeze Drying Food The following are the major advantages of freeze-drying that will benefit you a lot: Generally, the foods that you freeze-dry retain up to 97% of their nutritional value. For instance, the food retains vitamins, minerals, and antioxidants. Those foods have a long shelf life. Moreover, you do not need to store it in cold chains. Once you freeze-dry your food, you will end up removing 98% of its water content. Hence, you will reduce its weight by 90%. Thereby, it will be easy for you to carry that food on camping and backpacking trips. Freeze-dried food is easy to prepare. This is because you just have to add water to rehydrate them. Moreover, the shape and size of the food remains intact. Also, freeze-drying helps in preventing the growth of pathogenic organisms. You can preserve a wide range of foods with freeze-drying. This includes meat, fish, fruits, vegetables, eggs, ice cream, and more. When you freeze-dry food, it does not get brown or caramelize. However, this is quite common when you dry food traditionally. How To Freeze Dry Food At Home? Here are the steps you must follow to freeze dry food at home: Wash your food items that you want to freeze-dry. Also, remove dirt and residues from the food. This way, you can ensure food safety. Cut your food into small pieces. This way, you can make the freeze-drying process faster. Place your food on a flat tray. Moreover, make sure to spread the food evenly. Basically, if you spread your food properly, you can freeze the food evenly. Place your food in your freezer, and set the temperature correctly. Then, place the food in your freezer for two weeks. Actually, you need this time to remove the moisture in the food. After the completion of two weeks, remove the trays from the freezer. After that, quickly place the food items in airtight bags. Make sure to take out one tray at a time to ensure that the food does not rehydrate. Make sure to place the food bags in the freezer, and also in a cool, dark spot. Check the food after a couple of days. This way, you ensure whether all the food is dried-up or not. Tips For Successful Freeze Drying The following are some essential tips by following which you can successfully freeze dry your food: 1. Preparing the Food Harvest the food produced when it is ripe. Then, wash the food, remove the damaged parts, and prepare it as desired. This is because if you cut your food into small pieces, it will dry faster. 2. Arrange the Food Place your food on a tray and arrange it into pieces. Also, make sure to place those pieces in such a way that they do not touch each other. 3. Use A Freeze Dryer With the help of a freeze dryer, you can automatically lower the temperature. Moreover, a freeze dryer also helps you to create a vacuum. 4. Store The Food Once you freeze-dry your food, store it in an airtight container. Also, you can store it in a bag which you can vacuum-seal it. 5. Cook Raw Foods: One of the drawbacks of freeze-drying is that it does not kill harmful bacteria. Hence, you must cook freeze-dried foods thoroughly before consumption. Related: The Importance Of Proper Cutting When Preparing Meals Common Uses For Freeze-Dried Ingredients The following are some of the common uses of freeze-dried foods: Works as essential food supplies at times of emergencies. They have a long shelf-life and you can use it to maintain food quality. You can use freeze-dried food in stews, soups, baked goods, etc. You can eat freeze-dried food as a healthy snack any time. If you freeze-dry your seasonings, you can retain the flavor and freshness for years. Wrapping Up You now know how to freeze dry food. Generally, in manufacturing, food companies and manufacturers prefer freeze-dried food over regular food. This is because they are easy to prepare and are portable and lightweight. Also, such food removes the moisture from the food to make it compact. Do you have more suggestions for freeze-drying to offer? Please share your ideas and opinions in the comments section below. Additional Readings: How to Thicken Chili – Tried and Tested What To Look For And What To Avoid In Healthy Dog Treats The Difference Between Bacterial Amylase and Fungal Amylase

READ MOREDetails
slider-img

A Quick Guide on 3 Mukhi Rudraksh

A Rudraksha means-‘tears of Rudra’ in Sanskrit. It is a sacred bead, which is fashioned into rosary in Hinduism. Hindus regard the Rudraksha with great reverence and believe that it bodes good health and prosperity. It can be worn as a bracelet or as a chain. The 3 Mukhi (face) Rudraksha consists of three natural lines on the surface. It is a symbol for Agni- the fire, which consumes everything. It helps the wearer handle and overcome any situation. The ruling planet is Mars and days of wearing are Monday and Thursday. It is recommended for: Children suffering from chronic fever Gallbladder and liver disease Stress and depression Control of blood pressure Influence on body organ is throat Other Benefits of 3 Mukhi: Just as fire destroys everything, this Rudraksha destroys one’s Karma. It is believed that all past sins of the wearer are forgiven. It is a way of attaining Moksha. It removes obstacles faced by a person due to past Karma. It provides remission from the sin of committing an abortion. It helps attain purity of soul and to live a life, free of guilt. Protects from all sorts of diseases, accidents and blood poisoning. Mantras: Shiva Purana: Om Kleem Namaha Padma Purana: Om, Om, Namaha Skanda Purana: Om Dhum Dhum Namah Om Namah Shivaya Mode of Wearing: Take the beads. Wash them with sacred Ganga water or unboiled milk. Wear in the neck, chanting Mantra. Who Should Wear? Those who want to avoid the malefic effects of Mars. Those suffering from the disease. Those who are weak, lazy and have an inferiority complex Those suffering from stomach disorders, skin diseases, eye defects. Those who are depressed and need a boost of self-esteem. Rules to Wear: Wearers and devotees of Rudraksha enjoy peace, good health, and prosperity. But one must take some precautions: The Rudraksha must be worn only after Siddhi (purification rites and chanting of Mantras). Rudraksha mantra is to be chanted 9 times daily, after removing at night and wearing in the morning. It must be kept in the Puja room at night and worn after the bath in the morning. The wearer should not consume alcohol or non-vegetarian food. He must speak only truth and visit Shiva temple. Rudraksha must not be taken while visiting a baby or to the cremation ground. Women must remove it during menstruation. Keep Rudraksha clean and tidy. Pores of the beads can attract dirt and dust. Clean this with any soft material with fine bristles. Change the thread if it becomes dirty. After it has been cleaned, wash Rudraksha with holy water. This is to maintain its sanctity. Keep Rudraksha constantly oiled. After the beads and chord have been cleaned, periodically apply oil and treat with incense. This is crucial when you have kept the Rudraksha in storage for a long time and want to use it again. These are some safeguards for wearing and maintaining Rudraksh chains and bracelets. Since it is a sacred ornament, most Hindus are not affected by 3 Mukhi Rudraksha price. Don’t be confused by the shape and size of the beads. One has to buy the beads according to one’s gut instinct.

READ MOREDetails
Whiskey Cocktail

14 Whiskey Cocktail Recipes For Home Bartenders

Even though it is acceptable to consume whiskey neat or on the rocks, a whiskey cocktail is a delightful alternative for drinkers of any age, gender, or nationality. Everyone appears to enjoy the classic and contemporary cocktail concoctions that bars and nightclubs serve. Well-known whiskey cocktail recipes, such as the Old Fashioned, Irish Coffee, and Manhattan will be a delight to recreate at home. And while the list of popular alcoholic beverages is constantly evolving and expanding, there are a few that every skilled bartender should know by heart. These whiskey cocktail recipes highlight the versatility and quality of whiskey, which wine enthusiasts have enjoyed for several decades. This is the ideal starting point for a home bartender seeking to master whiskey cocktail recipes. 14 Whiskey Cocktail Recipes For Home Bartenders 1. The Old Fashioned   According to cocktail historian David Wondrich, the Old Fashioned is a descendant of the oldest cocktail. In 1806, it was created with a small amount of water, sugar, liquor, and a few dashes of bitters. 2. Whiskey Sours The Whiskey Sour recipe is a traditional and excellent option. It is a classic because the fruity red wine and smoky-sweet bourbon are perfectly balanced. The sour lemon flavor will complement the whiskey and syrup's sweetness. It would be best to serve it chilled by shaking it with ice cubes. You can also add egg whites to your shaker to create a unique mouthfeel; you may skip it if it's not for you. 3. The Manhattan   In the world of whiskey, a Manhattan is a classic. It's made with a traditional blend of sweet Vermouth, rye whiskey, and bitters. It serves as the basis for many classic whiskey cocktails and is as vital to whiskey as the martini is to gin. 4. Irish Coffee Original Irish coffee is a delicious way to spice up your coffee after dinner or on a cold winter night. This whiskey cocktail recipe demonstrates that great drinks require little effort and only high-quality ingredients. It's just coffee, Irish whiskey, and brown sugar with freshly whipped cream on top. 5. Vieux Carre According to wine experts from an Edwards liquor store, the Vieux Carre is a sophisticated whiskey cocktail that combines cognac, sweet Vermouth, and Benedictine. Although it is a New Orleans classic, you do not have to be in the city to appreciate it. Additionally, stick to the recipe to ensure a refined flavor balance. 6. John Collins This whiskey-based cocktail recipe is an excellent choice for happy hour, consisting of whiskey sour and club soda. After mastering this recipe, you can create any alcoholic beverage you desire. 7. High Ball A highball is a two-ingredient cocktail that is both refreshing and delicious. Ginger ale pairs well with blended whiskeys, rye whiskeys, and bourbons. It is optional, but you can add club soda to lighten the flavor. 8. Mint Julep The mint julep, a whiskey drink recipe classic, is one of the most refreshing drinks you will ever taste. It requires fresh mint, sugar, your preferred bourbon, and a muddler. This recipe is so popular that it has inspired numerous julep variations. 9. Whiskey Cobbler What is the best way to dispose of the fruit in your refrigerator? Make a cobbler with whiskey. Use seasonal fruits to sweeten and garnish your whiskey, then add club soda. You can also choose to drink it straight. 10. Fancy Whiskey Cocktail This rendition of a classic is delectable and refreshing. This sophisticated whiskey cocktail recipe with orange liqueur, sugar, and bitter is as good as any contemporary recipe and is ideal for mixing whiskey. 11. Algonquin Cocktail The cocktail Algonquin is an excellent illustration of how whiskey and pineapple can coexist. The dry Vermouth in the tropical whiskey martini combines the two flavors. It is a wonderful way to enjoy summertime meals due to its complex flavor. 12. Whiskey Tonic All types of soda water are used in simple whiskey cocktail recipes. Dry soda is an excellent choice, particularly when combined with Irish whiskey. On the other hand, tonic water is the most popular. 13. New York Sour You can enjoy the New Your Sour with bourbon or rye whiskey. This cocktail mimics the whiskey sour by adding fresh lemon juice and simple syrup to the whiskey sour base. The floating red wine elevates the flavor and appearance of this cocktail. 14. Sazerac Sazerac is a distinct flavor of rye whiskey. Simple ingredients such as sugar, bitters, and anise liquors such as absinthe complement the spiced rye. Key Takeaway These recipes can serve as building blocks that you can update, modify, and make your own as you hone your bartending skills at home. Since there is no specific version of any given cocktail, you're free to make a version of your own. Consider all the suggestions above and enjoy your concoctions in the comforts of your home. Additional: 7 Daring Party Drinks to Try This Winter Tips to Follow When Ordering Alcohol Online

READ MOREDetails