How To Grow Tomatoes From Seed

Published on: 28 April 2017 Last Updated on: 30 October 2024
planttomato

If you are an avid tomato grower you’re probably envious of all the different varieties that other growers talk about, but that you can’t find transplants for in your area. In many cases, those growers are growing tomatoes from seed.

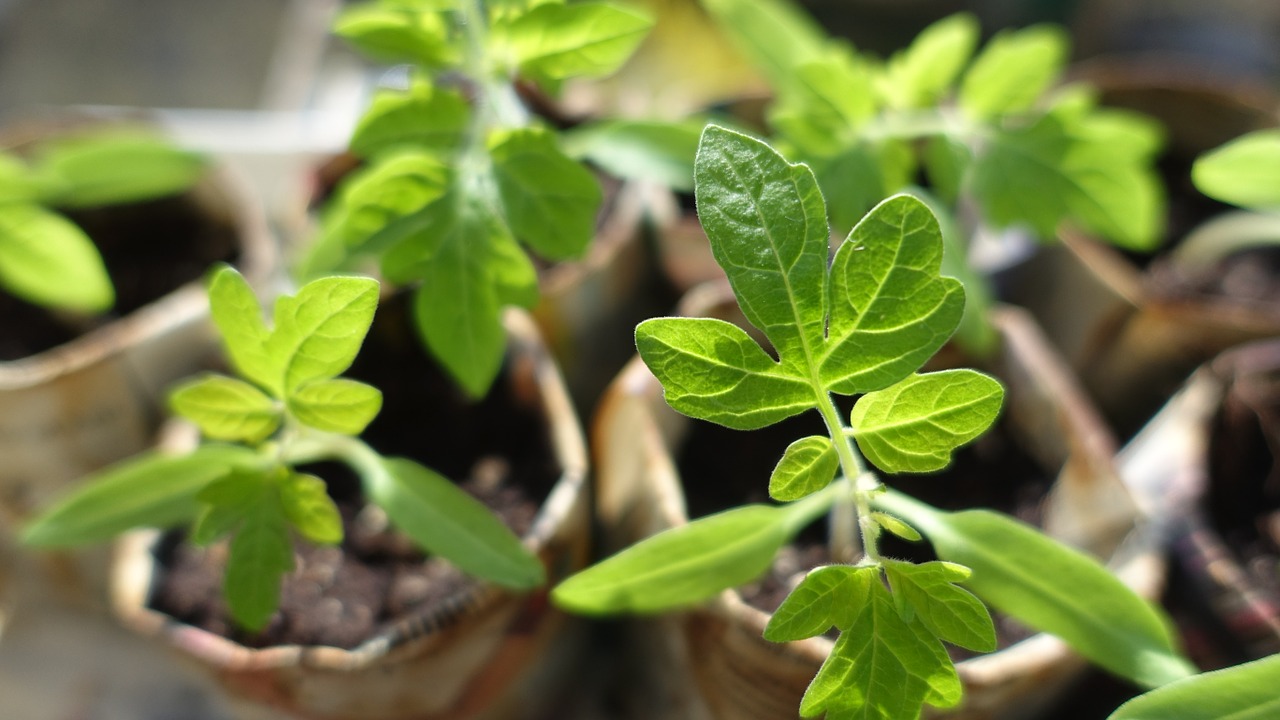
Growing tomatoes from seed really isn’t that difficult, as long as you understand a few basic things. Well, I will walk you through this process below. Read on.

Why is it necessary to start tomato seeds early?

Tomato seeds planted in the garden won’t germinate until the ground is warm enough. What’s the ideal ground temperature? They germinate best at temperatures in the 70-80 degree range.

If you plant seeds directly into the ground, odds are the summer will be too short for tomatoes to become productive before the end of the growing season unless you live in one of the warmest climates in the US.

The days to harvest number that is on a packageof tomato seeds assumes that you are using transplants.
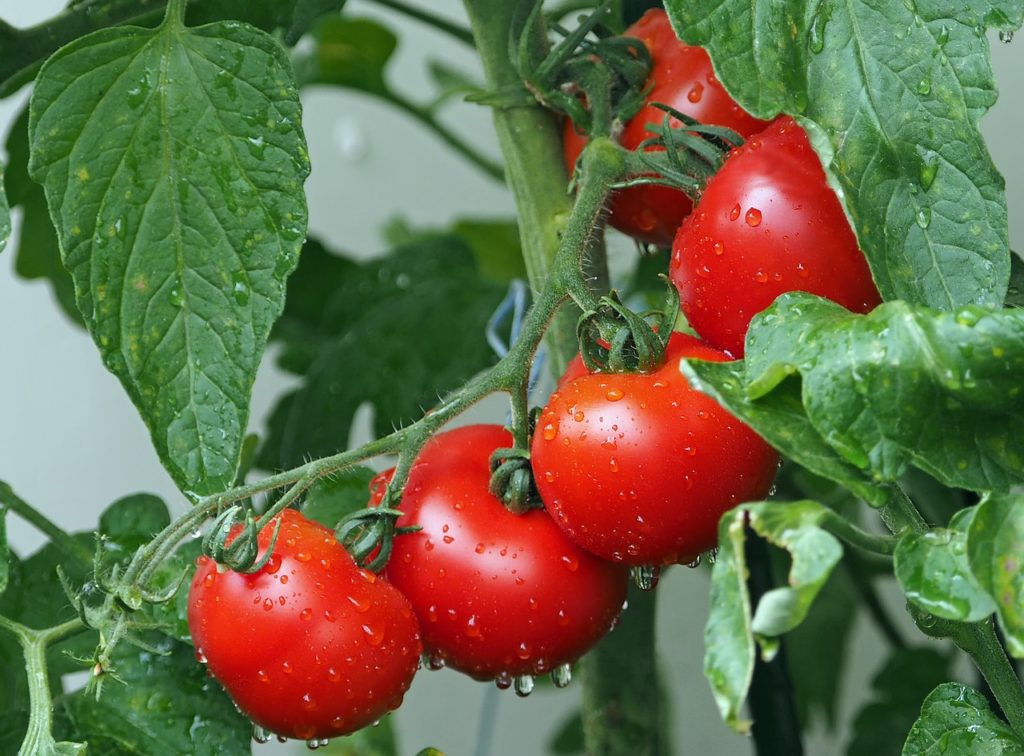
tomatoes

To decide if your area is warm enough to plant directly in the ground, add 30-50 days to that number. So if it says 90 days you would need 120-140 days of temperatures above 70 degrees to get your first ripe tomato if you plant the seeds in the ground!

When should I start my seeds?

Most people who are growing tomatoes from seed start 4 6 weeks before the last expected spring frost date in their area. You need to wait to plant the seedlings outdoors about 2 weeks after that date when the soil has warmed up to at least 50 degrees.

The date you start growing tomatoes from seed can vary depending on the space you have available and the length of your growing season.

tomato-flower

First, you need to gather some important items:

  1. Containers: Start with clean, sterile containers to grow your tomato transplants in.

    Your local garden center or big box store should have seed starting kits that consist of a black plastic tray with peat pots or plastic inserts and a clear plastic dome cover that fits over the top.

If you’re only starting a few seeds, you may want to just plant them in paper or foam cups with holes punched in the bottoms.

Many of us like to save money and reuse flats or recycle containers like plastic milk jugs for starting seeds. This is fine as long as you wash them thoroughly and then sanitize in a 10% bleach solution (1 cup bleach in 10 cups of water).

Note: Be sure whatever container you use has drainage holes in the bottom so that excess water can drain out.

  1. Lights: You cannot grow a healthy transplant without proper light. Even a sunny, south-facing window is not really adequate. Using a led grow light or fluorescent light on a timer that it is on for 12 hours and then off for 12 hours, will ensure that when you are growing tomatoes from seed your plants get all the light they need to grow properly.

You will need to plan a way to raise the lights so that the top leaves of the plants are 2- 3î below the lights. One method is to use a wire shelving unit. The chain that comes with a fluorescent shop light works perfectly to hang it from the shelf above your plants.

  1. Growing Media: Use fresh, sterile germination mix labeled for seed starting. These mixes are usually peat-based and do not contain garden soil.

Tip: More than 50% of people who are growing tomatoes from seed for the first time lose their seedlings to damping-off disease. This fatal disease can literally wipe out your seedlings overnight. Starting with sterile containers and soil mix will greatly decrease the chance of your seedlings becoming infected.

Read also: How To Choose The Right Containers For Your Container Garden

Growing tomatoes from seed are the only way to have the very best tasting and old fashioned heirloom varieties which are not usually available as nursery started plants.

Read also: Does Organic Gardening Improve Soil Quality?

Abdul Aziz Mondol is a professional blogger who is having a colossal interest in writing blogs and other jones of calligraphies. In terms of his professional commitments, he loves to share content related to business, finance, technology, and the gaming niche.

View all posts

Leave a Reply

Your email address will not be published. Required fields are marked *

Related

Homespace

Different Types of Conversions to Make the Most of Spare space

In the olden days, when land and construction prices were not as high as this time and age, it was common for people to build large homes, regardless of their needs and requirements. As the time went by, and land became scarce, while the construction prices kept rising, making the most of lesser space and building small yet efficient houses is becoming a norm for people living in metropolitan. Using the available space in a smart and efficient manner is not only an option for people looking to build a house from scratch. Even if you are living in an old home, you can look around and convert some spare area into usable space. Following are some rooms or areas, which are often ignored, and how you can convert them into living space. Loft Conversion:  Starting from loft conversions i.e. converting your loft or attic into a living space, but remember that not all lofts or attics can be converted into living rooms. However, majority of homes in the UK and its adjoining areas have the construction style that allows for a loft conversion. You can get your loft surveyed or look out for professional advice to see if you can convert your loft. In case the answer is in yes, you can easily add a bedroom, study area, home office, or recreational room to your home. Loft conversion will cost a little more than simply converting a store or basement into a living space (because it involves quite some construction and installations), however, you will add quite some value from loft conversions to your property, making it worth investing your money. Garage Conversion: Many homes have internal garages, which are seldom used for cars. In case you have an internal garage and you are not regularly using it for car parking, you have got some excellent space to be used for just about any purpose, from kitchen to gaming room, depending on the available space and your budget. Not to forget that internal garage can be an ideal space, if you are looking for a home office, where you will be having visitors every now and then. Basement Conversion: Basements use to be a dark and dingy area that was very rarely used as a living space in the recent past. Now, basements can provide you with ample space, a lot more than what you will be getting from garage or loft conversion. Again, you can use your basement for just about any purpose, in fact more than one purpose, because you can get multiple rooms by converting your basement into living space. Again, it will help if you can get advice from a professional basement conversion professional or a company specializing in basement conversions. Store Room Conversion: Many homes have small rooms or storage space that is used for nothing but keeping useless items (that can very easily be disposed of). True that you need to have some storage space, however, if you are using that room for keeping junk that you don’t see being of any use in near future, you can clear that room and use it for other purposes, especially if you are looking for some small and secluded space to set up a home office or study room. Moving Into New House Conversion: When a family relocate a new place, the most stressed conversation begins where to place the belongings this time you need to look for the plan you have designed while you were planning all your house removals things. It will help in choosing the best approach for placing all the things.

READ MOREDetails
Mold Damage

How to Prevent Mold Damage In a Building

Healthy living requires a clean and safe environment, but with the prevalence of many microorganisms such as mold damage, this can be challenging. This is because they are invisible to the naked eye and release spores into the air, which cause major health problems when inhaled. Mold is a fungus that grows in the form of hyphae, which are multicellular threads. It is composed of microorganisms that can be found almost anywhere. They are useful outside for breaking down garbage and composite materials, but when found indoors, they are extremely detrimental to human health. Mold damage produces allergic reactions or irritation and must be removed as soon as possible. To stop it from spreading, early detection and removal are essential. Mold remediation or removal is not something just anyone can do. To achieve a proper sanitization of the entire building to avoid the existence of mold, you will need to contact professionals or follow the complete guide about damp wall treatment procedures. This way, you will be sure that your home or office will be properly treated. Finding a good remediation service is not always a stroll in the park, especially if you have not worked with one before. However, with the right guide handy, you can easily find a professional company that will properly clean and sanitize your building. If you do not know how to find a good company, and you need recommendations on reputable companies to work with, you can visit the Long Beach mold removal company for help. Types of Molds Damage: Here are some common types: Aspergillus This type does not need much ventilation and can be found in attics, textiles, walls, dry food, and basements. It has a powdery appearance and may be white, green, or gray in color, with dark dots. It has several carcinogenic forms, but when detected within the home, it causes serious respiratory problems. Cladosporium This can be found in both warm and cold places. It can also be found on carpets, clothes, wood, and heating and cooling ducts, among other things. The color is usually black, or green. Alternaria This fungus has a white background with black dots and can be found near windows, in fabrics, bathrooms, kitchens, air conditioning units, and wallpapers. However, it is commonly found outdoors. Trichoderma This fungus is commonly creamy-white in appearance, but as it releases spores, it becomes green. Windows, baths, kitchens, and wood are among its favorite areas. Penicillium This type is fuzzy and comes in a variety of colors, including blue, green, and yellow. Basements, insulation, and carpets are all common places to find them. It is usually present anywhere a water-damaged structure is found. Penicillin, an antibiotic, is derived from it. You can learn more about penicillin by reading this article. Key Materials for Mold Removal Mold damage removal requires a variety of tools, depending on the size of the fungus and the type of surface to be cleaned. There are natural cleaning methods that may be utilized to get rid of it as well. Plastic Sheet A plastic sheet is used to separate the infected region from the rest of the room, preventing spores from spreading. It is used to block openings to air vents, doorways, and the rest of the building. Biocide It is critical to use a high-quality cleaning product for removing mold damage. The fungus will only be hidden if you use poor or regular household bleach or cleaning agent. Biocide is particularly effective at killing and inhibiting this bacterium's growth. Vinegar  Despite its strength, it is quite effective against fungus. Baking soda, hydrogen peroxide, and lemon juice can all be added to it. Wear safety clothing such as goggles, gloves, and a breathing mask when using it. To remove the mixture, wipe the area with a clean moist cloth. Sodium Bicarbonate  Baking soda, or sodium bicarbonate, has a wide range of applications, including the removal of fungus. It should be sprayed on the damaged surface after being combined with vinegar or water. After spraying, scrub the area with a brush, rinse, and then spray again. Dehumidifier This gets rid of the moisture and prevents future growth. It is best used after the cleaning procedure to air the place and remove any remaining moisture, but it can also be used as a preventative strategy. As a solution, a portable one can be stored in a room with an infestation. If you need tips on how to use a dehumidifier, you can check here: https://www.wikihow.com/Use-a-Dehumidifier Lemon Juice This natural cleanser is efficient, non-toxic, and has a pleasant scent. Before spraying it, clean the surface with soap and water. It can also be applied daily to keep fungus at bay. It is an excellent choice because it is both environmentally and pet-friendly. How to Keep Mold Damage at Bay Here are some methods to guide you: Regular Checks They can be found in open regions, but they can also grow in secret spots. This means that regular inspections of damp, dark areas like basements should be carried out to detect the infestation early before it worsens. Repair any Leaks If there is a leak from pipes or faucets, fix it immediately and dry the area. Also, inspect drains and pipelines on a regular basis. Liquid storage areas should also be checked because they can leak from their bottles. Make Use of Cleaners While it is necessary to deep clean your home on a regular basis, you should do so with a mold-prevention agent. Natural cleaners such as natural lemon, white vinegar, baking soda, as well as other citrus-based treatments are recommended. In addition to keeping fungi at bay, these solutions leave a fresh smell around the building. Allow Sunshine In Mold does not thrive in natural light and fresh air. This means that you have to open the windows and curtains to allow sunshine in. You can also turn on your ceiling fan to prevent the survival of mildew. Keep in mind that mold damage is detrimental to human health and this should guide you in taking the right steps to prevent its growth and survival. You can read articles explaining how mold affects human health for more information. Wrap Up Mold growth can pose a danger to human health; therefore, it should be nipped in the bud. Always inspect the bathroom, roof, pipes, and foundation for cracks, leaks, or damages. Delaying treatment as soon as the condition is discovered can worsen the condition and increase the cost of treatment, especially if toxic or black mold is present. This article outlined tips to help you prevent mold damage in a building. Feel free to check them out. Read Also: We Buy Houses Companies Saving Homeowners From Foreclosure Cleaning Your Home with Pets – The Most Common Problems Hosted Mail Service That Runs on the Cloud

READ MOREDetails
how to harvest dill

How to Harvest and Preserve Dill for Year-Round Use?

The tender, fern-like leaves of dill almost beg to be touched. If you want to cook them, trim the fresh dill foliage and gather the seeds for pickling. Or you can chop the feathery leaves and yellow umbels for attractive bouquets of homegrown flowers. In addition, black swallowtail caterpillars love to feed on it. Its tiny yellow blooms are great at drawing in a wide range of pollinators. Dill grows as an annual for summer harvests in USDA Hardiness Zones 2–8. In other parts, it may self-seed and is hardy in the winter in Zones 9–11. Here is everything you need to know about how to harvest dill. Keep reading for a comprehensive guide. How to Harvest Dill? Fresh dill clips easily, but it soon starts to droop. Sounds familiar to Cilantro, right? Its flower umbels may look lovely in a mixed bouquet, but after a few hours, don't be shocked if they start to wilt. When harvesting dill for recipes, use it as soon as possible because its flavor starts to fade after a few days. Cut off the flower stalks of dill after the yellow blooms have faded but before the seeds start to ripen and come away from the umbel. Cover the entire flower head with a small paper bag that has a few tiny holes for ventilation. Hang the plant upside down in a cool, dry place. Watch for the seeds to fall and collect them in the bag's bottom. The seeds should be kept in a cool, dry, and dark area in an airtight glass container. When and How to Plant Dill? Dill grows best outside and is simple to start from seed. Plant the seeds directly into the ground, 1/4 inch deep and spaced 1 to 2 inches apart, in the springtime following the last frost. If you want the dill plants to be able to self-sow, plant the seeds in tufts so the seeds can fall and sprout the following year. Or you can plant them in rows spaced about 6 inches apart. You might want to think about succession planting if you want a reliable supply of dill. During the growing season, start by planting a small number of seeds from the packet at a time and then a few more every week. Typically, seeds take 7 to 14 days to germinate. Also, dill can be grown from transplants grown in nurseries planted in the ground or in containers in spring. You can plant dill outside a few weeks before the last predicted spring frost because it can withstand light frost. To achieve lush growth and stop crowded seedlings from producing seed heads, which stops the production of foliage, thinning is essential. Every 12 to 24 inches, reduce the number of seedlings to just the strongest one once they reach 3 or 4 inches in height. As they get bigger, some start to flop. Plants can be kept upright by placing a stake or a sturdy twig in the ground close to the plant's base. To loosely secure the plant to the stake, use garden twine. You can start the dill seeds indoors four to six weeks prior to the last frost. And you can move the seedlings to the ground once the risk of frost has passed. Transplanting mature dill does not work well, so plant your seedlings where they will be able to grow and thrive. Where To Plant Dill? Dill should be planted in a spot with well-drained soil and at least 6 to 8 hours of daily full, direct sunlight. Particularly for cottage gardens, the delicate foliage gives garden beds and borders textural interest. Choose a location for your dill that will shield it from the wind if possible. Just like spinach, high winds can easily damage its stalks if you do not stake the dill. You can plant dill's fragrant foliage in perennial garden container plantings. Or you can plant them alongside other herbs or vegetables in a traditional kitchen garden. In an edible garden, cruciferous vegetables such as Brussels sprouts, collard greens, broccoli, and cabbage are good companion plants for dill. Dill draws beneficial insects like ladybugs and bees and drives away common brassica pests like loopers and cabbage worms. But avoid planting dill close to carrots. Carrots can be stunted by dill, and because they are closely related, dill can cross-pollinate with carrots to produce inferior hybrid plants. Planting dill close to tomatoes is also not recommended. Mature dill will probably stunt your tomatoes' growth, even though some studies have indicated that tomatoes and dill can be beneficial companions when they are young. How to Propagate Dill? Seed is the most effective method of dill propagation. Cuttings can also propagate Dill, though this isn't as dependable. Seed: Direct sow the dill seeds in early spring at a depth of 1/4 inch in a prepared garden bed. Dill does not tolerate transplanting well. Thin the seedlings so they are 12–24 inches apart when they are 3–4 inches tall. Cuttings: Using shears or scissors, cut off the stem with at least 3 to 4 inches of new growth to take a dill cutting. Place the cutting in a water-filled container, making sure to remove any leaves below the water's surface, and allow the roots to grow for two to three weeks. Fertilizer and rooting hormones are not required. Plant the dill in a container or on the ground once the roots are 2 to 3 inches long. Is Dill a Type of Weed? No, I am not talking about WEED weed (read: marijuana). Although dill isn't technically a weed, some individuals and spice companies call the plant dill weed, possibly due to its feathery leaves. Dill weed is a dried or fresh foliage plant. Flower umbels are yellow and used to make dill seeds. How Should Dill Be Stored for Optimal Quality? You can keep fresh dill in the fridge by wrapping its leaves in a moist paper towel. Or you can tuck its stems into a container of water. Fresh dill can be frozen by submerging it in water in ice cube trays. Place the cubes in cooked dishes that have enough moisture to withstand them. Dill seeds and leaves can also be easily dried for later use, though the flavor is a lot more muted. Water and Soil Sow dill in soil that is moist but well-drained. If there is a lot of clay in your soil, add organic matter to the top few inches to aid in drainage. If you have trouble with poor soil drainage, plant this herb in raised beds or containers. Growing dill requires proper irrigation. As the seeds germinate, keep the soil evenly moist. Dill plants require one to two inches of rain or extra water each week once they begin to grow. Humidity and Temperature Dill tolerates temperatures as low as 25ºF, but 70ºF is the ideal temperature for it. Dill often bolts, sending up flower stalks to set seeds when temperatures rise. This annual herb dies after it flowers and produces seeds. Get rid of the flowers to prolong the plant's growing season. Apply Fertilizer While most herbs, including dill, don't require extra fertilizer, you can give them once or twice during the growing season by applying a balanced 10-10-10 fertilizer. When planting, either mix a liquid fertilizer with water or etch a time-release fertilizer into the soil. Refer to the product label for instructions on how much to use. Trimming Dill should be pruned early in the growing season to prevent limb bending. Cut off the top leaves of the plant to promote more growth of the lower leaves. Food preparation and cooking can be done with anything that has been pruned. Repotting and Potting You can grow dill in pots on a sunny balcony or deck, even if you don't have an outdoor garden. Due to the deep taproot that dill plants have, choose a container that is at least 12 inches deep. Because clay and terracotta pots don't retain as much moisture as plastic or glazed ceramic pots. They are ideal for growing dill. Make sure the container you select has good drainage and is big enough to allow you to space your plants 12 to 24 inches apart. It is best to start over in a new, larger container. Especially if your dill plant outgrows its current one because it does not take well to transplant. If the temperature where you are planting is not too high, you can keep planting seeds into the summer. Types of Dill Dills can be of many types with each of their distinct looks and flavors. Here are the three different types of dill you can grow in your kitchen or backyard. Long Island Mammoth Also known as Long Island Mammoth this one is an old-time favorite. Its fern-like leaves can be dried and stored for a long time, or they can be harvested fresh. It produces big clusters of yellow flowers with flat tops. They turn into brown seed heads, and they can reach a height of five feet. Fernleaf Grown to a height of only 18 inches, Anethum graveolens, or Fernleaf, is a highly productive dwarf variety. It works well in container gardens or small in-ground beds. Its feathery, delicate foliage has a great flavor of dill. From midsummer into fall, it blossoms. Bouquet The 'Bouquet' cultivar produces plants up to thirty inches tall with fine bluish-green foliage. The enormous, six-inch-diameter yellow flower heads are ideal for drying, creating an enduring arrangement. Or you could chop them for fresh floral arrangements. How to Keep New Dill Fresh? Dill weed quickly wilts after harvesting and gradually loses its distinctive flavor and aroma. If you know how to store your freshly harvested dill, this shouldn't be a problem. Here are two straightforward techniques that you can use: Put It in the Crisper Drawer of the Refrigerator Loosely wrap the recently cut and cleaned leaves in damp kitchen towels before putting them in a container or sealed bag. Put the container in the crisper drawer of the refrigerator, which has a lower humidity than the other sections of the appliance. Utilize the herbs before they begin to wilt and dry out, which should happen in a few days. Put It in Water To make this method function, when harvesting the herb, you must cut off the entire stem. After gathering the stems, put them in a glass of water and seal the opening with a plastic bag. Every day, change the water. Unlike potatoes, dill leaves can remain fresh for up to a week when stored in this manner. How to Freeze Fresh Dill? Freezing is the best way to preserve extra dill for later use if you've harvested more than you can use at once or in a few days. Dill freezes most effectively when chopped into smaller pieces and added to ice cube trays with just enough water to cover the freshly minced dill. This allows the herbs to be kept for four months or longer. This will ensure you always have dill on hand for when a recipe calls for it. How to Dry Fresh Dill? Dried fresh dill is a popular method if you're searching for another way to store dill for a long time. The herb has many uses, even though it won't have as much flavor as when it's fresh or frozen. All year long, you can use it as a herb in cooked dishes or to make tea. Stick to hang-drying if you don't want much of the flavor to be lost. This is a very easy method to use. All you must do is gather a few dill leaves and then bind them with a string. Later, place them in an area with adequate ventilation upside down.  Place them in an airtight container once they're crumbling and dry. Even though fresh dill is always preferable, make sure to save some for later use. Particularly if you don't have a year-round indoor herb and spice garden. Wrapping Up Growing dill is a great way to add flavor to fish and seafood dishes. A little goes a long way because fresh dill leaves have a strong licorice flavor. It is best that you add dill toward the end of cooking, in salads, or as a garnish for soups. Because once cooked, it tends to lose its flavor. If you have thoughts to share or questions to ask about how to harvest dill, please leave a comment below. We would love to hear from you! Read Also: Asparagus 101: When, How, And How Often To Harvest? How To Harvest Sunflower Seeds: A Fun And Easy Activity For The Whole Family How TO Harvest Lemongrass: Tips AND Tricks FOR Growing AND Using This Versatile Herb

READ MOREDetails