Published on: 06 April 2022
Last Updated on: 17 February 2025
Tiles look pretty appealing to visual, but are they long-lasting or not?
There is no doubt that everything starts to damage after a certain period. But when it comes to a house, we must go for the option that looks appealing yet durable at the same time. Tiles on the roof look quite attractive to the sight, but the question is, what is the average life span of a tile roof?
Here, we will discuss the lifespan of various types of tile roofs. So, further ado, let’s find out all about tiles roof in detail below.
What Is The Average Cost And Life Span Of A Tile Roof?
The initial installation and up-front expenditures of tile roofs can cost a bit high than other materials. However, tile roofs survive so long before you need to replace them. A tile roof can also save you money in the long term, and you can also save money on roof repairs since you won’t need to hire roof repair contractors in Albuquerque.
1. Concrete Tiles
Concrete tiles can range from $4.00 to $9.00 per square foot on average. Concrete tiles are more durable and heavier than clay tiles. Concrete tiles can last for up to 50 years or more on average, depending on how you take care of them.
Concrete roof tiles also have an interlocking installation feature which can reduce labor time and installation costs. They are lighter than clay tiles, making installation easier and your property safer in the long term if the roof structure begins to deteriorate.
2. Clay Tiles
Clay tiles are less expensive and easier to maintain than other types of tiles. Clay tiles can last for up to 90 years if you keep them properly. Installing clay tiles is more expensive than installing a shingle roof.
The price of clay tiles varies between $10 and $17 per square foot. Clay tiles occur in various styles, and you can pick a design as per your choice. However, one must pay attention to the weight of clay tiles, as with other tile roofs.
Also, make sure your home’s current roofing structure and frame can sustain a relatively heavier roofing material.
3. Slate Tiles
These tiles are an environmentally friendly, attractive, and long-lasting roof installation alternative. However, slate tiled roofs can be more costly than concrete or clay. These tiles range from $9 to $16 per square foot.
Also, it requires a lot of labor to install due to its weight and construction method. Slate roofing is impenetrable to extreme weather because it is stone. So, you can anticipate a slate tiles roof to endure up to 100 years or even more.
4. Terracotta Tiles
Terracotta is a tough material that can survive hundreds of years if you take care of them properly. Terracotta is also waterproof and fire-resistant, providing excellent weather protection. A complete, tiled terracotta roof’s durability is also determined by how well it is built and maintained.
The terracotta roof tiles installation costs $10 to $25 per square foot. It includes a $5 to $10 per square foot material cost, slightly higher than other materials. Terracotta roof tiles have a life can be of up to 75 years if you maintain them properly.
Even with minimal maintenance, these tiles can last up to 50 years. Terracotta is a heavy roofing material, weighing between 600 and 650 pounds per square foot.
5. Solar Tiles
Solar tiles are a moderately new roofing option that more people consider while constructing their house roofs. The appearance of solar roof tiles is similar to that of a fresh asphalt shingle roof. Solar tiles are pretty expensive, ranging from $20 to $26 per square foot.
These tiles are similar to asphalt in protecting a roof from the elements and durability. Solar tiles can provide electricity for a house directly powered by the sun.
Also, solar roofing tiles can provide anywhere from 14 to 64 watts of energy, depending on the number of tiles available on your roof.
Conclusion
The roof is one of the most important parts of any house. Apart from protecting us from extreme weather, it also plays a significant role in increasing the structure’s beauty and aesthetics.
A roof constructed with tiles can be the best option that looks visually appealing and has a good lifespan. It costs a bit high initially, but tiles roof can last for up to 100 years if you take care of their maintenance.
Arnab is a professional blogger, having an enormous interest in writing blogs and other jones of calligraphies. In terms of his professional commitments, He carries out sharing sentient blogs.
You’re among one of the thousands of Americans who find themselves faced with packing for temporary storage. You're not alone... Maybe you're staging your home for a quicker sale, making room for a home office or a temporary classroom amid the Pandemic, or desire the peace of mind that comes from a space that is free of clutter.
With so many changes in the worldwide landscape, self-storage has become an asset to homeowners and apartment dwellers. Temporary storage offers flexibility while creating room in your home and free space in your mind.
All of those distractions not only lead to lower productivity but also lead to feelings of overwhelm that disempower us from reaching our goals. Feeling encumbered by stuff is a growing trend since so many of us are faced with how many things we actually have during a shelter in place! The good news is that by utilizing temporary storage, you don't have to wait for a bigger home to create that spacious feeling.
Whether you're packing for temporary storage due to a transition in your personal life, or just want to free up some space in your home in you home, it can feel overwhelming to do the research necessary to begin the process.
How To Pack For Temporary Storage?
Here is a full-step guide to pack for temporary storage. read the points below to know everything about it in detail. Clearing some space in your home would also help you concentrate on doing something meaningful to your life.
Step 1: Assess the space you have
Create a flow in your home. Your things should fit neatly into the space you have. Although it may be tough to decide what you need, storing things offsite means that your stuff is not gone forever!
Get Rid of the clutter! Clutter can be overwhelming to deal with when starting to pack your belongings for storage. Once it's out of the way, it makes the packing process so much easier. Even a few hours of decluttering can make things run a lot smoother. Try getting the family involved, and make it a game!
Read Also: Moving home checklist: What you need to know
Step 2: Categorize & Inventory
Making lists as you categorize your items for temporary storage will make it easier for you to find them as you need them. As you gather items from each category, make a list, or take a photo of what you pack in each box. Label your boxes with a number, and mark your photograph or list with the same number for a visual index. Having a list and documentation is also an asset in the event that an unfortunate or unexpected event should occur and you need to file an insurance claim.
Things you use seasonally
Your surfboard, your kid's inflatable pool, or your Bermuda shorts won't be of much use when it's snowing outside! Group all seasonal items by season, including decorations, clothing, and footwear together. When these items are packed together, and labeled, it's so simple to swap out a few boxes at the change of season.
Sentimental Items You Don't Need Right Away
High School Yearbooks, Stacks of your kid's artwork, and other items that have value but are rarely used in daily life can be prepared for temporary storage, so you can access them when you need them!
Things You Need, Just Not Right Now
Heirloom furniture, boxes of books, or clothes -you're saving for the next baby can all be stored off-site!
Step 3: Gather Materials and Pack
Following your inventory, pack items of each category together following these instructions for the safekeeping of your items.
When packing, it is important to consider that life changes quickly, and although you are packing for temporary storage, you may enjoy the spaciousness this brings and decide to keep your items packed away longer than 3-4 months! Packing items to be stored indefinitely not only safeguards your items but can offer you peace of mind in the event that plans change. Since things often take longer than expected, you can rest assured knowing that your valuable items are safe.
Be sure to use sturdy boxes, and always, always make sure the bottom is taped securely shut! Don’t overpack boxes, and make sure boxes can be comfortably lifted and moved. Pack lighter items on the top so they do not crush the contents beneath them. Fill any empty space in the box so it does not collapse.
Furniture
Clean each piece of furniture, removing any dust, debris, or food remnants. Condition any wood or leather items, and be sure to vacuum all upholstery.
Disassemble any furniture. Often the assembly instructions are long gone, so it is helpful to take photos of each step along the way, documenting hardware as you go. When it comes time to reassemble, you can review your photos in reverse, making reassembly a breeze!
Use a drop cloth, or moving blankets, wrap your items carefully for transport and storage. While bubble wrap is useful for protecting mirrors and glass, avoid using plastic coverings directly on your furniture. Plastic can trap moisture, which can cause wood to warp and upholstery to mold or mildew. Use only white drop cloths to cover wood or upholstery, as the dyes can bleed in humid environments leading to discoloration of your furniture.
Electronics
Remove any dust or debris from the item using a dry cloth. If you are storing an electronic device that stores data, be sure to back up any important information before packing it away.
Secure packing of electronics is so important! In the event of any bumps or drops, you can be at ease knowing your electronics are secure in their packaging. Remove all cords, and wind them into a circle, securing with a tie.
If possible, pack electronic items in their original packaging. If that is long gone, use a box slightly larger than your item, and create a shock-absorbing buffer firmly around the item using packing peanuts or styrofoam. Avoid using any plastics that will trap moisture, and be sure to include several silica packs to absorb any humidity.
Always keep your electronics upright. Mark an arrow on the box with the correct direction to ensure that your item is stored and transported safely.
Once your device is placed securely in the box, you can place the corresponding cords on top of the packing, and tape your box closed securely.
Clothing & Specialty Worn Items
Books, Papers, and Photographs
Since mold is a common issue when storing books, and papers, it's recommended to ensure they are totally dry. If you live in a humid climate. Paper objects can be stored in smaller, opaque plastic totes to ensure they are kept free from moisture and light, and rodents.
Pack larger books lying flat, and store smaller books upright, as you would on your bookshelf. Never store a book on its spine, as it can cause damage to the structural integrity of the book and damage it.
Protect your photographs by storing them in an archival album before storing to ensure your photos will be around for generations. To store larger photographs, carefully place them between layers of cardboard, and lie flat.
Instruments, Art, and Other Delicate Objects
To properly store delicate objects, it is important to have a facility tha is climate controlled, even for temporary storage. Make sure all packing is secure, keeping packing materials out of direct contact with any painted areas, wood accents, or delicate features.
You May Also Like: Small Kitchen Storage Ideas
Step 4: Finding A Storage Space
It can be difficult to conceptualize how much storage space you actually need. Many self-storage websites offer guides that can help you visualize how your things will fit in the space. Some storage units are multi-level, so be sure to ask about accessibility if you need a space that is on the ground level.
If you are storing any sensitive items like instruments, electronics, or antiques, be sure to rent a climate-controlled unit.
When people think of storage, the image that comes to mind is often a traditional storage facility. While traditional storage is an excellent option for many, there are alternatives that can offer some flexibility, convenience, or some sizable savings. Maybe you have a spare vehicle that never gets used sitting in your garage. Consider storing your vehicle, renting extra space from someone in your neighborhood, or asking a family member or friend to store belongings for you.
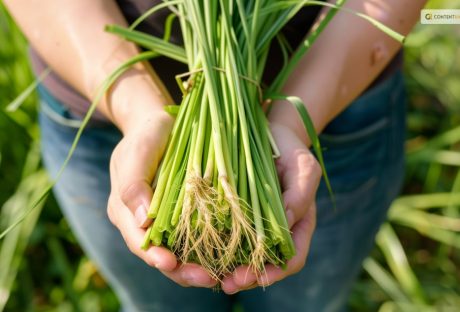
Lemongrass is a tropical herb that has a fresh and citrusy flavor and aroma. It is one of the most essential herb that is people widely use in Asian cuisines. They especially use it in Vietnamese, Thai, and Indonesian dishes. It is also a popular ingredient in teas, soups, curries, salads, and marinades. Lemongrass has many health benefits, such as improving digestion, boosting immunity, reducing inflammation, and relieving stress.
But did you know that you can grow and harvest your own lemongrass at home? Yes, you can! Lemongrass is easy to grow and maintain, and can thrive in pots, containers, or gardens. You can enjoy fresh and organic lemongrass all year round, and save money and time from buying it at the store.
In this article, I will show you how to harvest lemongrass, and share some tips and tricks for growing and using this versatile herb. By the end of this article, you will have a better understanding of how to harvest lemongrass, and how to make the most of this wonderful herb.
So, if that is something that you want to know, I have you covered! Keep on reading this blog till the end to learn more…
How to Grow Lemongrass?
Lemongrass is a wonderful herb that can add a refreshing and citrusy flavor to your dishes, drinks, and teas.
It is also a beautiful ornamental plant that can brighten up your garden with its tall, graceful stalks and fragrant leaves. Lemongrass is native to tropical regions, but you can grow it in cooler climates as well with some care and preparation.
Here are the steps and conditions for growing lemongrass successfully at home:
1. Choose a healthy lemongrass plant or stalk
You can buy a potted lemongrass plant from a nursery or garden center, or you can start your own from a fresh lemongrass stalk that you can find in most grocery stores or Asian markets. Look for a stalk that is firm, green, and has some roots at the base. Avoid any that are dry, brown, or moldy.
2. Prepare a sunny and warm spot for your lemongrass
Lemongrass loves full sun and heat, so choose a location that gets at least six hours of direct sunlight per day. If you live in a colder region, you can grow lemongrass in a container that you can move indoors during the winter.
Use a large pot with drainage holes and fill it with rich, loamy soil that is high in organic matter. You can also add some compost, manure, or leaf mold to improve the soil quality and fertility.
3. Plant your lemongrass in the soil
If you bought a potted plant, simply transplant it to the ground or a larger container, making sure to bury the roots well and leave some space between the stalks.
If you are starting from a stalk, peel off any dead or yellow leaves and trim the top part to about six inches.
Place the stalk in a glass of water and keep it in a sunny windowsill until roots start to grow, which can take a few weeks.
Then, plant the rooted stalk in the soil, leaving about two inches of the stem above the ground. Space the plants about two feet apart to allow them to spread
4. Water and fertilize your lemongrass regularly
Lemongrass needs moist soil to thrive, so water it frequently and deeply, especially during hot and dry periods.
A good rule of thumb is to water it once a week or whenever the top inch of the soil feels dry. You can also apply a layer of mulch around the plants to conserve moisture and prevent weeds.
Lemongrass also benefits from a monthly dose of liquid organic fertilizer during the growing season, such as fish emulsion or seaweed extract. This will help it grow faster and produce more leaves and stalks.
5. Harvest and enjoy your lemongrass
You can start harvesting your lemongrass when the stalks are about a foot tall and half an inch thick. Cut the stalks at the base with a sharp knife or scissors, leaving about two inches of the stem in the ground.
Additionally, you can use the whole stalk, or peel off the outer layers and use only the tender inner part. You can also harvest the leaves and use them fresh or dried for teas and infusions.
Lemongrass can be stored in the refrigerator for up to two weeks, or in the freezer for up to six months. You can also dry it and store it in an airtight container for later use.
How to Harvest Lemongrass?
Harvesting lemongrass is a simple and satisfying process that can be done in a few steps. Here are the basics of how to harvest lemongrass:
Choose the right time
The best time to harvest lemongrass is when the stalks are about 12 inches tall and 0.5 inches thick. This usually happens after 3 to 4 months of planting. You can harvest lemongrass throughout the year, as long as the temperature is above 40°F. You can also harvest lemongrass in batches, leaving some stalks to grow and regenerate.
Cut the stalks
To harvest lemongrass, you need a sharp knife or scissors, and a clean cutting board. Cut the stalks at the base, as close to the soil as possible. You can cut as many stalks as you need, or as many as you can use within a week. You can also trim off the leaves, as they are not edible and can be used for other purposes.
Wash and store the stalks
After cutting the stalks, wash them under running water, and pat them dry with a paper towel. You can store the stalks in the refrigerator, wrapped in a damp paper towel, and placed in a plastic bag. They can last for up to a week. You can also freeze the stalks, chopped or whole, in a freezer bag. They can last for up to 6 months.
Dividing Lemongrass: What is It and How to Do It?
Dividing lemongrass is a great way to propagate and maintain this aromatic and flavorful herb. Lemongrass is a perennial plant that grows in clumps of stalks and leaves.
Over time, these clumps can become crowded, woody, and less productive. By dividing lemongrass, you can rejuvenate the plant, increase its yield, and share it with others.
Here are the steps and reasons for dividing lemongrass:
1. When to divide lemongrass?
The best time to divide lemongrass is in the spring, after the last frost date when the plant is actively growing and has new shoots.
You can also divide lemongrass in the fall if you live in a warm winter climate or if you plan to overwinter the divisions indoors.
Avoid dividing lemongrass in the summer, when the heat and drought can stress the plant and reduce its survival rate.
2. How to divide lemongrass?
To divide lemongrass, you must dig up the entire plant and separate it into smaller sections. You can use a shovel, a sharp knife, or your hands to do this.
Each section should have at least one inch of root and several healthy stalks and leaves attached.
You can trim the leaves to about six inches to reduce water loss and make the divisions easier to handle. Discard any old, brown, or damaged parts of the plant.
3. Where to plant lemongrass divisions?
You can plant lemongrass divisions in the same spot where you dug up the parent plant or in a new location with full sun, moist and well-drained soil, and plenty of organic matter.
You can also plant lemongrass divisions in containers at least 10 inches deep with drainage holes. Space the divisions about two feet apart to allow room for growth.
Plant the divisions at the same depth as they were before, with the crown just below the soil surface.
4. How to care for lemongrass divisions?
Lemongrass divisions need regular water and fertilizer to establish and thrive. Water them deeply and frequently, especially during the first few weeks and during hot and dry periods.
You can also apply a layer of mulch around the plants to conserve moisture and prevent weeds. Fertilize the plants once a month with a liquid organic fertilizer, such as fish emulsion or seaweed extract, during the growing season.
Protect the plants from frost in the winter by moving them indoors or covering them with a frost cloth.
5. How to harvest and use lemongrass divisions?
You can start harvesting lemongrass divisions when they are about a foot tall and half an inch thick. Cut the stalks at the base with a sharp knife or scissors, leaving about two inches of the stem in the ground. You can use the whole stalk, peel off the outer layers, and use only the tender inner part.
Additionally, you can also harvest the leaves and use them fresh or dried for teas and infusions. Lemongrass can be stored in the refrigerator for up to two weeks or in the freezer for up to six months. You can also dry it and store it in an airtight container for later use.
How to Use Lemongrass in Food?
Lemongrass has a long, green stalk with a bulbous base and grassy leaves. It has a lemony taste with a hint of mint and ginger. Lemongrass can be used fresh, dried, or powdered, depending on the recipe and preference. Here are some ways related to how to use lemongrass in different ways:
Fresh lemongrass
Firstly, fresh lemongrass is the most aromatic and versatile form of lemongrass. You can find it in the produce section of most supermarkets, Asian markets, or online.
To prepare fresh lemongrass, you need to peel off the tough outer layers and trim off the root end and the top third of the stalk. You can use a sharp knife or scissors to do this. The part that you want to use is the pale and tender lower part of the stalk.
After that, you can slice it thinly, chop it finely, or bruise it with a pestle or the back of a knife. Slicing or chopping is good for salads, stir-fries, curries, and marinades, while bruising is good for soups, stews, and broths.
You can also make a paste by pounding or blending lemongrass with other ingredients, such as garlic, ginger, chilies, and cilantro.
A paste is great for adding flavor to meats, seafood, tofu, and rice. You can store fresh lemongrass in the refrigerator for up to two weeks or in the freezer for up to six months.
Dried lemongrass
Secondly, dried lemongrass is less potent than fresh lemongrass but still has a nice, lemony flavor. You can buy it in whole or sliced form or dry your lemongrass by hanging the stalks in a warm and airy place until they are brittle.
Dried lemongrass is good for making teas, infusions, and herbal blends. You can also use it to flavor soups, stews, and broths, but you must soak it in hot water for about 20 minutes before adding it to the pot.
Additionally, you can store dried lemongrass in an airtight container in a cool, dark place for up to a year.
Powdered lemongrass
Lastly, powdered lemongrass is the most convenient form of lemongrass, as it does not require any preparation. You can buy it in spice shops, Asian markets, or online.
Powdered lemongrass has a mild and sweet flavor and can be used in baking, desserts, sauces, and dressings. You can also sprinkle it over salads, soups, and stir-fries for a touch of freshness.
The shelf life of powdered lemongrass is also great. For up to six months, you can store powdered lemongrass in an airtight container in a cool and dark place.
How to Use Lemongrass in Other Things?
Apart from cooking, you can use lemongrass in many other ways. Some of the best and most popular uses of this herb are as follows:
Beautifying
You can use lemongrass to make your own beauty products, such as soap, lotion, or shampoo. You can infuse the stalks or the leaves with oil, such as coconut, olive, or almond oil.
Moreover, you can also add other ingredients, such as honey, aloe vera, or essential oils. You can use the products to cleanse, moisturize, or scent your skin and hair.
Healing
You can use lemongrass to treat various ailments, such as headaches, colds, or infections. You can inhale the steam from boiling the stalks or the leaves, or apply the oil to your temples, chest, or throat.
Additionally, you can also drink the tea, or gargle with the syrup. You can use the products to relieve pain, inflammation, or congestion.
Wrapping It Up!
If you want to know how to harvest lemongrass, I hope that this blog has been of help to you. If there are any other queries about the same, please feel free to let me know. All that you need to do is scroll down till you reach the bottom of the bottom of the page. Then leave your suggestions and comments in the box below. And I will be there to answer them all for you!
Learn More About:
Everything You Need To Know About Harvesting Basil
Asparagus 101: When, How, And How Often To Harvest?
How to Harvest Spinach the Right Way: A Step-by-Step Guide
Many things can clog a drain in a tub or sink by blocking nooks and crannies in its plumbing system. The big benefit is that there are easy ways to eliminate different clogs, and you can achieve practical results by using the solutions in this guide.
Bent Hanger
A hanger can extract hair and goo that blocks a drain in a tub or sink. To use a hanger, you'll need to take it apart so that its hook can travel down the drain. When wiggling the hook around, ensure that it doesn't push the debris down the pipe. You can avoid this problem by maneuvering the hook around in a circle before pulling it up. The rotation will help you grab debris that's lodged against the walls in the drain. Once you've removed most of the debris, eliminate the lingering particles by running the hot water.
Baking Soda and Vinegar
A baking soda and vinegar solution can get rid of a general clog. To make the solution, mix 1/3 cup of vinegar with 1/3 cup of baking soda. When the mixture fizzes, pour it down the drain so that the bubbles can dissolve sticky grime that's causing the clog. If possible, let the solution set in the drain for 24 hours. Then, flush the drain thoroughly with hot tap water.
When a drain has a heavy clog, pour the baking soda down the drain first. Then, gradually pour the vinegar into the drain. This strategy will give the solution an opportunity to activate the source of the clog.
Vacuum
A wet and dry vacuum can pull up the is that's stuck in the upper portion of a drain. The suction power is very important as it can impact how effectively a vac extracts debris, to ensure that your vacuum has an efficient motor. To use a vacuum, adjust it to the highest setting. Then, place the hose over the drain. If the debris isn't too dry or stiff, the vacuum will remove it.
Tumbling Water
When your plumbing system has a clog that's tough to access, you can remove it by pouring boiling water down a drain. If you have a kettle, you can use it to bring the water to a boil, or you can boil water in the microwave.
While the water is boiling, pour it slowly down the drain in stages, and wait a few seconds between each pour. To avoid burn injuries, hover the kettle or pot close to the drain so that the water doesn't splash.
Caustic Soda
Caustic soda contains sodium hydroxide, which is a risky substance that can produce chemical burns. As a result, you must wear dense rubber gloves and protective goggles when using caustic soda.
Because caustic soda is strong, you'll need to combine it with ¾ gallons of cold tap water. For a general clog, you'll only need three cups of soda. To mix the soda, stir it around in the water with a wooden spoon. The mixture will begin to fizz as it heats up during this process. At this point, pour the solution down the drain, and let it sit there for about half an hour. Then, use boiling water to flush the drain.
Pipe Maintenance
General maintenance is an easy way to unclog a drain underneath a sink. Begin by placing a bucket below the trap. The bucket will capture water that spills after the trap is removed. To remove the trap pipe, gradually loosen it with a plumber's wrench. While the trap is detached, lift the housing, and rotate it until the trap is upside down. The source of the clog should drop on the ground. If nothing drops, use a tool to fish out the debris.
Salt and Baking Soda
Thick blockages will break down when they're treated with strong chemicals. The easiest way to create a chemical reaction that's powerful enough to destroy heavy grime is by mixing ½ cup of baking soda with ½ cup of salt in a drain. After the solution sets for about 20 minutes, rinse it down the drain with boiling water.
Dish Detergent
Dish detergent can eliminate clogs in a toilet bowl if it's mixed with hot water. The soapy suds are effective because they strategically break down dry debris. For an average clog, you'll only need to mix ½ cup of dish soap and a cup of hot water in the bowl.
Vinegar and Baking Soda
Tubs have the toughest clogs since a lot of dirt and grime travels through the drains each day. To get rid of thick debris, you'll need to loosen the goo, and the best solution for this task is made with a combination of baking soda and vinegar. To treat a clog, pour the solution down the drain. Then, cover the drain with a stopper. At this point, let the solution set for about 45 minutes, and pull the stopper off the drain. As the water exits the tub, the pressure will get rid of the blockage that was weakened by the vinegar and baking soda.
Plunger
Plungers can get rid of a clog in the toilet bowl. When using a plunger, totally submerge it underwater. The rubber portion of the bell should touch the housing in a sink or toilet. Once you have a good grip, push and pull the handle rapidly for about 20 seconds. Then, lift the plunger, and let the water escape out of the drain.
Whenever the process of unclogging a fixture is too complicated, seek help from a professional plumber. If you want great service options, considering working with Canberra Blocked Drains Definitive Plumbing.
Read Also:
The 7 Most Common Types Of Plumbing Problems
8 Plumbing Myths Busted
4 Tips For Finishing A Basement