The Benefits Of Custom Dirtbike Graphics

Published on: 22 July 2022 Last Updated on: 19 February 2025
Dirtbike Graphics

A dirt bike is an investment. The owner wants to protect this investment while making it their own. Customizable graphics kits provide an excellent way to ensure each bike reflects the personality of the rider.

However, this is only one of several benefits of graphics kits. Find other benefits listed below. 

Checkout Five Crucial Benefits Of Custom Dirtbike Graphics:

1. Distinct Appearance

Benefits OF Dirt Bike Graphics

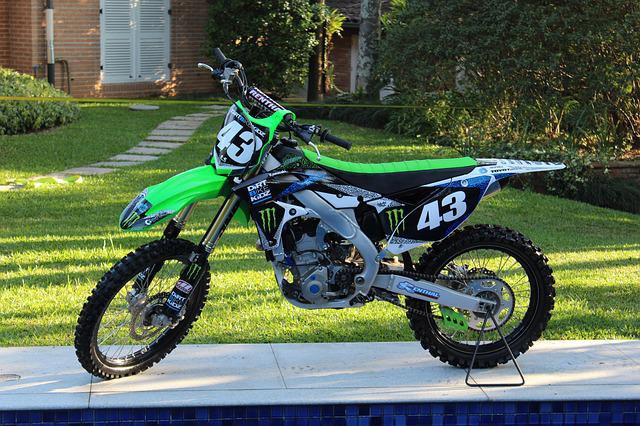
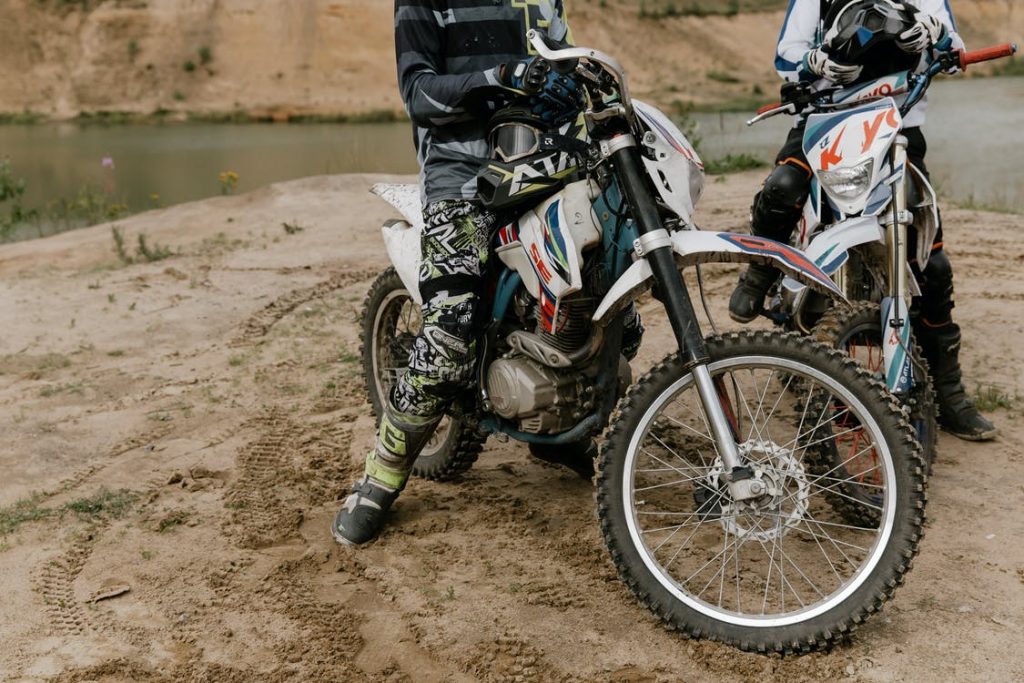
Many people choose options from Senge Graphics because they don’t want their bikes to look like the others. They want their bike to stand out in the crowd and be noticed. With many graphic packages to choose from, a person won’t find it difficult to achieve this goal.

The owner chooses the colors, patterns, and gradients. This means every rider can have a bike that is as unique as they are. 

When choosing these graphics, the rider must ensure those graphics are UV resistant. The decals only provide this visual appeal if they remain bright and glossy. Inexpensive graphics fade quickly and make the bike look old and neglected. Spend a little more to get quality graphics that last. 

2. The Right Fit

Invest In Dirt Bike Graphics

Another benefit of investing in quality graphics is they will be created to fit the specific make and model of the bike. The rider determines which parts of the bike they want to cover with graphics and purchases those pieces.

This means they can cover any damage to the bike while leaving other parts exposed. Hide rust damage and scratches, knowing the decals will cover any marks with ease. This allows the bike to look new longer and present the right image. 

3. An Affordable Option

Dirt Bike Design Collection

A person may wish to update the look of their bike without spending the money to have it painted. A graphics kit allows them to do so at an affordable price. One reason a person may choose to use graphics is they want to update their bike regularly. They don’t want to have it in the shop being repainted, as this process takes time.

Graphics can be applied in a matter of hours, making this ideal for people who like to feel as if they have a new bike every year or two. A new paint job requires multiple coats, and each coat must dry before the next one is applied. With graphics, a person applies them, allows them to cure, and begins riding again. 

4. No Commitment

Dirt Bike Design Collection

A rider might find they need to secure new sponsors. The partnership with current sponsors isn’t working out and they are ready to move on. However, the rider might hesitate to take this step because it means changing the graphics on their bike.

Doing so is easy with the help of a custom graphics kit. They won’t spend a lot of time and money updating the graphics when they make this move, which riders appreciate. It allows them to find partnerships that are beneficial for both parties. 

5. Easy to Install

apply dirtbike graphics

Anyone who can read and follow directions will find they can apply dirtbike graphics. Preparation is key to a successful job, so make certain time and effort are put into this part of the process. The manufacturer includes instructions to follow, and the rider should review these instructions, as they do vary by the product.

By following the specific instructions provided with the graphics kit, a rider finds the job is done right the first time.  Look into custom graphics kits today.

Many riders find they have ample kits to choose from for their dirt bike make and model. Customizable kits are also offered, so no rider has to do without. Learn more today to see which kit is right for your needs. 

Read Also:

Arnab is a professional blogger, having an enormous interest in writing blogs and other jones of calligraphies. In terms of his professional commitments, He carries out sharing sentient blogs.

View all posts

Leave a Reply

Your email address will not be published. Required fields are marked *

Related

TurboLogo

Create Your Logo for Free with TurboLogo

Creating a logo with Turbologo can be the best solution if you do not have any experience to create a logo. Understandably, you might think it is going to be hard to create a simple logo for your small business or even for your presentation. For common people who do not have knowledge and experience about creating a logo digitally is nearly impossible. However, you can do it by using Turbologo and it will help you to create the logo at ease. You do not need to hire an expert to make a logo that you have in mind. Turning Idea into Logo The Turbologo will give you the facilities to make the logo that you want. You basically can create the logo based on the idea that you have. It is the best application that can help you to create a logo that matches with your taste and preference. Here are some benefits that you can get by using Turbologo. It is Free! This Turbologo is free! So, if you think creating a logo will cost you a lot of money, you should think otherwise. This Turbologo proves that you can be a logo creator even if you have no skill. You do not need to hire a design graphic to create a simple logo. There is no need to spend your money on a simple logo. By using this logo generator, you will create the logo on your own. Simple and Easy to Make The Turbologo provides easy functionalities that can be accessed by people with skill and also for those who do not have the skill as a logo maker. The simple system has a user-friendly interface that will guide you to understand how to create a logo you want step by step. It is a great way to try making your logo without any difficulties especially for a basic logo with a simple design. Free Templates If you do not have time to create your logo from the first start, you can easily stroll through the library to find the templates. There are endless templates with nice designs that you can choose to create your logo. It is easy and simple to create. You can easily create your logo in just a few minutes. Templates like this will ease you to get a logo without spending too much time on a logo. It is nice to be creative and also the fact that it is free, you can start your small business without expenses. When it comes to business, you have to ensure that you don’t spend too much and focus on your income. This Turbologo also offers premium paid products if you want to have more features when needed. With Turbologo the logo creator, you can have the original idea of your logo and it is simple to do. All you need to do is just search for Turbologo and follow the step-by-step tutorial to start creating your logo. Spend some time to try turning your ideas into the logo that you want. It will worth the effort as the logo represents your business and service.

READ MOREDetails
Personalized Inflatables

Crafting Personalized Inflatables: Aligning Designs With Your Unique Taste And Preferences

Do you want an inflatable in your own personal design? That's a great choice! Or maybe you want an inflatable sign for your business. Or maybe you're looking for something more fun, like a bounce house or an inflatable slide. Whatever you need, there is a wide variety of options to choose from. And if you can't find what you're looking for on the market, you can have it custom-made. How cool is that? Two of the most defining benefits of inflatables are their versatility and customizability. Versatility, because they can be used in a variety of settings, from indoor parties to large festivals. You can use them for party decoration, amusement park rides, advertising, and many more. And customizability, because they can be made to match your vision. If you have a specific need or preference, you can simply give your designs to an inflatable manufacturer and have it done in that exact image. You can choose the size, shape, color, and design of your inflatable. The ability to customize inflatables allows you to add a personal touch and create a unique design that is not available anywhere else. In this article, we will explore the idea of crafting inflatables that reflect your unique tastes and preferences, helping you to create designs that express your individuality. Let’s dive into it. Why Personalized Inflatables? The market is already saturated with generic inflatable designs. If you go online or visit inflatable stores, you will find almost the same designs everywhere. So if you want to stand out, you need to be different from the rest. And to be different, you need to be unique. Your custom inflatable design should not be ordinary, or else you will run the risk of looking like everyone else and having no special edge. Here are some more reasons to consider crafting personalized inflatables. Uniqueness Crafting your own personalized inflatable designs helps you to get a one-of-a-kind design that nobody else will have now - and in the future. This gives you a sense of exclusivity, as you know that your inflatable is unique and that no one else has the same one. Express Your Individuality It also allows you to express your own personal style and creativity, as you can choose the colors, patterns, and design elements that you want. As a result, your inflatables become an extension of your personality. This can be particularly valuable for businesses that want to advertise their brand identity to potential customers. For instance, if they want to appear as a fun brand, they can use certain blow up inflatables or replicas of their products to mesmerize potential customers and get them hooked on it. Memorability Something that stands out is sure to be remembered. People will remember the unique inflatable that caught their eye and was different from the others. So if you want to create an inflatable that truly leaves a lasting impression on people, you should definitely consider creating a personalized inflatable. How to Craft Personalized Inflatables The process of creating your own personalized inflatables begins when you have a clear idea of what you want. It may seem like a daunting task, but don't be discouraged; the inflatable manufacturer will handle most of the heavy lifting. With the right guidance and a touch of creativity, your unique inflatable vision can come to life. Here is a simple breakdown of the process. Choose the Right Type of Inflatable Consider your specific needs and goals when choosing an inflatable. What do you need it for? Will you be using it for a business exhibition? If so, you may want to consider a product replica, inflatable signage of your business logo, or regular inflatables designed with your brand elements. The Design Concept Think creatively about your inflatable design. What message do you want to communicate, or what theme do you want to explore? You could sketch it out on paper or simply describe your ideas to an inflatable manufacturer. They will have a designer create a visual representation of your concept. Material and Size Once you are happy with the design, you can move on to choosing the material for your inflatable. PVC and nylon are the most popular choices, but you should make your decision based on your needs. Both materials have different strengths and prices. Nylon is generally stronger than PVC. So if you need something that can withstand rough handling and the test of time, nylon may be a better choice. However, keep in mind that it is more expensive. The size is also important. You need the exact size of the inflatable that meets your needs, as this will help ensure that it fits properly and is not too small or too large. Measure the dimensions of the area where you want to put them. Complete Your Order Make payment. Then wait. It usually takes a while for your inflatable designs to be manufactured. Finally, when your inflatable is ready to go, make sure to inflate it properly according to the instructions provided. Then sit back, relax, and watch as your inflatable designs come to life! Just remember to take good care of your inflatable so that it lasts as long as possible. In Conclusion If you think the world is already too full of generic designs, then personalized inflatables are the way to go. With these custom creations, you can express your individuality and capture attention like never before - whether it's for personal celebrations, marketing campaigns, or special events. Trust me, they're sure to make an impact! Read Also: Where To Display Large Halloween Inflatables: Transform Your Front Yard, School Front, And More What Type Of Inflatables Should You Opt For At Your Business Event 6 Steps to make Your Trade Show a Success

READ MOREDetails
Practices for Visual Regression Testing on Cloud

A Beginner’s Guide To Playwright Inspector

As the world continues to shift towards a more digital landscape, the significance of quality web applications has become progressively apparent. Given the vast array of tools and technologies at the disposal of web developers, determining an appropriate starting point can prove challenging. Debugging is the method of identifying and fixing bugs or errors in software. It is a vital aspect of web automation testing as it contributes significantly to the dependability and precision of the automated test results. Playwright is an open-source cross-browser testing framework released by Microsoft in 2020. As stated by Systems Sciences Institute, the expenditure of addressing an error or bug discovered after product release was 4 to 5 times higher than pinpointing it during the configuration phase. The detected value during the maintenance phase can be exceeded by up to 100 times. Playwright developers operate at the API level and offer comprehensive tooling through the integrated Playwright Inspector. Playwright Inspector is a powerful tool that authorizes developers to efficiently test and debug their web applications. Also, it facilitates creating automation scripts by furnishing auto code generation capabilities. Playwright Inspector allows you to inspect the Document Object Model (DOM) structure of a webpage, interact with web elements, and inspect CSS styles utilizing the Playwright API. It authorizes stepping through tests, picking locators, editing live locators, and seeing actionability logs. This blog will dive into the basics of Playwright Inspector and explore its many features. So if you're ready to take your web development skills to the next level, buckle up and dive into the world of Playwright Inspector. Before that, let's have a brief understanding of Playwright. What is Playwright? Developed by Microsoft, Playwright is an end-to-end open-source web testing and browser automation framework. Playwright offers outstanding cross-browser compatibility and convenient features. This makes it a perfect choice for automation and quality assurance purposes. The playwright is a flexible, robust, and efficient framework. It supports multiple languages like JavaScript, Java, Python, C#, and TypeScript. Playwright utilizes a single automation API. This makes it steadfast and quick and produces consistent outcomes while running cross-browser testing. It provides a powerful set of testing features. These features can be utilized to simulate end-user interactions with the web application. Also, the framework authorizes testing complex scenarios such as file uploads, login flows, and other interactions. These test scenarios can be tough to test with other testing frameworks. The software platform furnishes developers with a comprehensive selection of standard and personalized locators. This facilitates the straightforward and effective identification of elements on web pages. These locators can pinpoint elements based on a variety of attributes, including text content, position on the page, and other distinguishing features. With Playwright locators, developers can confidently identify elements on the DOM, ensuring the creation of substantial and steadfast test suites. What is a Playwright Inspector? Playwright Inspector is a Graphical User Interface based tool that helps testers and developers record scripts and debug Playwright tests. The tool helps generate boilerplate code. This can be a suitable starting point for building codes. Also, it assists developers and the Quality Assurance teams save time when writing the test script from scratch. Software developers can utilize the time saved to comprehensively understand the codebase and make informed modifications, as required, to enhance the efficacy of the testing suites. The Playwright Inspector simplifies the process of debugging web applications. It is a browser-based development tool that facilitates developers to inspect, debug, and troubleshoot web applications. The tool authorizes developers to record user interactions, capture screenshots, and inspect HTML elements, CSS styles, and JavaScript code. Playwright Inspector furnishes a console for developers and testers to run arbitrary JavaScript code in the context of the inspected page. To scale Playwright Inspector, an AI-powered test orchestration and test execution platform like LambdaTest offers an online farm of 3000+ browser and OS combinations to execute the Playwright test. You can effortlessly test your application as its scalable cloud infrastructure enables parallel test execution where you can run test cases altogether. It can also integrate with your existing testing infrastructure. It effortlessly plugs into your Playwright tool, eliminating the need for complex configurations. LambdaTest's Playwright Inspector  empowers you to debug and analyze Playwright scripts effortlessly. Inspect element properties, verify page behavior, and optimize automated tests using this user-friendly tool. Installation and Setup Instructions Installation and setup instructions are crucial for any software tool, and Playwright Inspector is no exception. As a beginner, it's essential to follow these instructions carefully to ensure that you can start using the tool without any issues. To install Playwright Inspector, first, you need to make sure that you have Node.js installed on your computer or laptop. Once you have Node.js, you can install Playwright Inspector through npm by running the command "npm i -g playwright-inspector" in your terminal. Upon successful installation, the tool can be initiated by executing the command "playwright-inspector" in your terminal. You can also use Playwright Inspector with other browsers like Firefox and Safari by installing the corresponding browser extensions. Following these instructions will give you a smooth and hassle-free experience of using Playwright Inspector, authorizing you to debug and troubleshoot your web applications with ease. How to Inspect Elements in Playwright Inspector If you are new to Playwright Inspector, you may be wondering how to inspect elements within your web page. Fortunately, Playwright Inspector comes equipped with a number of useful tools and features to assist you in efficiently identifying and inspecting elements on your web page. To start, simply launch Playwright Inspector and navigate to the web page you want to inspect. Once you are on the page, right-click on any element within the page and select "Inspect element" from the context menu. This will bring up the Playwright Inspector pane, where you can view the HTML and CSS code for the selected element. You can also view any associated styles and properties. From there, you can use the various tools and features within Playwright Inspector to further inspect and manipulate the element, making it easier than ever to identify and troubleshoot any issues within your web page. Benefits of Playwright Inspector The Playwright Inspector tool presents lots of benefits. Let us consider a few pivotal benefits of the Playwright Inspector: 1. Easy Debugging: Playwright Inspector facilitates the process of debugging Playwright scripts by furnishing a visual interface. This authorizes developers to inspect the page, make alterations to its state, and swiftly identify the cause of issues. 2. Record and Replay: The tool presents a record and replay feature that authorizes testers and QA teams to record end-user activities on the page and replay them for debugging purposes. The record and replay feature can help pinpoint issues that may occur only during specific user interactions. 3. Robust Logging: Playwright Inspector presents robust logging abilities that authorize testers and QA teams to outline the execution flow of the test script. This helps swiftly determine issues and fix them, thereby enhancing confidence in the code and application itself. 4. Intuitive Interface: The Playwright Inspector boasts an intuitive and user-friendly interface that is simple to navigate and operate, even for testers and QA teams who are new to the Playwright platform. 5. Cross-Browser Support: The Playwright Inspector facilitates the testing and debugging of applications across various platforms as it supports multiple Chromium-based browsers such as Chrome, Edge, and Firefox. This enables developers to ensure their applications perform optimally on different browsers. 6. Breakpoints: The Playwright Inspector tool is designed to enhance the testing process for software testers and QA teams. With this tool, users can set breakpoints in their test scripts, enabling them to pause test execution at specific points and thoroughly investigate the page's state. This increased level of control and visibility allows for improved efficiency and effectiveness in the testing process. Best Practices for Using Playwright Inspector The Playwright Inspector tool furnishes developers with an intuitive solution for testing web applications at scale. With the help of Inspector, developers and testers can debug their web automation scripts, view page elements and attributes, and pinpoint issues that may be causing the tests to fail. To make the most out of this tool, it is paramount to follow the best practices for using it. Here are eight best practices for using Playwright Inspector: ●        Familiarize yourself with the Inspector UI. ●        Utilize the search feature to swiftly pinpoint page elements. ●        Utilize the highlight feature to visually locate elements on the page. ●        Utilize the console to test JavaScript code and interact with the page. ●        Utilize the network tab to inspect network requests and responses. ●        Utilize the performance tab to pinpoint performance issues. ●        Utilize the snapshot feature to capture a snapshot of the current page state for later analysis. ●        Utilize the playback feature to replay test scripts and identify errors. By following these best practices, you can utilize Playwright Inspector to its full potential and optimize your web automation testing process. Conclusion Playwright Inspector is a powerful tool that can help developers troubleshoot issues and enhance the quality of their web applications. With its user-friendly interface and wide range of features, Playwright Inspector is a prominent addition to any developer's toolkit. By following the steps outlined in this beginner's guide, you can start utilizing Playwright Inspector today and take advantage of its many benefits. Whether you are a seasoned developer or just starting out, Playwright Inspector is a must-have tool for anyone looking to enhance their web development skills. Read Also: Mobile Testing With Appium On Lambdatest 10 Reliable Free Currency APIs For Your Business Using Tracking Code, Google Analytics Can Report On Data From Which Systems?

READ MOREDetails