How To Plan A DIY Bathroom Remodel

Published on: 13 February 2023 Last Updated on: 06 November 2024
Bathroom Remodel

A bathroom remodel can be a big project, but it can also be a fun and rewarding DIY project. If you’re looking to update your bathroom, there are a few things you need to consider before getting started. In this article, we’ll go over the steps you need to take to plan a successful DIY bathroom remodel, including what bathroom supplies you’ll need and how to budget for your project.

plan a successful DIY bathroom remodel

Determine Your Needs and Wants

Before you start buying bathroom supplies and tearing apart your bathroom, take some time to determine what you actually need and want in your new bathroom. Do you need more storage space? Do you want a spa-like shower? Do you need to add a bathroom for guests? Write down a list of what you want and need in your new bathroom to help guide your decision-making process.

Measure Your Space

Before you can start buying bathroom supplies and figuring out what you need, you need to know the dimensions of your bathroom. Measure the length and width of your bathroom, as well as the height of your ceiling. You’ll need this information to determine how much tile, paint, or other bathroom supplies you’ll need.

Create a Budget

Budgeting is one of the most important parts of any DIY project, and a bathroom remodels is no exception. Make a list of everything you want to include in your new bathroom and estimate the cost of each item. Keep in mind that you’ll also need to factor in the cost of labor, as well as any unexpected expenses that may come up during the project.

Decide on a Design

Once you have a list of what you want and need in your new bathroom, as well as a budget, you can start deciding on a design. Look at bathroom remodel ideas online and in magazines to get an idea of what you like and what you don’t like. You can also consider hiring a designer to help you create a bathroom design that meets your needs and fits your budget.

Choose Your Bathroom Supplies

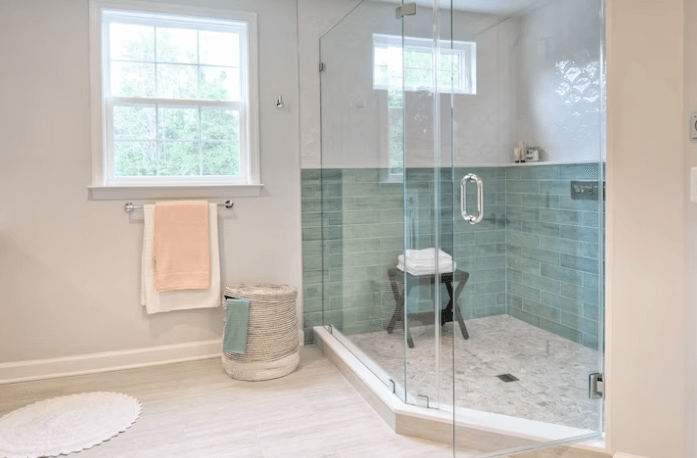
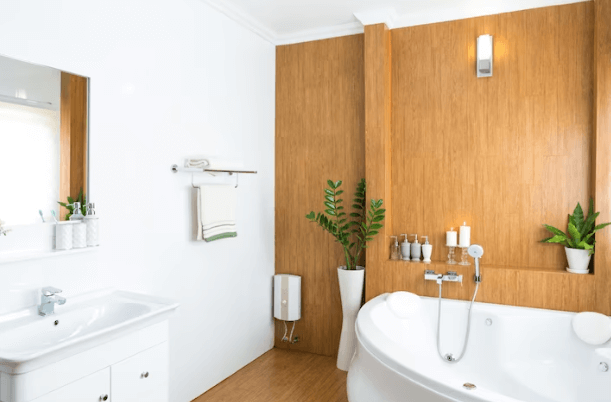
Once you have a design in place, you can start choosing your bathroom supplies. You’ll need to choose a vanity, a sink, a toilet, a shower or bathtub, and any other items you want to include in your bathroom. Make sure you choose bathroom supplies that fit your budget and the design you’ve chosen for your bathroom.

Plan Your Timeline

Once you’ve chosen your bathroom supplies, it’s time to plan your timeline. Decide how long you want to take to complete your bathroom remodel and create a schedule that fits your timeline. Make sure you factor in time for unexpected events, such as rain or illness, that may delay your project.

Start Your Remodel

Now that you have a plan in place, it’s time to start your DIY bathroom remodel. Start by removing any old bathroom fixtures and preparing the space for your new bathroom supplies. Make sure you have all the tools you need and take your time to ensure a successful outcome.

A DIY bathroom remodel can be a big project, but with a little planning, you can create a beautiful new bathroom that fits your needs and budget. By following these steps, you’ll be on your way to a successful DIY bathroom remodel in no time.

In conclusion, planning a DIY bathroom remodel requires careful consideration and preparation. From determining your budget and creating a design plan to obtaining necessary permits and selecting materials, each step of the process is crucial to ensuring a successful outcome.

By following these tips, you can create a beautiful and functional bathroom space that meets your needs and exceeds your expectations. With careful planning and attention to detail, you can complete a DIY bathroom remodel with confidence and ease.

Additional:

Content Rally wrapped around an online publication where you can publish your own intellectuals. It is a publishing platform designed to make great stories by content creators. This is your era, your place to be online. So come forward share your views, thoughts and ideas via Content Rally.

View all posts

Leave a Reply

Your email address will not be published. Required fields are marked *

Related

plumber moreno valley

Moreno Valley Plumbing Pros: Your Reliable Plumbing Experts

Having a reliable plumbing system is crucial for a comfortable and healthy home. Yet, plumbing issues often strike unexpectedly, causing stress and inconvenience. In such scenarios, A plumber in Moreno Valley is your dependable solution for all plumbing needs. With expertise and dedication, experts ensure your plumbing functions seamlessly, alleviating the worry of potential problems. In this blog, we delve into the benefits of entrusting your plumbing needs to professionals for residential plumbing services in Moreno Valley. And will decode why they are your trusted partner in maintaining a smooth-running plumbing system. The Importance Of Reliable Plumbers In Moreno Valley You may be surprised to know that a tap can waste up to 3,000 gallons of water in one year. It is enough to fill a small swimming pool! Furthermore, the study and observations conducted by the Environmental Protection Agency (EPA) show that wrong plumbing upkeep can cause issues like sewage backups. These troubles can bring several risks and cause widespread damage to your property. Consequently, you may have to spend thousands of dollars on upkeep. Moreover, another study by the American Water Works Association (AWWA) estimates that an ordinary household persistently leaks 10 gallons per day, aggregating to a whopping 3650 gallons of wastewater annually. How Expert Plumbers In Moreno Valley Deliver Exceptional Service? An expert emergency plumber in Moreno Valley has the experience to diagnose the root cause of the issues and eliminate them swiftly. Consequently, it minimizes the disruption to your home. And… congrats! You save lots of dollars by keeping costs down. However, they provide you with long-term recommendations. Ultimately, it can help you prevent future issues, saving you dollars on repairs. For example, a professional plumber might suggest replacing an old, inefficient water heater with a new one. This energy-saving model may lead to significant savings on utility bills. 1. Clear Communication:  First, he expert plumber in Moreno Valley begins by learning about your problems. They discuss your plumbing issue and provide a transparent estimate before beginning work. 2. Prompt And Reliable Service:  Secondly, the plumber at Moreno Valley values your time. Moreover, they arrive on time and are ready to tackle any plumbing challenges because they are well-equipped… this is their added advantage. Furthermore, they also provide an emergency plumber in Moreno Valley. 3. Professional And Courteous Technicians:  They usually have highly trained experienced and capable employees, respectful of your home, and maintain a clean work environment. However, good behavior is key to offering any services. 4. Guaranteed Quality Workmanship: They stand behind their work and take full control and authority over it. Ultimately, they offer a warranty on all repairs and installations for peace of mind. 5. Cutting-Edge Technology:  The Plumber Moreno Valley uses advanced tools like electronic leak detectors, video inspection cameras, and hydrojetting machines. Moreover, they use some other specialized plumbing software to understand the problems to the core. Thereafter they deliver the most efficient solutions. 6. Expertise You Can Trust:  Moreover, the plumber in Moreno Valley has the necessary accreditations. This means they have undergone rigorous training and extracted adequate experience in handling various plumbing issues. However, notable examples include leak detection and repair, drain cleaning, and replacement or Toilet Installation in Moreno Valley. However, some other notable examples include water heater installation and maintenance, fixture installation, and gas line repairs. Technology At The Forefront In plumbing services, the involvement of high-end technology and state-of-the-art tools is key to accurately diagnosing real issues. Based on them, the expert's services offer the most efficient solution. Here's how it works: Video Inspection Cameras:  These high-tech cameras allow the plumbers to see the real issues inside the pipes. They're used to pinpoint leaks and clogs accurately. However, based on these, they take measures. Ultimately, this helps the professionals in detecting pipe leak repair in Moreno Valley. Electronic Leak Detectors:  These tools help detect latent issues swiftly, minimizing property damage. Additionally, the plumber more valley uses sophisticated gadgets that make leak location a breeze and ease the work. Hydro Jetting Machines:  These powerful machines can help clear even the toughest sedimentation of clogs from drains and sewer lines. However, with these machines, the experts push air by using high-pressure water jets. It is touted as the long-lasting solution to stubborn blockages. Plumbing Software:  Plumbers use specialized software to track inventory and manage appointments. Additionally, they ensure efficient service delivery. This technology streamlines operations and enhances customer service. Furthermore, this new technology group makes residential plumbing services in Moreno Valley more efficient and convenient. In addition to it , the team comprises licensed and insured plumbers with extensive experience and training. They handle various plumbing issues, such as: Leak Detection And Repair:  The plumber in Moreno Valley uses the most advanced tools and techniques to pinpoint and fix leaks. It helps reduce damage to water and drain cleaning in Moreno Valley. Toilet Repair And Replacement:  Whether fixing a running toilet or other activities like installing a new low-flow model, the use of new technology ensures efficiency in toiled function. Ultimately, it helps save money on water bills. Water Heater Installation And Maintenance: Regular maintenance by qualified plumbers like the plumber in Moreno Valley extends the lifespan of water heaters. As a result, it saves them from costly breakdowns. In addition, they also offer guidance on the best water heater models that serve individual needs and water heater repair in Moreno Valley. Fixture Installation:  Professional plumbers ensure the correct installation of new fixtures. Moreover, they are highly trained in bathroom remodeling or replacing worn-out faucets. Finally, it ensures flawless functionality. Drain Cleaning And Unclogging:  From mechanical snakes to hydrojetting, they use different mechanisms to clear clogged drains effectively. Ultimately, it ensures lasting results after drain cleaning in Moreno Valley without harming pipes. Gas Line Repairs:  These are handled with the utmost care and precision. However, the clients get safety from licensed plumbers and adhere to the strictest of protocols to prevent hazards. Finally, combining expertise with the most hi-tech machinery tools and technology, the plumbing service provides trustworthy solutions while reducing property inconvenience and damage. Benefits of Hiring Professional Plumbers While a quick YouTube tutorial might make a DIY plumbing project seem simple, the reality is that there's a high risk of making costly mistakes. However, here's how professional plumbers can save you time, money, and frustration: Avoid Costly Mistakes Studies show that 7 out of 10 DIY plumbing attempts result in needing to call a professional plumber in Moreno Valley to fix the problem. And often at a higher cost than if they had called a plumber in the first place. However, some of the most common DIY mistakes include: Using The Wrong Parts Or Materials Plumbing parts come in various sizes and specifications. Mismatched parts can lead to leaks, breaks, and further complications. Misdiagnosing The Problem A dripping faucet might seem like a simple fix, but it could be a symptom of a more significant issue like worn-out pipes or low water pressure. However, a professional plumber can diagnose the root cause of the problem and recommend the most effective solution. Causing Further Damage To Pipes Or Fixtures Improper techniques or tools can easily damage pipes and fixtures, leading to more extensive and expensive repairs. Complexities Best Left to the Pros Some plumbing problems are simply beyond the scope of a DIY project. For instance: Slab leaks: These leaks occur beneath the concrete foundation of your home and require specialized equipment and expertise to locate and repair. Even a tiny slab leak can cause extensive damage to your foundation and need significant repairs. Sewer line clogs: These stubborn clogs often necessitate powerful hydrojetting machines. Moreover, the work involves the use of video inspection cameras to diagnose and clear the blockage. However, improper attempts to fix a sewer line clog can lead to raw sewage backups in your home, posing severe health risks and causing an even bigger mess. Gas line repairs: Working with gas lines is extremely dangerous and should only be attempted by licensed and qualified plumbers. A gas leak can lead to explosions and fires, putting your entire home and family at risk. Conclusion Please don't gamble with DIY projects regarding your home's plumbing system. Moreno Valley Plumbing Pros are your reliable partners, offering expertise, experience, and the tools to get the job done right – the first time. The expert plumber in Moreno Valley takes pride in providing exceptional service at competitive rates. For years, the experts have been committed to providing excellent service and ensuring your plumbing system functions smoothly and efficiently. Don't let plumbing problems disrupt your life. Contact your nearby residential plumbing services in Moreno Valley to book a consultation and experience working with a reliable and professional team. Read Also: Your Ultimate Guide To Buying Plumbing Products Online Trusted Local Solutions: Insights On Balmain Plumbing 10 Plumbing Myths Debunked

READ MOREDetails
Luxury Hotel

6 Upgrades to Make Your Bedroom Seem Like a Luxury Hotel

Most people love the luxury hotel experience. The bed is large and comfortable, the robes are ultra soft and the toiletries smell like a dream. With just a few days to indulge in all the comforts, you may not even get to try all the features of the shower or tub. When you return to your regular digs, you find yourself missing the hotel experience. But what if you could recreate the luxury experience at home? Read on for six tips on how to do so. 6 Upgrades to Make Your Bedroom Seem Like a Luxury Hotel Source Egyptian Cotton Bed Linens: You may want to start with the bed. Look for genuine Egyptian long staple cotton bedsheets and duvet covers to make sinking into bed feel like a dream. Get a thread count of 300 or more and a breathable cotton duvet for the ultimate in softness. Stick to white linens to really recreate the hotel look. Luxury hotels know crisp whites convey a feeling of freshness and cleanliness so you would do well to follow their lead. Purchase a Hotel Grade Mattress: If you want to go all in, get a new mattress. Many hotels actually get their mattresses made exclusively for them so it’s not your imagination – they really do feel more comfortable. With mattresses, you will almost certainly get a high-quality one if you are willing to pay more. With a little research, you may also be able to get an actual hotel bed. For example, Fairmont Hotels and Resorts sells its Sealy mattresses. Choosing the right mattress can make a huge difference in the quality of your sleep. Get Cozy Lighting: Luxury hotels know how to use the right lighting to create a cozy atmosphere. Swap your bright lights for lamps and sconces with low-wattage, warm bulbs. Not only does this instantly relax you but it puts you in the mood to sleep. Of course, there will be times when you need brighter lights in your bedroom. Try to install the right balance of ambient, task and accent lighting to keep things practical. Add Some Nice Touches to Your Bedside Table: It’s easy for the bedside table to become cluttered with to-do lists and receipts. However, hotels are known for their clutter-free surfaces. Pare down to the bare essentials and a couple personalized items. You may need a lamp, an alarm clock, and a décor item. This can a photo of your partner or family, a small piece of artwork or a vase of fresh flowers. You can also opt for a beautifully scented candle or a gratitude journal or devotional. You can add a small luxurious hand cream as well so you can use it as part of your bedtime ritual. Give Your Feet A Treat with Fluffy Rugs: This is a small touch but it can make a lot of difference. When you get out of bed in the morning, your feet will feel like they are enveloped in a soft cloud. If you can’t make large-scale changes to your bedroom just yet, a plush rug can make a big difference in the interim. Consider placing small sheepskin rugs at each side of your bed. Your bare feet will thank you, especially during the colder months. Invest in Luxe Bathrobes: Some hotels sell their soft fluffy bathrobes since guests often love them so much that they try to take them. If you have a favorite hotel, check to see if they can send you one. Otherwise, search your local home store or online for a hotel or spa-quality bathrobe. It may be a splurge but it can help you to keep that luxurious holiday feeling going for a little bit longer. You may not live in the lap of luxury but with a few choice purchases, you can make your bedroom much comfier. If you’re craving the hotel experience, take our advice and get started on some of these upgrades. Read Also: How To Make Your Home Look Like A Splendid Hotel? Preparing To Stay In A Luxury Apartment On A Vacation

READ MOREDetails
Drywall

Elevate Your Home With Unique Ceiling Textures

Drywalls are those construction materials that are used to create walls and ceilings in your home. Not all that, but drywalls also come in handy if you want to create design features like eaves, arches, or any mind-blowing architectural requirements!!! Do you know the best part about drywalls? These are super easy to install, highly durable, and only require simple repairs when damaged. So, drywall is a flat component composed of calcium sulfate dihydrate, typically between thick sheets of backer paper, and facer, used to construct interior ceilings. Let’s talk about the ceiling textures and the drywall options you can choose for your home!!! The Ceiling Textures And Your Drywall Options Decorating your home can be a real challenge for many !!! Therefore, choosing the right drywall finish or texture can prove to be a hard nut to crack. And it’s very natural to get in a state of indecision if you are handpicking it for your new home or renovation project. There are so many options that it feels like you are “searching for a pearl in an ocean.” Making up your mind about whether or not to go texturing your ceiling can be a tough job. And even if you choose to texture your ceilings, there are chances you’ll be confused about which one to go for!!!! And remember, getting the drywall right is the first step of tiling projects?”. But No Need to Worry!! This article will guide you in choosing the perfect texture and drywall option for your ceilings to look more elegant than ever!! 1. Sheetrock Texture: Old Is Gold Sheetrock ceiling texture is a drywall ceiling texture that has been famous since 1917. The reason this drywall texture is so awesomely renowned is because of the artistic look that it gives to your ceiling And the best part is you don’t need to use any sort of spray paint in this case. You can achieve this texture by using your artistic hand technique and without using any special brushes. This texture is perfect for any room. There are no restrictions on the use of this ceiling texture. 2. Stipple Brush Texture: A Test Of Your Skill This texture is not as easy as it seems. You need skills to create this texture. To create this texture, you need a roller and slap brush. The fascinating fact about this texture is it can cover the bumps and holes on your ceiling. And if you have the skills, then this texture can surely make your ceiling look gorgeous than ever!! 3. Swirl Texture: Creativity Taken To A New Level To achieve this texture, you need either a roller or sprayer. You can also do this by using a technique called “the basic swirl” method. But one thing that you need to keep in mind is while creating this texture, you’ll need a lot of patience to get the best result. And the difficult part is you need to create the pattern before the mud dries. So, make sure to have a helping hand by your side. Overall, the texture can really give that awesome look on your ceilings if you do it in the right way!!! 4. Orange Peel Texture: A Color Of Choice The name suggests all the colors of orange skin, but sometimes it’s also called “an eggshell” ceiling texture. If you really love this color, then this can be on the top of your favorite lists. To create this texture, you need to apply thin mud to the ceiling using a spray gun set at very high pressure. The more artistic mind you have, the more artistic look it has got!!!! 5. Smooth Textures: Choice Of Many If you are someone who wants the best at a cheap cost, then this texture is just the right choice for you. Moreover, you don’t need to have many skills to create this texture design. The look of this texture is just mind-blowing, and if you are someone who likes things to be consistently gorgeous, then this is the texture you can have for your ceiling. This texture is effortless to remove and is also perfectly suited for any room. 6. Tree Bark Texture: Beauty Of Nature If you are someone who loves nature and wants to bring the reflection of nature inside your home, then this textured style is just the option you can have. This ceiling has the look of a tree. You can create this texture just by using a heavy roller. The texture might look simply, but it’s very artistic and can surely catch the eyes of many. If you have a farmhouse, then this texture will double the beauty!!!!! 7. Slap Brush Texture: Slap The Beauty Out Artistic, gorgeous, beautiful, and elegant are the nicknames you can give to this texture. A complete package of beauty!!!! To get this texture, you’ll need a brush with very stiff bristles and thin mud. Firstly, you have to cover your ceiling with mud using a roller, then take the brush and slap the ceiling from the edge. This can be a hard nut to crack because if you don’t get it right on the first shot, the whole ceiling might end up looking messy. 8. Popcorn Texture: Cottage Cheese This texture, also known as the “cottage cheese” or “acoustic” ceiling texture, is probably one of the most famous ceiling textures ever!!! If you look closely, you’ll see it’s kind of a look-alike of “popcorn.” That’s why it’s called “popcorn texture.” To achieve the correct texture, you need to use a sprayer to apply to your ceiling. This contains Styrofoam with mud which gives that puffy effect. But it will require you to have a lot of skill to achieve this effect. That’s because the “popcorn texture” is both challenging to apply and remove. I hope this article will help you to know about the needs of ceiling textures and drywall options. And now I believe you’ll be able to get yourself the perfect texture for your ceilings. How Can I Remove Old Ceiling Textures Safely? Removing old ceiling textures can be a big job, but it doesn’t have to be intimidating! If you want to update your ceiling and get rid of that outdated texture, I’m here to help. No matter if you have popcorn, stipple, or another type of texture, this process takes a little bit of care, but don’t worry! Here’s a step-by-step guide on how to remove an old ceiling texture without breaking your back or the bank. Step 1: Test For Asbestos Before you get out any tools…safety first!  Remember, many older ceilings (especially those with popcorn texture installed prior to 1980) contain asbestos. Before doing anything else, have your ceiling tested for asbestos. You can hire a pro to test the ceiling or buy a self-test kit. If asbestos is present, halt all work and consult pros immediately. Asbestos removal is not a do-it-yourself job because it poses serious health risks if mishandled. Step 2: Clear The Room If there’s no asbestos present, it’s time to get the room ready. Cover all the furniture. You’d be amazed at how far a fine mist of water, compound, and paint can travel! Also, plastic should be removed from the floors, and tape should be around any ceiling fans or lights that are not being removed. I can personally tell you we didn’t do this. We found dried white dust on our bedspread when we were stripping the wallpaper in our bedroom, and we had to clean up all the residual dust a little too late. It was wild! Step 3: Soften The Texture For Better Finish Here’s where the fun starts! To make that texture easier to remove, you’ll need to soften it. Fill a spray bottle with warm water and mist the ceiling. You don’t want to drench it. If you put too much water on the ceiling, it could end up damaging the drywall underneath. Allow the water to sit for about 15–20 minutes or so, giving it time to penetrate and loosen up that texture material. Don’t rush this step. It’ll only cause more work for you in the long run. Step 4: Clean Your Work Grab a wide putty knife or scraper and start scraping off the texture. Do small sections at a time, and scrape at a shallow angle so that you don’t gouge the drywall underneath. If it’s not coming off well, spray some more with the water bottle and let it sit for a little longer. This step can be kind of messy and time-consuming, but have patience because, in the end, you will have a nice smooth ceiling. Step 5: Patch & Sand Once the texture is gone, you may notice a few dings or dents in the ceiling. Don’t worry! Just fill them with some joint compound, sand it smooth, wipe away any dust and you’re ready for a new ceiling. And that’s it! A fresh, smooth ceiling in no time! Read Also: Here’s How to Turn Your Garage into a Bedroom on a Budget! Turn your attic into a living space

READ MOREDetails