Make Your Shapewear Last: A Guide To Caring For Your Shapewear

Published on: 12 April 2023 Last Updated on: 30 October 2024
shapewear

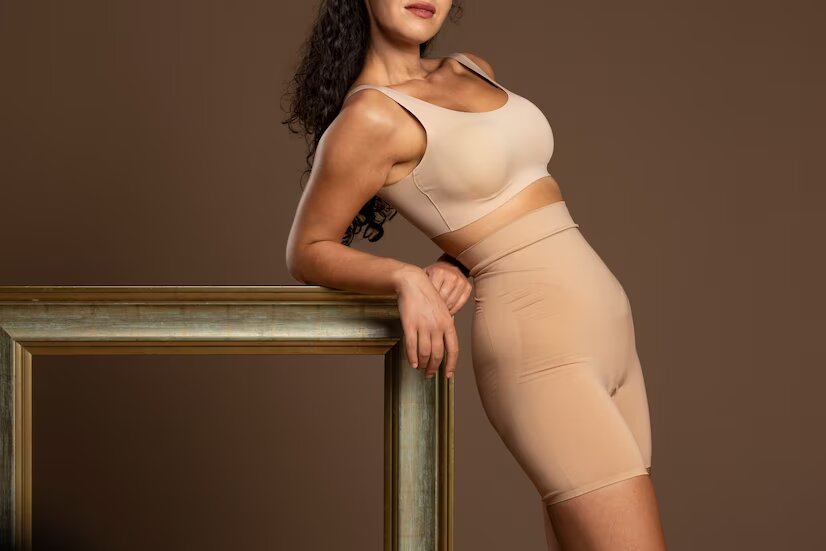
Shapewear from SheBird is a great way to enhance your curves and look your best in your favorite outfits. It can provide your outfit with a smooth, figure-hugging silhouette while also helping to sculpt and lift the body’s natural curves to create a sleek silhouette. To get the most out of your shapewear, it’s essential to take good care of it so it can last for a long time. Follow this guide for tips on how you can make sure your shapewear lasts as long as possible.

Washing Your Shapewear

When it comes to washing your shapewear, the key is to be gentle. You want to avoid damaging the fabric or stretching out the garment. Hand washing is the best option, but if you must use a washing machine, make sure to put your shapewear in a lingerie bag and use the delicate cycle.

Use gentle detergents specifically designed for delicate fabrics. Avoid harsh chemicals like bleach or chlorine and fabric softeners that could damage the fibers of your garment and weaken the elastic, making them less effective over time.

Drying Your Shapewear

After washing, air-dry your piece until completely dry. It’s important to let your shapewear air dry to avoid damaging the fabric or causing the elastic to lose its shape. Avoid putting your shapewear in the dryer, as the heat can cause shrinkage and damage the fabric.

Storing Your Shapewear

Storing your shapewear correctly is critical to making sure it lasts. The best way to store your shapewear is on a hanger or folded neatly in drawers that fit its size correctly. Never stuff it into small spaces where it may stretch out or become misshapen over time. Avoid hanging your shapewear in direct sunlight or a damp area, as this can damage the fabric and cause it to lose its shape.

If you want to keep colors vibrant, avoid storing different colors next to one another, as colors can bleed onto each other during storage, which can cause permanent damage to the piece.

Choosing The Right Size

One of the most important things you can do to ensure your shapewear lasts is to choose the right size. If your shapewear is too small, it can stretch out the fabric and cause the elastic to lose its shape. It won’t provide the necessary support if it’s too big and may not stay in place. Check the sizing chart and measure yourself before purchasing shapewear.

Rotating Your Shapewear

Rotating your shapewear is a great way to make sure it lasts longer. Wearing different pieces on different days gives each piece a chance to rest and recover its shape. This rotation is especially important for shapewear designed to be very tight or compressive.

Wrap Up

Caring for your shapewear is essential to making it last as long as possible. Remember to be gentle when washing, air dry your shapewear, store it properly, choose the right size, and rotate it to prolong its life. By following these tips, you can keep your shapewear in great shape for longer than expected and continue to look and feel your best.

Read Also:

Abdul Aziz Mondol is a professional blogger who is having a colossal interest in writing blogs and other jones of calligraphies. In terms of his professional commitments, he loves to share content related to business, finance, technology, and the gaming niche.

View all posts

Leave a Reply

Your email address will not be published. Required fields are marked *

Related

what is builder gel

What Is This Magic Product Salons Are Using? What is Builder Gel?

What is builder gel? It could be your whole personality right now. I mean, that’s the prime function of beauty, though. Most importantly, it can change your nails big time. I just felt everyone should get to know more about it. So, here I am with the details!  Firstly, it is a magic product, no doubt. Most licensed nail teachers and professional salon experts say this viscose polish strengthens your nails. The nails can grow without breaking. In technical terms, we call this- building your apex. Some refer to builder gel extensions as adding structure or creating structured overlays.  What is an apex? You now know what builder gel is. But what is an apex? In the terminology of nail care, the apex is the highest point of nail extensions. It is added to your nail to give it strength and balance it simultaneously.  To understand an apex better, you can think of it as the arch or dream curve of the nail. It is the thickest segment of your nail and the most challenging part of your nail palette. Once you get the apex right, you can pull off any of the nail designs 2024. How Do You Apply Builder Gel? Don't confuse it with the application of nail polish. Firstly, we apply nail polish in vertical strokes. However, builder gel is much more viscose. Hence, we use horizontal strokes while applying it.  As a result, the policy expands across the whole nail. There are three types of builder gel. These are hard, medium, and soft gels. If you’re using the hard gel, then use a separate brush for the same.  Let's clarify another confusion here. Some builder gels need you to apply a base coat first and then apply the gel on the top. However, builder gels manufactured by brands like Halo need nothing.  Once applied correctly, the hard gel helps you keep your manicure safe for a long span. However, some experts say using a rubber-based base coat is always better. It helps you to achieve the correct adhesion and take good care of your nails.  Why does builder gel lift? There are many reasons why the builder gel coating can lift from the nail top. Firstly, you must know that it is not as flexible as the natural nail. Therefore, the gel coat may lift at any time. The same may happen when you don’t apply a base coat to make the natural nail more adhesive.  Generally, we call the lifting of gel- “pocket lifting.” The center of the enhanced nail lifts away from your natural nail. Well, we understand that the builder gel coat may ward off any time.  But we apply it to give our nails strength, shape, and safety. So, we must know why the nail coating comes off. Otherwise, our builder gel treatments would be in vain. Here are some of the main reasons I’ve noticed over the years:  Inaccurate nail preparation You can’t achieve proper adhesion if you don’t remove your ail cuticle debris; moreover, not buffing the surface properly leads to the same outcome. Therefore, I suggest using a hydrator properly and avoiding such outcomes especially if you’re into French manicure acrylic nail ideas. Imperfect application I’ve always suggested visiting experienced nail experts. They know the proper application techniques. Frail treatments like builder gel applications may go wrong if you don’t know the accurate application technique.  However, the exact flaws that amateurs make are not properly curing the portions between the layers. The process takes time and patience.  Poor products  Are you using cheap or non-compatible gel primer? Even poor topcoats can also cause poor adhesion. Hence, the builder gel coat can be lifted easily.  Quality of natural nails  Often, your nails are naturally damaged. Some of the people have fragile natural nail layers. In that case, the nail additions can easily ward off. So, you must apply a good hard gel and a base coat of the right consistency. The same is also important for ombre nail designs 2024. Poor Curing Quality Did you use weak UV to cure the gel? It may be one reason your builder gel came off before time. When you don’t apply the UV for long, it makes the polymerization process weaker. As a result, it leads to easy lifting.  Benefits of Using Builder Gel There are many benefits to using builder gels. By now, you know what builder gel is and its uses. Now, it is time to find out what are the most expected benefits of the builder gel application: a. strengthening natural nails if your nails are skinny and weak  b. The nails can grow long, giving your fingers a premium finish  c. The thickness of your nails also improves when you apply a builder gel finish  d. Lastly, the builder gel nails become more durable. It can resist weathering, especially during severe winters.  Builder gels make your nails chip-resistant and much longer lasting. However, you have to make the application right. Remember the tricks I mentioned, and you can enjoy builder gel nails for a long time.  Application Process The application process is easy. It suits even beginners well. I suggest just following the steps below and having a safe and durable coat of builder gel. Start with preparing your nails for application. Do that by cleaning your nails and removing any existing polish or debris. After that, you have to do your nail buffing clinically.  Start with buffing the surface gently. After that, ensure you’ve achieved the right rough texture to help the gel sediment on your nails.  Thirdly, you have to apply builder gel. This is the most critical stop that we were all looking for. First, use only a thin layer of gel on each nail.  Remember, the gel is much thicker than regular nail paint or nail polish. So, don’t use the builder gel in very high concentrations. At the same time, know about the proper application strokes.  When you apply builder gel, the strokes go horizontally. However, the nail polish strokes are vertical. Lastly, use a sculpting form to extend it evenly across the edges, too.  Done the primary step? Now, think about increasing the life of your builder gel nails. You must cure your nails with a UV/LED lamp. It will harden the builder gel layer. To finish off, cover the tips of your nails with a short nail polish layer.  Always remember you must use a clean brush to remove the remains of the polishes applied beforehand. There might be small traces of polish inside the cuticles. Or on the sidewalls. So, use the brush well. Clean up and then layer the builder gel.  Maintenance and Removal Maintaining a builder gel is not challenging. Shrug off the terrors experts may be giving you. You can now easily keep your builder gel nails with some simple tricks:  1. don’t use any harsh chemicals on the nails.  2. Most importantly, don’t soak your nails in water for a prolonged time. It is enough to ward off adhesion. At least avoid doing that for the first 3 days after application.  3. Don’t forget cuticle oil. You must regularly apply cuticle oil to keep the nails hydrated for a long time. In the meantime, the same also keeps your nails healthy. At the same time, cuticle oil can help avoid hangnails or dry and choppy nails. Most importantly, it helps you to avoid cracked cuticles, too.  The removal of the builder gel coat is equally easy. Just soak the nails in an acetone remover. However, you can also remove the layer manually with a nail file and a cuticle pusher. This is, in fact, a gentler method. Hence it helps you to keep the health of your natural nails intact. Read Also: Fashion Style Every Modern Woman Must Know Types of Fashion Designing Courses You Should Know

READ MOREDetails
slider-img

DIY: How to clean a leather handbag

Keep your leather looking new by cleaning it right When it comes to leather, one thing is universal and that is that over time it fades and loses its luster. Regardless of whether you spend thousands on a handbag at a top retailer or $10 at the local mega super store, the leather will eventually need to be cleaned and revitalized. Of course, the quality of leather that was used in the construction of the handbag plays a great deal into the longevity of the leather before reconditioning is needed (personally I believe that a leather artisan is the best place to get a handbag). When the time comes to re-condition your leather handbag, ensure that you do it properly. Here are a few steps to ensure that your leather stays vibrant and has that new product smell. Step One: Clean out the wallet It may sound a bit redundant, but I have known several people who have tried to use cleaner and conditioner on a bag full of junk. First, remove the contents. You have to keep in mind that whatever you have in the bag will have an impact on the shape of the leather as well as on how the bag rests. Besides that, it is just common sense that the contents can get damaged or ruined from the cleaning solutions. Step Two: Pick a cleaner and conditioner that matches your leather Not all cleaners and conditioners are the same. There are some which are intended for black leather, some for alligator skin, some for cowhide, sheepskin, etc. This is vital to ensuring that you do not over-saturate or add too much acidity and chemicals to the leather. For example, the chemicals in a leather conditioner for cowhide will be greater than sheepskin due to the thickness of the skin. Applying a cowhide leather cleaner to sheep’s skin could cause the leather to rip and tear or for the leather to become “burned”. If you have any questions or concerns about which leather cleaner to use ask your local leather artisan. Step Three: Clean the leather like you would your hair By this I mean start with the cleaner. Using a soft cloth which has no abrasive fibers apply a small amount of the cleaner to the cloth. Do not apply the solution directly to the leather. Apply the cleaner in soft circles until you have covered the surface of the handbag. At this point, the leather will probably have a dull and matt aesthetic to it. Do not worry, this is normal. Most cleaners require you to buff or clean off the cleaner. Let the cleaner sit for a little while to work into the leather. Typically, I wait 30 minutes or so to allow for the cleaner to get down into the pores of the skin. After an ample amount of time has passed, use a separate cloth to buff off the cleaner. It should have a slight shine now. Step Four: Apply Conditioner When you have finished cleaning the leather, do not jump straight to the conditioner. Look at the leather handbag and ensure that all areas have been cleaned. If you notice any imperfections on the leather, apply another coat of cleaner. Once you are satisfied with the overall look and want to get that new leather shine, then add the conditioner. Depending on the brand that you choose, the conditioner may require you to apply it with a soft cloth, or you may be able to spray it on and work it into the leather. Just keep in mind to apply the conditioner evenly. The conditioner of leathers typically does not require that you remove it once it is applied (no need to buff). Again, it depends on the leather, the cleaner and conditioner, and the age of the bag. Step Five: Let it dry When you take a shower, you dry off before you put clothes on. Why? Because you do not want to get your clothes wet. In the same way, you should give the bag an ample amount of time to dry before you add anything back into it. This will prevent any of the leather polish, cleaner, or conditioner from coming off on the contents. Again, if you feel uncomfortable in cleaning your leather handbag or if you have questions on how to properly apply leather cleaner and conditioners to your handbag, go and see your local leather artisan. Most artisans offer leather cleaning services should you not have the materials or the patience to clean your bag properly. Read More: Home Hacks: Stuff You Can Clean In One Hour Or Less How To Choose Best Brush For Your Cat How To Salvage Your Furniture After A Flood Tackle Your Shredding This Family Day

READ MOREDetails
Outfit Stand Out

6 Secrets to Make Any Outfit Stand Out

Have you ever noticed how some people just seem to look great no matter what they wear? And even things you and I would toss aside seem to match and work well with their wardrobe. What sorcery is this? And how do I make my clothes stand out like that? The truth is, there isn’t really a “secret” to making your outfit stand out. Instead, there are some tips and tricks that Fashionistas use to make even the most basic clothes look more stylish and fun. The even better news is that those tips and tricks aren’t that hard to decipher. In fact, we’ve got the low down and we are passing it on to you right now! Secrets to Make Any Outfit Stand Out Again, these aren’t as many secrets as they are tried-and-true tips for making your style shine. At the heart of every tip is this one element – accessories. That’s right. The key to making your outfits stand out is accessorizing them just right. Want to accessorize your wardrobe like a pro? Keep reading to find out how to accessorize like the fashionista you really are! 1. Wear big earrings to dress up a casual outfit Big earrings draw attention to your face and can add a pop of color, metal, or glamour to even the most casual outfit. Choose earrings that complement your hairstyle. Chunky studs are great for shorter hairstyles. Meanwhile, longer or curly hairstyles may need some serious statement earrings to draw attention. 2. Join the layered necklace trend   Layered necklaces are hot right now. The hottest styles combine various lengths, sizes, and styles. Two or three-layered necklaces can really make your outfit stand out. Just be careful not to layer too many together. You don’t want to look like you just stepped off Bourbon St. during Mardi Gras. 3. Play with proportion A great way to really make your style stand out is to play with proportion. If your outfit has a lot of volumes or is pattern-heavy, scale down on the accessories a bit. But if your outfit is sleek, neutral, or form-fitting, some bold jewelry and a sexy handbag can make a big impact. The more basic your outfit is, the more room you have to be creative and bold. 4. Try layering bracelets Layered necklaces aren’t the only layering trend hot right now. Layered bracelets are also a hot accessory. Mix and match colors and patterns and wear a bunch of them on one arm to jazz up any outfit. The right mix of bracelets can be casual enough for everyday wear, but can easily be glammed up with the addition of metals or gemstones. 5. Add a belt to your look Belts were a hot trend last fall, and it’s looking like the trend is sticking around. A wide belt is a great accessory over a flowy dress. A brightly-colored belt paired with neutral tones can add a pop of color and help accentuate your waist. 6. Mix up the materials Some people would argue this point, but it really is okay to mix up materials when you are accessorizing. Mixing up your jewelry materials – especially layers – can really create a vintage, classy vibe. Don’t be afraid to mix and match and experiment with the accessories you have, and those you plan to have in the future. Putting it All Together Now you know the secrets to make any outfit stand out. You no longer need to live in fear that your outfit isn’t bold or creative enough. Just use your imagination and stay true to your style and personality. The rest will fall into place as easily as those layered bracelets. Read Also: 5 Tips To Enhance Your Personal Style With Jewellery Gold: Choose your Jewellery Carefully The Future of Women’s Fashion: Shopping Online

READ MOREDetails