Toilet Flush Button: Understanding The Nuts And Bolts

Published on: 03 August 2023 Last Updated on: 13 September 2024
Toilet Flush Button

Though our bathrooms play a critical role in daily life, they’re often forgotten until a problem arises. Of all its components, one that stands out is the toilet flush button’s use – and understanding. This article looks closely at its workings, maintenance needs and replacement considerations.

The Fundamentals Of The Toilet Flush Button

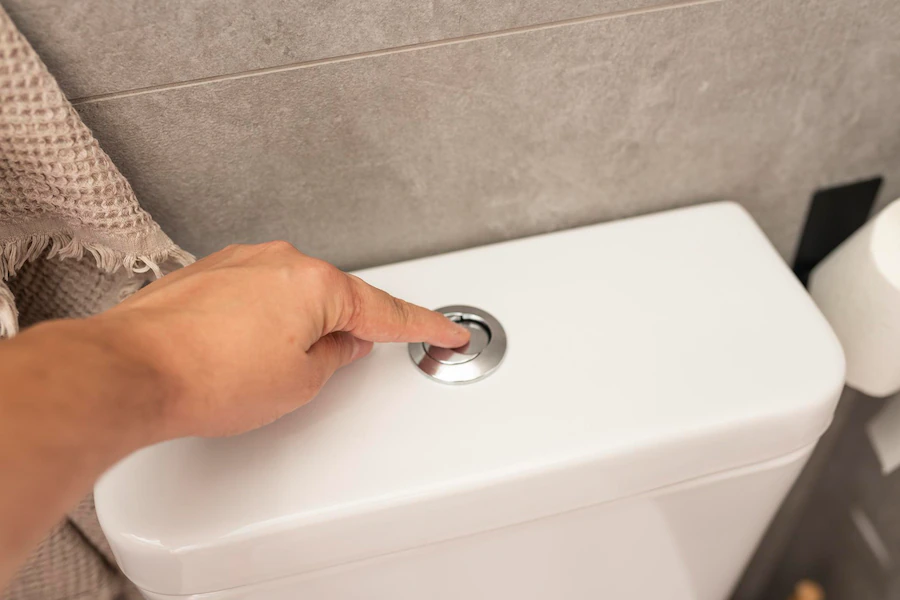
What Exactly Is A Toilet Flush Button?

A toilet flush button is the mechanism responsible for initiating the flushing process in your toilet system. Situated on the tank’s exterior, we press or push this component when using our toilet to flush out its contents into the sewage system. By activating this flush button, we begin an action chain within our bathroom that sends water from its tank into our bowl to flush away its contents into sewer lines.

How Does The Flush Button Work?

The magic of the toilet flush button lies in its ability to control a more complicated mechanism. Pressing it lifts a lever connected to a chain inside the tank; that chain connects to a flapper (or flush valve seal), covering up drain holes at the bottom.

When the flapper is raised, water stored in the tank begins rushing from its source into the bowl through its drain hole and siphon tube into the sewage system. As soon as this process completes, however, the flapper falls back down, sealing off its drain hole once more – and replenishing its supply in readiness for another flush cycle.

Maintenance Of The Toilet Flush Button

Regular Cleaning

Regular cleaning of your toilet flush button is vital to its optimal operation, as dirt can clog the switch and make it less responsive, leading to inconvenient situations for users. A non-abrasive cleaner and soft cloth should be used for exterior cleaning; internal components should be checked regularly to avoid build-up and potential mechanical problems.

Checking For Wear And Tear

Given how often flush buttons are used, wear and tear are inevitable. Look for signs of damage, such as cracks or looseness. If the control becomes less responsive when pressed or sticks down without returning up when released, this may indicate internal components need to be reviewed for potential problems.

Troubleshooting Common Problems

Is The Button Hard To Press, Or Is It Sticking

A toilet flush button that is difficult to press or sticks down often points to a problem with the connected lever or chain inside the tank. It could be that the chain is too tight or too slack, or the lever needs to be aligned or fixed. A careful inspection and adjustment of these components usually solve the issue.

The Button Doesn’t Activate The Flush

If the button doesn’t activate the flush, the issue could be that the switch is no longer effectively connected to the lever, or the flapper isn’t lifting. A look inside the tank should reveal the issue. The button, lever, or flapper may need to be replaced.

Replacing The Toilet Flush Button

When Should You Replace The Button?

As with any mechanical component, toilet flush buttons have a finite lifespan. Over time and through regular use, their controller may wear out or become damaged, requiring replacement. Signs to replace it include physical damage to its housing and sticky buttons or ones that no longer activate flushing actions. Looking for a portable toilet rental might also be necessary if you need to fix your toilet for a couple of days.

Toilet Flush Buttons: More Than Meets The Eye

Though seemingly simple, toilet flush buttons are critical in maintaining sanitation in homes and public spaces. Understanding their inner workings helps us better appreciate their importance, maintain them properly, and effectively troubleshoot any potential issues with them. So next time you press one, remember its critical function while giving it some love and consideration.

Conclusion:

Understanding how a toilet flush button works may initially seem complicated, but understanding its mechanics is crucial to efficient bathroom operations and sanitation practices. Knowing their inner workings could save us from future inconvenience or repair costs.

Maintaining the toilet flush button regularly is vital to prolonging its lifespan and guaranteeing reliable performance within a plumbing system, thus streamlining home maintenance. By periodically inspecting it for signs of wear and tear, individuals can identify and address potential issues early on and prevent more significant ones from developing into larger problems later. By taking proactive measures like this one, individuals save both time and money on costly repairs and ensure an effortless toilet operation experience.

Maintaining a flush button is an accessible DIY project for anyone, provided they possess basic knowledge and the appropriate tools. Even if it eventually succumbs to wear or damage despite regular maintenance efforts, replacing the button remains straightforward, making this an achievable DIY project for homeowners.

Read Also :

Abdul Aziz Mondol is a professional blogger who is having a colossal interest in writing blogs and other jones of calligraphies. In terms of his professional commitments, he loves to share content related to business, finance, technology, and the gaming niche.

View all posts

Leave a Reply

Your email address will not be published. Required fields are marked *

Related

Commercial Roof

7 Important Factors You Must Consider Before Renovating A Commercial Roof

The roof is important for any commercial building. If your roof is broken, it exposes precious belongings that incorporate certain expensive commodities.  In most of the commercial buildings, roofing projects often stand out. It is necessary for your home to be protected from the harsh elements. For this, all you need is a reliable roofing company that can offer you these required services.  It is important to remember that remodeling and renovating your home is an intensive undertaking with several potential pitfalls. Before you can think of renovating your commercial roof, there are a few considerations to make.  This article will emphasize factors you should consider before renovating a commercial roof.  Top Considerations Before Renovation Of A Commercial Roof  Here is a list of guides to help you fix your commercial building roof.  1. Roof Ponding  Before you can contact a roof contractor, you need to inspect your building to see if there is any ponding.  Therefore, you need to observe if there is an act of accumulation on the roof. This will indicate you have an issue and might also face certain drainage issues. Excessive ponding might also lead to algae growth. This causes permanent harm to the rooftop.  Ponding indicates the right sign your roof is getting damaged, and it is time that you get into reroofing.  2. Determine The Material That Fits The Best  Thinking of renovating the commercial space is a great way to look functional. But at the same time, it is also expensive and time-consuming if you do not pay attention to the included material. Before initiating the renovation, create a plan outlining the materials you need and the purpose. This will help you delegate the project effectively. Researching the materials in advance will help you renovate appropriately, last longer, look great, and cost much less.  Not only will certain materials dictate aesthetics, but they will majorly reflect attributes in the home’s new design. When you are taking on home renovation projects, make sure you choose the right materials.  3. Consult An Insurance Company  If you need to replace the roof, it might be due to bad weather, so ensure it from an insurance provider first.  There are certain contractors who are more happy about helping one another during the time of processing the claims. So look for an insurance provider who can clear your doubts and get you all the valid information required to proceed with the claim.  In addition to that, they will try to get the insurance company to pay according to the damages. Similarly, you might also get a new roof without spending as much.  4. Prepare A Contingency Plan  Renovating your home is an exciting undertaking. It requires thorough planning and research. Similarly, knowing if you can prepare a contingency plan for any potential issues is vital.  An unforeseen issue might occur throughout the course of the renovation process. Thus, your contingency plan should include details about what you would need in certain cases, what can go wrong, the material required, and design decisions.  Hence, a comprehensive contingency plan can equip you and assist you in tackling unanticipated issues instantly. Moreover, you might not have to cause much of a disturbance in your renovation timeline.  5. Check The Paperwork When you are dealing with something as vital as your roof, you do not wish to leave anything else to change.  For any contractor, it lays out how much you would need to pay and how much time they need to install a new roof. In addition to that, the paperwork can include all pertinent details on what permits you would need to make the new roof within your community.  In the end, you should also receive a letter from the contractor’s insurance providers and communicate exactly what is under the business liability plan. Commercial Roofers, similarly, can also help you with the renovation process and install a new roof.  6. Anticipate The Budget  Determining and setting the right budget is important before you can contact any roof contractor. You might develop a limit or have an expensive amount, so consider your decision.  Thus, setting a budget makes you plan about every attribute in the renovation project. Dreaming about a luxurious change that might increase your home's value is easy.  Therefore, create an estimated labor charge, material and decoration costs, and a contingency fund. Build up a detailed calculation and cost breakups that will keep you on the right track and assist you in saving time and resources.  Furthermore, keep all your expectations in check today.  7. Obtain The Right Permit  Before you can start with the major renovation, it is vital to know about the local areas and obtain the necessary permits.  This could be acquired for a permit from the country or city before you can begin the construction process. This is a specified requirement if you are undertaking any work affecting the home structure, plumbing, or electrical system.  Thus, by doing so, you need to protect the roof in the long run and save resources while ensuring that renovation will be handled professionally.  Furthermore, obtaining the right permit can avoid legal issues with the local authority, and it is worth going through the entire stage.  Hire The Best Roofing Contractors  Thus, finding a listed contractor is an integral factor. This is because it would ensure your home is in tip-top condition. If you know business owners who offer commercial roofing repairs, research before hiring contractors.  When you finally consider the essential requirements before renovating a commercial roof, you must hire the best contractor. You must look for contractors with the expertise and skills to install and replace a roof. Ensure they carry their material and tools as well.  Therefore, a roofing contractor can offer significant advice on roofing installation and repair. Make sure that roofing projects are conducted properly with qualified materials.  Furthermore, roofing contractors carry liability insurance, so you only need to protect yourself if any mashup or accident occurs.  Thus, roofing contractors offer invaluable skills and knowledge regarding roof installation and repair and valuable protection from damage.  Read Also: Choosing A Siding And Roofing Companies In Delaware What To Know About Commercial Greenhouse Flooring Why You Must Use A Residential Roofing Company For Your Home

READ MOREDetails
Sound Dampening

What Does Sound Dampening Mean?

Noise traveling to and from rooms can be distracting when trying to work, read, or enjoy some peace and quiet. It can be hard to focus on what you are trying to do when you can hear music blaring, a loud television, or children screaming through the walls, not to mention a million other potential distractions. Fortunately, there are ways to reduce sound transmitted through the walls, which can be invaluable when preventing sound transfer inside or outside a room. Felt Right has a unique way to achieve this. Depending on the materials you use for this procedure, you can obstruct more or less sound, even blocking the transmission of sound waves entirely, if you choose. What is Sound Dampening? Sound dampening is installing materials within a home, vehicle, or other location to absorb, reflect, or diffuse sound. This reduces the amount of noise that passes through and can also improve a room’s acoustics, which is why sound dampening is also known as “acoustic treatment.” It is a significant reason that recording studios make use of this technique. Sound dampening can eliminate approximately 80% of the sound transfer, meaning that you can prepare a room for studying, work, hobbies, or mental health. However, there is just enough sound to hear if there is an emergency in another room or someone yells for you. This is especially ideal if you have children in the house or others who may need your attention so that you can focus on what you are doing while still being accessible to others if required. If you need even greater solitude, one option is to soundproof a room similar to sound dampening but endeavors to block any sound infiltration whatsoever completely. However, this process is far more intensive and to prove entirely successful generally requires planning in architectural design before room construction to ensure complete soundproofing. What Materials Work Best for Sound Dampening? When you sound dampen locations, you must decide which materials you wish to use. Different materials can prove effective to different degrees; some are external solutions, while others require installation within the walls or other surfaces. Keep in mind if air can pass into an area, so can sound. For best results, address windows, spaces between and under doors, and other airflow conduits. No matter how effective your sound-dampening materials are, if air passes freely through such openings, you will have more noise. Felt Tiles One of the easiest methods for sound dampening is through the use of felt tiles. These panels have an adhesive back designed not to damage walls or paint, creating a plug-and-play solution. Felt tiles are versatile, coming in various shapes, sizes, and colors, so they are excellent choices if you wish to snazzy up the interior design of your room and enjoy the benefits of the felt’s sound-dampening qualities. Choosing felt tile designs to match your taste or set a professional tone can be invaluable when creating a relaxing atmosphere or environment conducive to work. A soothing, welcome decor has proven effective in improving mental health by reducing stress and anxiety. Having an attractive backdrop during work video calls provides an air of credibility to a home office space. In either situation, the reduced noise permeation is invaluable. Polyurethane Foams These polymer foams come in rolls or sheets and can serve as a suitable sound-dampening barrier, particularly when reducing high-frequency noises. However, low-frequency sounds are more likely to penetrate if the foam is not sufficiently thick, so keep this in mind if you want more effective noise reduction. Also, be aware that polyurethane foams are flammable, so only place them in areas where they will not be susceptible to open flames or other fire risks. As a result of this quality, this type of sound dampening should be for home use in fire-safe locations rather than used in an industry setting, where there is a greater risk of inflammation. Polyester Fibers These dense materials are excellent for sound dampening in industrial settings or other noisy areas. They work best on high-frequency sounds and are often lauded for their strength and durability, making them incredibly resistant to general wear and tear and fire. Plus, it is a lightweight material, which makes it easier to transport and install. Cork This porous material is surprisingly effective as it can trap a significant quantity of air, which means it can catch sounds and convert them to vibrations, effectively deadening noise. Cork is effective even in thin sheets, and the material is incredibly lightweight. Furthermore, it is an accessible material to install and can be purchased in tile forms for easy customization. Mass-loaded Vinyl A popular choice because it is one of the least expensive sound-dampening options, mass-loaded vinyl is explicitly intended for sound dampening. It is easy to find and acquire this material, but remember that the denser the material, the more effective it will be. Mass-loaded vinyl does not have much elasticity, so it forms a solid barrier that sounds waves have trouble passing through. Green Glue, Gaps, and Spaces Remember that sound can pass through any space air can, so for better sound dampening, you need to find spaces where air can pass through, such as cracks or gaps within the walls. Green glue is an excellent choice for filling holes, blocking airflow, and reducing the noise that can enter (or exit) the room. For areas you will not want to seal, such as windows, you can find sound-reducing curtains that can serve as sound dampening, combatting unwanted outdoor sounds such as those from traffic, industries, and neighbors. For doors, sound dampening can be as simple as placing a blanket against the gap beneath. Alternatively, you can install a door stop, soundproofing rubber, or acoustic panels to block sound from entering. The Bottom Line When you want to keep from traveling in or out of a room, one of the most effective ways to reduce sound is to find appropriate materials that function as sound-dampening agents, placed along walls and wherever there are gaps or cracks in which sound can pass. Proper sound dampening can create an atmosphere conducive to work or relaxation or prevent televisions, music, musical instruments, and other loud forms of recreation from disturbing others. Read Also: How To Get 60 Day Trial For Luxury Beddings Five Bedroom Rug Ideas – Area Rugs and Decorating Ideas Living Ideas In Small Bedroom House Plans With Efficient House Designs

READ MOREDetails

Outstanding Design Advice If Your Home Is Really Small

It’s easy to feel confined by your surroundings when your house has narrow hallways and small rooms. It can seem like you can’t buy any new additions and furnishings without crowding what limited space you already have. You can make your home look larger than it really is if you follow these three renovating and decorating tips. 1. Sliding Windows And Doors : One of the first things that homeowners with cramped properties should do is get rid of their old windows and back entrance doors, and then get new slider windows and sliding patio doors installed in their place. Slider windows do not hinge outward, so they will not take up any extra space when they open and close. They are considered ideal choices for areas that can’t have large windows, like raised basements, bathrooms and laundry rooms. Replacing a solid back entrance door with a clear glass door is one of the recommended ways to maximize space in your home — the transparent surface will open up the area and make it look much more spacious. Much like slider windows, a set of sliding patio doors move horizontally along a track and take up no extra space when they are opened or closed. If you decide to get these Kitchener replacement windows and doors for your home renovation, you should choose an experienced company like Golden Windows for assistance. They have been manufacturing, distributing and installing high-end Kitchener windows and doors for homeowners and builders for over fifty years. 2. Convertible Furniture : When every single piece of furniture limits the amount of room that you have, you need to be clever about your selection. Flexible, convertible and multi-purpose items are the ultimate solution to your crowding problem. Look for space-saving furniture pieces like stackable chairs, folding stools, murphy beds, nesting tables, futons, expandable tables, and hinged office desks. It’s also wise to find items with storage options like drawers, shelves, cubbies or hollowed tops to deal with clutter. Keeping all of your rooms organized and tidy will make them appear bigger than their actual square footage. 3. Smart Shelving : Bringing in a large shelving unit is not always a good idea when you are dealing with a small space. The new addition could make a cramped room look even more cluttered or it won’t fit into an area without obstructing a pathway. There are a number of efficient space-saving designs for shelving units that can help you store your favorite books, magazines, vinyl records, movies, and other personal collections. Floating shelves can be arranged anywhere along the walls for a minimalist and chic look that won’t take up any floor-space. For anyone with an impressive number of books, you can hollow out stair bottoms or sides and then store your personal library inside. People with small houses don’t have to do drastic renovations to make their place look bigger. Simple fixes like slider windows and sliding patio doors, convertible furniture, and smart shelving ideas can make any space seem open and airy. Read Also :   Turn Your Attic Into A Living Space Leather Furniture Is An Essential Improvement For Any Home Or Office 5 Ways To Make A Big Statement In Small Bedroom

READ MOREDetails