Natural ways to get rid of flea in your lawn

Published on: 21 March 2018 Last Updated on: 29 July 2024
Natural ways to get rid of flea in your lawn

It may be a challenging task to remove fleas from your lawn. This can drive somebody crazy, sick and tired of spending a huge sum of money to buy chemicals with a view to expelling fleas for good. All efforts go up in smoke due to wrong methods. Is there any right, natural way to make their dream come true? Yes, here is the answer that is proven for green pest control in Minnetonka.

Natural ways to kill fleas in your lawn :

Natural ways to kill fleas in your lawn

source

  1. Spray thoroughly your whole lawn with natural ingredients: Nowadays, many industrial products are available for your choice, yet they can be harmful to your health. Why don’t you make use of fewer but multifunctional things right in your kitchen? Vinegar or lemon is accepted. As for vinegar, mix ½ vinegar with ½ fresh water. As for lemon, slice them and boil in at least 20 minutes. Either vinegar or lemon, you also end up pouring the combined water into a spray bottle in order to sprinkle your lawn. This handmade flea killer is friendly to the environment, hence you can utilize it day in and day out.
  2. Flood your lawn: After spraying, don’t rush to flood right away. Take some time, about at least 2 hours, to kill the adults. So, what about larvae and eggs? Just flood your lawn slightly to soak up and eradicate them. Maintain the flood in a couple of minutes, and drain your lawn as fast as possible.

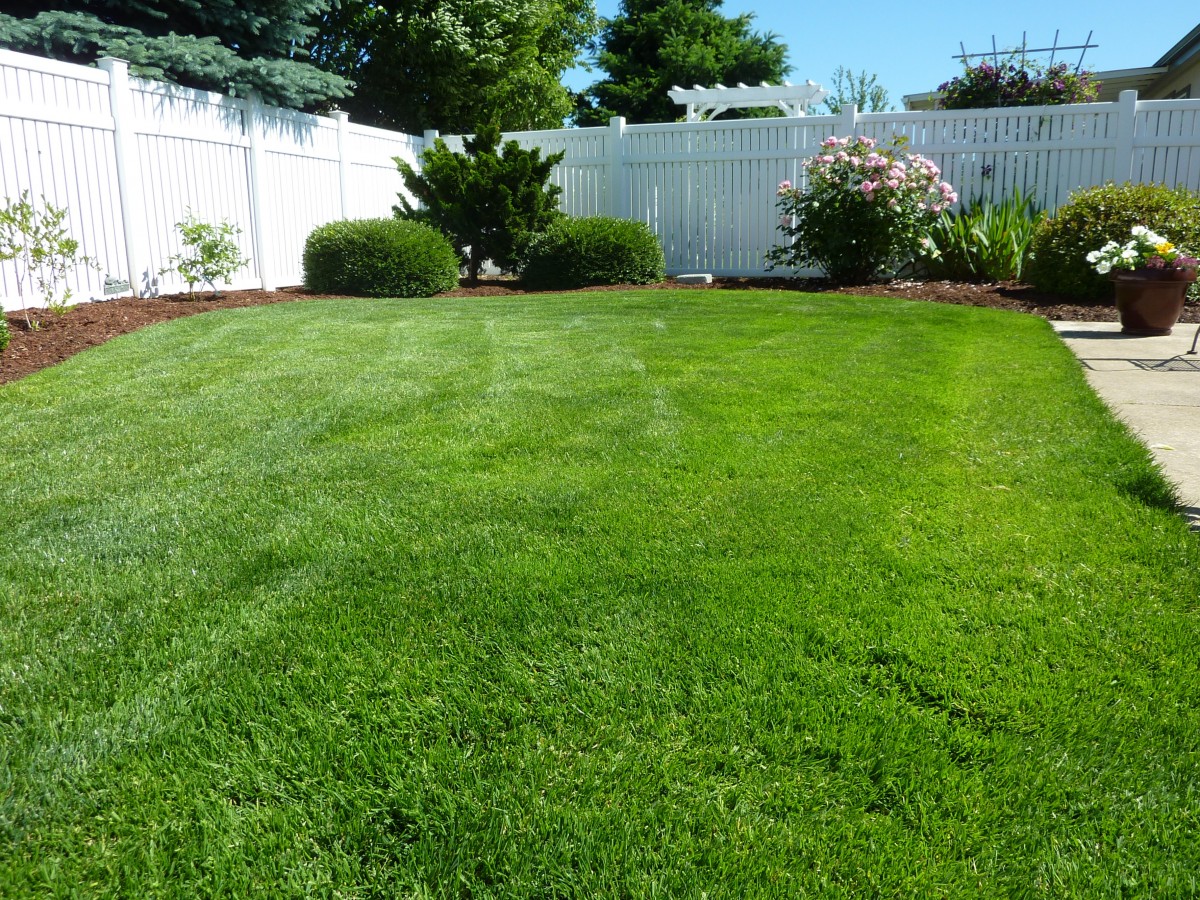
Natural ways to prevent fleas re-infesting :

Natural ways to prevent fleas re-infesting

Source 

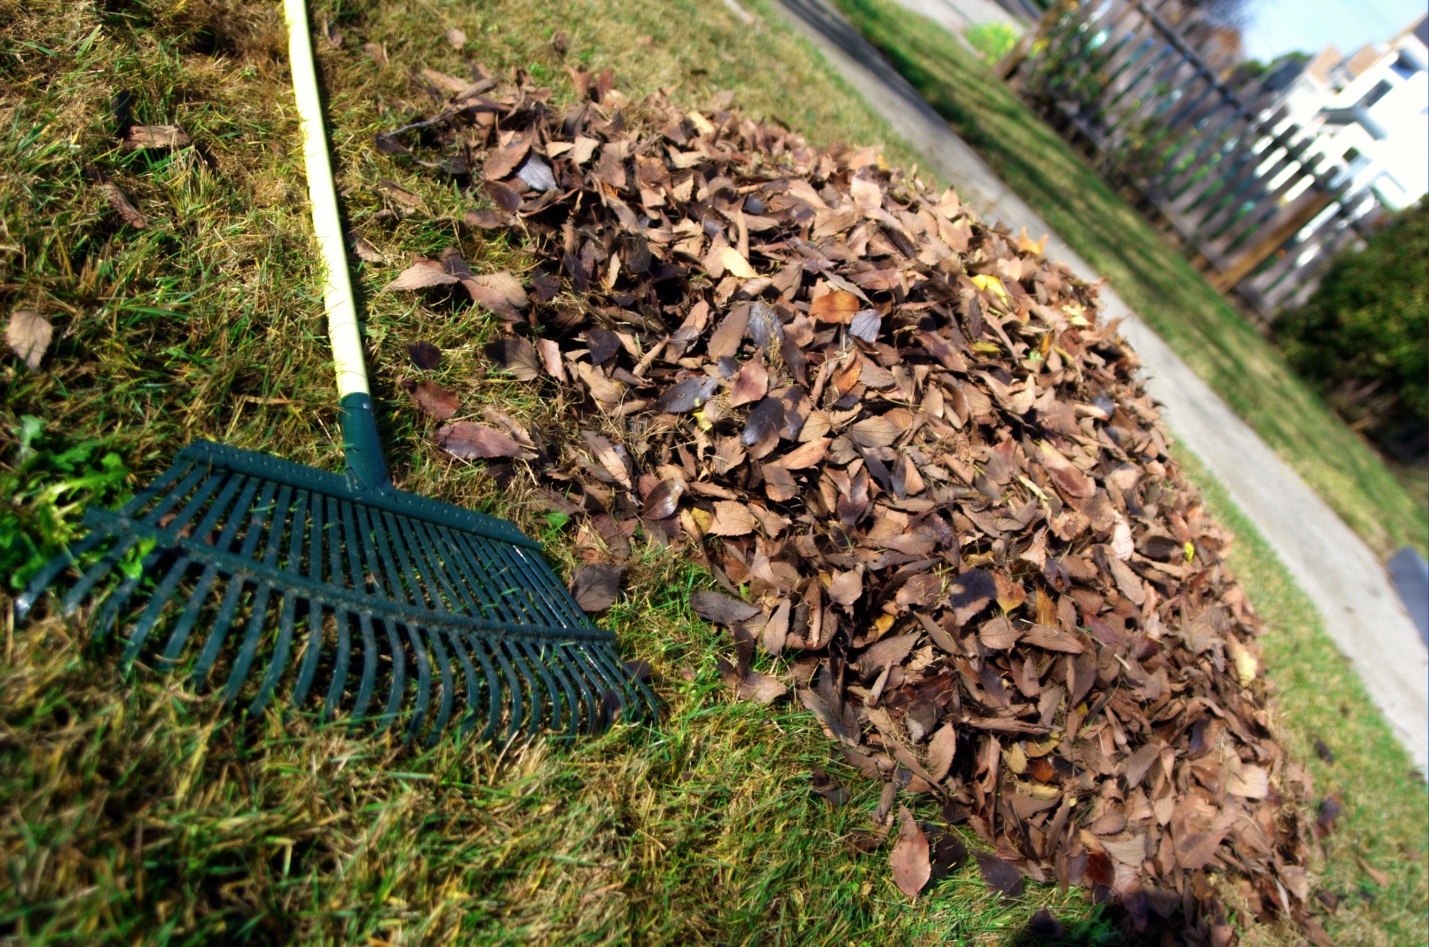
  1. Rake your lawn to get rid of all shrubs, littered pots, trash and leaves: In fact, this step is indispensable in the whole process of getting rid of tenacious pests. Many people are wondering why they treat flea inside their home and in their pets already, but flea infestation does not decrease or boom just after a short period. Simply it is because of your uncompleted treatment, and you have skipped one of the most potential areas, your lawn. Fleas can live outdoors until they find a good chance to jump into your house or your pets, and their favorite environment is a moist, dark place. They can find it easier to escape from your “checking-radar” if hiding under a bottle or rotten leaves. After raking all useless items, don’t pile them up. Instead, clear up and throw away as soon as possible. The cleaner your lawn is, the lower the percentage of being infestation is.
  2. Mow your lawn: Mowing is one of the most useful methods to remove flea in the lawn. It can be understandable because to let your lawn long also means to create “an ideal shield” for fleas’ larvae and eggs. In addition, short lawn also allows sunlight to deeply penetrate into while fleas really hate daylight. Nonetheless, don’t try to cut your lawn as short as possible as the too-short, on the contrary, can make your lawn weaker and more attractive to fleas and even other animals like ants.
  3. Don’t overwater: As aforementioned, fleas prefer moist, as a result, you should prepare for an appropriate watering schedule and leave your lawn to dry. Moreover, a good drainage system is enormously useful.
  4. Minimize other animals’ contact to your lawn: Outside your fence may be a huge potential to be infested by fleas, coming from wildlife animals. Build up a fence around your lawn to protect your lawn and your house as well.

Sound simple, right? In fact, it really is. All the mentioned methods are so cost-effective and practical. They are really worth a try.

Read More :

featured image Source: https://pxhere.com/en/photo/994438

Content Rally wrapped around an online publication where you can publish your own intellectuals. It is a publishing platform designed to make great stories by content creators. This is your era, your place to be online. So come forward share your views, thoughts and ideas via Content Rally.

View all posts

Leave a Reply

Your email address will not be published. Required fields are marked *

Related

Hardwood Timber Flooring: Gives a Classic Look to Your Home

Hardwood Timber Flooring: Gives a Classic Look to Your Home

Solid hardwood flooring is known for imparting an impressive look. Customers tend to prefer hardwood flooring since decades because it gives not only a unique but a classic look to the room. Hardwoods are usually used for construction purposes such as boat, furniture, flooring, and instrument construction. The hardwood variety is usually obtained from oak, maple, cherry, hickory or pecan trees. Thus, the hardwood timber flooring is known for imparting a sense of beauty to the room and also displays the sign of high status. Styles of Hardwood flooring The most popular hardwood flooring includes Solid hardwood flooring Engineered wood flooring Long strip engineered wood floors Each type of hardwood flooring is different from the others in regards to the advantages, durability, look and pattern. The solid hardwood adds charm, cordiality and value to the room, while the engineered hardwood flooring does not shrink easily and is more durable. The long strip engineered wood floors are known for their unique features, they are designed for the floating installation. The hardwood timber flooring is a magnificent product that can last for generations. However, proper care and regular maintenance are the two most important things that need to be considered when talking about timber flooring. How to increase the performance of the hardwood timber flooring?  Refrain from using hot water as it may cause serious damage to the floor. Use a damp mop by wringing out the extra moisture as this can hamper the flooring and wet patches can develop on the floor surface. Always mop in the direction of the wood grain to remove the entrenched dust more swiftly. Refrain from using harsh chemicals, detergents or floor cleanser; instead, look for cleansers that are mild and are meant for this type of flooring to remove stains. Use gentle nonscratch microfiber mops for cleaning the hardwood timber flooring. Sweep the floor regularly with a soft-bristle broom or vacuum cleaner.  Some more facts about hardwood timber flooring The furniture and the other appliances should be placed after 48 hours from the last coat of varnish on the hardwood timber flooring. The furniture and the other appliances should have protective pads to prevent marks on the floor. The rugs or the carpet can be placed at least after 2 weeks from the last coat of varnish on the hardwood timber flooring. Guard the floor against direct sunlight by using window curtains or by using rugs and carpets. This prevents the hardwood timber flooring from getting discolored. Maintain a normal temperature to prevent gaps and cupping. Ensure that no one uses pencil heel shoes or sharp-pointed heel shoes on the floor as it may create a dent on the floor surface. Trim the nails of the pets in the house to prevent scratches on the hardwood timber flooring. Advantages of hardwood timber flooring Selecting a good quality hardwood timber flooring can last for several years in fact through generations. The hardwood timber flooring is easier to clean and is highly cost-effective. The hardwood timber flooring increases the resale value of the home. Good quality hardwood timber flooring keeps the room warm and cozy and is more hygienic compared to other flooring materials. How to choose hardwood timber flooring?  When choosing the hardwood timber flooring for your home, Check the color and pattern to match the décor of the room. Check the timber wood based on select, standard and feature grade. Check for the coating that can be used based on oil or satin finish. Thus, the hardwood timber flooring is ideal for imparting a classic look to the room. Read More: Additional Ways To Keep Your Home Warm Home Hacks: Stuff You Can Clean In One Hour Or Less How To Make Your Home Look Like A Splendid Hotel? Best 5 Designer Secrets To Make The Most Of Small Spaces

READ MOREDetails
Garden Wall Fountains

Wall Fountains Are Trending In Both Indoor And Outdoor Décor

Fountains are a center of attraction for any home, office, or estate but are surrounded by some ill notions like you need a big space to enjoy that soothing sounds of water and they are not cost-effective and do need a huge amount of water to keep it running. After completing this article you will be free from all those notions. Fountain designs have evolved with time and the trends of the users. The best example of those designs is Campania Fountains, you will be amazed to see the range of fountains they provide. You can have a fountain for any place in your home. No matter how big or small a house you have they have a fountain for you. And forgot to mention one more notion that fountains are more likely found in the outside garden area of the house. Well to break that notion Indoor Wall Fountains are trending products amongst all the fountains. They are well designed, they come in amazing look and they fit practically anywhere. As they are attached to the wall. Indoor wall Fountain Just imagine one of those hanging in your home, they are best to add natural beauty to your home, many people say that the home becomes dull and less lively. To make it more lively how about soothing water flowing from a beauty flowing through the wall? You can have your evening tea listening to the soothing sound of water and a fire burning on a chilly winter eve. They are available in many shapes and sizes as well as designs. Just make sure you measure the space first where you want to keep the fountain, this will ease the process of shortlisting one perfect fountain for you. One other thing you need to keep in mind is the color and material of the fountain, it will look more beautiful when it blends in the interior of your home. It will beautify the whole area. And also the material, they come in metal, glass, stone and many other materials. Just make up your mind that which material will be best suitable for your interior. Basically, all these things are just to make sure that you get optimum value for all the money you are spending. It should blend in and not fall apart from the interior of your home. Garden Wall Fountains If you have a small garden and a large outdoor fountain doesn't seem like an option, then you can always find one that can be attached to your garden wall or placed anywhere near your lawn or gate. They come in various shapes and sizes. If you have a small garden space where you have a lush green lawn or a place where you’ve kept a few planters, these garden wall fountains can add charm to any of these spaces. They come with a unique lighting setting that is a must-watch. Try to find a fountain that best suits your surroundings and also which makes the whole area more beautiful when it matches the lightings and its color which you have set in your garden area. This will make the whole area look more ravishing. The view becomes just mesmerizing in the night. You can impress your neighbors with the view over a Barbeque Party. And you don’t even need to do much for maintaining the fountain. It can be cleaned easily and you won’t need more water to maintain the flow of the water through the fountain. It fits any size and also helps you save more as it comes at many affordable rates as compared to those large garden fountains. As I said earlier that wall fountains are the best when it comes to breaking the stereotypes and ill notions about fountains. No matter which area you choose, indoor or outdoor get a wall fountain and make things more beautiful and lively. Read More: Grow These Flowering Plants In Your Home Garden To Remove Vastu Related Problems How To Bring Summer Into Your Space  

READ MOREDetails
Portable Generators

Portable Generators: 5 Ways To Keep Them Clean and Running

Before purchasing your portable generator, there are two essential things you should always consider; it’s versatility and handiness. This will significantly help in cases of breakdown. How? Once you’re sure of your portable generator power and versatility, then it becomes more comfortable for you to identify it’s spare parts availability. If you want your portable generator to last longer, then you’ll have to follow the number one rule of owning a portable generator strictly. Bonus: Maintenance. Proper maintenance will ensure your portable generator works efficiently. Outlined below are five tips for maintaining your portable generator for efficiency. 1. Fresh Oil Helps Changing the oil of your machine regularly replacing it with a fresh one will maintain your engine for efficacy. If your generator is new, then it needs to be synchronised exactly after 30 hours of use. This sounds demanding and tiresome but, you’re never going to regret it. Don’t worry because as time goes by, changing the oil of your small engine will only be done after every 100 hours of use, or even after every season. It is always important to have a stock of oil or gas set aside in case you run out of power. The fact is that you’ll never know when you’re going to have extended power outages. This is to prevent your engine from corrosion. 2. Plugs & Filters Ensure that your generator has a way of igniting gas into the engine cylinders otherwise, your generator will have no use. However, maintaining your generator will have you change your plug and air filter occasionally. You can do this after using it for 200 hours or maybe once at the start of each season. Having done that successfully, your generator will have a proper fuel-air mixture that will help your generator work efficiently thus, an extension of lifespan. 3. Store Your Generator on an Empty Tank This implies that if you ’re planning to store your generator for longer, maybe a month or so. But, before you do that, ensure that you drain the fuel from the tank. However, there are necessary steps you’ll need to follow before emptying your generator’s fuel tank. First, you’ll have to add a quality gas stabilizer to the fuel tank and allow it to run for about 15 minutes.Once you’ve done that, allow your engine to cool down, then start your engine and run it until it runs out of gas and automatically shuts down. On the other hand, you may use a siphon that’s non-conductive to remove excess gas in the tank. Remember, the siphon should be non-conductive to prevent the fuel tank from static electricity. 4. Charge the Battery You can charge your generator only if it has a battery because not all of the generators use a battery. Some of the generators are electric starts feature so; they will need to charge before storing them.You can as well plug your generator’s battery in a trickle charger for freshness and availability. 5. Train in the Off-Season As you continue to store your generator, you are advised to always start it after every month allowing it to run for some few minutes. This will help keep your generator’s features lubricated because oil will be circulating through the engine. Wrap Up Had problems before maintaining your portable generator? Worry not because the above tips have provided solutions to your questions. Read More: 7 Specifications You Should Look for When Buying a Home Generator Generator Secrets that manufacturer won’t tell you Advantages of Using a Portable Solar Generator

READ MOREDetails