Kitchen Renovations Must be Done at Regular Intervals

kitchen renovations

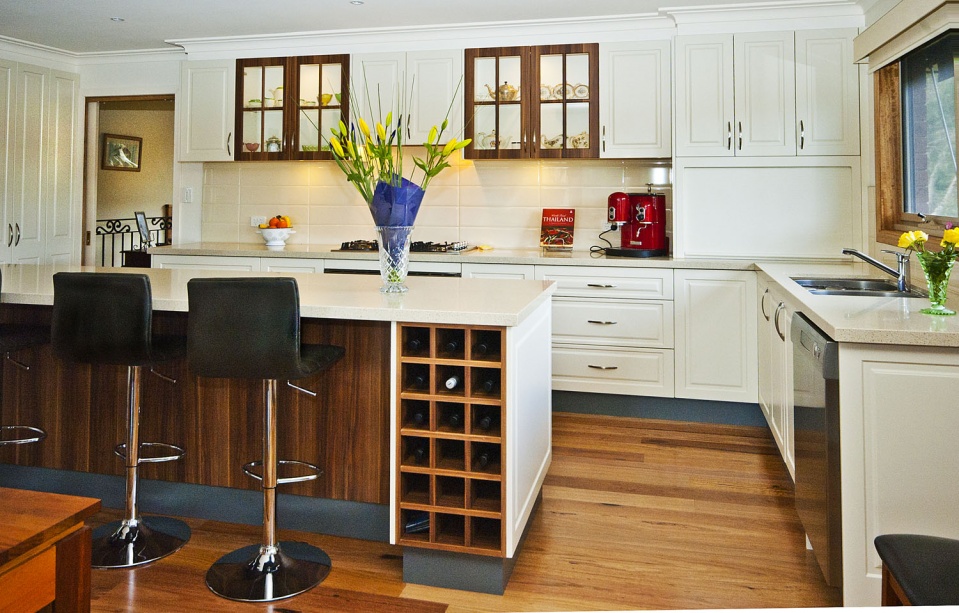
Investing in decent quality kitchen renovations goes far in keeping up your workspace. You require a ledge that is solid and in addition simple to clean.

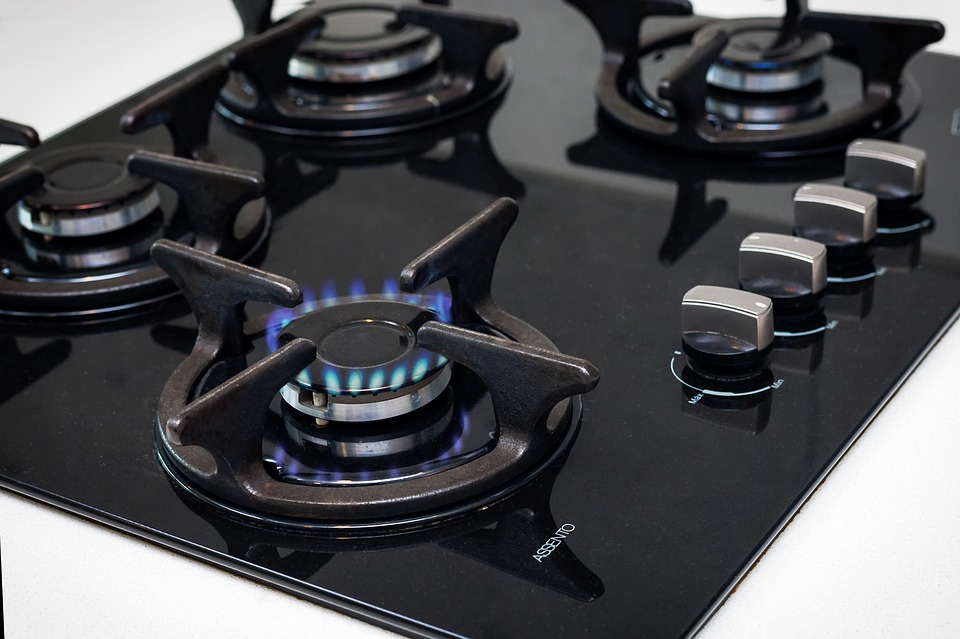
  • Security: make beyond any doubt all your energy supply focuses are all around covered to keep up a sheltered space for children. The ledge edges ought to be fixed to maintain a strategic distance from any wounds to anybody.
  • Flooring: The deck additionally has the imperative impact; go in for an against a slip ground surface to maintain a strategic distance from mischances while exciting visitors if anything spills on it. Additionally, as the ground surface ought to be anything but difficult to clean of the considerable number of stains and waste which will guarantee your kitchen dependably looks like new.

Kitchen Renovations Must be Done at Regular Intervals:

Get the most innovative kitchen renovations done in your city

Dispose of single old hardware: Many individuals tend to clutch apparatuses or kitchenware to either cut expense or for nostalgic reasons. On the off chance, your apparatuses are old you have to contribute new machines to maintain a strategic distance from any likely mischances because of poor attachments or loose wiring.

  • Kitchen Renovations Melbourne will make your kitchen look amazing
  • Regular repairs in kitchens are necessary
  • Get advice from experts regarding renovating your kitchen
  • Less expensive cost and creative ideas must be considered

Collect the right information before repairing your kitchens

Put resources into a decent advisor: This is an essential angle you have to remember while remodeling your home. A decent advisor will offer you some assistance with understanding your space better way and aide you in the right bearing. A decent expert will likewise offer you some assistance with working inside of your financial plan and make your experience of revamping your home an anxiety-free one. There are also virtual kitchen design tools available such as this one that can help you to get ideas, and allow you can see how different treatments, surfaces, cabinets, and even colors, work together.

Is it true that you are considering kitchen rebuilding? Possibly the deck is old, recolored, breaking in a wide range of spots making it look unattractive. Maybe your ledges are starting to look like something from the ice age or much more terrible, your cupboards don’t match; the entryway pivots are drooping and the drawers simply need to drop out when you open them.

Ask a few questions and get the right advice for renovating your kitchens

You will be excited each time you stroll in and see the delightful new look of your kitchen. Also, how you’ll feel when your loved ones are in amazement of your most recent creation.

Read Also:

  1. Installation of Kitchen Cabinets: Best Way to Give Your Home a Perfect Facelift

Kitchen design can be great with a totally revamped floor-plan or basic little upgrades to machines or equipment. Possibly you simply need to re-confront those old cupboards, or put in a new deck for the time being yet genuinely a complete re-try of your kitchen is going to give you the most fulfillment and have a greater effect on the worth included.

The most solid option is to go for the most astounding quality items for kitchen renovations, if conceivable in light of the fact that you need this redesign to keep going forever and additionally look fabulous.

Read More:

  1. List Of Most Durable Kitchen Flooring
  2. Installation Of Kitchen Cabinets: Best Way To Give Your Home A Perfect Facelift
  3. 5 Factors To Consider When Buying A New Garage Door

Lucia Patterson is the woman behind TheLegalGuides, a blog solely focused on legal guides, tips, and advice. Lucia loves essay writing and blogs at EssayWritingGuides from her college days.

View all posts

Leave a Reply

Your email address will not be published. Required fields are marked *

Related

Mattress

Five Easy Steps When Cleaning Your Mattress

It is highly important to clean your mattress on a regular basis. This is because mattresses could become a breeding ground for dust mites, stains, and bad odor. None of which we would want in our homes. Since we spend about a third of our lives sleeping, it’s only proper that the mattress we’re sleeping on is clean. But mattress cleaning may prove to be an intimidating task, especially if you do not know what to do. Do you wash it or dry it out? What cleaning agents will you use? Are you using the right cleaning techniques? The questions are endless – and overwhelming, too. After all, no one would want to damage an expensive mattress. To help you out, we have compiled a few tips to make the mattress cleaning experience a lot less daunting. Read on and find out. Suck Up the Dirt : Vacuuming your mattress is perhaps one of the easiest ways available to clean it. It may also be one of the most convenient ways. First remove your pillow top, sheets, pillows, and blankets. After doing so, you may then proceed to vacuum your mattress. This will: Remove any crumbs that may have accumulated from late-night snacking sessions or from movie marathons. Take off any pet hair that may have stuck to the mattress after letting your pet sleep in the same bed as you. Remove any dust that has formed since the last time you took the time to clean your mattress. Nearly every house would have a vacuum cleaner for general cleaning purposes. If yours does not, then consider getting one, as it is quite a good investment. It makes cleaning not only the rooms of your house a breeze, but it is a big help in cleaning your mattress as well, keeping it as comfortable as possible. Easy Spot Cleaning : The next thing you can do to clean your mattress is to spot clean it. The type of stains present on a mattress will vary from person to person. Likewise, the best ways to clean these stains vary as well. Here is a quick list of what you should use when you get an unsightly stain on your mattress: Water: Water is a safe bet. It is cheap and safe to use on absolutely everything. It is good as an immediate treatment to prevent stains from setting. It also lessens the effect of dyes but is not 100% effective. Detergents: These can be used for most situations, especially for grease stains. Commonly, people have detergents for laundry and dishwashing at their disposal. You must be careful with the latter, as it could damage the fabric on the mattress. Salt: This one can be found in almost every household. It is effective in removing sweat or deodorant stains. It is also good in lessening red wine and bloodstains. Vinegar or Lemon Juice: These two are amazing tools for removing coffee and tea stains. People have also found them effective against grass stains as well as tape and glue residue. Bleach: Bleach is effective in removing dyes. This means that it is a good bet for make-up and grass stains. This should be used in moderation, as it can damage more delicate mattresses. People also rely on a combination of hydrogen peroxide, liquid detergent, and baking soda. Simply spray the mixture on a stain and spot clean away. Another easy combination is that of lemon juice and salt. Spread this on a stain and leave it on for at least half an hour. Afterward, just wipe it off. Remove Foul Odors : The third step we suggest for the mattress-cleaning process is deodorizing. There are multiple, easy ways for you to do this. Air Dry: Perhaps the easiest and most convenient way to do when you want to deodorize. Simply leave it in the heat of the sun for a couple of hours. This will remove any foul odors and naturally kill bacteria as well. Baking Soda: Simply sprinkle this stuff on your mattress and leave it be for a couple of hours. It is a natural deodorizer that also kills germs. After it has done its job, just vacuum off the excess on the mattress. Lavender: A bit of an extra step, but has proven to be worth it. It does not only remove unwanted odors from your mattress, it also adds a relaxing scent that will help you get a better night’s sleep every night. While each one of these suggestions is effective in their own right, doing all three would help you achieve better sleep. It may take some more effort on your part, but it will all be worth it. Clean Your Sheets :  Washing your sheets is another important step in this process. It’s not enough that your mattress is clean; your sheets should be, too. It is always a good idea to clean your sheets regularly as this would prevent stains from seeping through to the mattress. This will also remove unsightly stains and foul odors. Together with a clean mattress, this will help you wake up more relaxed and energized. When doing this, it is important to remember the following : The washing machine is your best friend when it comes to washing bulky sheets. A dryer would also help deodorize and kill bacteria with its heat. Read care labels so that you do not cause damage to your sheets especially on sensitive fabrics. Some detergents are very strong and may actually do more harm than good. Some may even make the stain spread instead of removing it. It would not hurt to use a scented detergent to wash sheets. Just know how much and which brand to use. As mentioned before, lavender is a good scent for some more peaceful sleep. It is recommended that sheets be washed at least once a week. If this is not possible, then at least make sure to change them. Protect Your Mattress : Lastly, we would recommend you to protect your mattress. A lot of manufacturers offer mattress covers nowadays. They help prevent future stains from getting on the mattress itself. Not only that, some of them even make the bed more comfortable. As an added bonus, they can easily be thrown in the washing machine with the sheets. And On That Note… While this task may seem like it is too much, it really is not. This also has a lot more benefits than just removing stains. If you haven’t tried doing it and you’re scared of trying, ask someone who can help you out. Additionally, a wealth of information is available on the internet. Sometimes, the answers to your questions are a mere mouse click away. Cleaning your mattress on a regular basis is important. This would help keep germs at bay and remove foul odors. This will also increase your mattress’s longevity. Your mattress will keep you comfortable for as long as possible. All of this would lead to you getting a better night’s sleep in the long run. Take the first step today and you will thank yourself later. You invested quite well on that mattress; make that investment well worth it. Take good care of your mattress and it will take good care of you. Read More : Natural ways to get rid of flea in your lawn. Home Hacks: Stuff You Can Clean in One Hour or Less.

READ MOREDetails
Ways to Make a Big Statement in Small Bedroom

5 Ways to Make a Big Statement in Small Bedroom

No matter how you want to redecorate your room, making a big statement in a small bedroom room is what you will find this post. And of course this article includes some ideas which can have an enormous effect and all the difference you would like to have in your bedroom by small changes. Despite the fact that it might appear to be anything but difficult to top off a little space with a negligible measure of furniture; yet, it is an fatiguing task for when one plans on putting forth a style expression. So, let’s see how it can be done. Idea # 1: A Nice Looking Bed Set Buying a nice bed set is never difficult and it’s so easy to change the look of your bed room with bright bed sheet, bed covers and pillows. It’s nothing like you need a big financial plan for it. Nice theme of a bed set can smoothly give your room an engaging look. You can try some hardwood bed set to make a statement in your room as well. Hardwood being utilized may turn out to be generally on an expensive side considering the two its sheer toughness and additionally high feel. However, it is justified regardless of each penny spent. Idea #2: Buy Some Gorgeous Looking Wallpaper A darker shade of wallpaper on one wall gives the room a bigger and better look. You can choose wall paper designs according to the overall theme of your room. You can use printed wall paper on one wall and keep the other walls plane. Idea #3: Have a Nice Bookshelf No room can turn out badly with a bookshelf joined inside. It isn't important to have a big book shelf in your room but including a small bookshelf inside will look great and noticeable. For rooms with a smaller size beautiful bookshelves can be fixed with traditional hardwood boards upon the divider. In a few cases, where the bed may comprise of a nice headboard, the book shelf can be made near the bed for best use of free space. Close by conventional sweet-smelling candles. Idea # 4: Get a Full Length or Big Sized Mirror Keep a full-sized mirror upon a whole divider or your preferred space. It is the most generally used secret and in addition the most seasoned trend to not just influencing the space to appear more outwardly engaging but also  influencing the space to seem bigger than it at first is. The impression of the room itself makes the ideal fantasy and also get intensifies, mirrors are best for adding more space to the premises of the little room. Idea #5: Lights/Chandeliers Lights, especially traditional chandeliers or side table lamps can change the look of your room. Lights help in making a comfortable atmosphere in your room. Mostly the essential lights may appear to be excessively cruel or too brilliant; some additional small lights like fairy lights, lamps or light chandeliers can really give your room a subtle look. Hanging up light fixtures of little to medium sizes upon the divider can help with better use of divider spaces. And additionally make a more traditional appeal in your room. It's not the size of your room you claim which matters. It is the manner by which you design it and also how you use free space in an imaginative way, which helps influence a room to appear sufficiently lavish. I hope you liked reading these bedroom decorating ideas. If you have some interesting tips to add, do let us know in comment section. Read More: Home Decor Is An Art Itself – Things To Know Mirror Decorating Ideas To Style Your Bathroom Top Expert Tips For A Stunning Condo Interior! 5 Essential Tips To Designing A Beautiful Front Yard Garden

READ MOREDetails
how to harvest sunflower seeds

How To Harvest Sunflower Seeds: A Fun And Easy Activity For The Whole Family

Sunflowers are not only beautiful and cheerful, but they also produce delicious and nutritious seeds that you can enjoy as a snack or use in various recipes. Harvesting sunflower seeds is a fun and easy activity that you can do with your whole family. It is also a great way to teach your kids about nature, gardening, and healthy eating. In this article, I will show you how to harvest sunflower seeds in a few simple steps, as well as some tips and tricks to make the most of your sunflower harvest. If you enjoyed reading my blog on harvesting lettuce, you will enjoy reading this one! So, if that is what you are interested in knowing, I have you covered! Keep reading this blog till the end to learn more… How to Grow Sunflower Seeds: A Simple and Rewarding Gardening Project? Sunflowers are one of the most iconic and cheerful flowers in the world. They are also one of the easiest and most rewarding plants to grow from seeds. Sunflowers can brighten up your garden, attract pollinators, provide shade, and produce edible seeds that you can harvest and enjoy.  In this part of the article, I will show you how to grow sunflower seeds in a few simple steps, as well as some tips and tricks to make the most of your sunflower growing experience. How to Choose Sunflower Seeds? The first step to growing sunflower seeds is to choose the right seeds for your garden. Sunflowers come in a wide range of sizes, colors, shapes, and types. Some of the most common types of sunflowers are:  Giant sunflowers These are the tallest and largest sunflowers, reaching up to 15 feet in height and 12 inches in diameter. They produce huge and heavy flower heads that are filled with large and plump seeds. They are ideal for creating a dramatic and impressive display in your garden, as well as for harvesting large quantities of seeds. Some examples of giant sunflowers are Mammoth, Titan, and Kong. Dwarf sunflowers These are the smallest and shortest sunflowers, growing up to 3 feet in height and 6 inches in diameter. They produce smaller and lighter flower heads that are easier to manage and maintain. They are ideal for growing in containers, pots, or small spaces, as well as for adding a splash of color and charm to your garden. Some examples of dwarf sunflowers are Teddy Bear, Sunny Smile, and Little Becka. Colored sunflowers These are the most diverse and colorful sunflowers, ranging from yellow, orange, red, pink, purple, brown, and even green. They produce medium-sized flower heads that are attractive and eye-catching. They are ideal for creating a vibrant and varied display in your garden, as well as for cutting and arranging in bouquets or vases. Some examples of colored sunflowers are Autumn Beauty, Moulin Rouge, and Lemon Queen.  Things to Consider While Choosing Sunflower Seed When choosing sunflower seeds, there are several things that you need to keep in mind. For instance, you should also consider the following factors: Climate and season of your area Sunflowers are warm-season plants that need full sun and warm temperatures to grow and bloom. They are best planted in late spring or early summer, after the last frost, when the soil is warm and moist. If you live in a cold or frost-prone area, you can start your seeds indoors and transplant them outdoors when the weather is favorable. Soil and water conditions of your garden Sunflowers are adaptable and tolerant plants that can grow in most types of soil, as long as they are well-drained and fertile. They prefer slightly acidic to neutral soil with a pH of 6.0 to 7.5. They also need regular watering, especially during the germination and flowering stages. However, they can withstand some drought and dryness once they are established. Space and support available in your garden Sunflowers are large and sturdy plants that need ample space and support to grow and thrive. They should be planted at least 2 to 3 feet apart from each other and from other plants, to avoid overcrowding and competition. They should also be staked or tied to a fence, a trellis, or a pole, to prevent them from bending or breaking under their own weight.  How to Plant Sunflower Seeds? Once you have chosen your sunflower seeds, you can proceed to the next step. Planting sunflower seeds is a simple process that involves preparing, sowing, and caring for the seeds. Here is how to do it: Prepare the Soil Prepare the soil by loosening it with a fork or a spade. Ensure that you remove debris, weeds, or rocks. You can also enrich your soil by adding some compost, manure, or fertilizer, to boost its fertility and drainage. Make sure the soil is moist but not soggy, and has a temperature of at least 50°F. Sow the Seeds Sow the seeds by making holes or furrows in the soil, about 1 to 2 inches deep and 2 to 3 feet apart. You can use a ruler, a stick, or your finger to make the holes or furrows. Drop one or two seeds in each hole or furrow, and cover them lightly with soil. You can also sprinkle some water over the seeds to help them settle in the soil. Nurture Care for the seeds by watering them regularly, but not excessively, to keep the soil moist but not wet. You can also mulch the soil with straw, grass clippings, or leaves, to retain moisture and prevent weeds. You should also protect the seeds from birds, squirrels, or other animals, by covering them with a net, a cage, or a cloche. You should also thin the seedlings when they are about 4 to 6 inches tall, by removing the weaker or smaller ones, and leaving only the strongest and healthiest ones.  How to Grow Sunflower Seeds?  After planting your sunflower seeds, you can watch them grow and enjoy their beauty and bounty. Growing sunflower seeds is a rewarding and satisfying experience that requires minimal maintenance and care. Here are some tips and tricks to grow sunflower seeds successfully: Water Water your sunflowers regularly, but not excessively, to keep the soil moist but not wet. Sunflowers need about 1 to 2 inches of water per week, depending on the weather and the soil conditions. You can use a hose, a sprinkler, or a drip irrigation system to water your sunflowers. You should water them in the morning or evening, and avoid wetting the leaves or the flower heads, to prevent fungal diseases. Fertilizer Fertilize your sunflowers occasionally, but not excessively, to boost their growth and flowering. Sunflowers need a balanced fertilizer that contains nitrogen, phosphorus, and potassium, such as a 10-10-10 or a 20-20-20 formula. You can apply the fertilizer once or twice during the growing season, following the instructions on the label. You should avoid over-fertilizing your sunflowers, as this can cause them to grow too tall and weak, and make them prone to pests and diseases. Pruning Prune your sunflowers occasionally, but not excessively, to improve their shape and health. Sunflowers do not need much pruning, as they are naturally self-pruning and self-cleaning. However, you can prune them to remove any dead, damaged, or diseased leaves, stems, or flowers, to prevent infection and improve air circulation. You can also prune them to control their height and spread, by pinching or cutting off the tips of the main stem or the side branches. You should use clean and sharp scissors or pruners to prune your sunflowers and do it in the morning or evening when the plants are less stressed. When to Harvest Sunflower Seeds? The first step to harvesting sunflower seeds is to know when they are ready. Sunflowers typically bloom in the summer and their seeds mature in late summer or early fall. You can tell when your sunflowers are ready to harvest by looking at their appearance and feel. Here are some signs that your sunflowers are ready to harvest: Petals have fallen off or turned brown. The back of the flower head has turned yellow or brown. Seeds have developed black and white stripes. The seeds are plump and firm to the touch. If you are not sure if your sunflowers are ready to harvest, you can do a simple test by rubbing your thumb over the seeds. If they come off easily, they are ready to harvest. If they are still attached to the flower head, they need more time to ripen. How to Harvest Sunflower Seeds? Once you have determined that your sunflowers are ready to harvest, you can proceed to the next step. Harvesting sunflower seeds is a simple process that involves cutting, drying, and storing the seeds. Here is how to do it: Cut the flower heads from the stems using a sharp knife or scissors. Leave about 12 inches of stem attached to the flower head for easier handling. Place the flower heads in a dry and well-ventilated area, such as a garage, shed, or porch. You can hang them upside down or lay them flat on a screen or rack. Make sure they are not touching each other to prevent mold and rot. Let the flower heads dry for about two weeks or until the seeds are completely dry and hard. You can check the dryness by biting or cracking a seed. If it is crunchy and not moist, it is dry enough. Remove the seeds from the flower heads by rubbing them gently with your hands or a soft brush. You can also use a fork or a spoon to scrape them off. Discard any debris, such as petals, leaves, or insects. Store the seeds in an airtight container, such as a glass jar, a plastic bag, or a metal tin. Label the container with the date and the variety of sunflower. Keep the container in a cool and dark place, such as a pantry, a cupboard, or a basement. How to Enjoy Sunflower Seeds? Now that you have harvested your sunflower seeds, you can enjoy them in various ways. You can eat them raw or roasted, salted or unsalted, shelled or unshelled. You can also use them in salads, soups, breads, muffins, granola, trail mix, pesto, butter, and more. Sunflower seeds are rich in protein, fiber, healthy fats, vitamins, minerals, and antioxidants. They can help manage high cholesterol, blood pressure, and inflammation and boost your immune system, brain function, and mood. Here are some tips and tricks to enjoy your sunflower seeds: Roast To roast your sunflower seeds, spread them in a single layer on a baking sheet and bake them in a preheated oven at 300°F for about 15 to 20 minutes, stirring occasionally, until golden and crisp. You can season them with salt, pepper, garlic, onion, paprika, cumin, or any other spices you like.  Shell To shell your sunflower seeds, you can use your teeth, your fingers, or a nutcracker. You can also soak them in water for a few hours to make them easier to shell. To remove the shells, you can blow them away with a fan, a hair dryer, or your mouth, or you can shake them in a colander or a sieve. Sunflower Seed Butter To make sunflower seed butter, you need to blend the shelled and roasted sunflower seeds in a blender until it turns smooth and creamy. You can add a little oil, honey, salt, or vanilla to enhance the flavor and texture. You can use sunflower seed butter as a spread for toast, crackers, or fruit, or as a dip for pretzels, celery, or carrots. Pesto To make sunflower seed pesto, blend roasted and shelled sunflower seeds with fresh basil, garlic, olive oil, lemon juice, salt, and pepper in a food processor or a blender until smooth and thick. You can use sunflower seed pesto as a sauce for pasta, pizza, or sandwiches, or as a dressing for salads or roasted vegetables. Wrapping It Up! Harvesting sunflower seeds is a fun and easy activity that you can do with your whole family. It is also a great way to enjoy the beauty and bounty of nature, as well as the health benefits of sunflower seeds. By following the steps and tips in this article, you know how to harvest sunflower seeds in a few simple steps, as well as enjoy them in various ways. I hope you found this article helpful and informative. If there are any other queries related to the same, please feel free to let me know. All that yo need to do is scroll down till you reach the bottom of the page. Then leave your comments and suggestions in the box below. And I will be ether to answer them all for you!  Learn More About: Best Material for Garden Sheds: A Guide for Everyone Asparagus 101: When, How, And How Often To Harvest? Best Gardening Tips For Beginners: Adopting A Relaxing Hobby

READ MOREDetails