Appliance Repair Process Getting Your Appliances Back In Top Shape

Published on: 17 October 2023 Last Updated on: 28 February 2024
Appliance Repair Process

In today’s fast-paced world, household appliances have become an integral part of our lives. From refrigerators to washing machines, these appliances simplify our daily chores, making our lives more convenient. However, like any other machine, appliances are prone to wear and tear over time. 

When your trusty appliance breaks down, it can disrupt your routine and be a source of frustration. But fear not! In this article, we’ll walk you through the appliance repair process, helping you understand what to expect when seeking professional appliance repair services.

Appliances can malfunction for various reasons, such as wear and tear, electrical issues, or mechanical failures. When your appliance starts acting up, the first step is to identify the problem accurately. This is where professional appliance repair toronto downtown services come into play.

Basic Aspects Of The Repair Process

Basic Aspects Of The Repair Process

Repair of electronic appliances is quite a comprehensive process. It will be an expansive discussion. This is the reason people try to ensure that they give the work to experts. However, let’s try to understand them here in brief to gather a clear idea on the subject. 

1. Saving Money 

Electronic appliances, especially quality ones, usually serve customers with satisfaction. However, after theft, they face some issues, and consumers generally make the decision to replace it with a new one. But if you are investing to get a new machine, you have to spend a lot of money. It can entirely derail your budget. Why not get them repaired? Repairing these malfunctioning gadgets saves you extra dollars. 

2. Convenience

One of the great benefits of repairing the old appliance is the convenience. Be it the Television, washing machine, or some other gadget, you definitely have your convenience. You are used to this very quality. But sometimes the new gadgets or appliances fail to satisfy the consumers. Notwithstanding the expenditure, you may not be happy. Repairing an old appliance can make your life quite convenient. 

3. Safety

When an electronic appliance stops functioning, it may be unsafe for people, especially kids. These malfunctioning appliances can disrupt the electronic connection within the house. So to stop further damage to the appliance and maintain the safety of the people, you have to be mindful of the repair of your appliances. So, get these applications to the best of your understanding and ensure that you have them. 

4. Assessment And Diagnosis

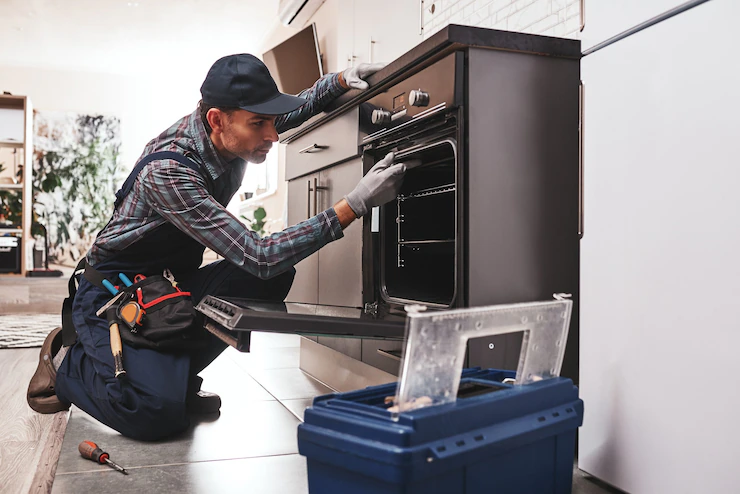
The first process in this system is the assessment and diagnosis. First, you have to look at the types of issues that you are facing with your appliance. The problem requires the replacement of certain components. The problem may also have a link with repairs. 

A. Identifying The Issue

The initial phase of the appliance repair process involves identifying the root cause of the problem. Skilled technicians use their expertise to pinpoint the issue: a faulty motor, a broken thermostat, or a malfunctioning control board.

B. Diagnostic Tools And Techniques

Technicians utilize advanced diagnostic tools and techniques to ensure accurate problem identification. These tools help assess the appliance’s functionality and determine the necessary repairs.

5. Choosing the Right Appliance Repair Service

Appliances’ care is under your hand. If you take adequate care of your appliance right from the beginning, then it will help you increase the shelf life of your appliance. But when the appliance goes out of order, then, its better that you take the assistance of the right repair services. They are professionals and they will provide you with the best suggestion on wha exactly you have to do it fix the issue. 

A. Research And Reviews

Selecting a reputable appliance repair service is crucial. Conduct thorough research and read reviews to gauge the reliability and customer satisfaction of different service providers in your area.

B. Credentials And Experience

Ensure that the repair service you choose has certified technicians with ample experience in repairing appliances of various brands and models.

C. Getting A Quote

Before proceeding with the repair, request a detailed quote from the service provider. This should include the cost of parts, labor, and any additional charges.

Related: How To Repair Home Appliances and Use Humidifiers

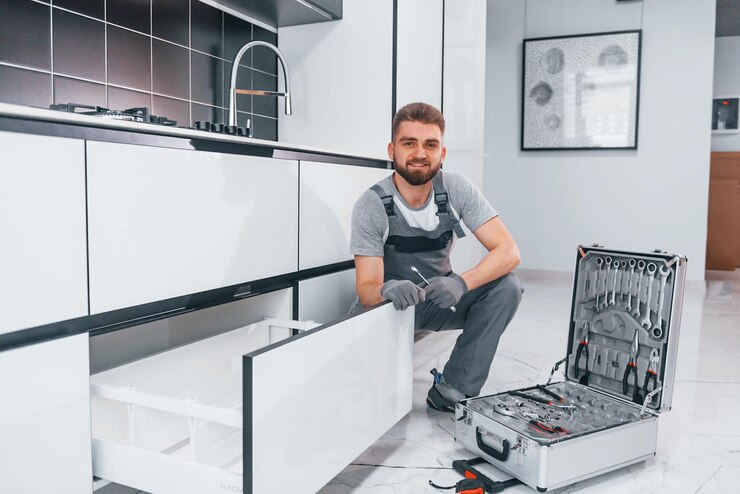
6. Repairing Your Appliance

When you are repairing an appliance, you may have to replace one of many components. At the same time, you may do some repairing of that component and fix the problem. It will depend on not one but a group of elements. 

Parts Replacement

If your appliance requires replacement parts, the technician will use genuine components to ensure optimal performance and longevity.

Repair Techniques

Technicians employ effective repair techniques, ensuring that the appliance functions as good as new. These may include soldering, rewiring, or recalibrating components.

Quality Assurance

The longevity of the electric appliance depends primarily on not one but many elements. The electric appliance, whether it is a refrigerator or, say, a washing machine, branded goods generally offer better products. Quality repair  standards and their maintenance depend on some other elements and including;

Testing And Inspection

After repairing your appliance, thorough testing and inspection are carried out to verify that it’s working correctly. This step ensures that the issue is fully resolved. The repair service with a good enough name and fame would always love to ensure zero tolerance towards any negligence. 

Warranty And Guarantees

Reputable repair services provide warranties and guarantees on their work. It also offers you peace that your appliance is in good hands.

Warranty on the repair provides confidence to the people that their investment will not go to waste under any circumstances.

Preventive Maintenance

To avoid future breakdowns, performing preventive maintenance on your appliances is essential. Here are some tips:

  • Clean filters and vents regularly.
  • Check for loose or damaged wires.
  • Schedule routine check-ups with a professional technician.

Conclusion

The appliance repair process may seem daunting when your valuable appliances malfunction, but with the right knowledge and a trusted repair service, you can have them back in top shape in no time. Remember to prioritize regular maintenance to prolong the lifespan of your appliances and minimize the need for repairs. Finally, take the assistance of an experienced repair services to save yourself from loss of further damage. 

Read Also:

  • Vampire Appliances And Electronic Costs
  • Best Practices That Extend The Life Of Your Appliances
  • How Can Appliance Repair Services Help You

Ankita Tripathy loves to write about food and the Hallyu Wave in particular. During her free time, she enjoys looking at the sky or reading books while sipping a cup of hot coffee. Her favourite niches are food, music, lifestyle, travel, and Korean Pop music and drama.

View all posts

Leave a Reply

Your email address will not be published. Required fields are marked *

Related

Centerpiece-Inspired Decor

Transform Your Wedding With The Top 10 Centerpiece-Inspired Decor Trends

Weddings, the celebration of love and unity, are occasions where every detail matters. And they are certainly incomplete without incorporating centerpiece-inspired decor trends. The magic of the event is found not only in the bride’s gown or the perfect ceremony but also in the decor that sets the mood and theme of the wedding.  Wedding decor trends have evolved over the years, with creativity and personalization taking the forefront. Couples are now leaning towards decor that reflects their personalities, love story, and even their favorite hobbies. However, with so many options available, it can be overwhelming to decide which trend to follow. From rustic to modern, vintage to boho, the choices are endless. With the right guidance, you can decode the vast world of wedding decor trends and choose the ones that suit you best. In the realm of wedding decor, one aspect that holds significant importance is the centerpiece. Let's delve into its significance and how it can transform your wedding. Importance of a Centerpiece in Wedding Decor The centerpiece is not just a mere decoration, it is the heart of the table setting that brings everything else together. It sets the tone for the table decor and, ultimately, the entire room. A well-chosen centerpiece can create a cohesive look, reflect the wedding theme, and even serve as a conversation starter among guests. Centerpieces can be simple or elaborate, minimalistic or extravagant, depending on your personal style and wedding theme. Regardless of its design, a centerpiece should be engaging, drawing your guests' attention and leaving an impression. However, the power of a centerpiece extends beyond aesthetics. It can also evoke emotions, create a mood, and tell a story. A well-thought-out centerpiece can speak volumes about your personality, taste, and the love story that brought you to this day. Top 10 Centerpiece-Inspired Decor Trends As with any other aspect of wedding decor, centerpiece trends are also ever-evolving, reflecting the changing tastes and preferences of couples. Below are the top 10 centerpiece-inspired decor trends that can add a touch of elegance and personality to your wedding. Botanical Bliss: This trend involves using a variety of plants, from succulents to ferns, to create a natural, eco-friendly vibe. Floral Fantasia: Floral arrangements will forever be a classic choice, but the trend now is to go for unconventional flower types, colors, and arrangements. Vintage Charm: Antiques, heirlooms, and vintage items can be used to create a nostalgic and timeless atmosphere. Rustic Allure: Using elements like burlap, wood, and mason jars can create a cozy, rustic charm. Glamour and Glitz: For those who love sparkle and shine, incorporating crystals, sequins, and metallic accents can add a glamorous touch. Boho Chic: This trend involves using eclectic elements like macrame, dream catchers, and vibrant colors to create a bohemian, free-spirited vibe. Modern Minimalism: For a clean, sophisticated look, go for minimalistic centerpieces with geometric designs and neutral colors. Exotic Elegance: Incorporate elements from different cultures to create a unique, worldly vibe. Nautical Nuance: If you love the sea, use elements like shells, sand, and sea glass to bring a coastal charm to your wedding. Playful Pop Art: For a fun, vibrant atmosphere, use bold colors and pop art-inspired designs. Now, let's see how some of the most popular centerpiece-inspired trends can transform your wedding. Transforming your Wedding with Welcome Sign-Inspired Centerpieces Welcome sign-inspired centerpieces are a trend that's gaining popularity. Instead of a traditional guest book, the centerpiece can be a beautifully decorated welcome sign where guests can leave their well wishes. It's a creative and interactive way to engage your guests and create a keepsake that you can cherish forever. A welcome sign centerpiece can also give your guests a warm welcome and set the tone for the rest of the wedding. It can reflect the wedding theme, your personality, or even your love story. You can personalize it with your favorite quotes, images, or even a timeline of your relationship. The possibilities are endless. You can go for a rustic wooden sign for a barn wedding, a sleek acrylic sign for a modern wedding, or a vintage chalkboard sign for a retro wedding. Whatever your preference, a welcome sign centerpiece can definitely add a unique touch to your wedding. Enhancing Ambience with Candle-Inspired Centerpieces Candles have always been a favorite when it comes to centerpiece-inspired decor trends. They add a warm, romantic glow to the setting and can transform the ambiance of your wedding. However, the trend now is to think beyond traditional candle arrangements and to get creative with your candle-inspired centerpieces. You can place candles in lanterns for a rustic charm, float them in water-filled glass bowls for a magical effect, or arrange them among flowers for a classic look. You can also experiment with different candle shapes, sizes, and colors to create a unique centerpiece. But apart from their aesthetic appeal, candles also create a warm, intimate atmosphere. The soft, flickering light can make your guests feel relaxed and comfortable, setting the perfect mood for a celebration of love. Delighting Guests with Gift-Inspired Centerpieces Another trend that's making waves is the gift-inspired centerpiece. Instead of traditional decor, the centerpiece can be a beautifully wrapped gift that adds a festive touch to the table. This can double as a thank-you gift for your guests, making them feel special and appreciated. You can personalize the gifts based on your wedding theme, your personality, or even your guests' preferences. It could be a small plant for a green wedding, a custom-made candle for a romantic wedding, or a jar of homemade jam for a rustic wedding. Gift-inspired centerpieces not only add a unique touch to your decor but also create a memorable experience for your guests. It's a small gesture that can leave a big impact, making your wedding unforgettable. How to Choose the Best Centerpiece for Your Wedding Choosing the perfect centerpiece for your wedding can be a daunting task, but with a few tips and considerations, you can find the one that best suits your style and theme. Firstly, consider the size and shape of your tables. The centerpiece should complement the table and not overpower it. Also, it should not obstruct the view or conversation among guests. Secondly, take into account the overall theme and color scheme of your wedding. The centerpiece should blend in seamlessly and enhance the aesthetic of your decor. Lastly, think about your personal style and preferences. Your wedding is a reflection of you and your partner, so choose a centerpiece that speaks to your personality and tells your story. DIY Tips for Creating Your Own Centerpiece If you're a crafty couple who loves DIY projects, creating your own centerpiece can be a fun and fulfilling experience. Here are a few tips to help you out. Start by gathering inspiration. Look at wedding magazines, decor blogs, and Pinterest to get ideas. Once you have a clear vision, start sourcing materials. You can find a wide range of supplies at craft stores, thrift shops, or even online. When it comes to design, simplicity is key. Choose one or two main elements and build around them. You can use flowers, candles, vases, or any other items that fit your theme. Lastly, don't be afraid to experiment and get creative. Your centerpiece is a reflection of your personal style, so make it unique and memorable. Where to Buy Wedding Centerpiece-Inspired Decor Trends? If DIY is not your thing, there are plenty of places where you can buy trendy wedding centerpieces. From online marketplaces like Etsy and Amazon to local florists and decor rental companies, you have a myriad of options to choose from. When shopping for centerpieces, keep in mind your wedding theme, color scheme, and budget. Look for reputable sellers with good reviews, and make sure to order well in advance to avoid any last-minute stress. Conclusion: Making Your Wedding Unforgettable with Centerpiece-Inspired Decor In conclusion, the centerpiece is an integral part of your wedding decor that can set the tone, create a mood, and tell a story. Whether you opt for a welcome sign-inspired centerpiece, a candle-inspired centerpiece, or a gift-inspired centerpiece, you can transform your wedding and create a memorable experience for your guests. So, embrace the latest trends, get creative, and let your personality shine through your centerpiece. After all, your wedding is a celebration of your unique love story, and every detail should reflect that. Read Also: Why Trusting Professionals For Your Wedding Photography And Videography Is A Must Why Sending An E-Invite For Your Wedding Is A Smart Option? How to Choose Hotels for Your Wedding in Pigeon Forge TN

READ MOREDetails
Best Furniture Stores

The Ultimate Guide To Finding The Best Furniture Stores

When it comes to furnishing your home, looking for an optimum furniture store is crucial. There are plenty of options available, but it might be a bit overwhelming to make the best choice for your needs and style preferences. In this comprehensive guide, we will walk you through the essential aspects of selecting the perfect furniture store, ensuring you get the best value for your investment. Why Choosing The Right Furniture Store Matters Your choice of furniture store can significantly impact the quality, style, and overall satisfaction of your furniture purchase. Here's why it matters: Quality Assurance High-quality furniture ensures durability and longevity. Reputable furniture stores toronto source their products from trusted manufacturers, guaranteeing top-notch craftsmanship. Style And Variety Each furniture store has its unique style offerings. Finding one that aligns with your taste and home decor is essential for a harmonious living space. Budget Considerations Furniture prices can vary significantly from store to store. Choosing a store that fits your budget without compromising on quality is vital. Customer Service Excellent customer service can make your shopping experience enjoyable and hassle-free. Friendly and knowledgeable staff can help you make informed decisions. Factors To Consider When Choosing A Furniture Store Reputation Look for stores with a strong reputation in the market. Reading reviews and asking for recommendations can help you identify trustworthy options. Product Quality Inspect the furniture's materials and construction. Solid wood and high-quality upholstery are signs of a good product. Style And Aesthetics Consider your personal style and the overall look you want for your home. Choose a store that aligns with your aesthetic preferences. Budget-Friendliness Set a budget beforehand and stick to it. Compare prices from different stores to find the best deal for your budget. Return Policy And Warranty Ensure the store offers a reasonable return policy and a warranty on their products. This provides peace of mind in case of any issues. Delivery And Assembly Check if the store provides delivery as well as assembly services. This can save you time and effort in setting up your furniture. Top Furniture Store Chains IKEA Popular for its affordable as well as modern furniture sets, IKEA is a favorite among budget-conscious shoppers. Ashley HomeStore Ashley HomeStore offers a massive range of stylish and well-crafted furniture pieces suitable for various tastes. Wayfair Wayfair is an online retailer with an extensive choice of furniture, making it easy to find unique pieces for your home. Crate & Barrel Crate & Barrel is known for its contemporary and elegant furniture, perfect for those with a taste for sophistication. Making Your Final Decision Once you've considered all the factors and explored various options, it's time to make your final decision. Trust your instincts and choose the furniture store that aligns best with your needs and preferences. Selecting the right furniture store is a crucial step in creating your dream home. With careful consideration of factors like reputation, product quality, style, and budget, you can look up for the best store to fulfill your furnishing needs. Read Also: 10 Best Bedroom Plants To Buy In 2022 How You Can Update Your Home with Cream Color Is Home Furnishings A Good Career Path In 2021?

READ MOREDetails
how to harvest dill

How to Harvest and Preserve Dill for Year-Round Use?

The tender, fern-like leaves of dill almost beg to be touched. If you want to cook them, trim the fresh dill foliage and gather the seeds for pickling. Or you can chop the feathery leaves and yellow umbels for attractive bouquets of homegrown flowers. In addition, black swallowtail caterpillars love to feed on it. Its tiny yellow blooms are great at drawing in a wide range of pollinators. Dill grows as an annual for summer harvests in USDA Hardiness Zones 2–8. In other parts, it may self-seed and is hardy in the winter in Zones 9–11. Here is everything you need to know about how to harvest dill. Keep reading for a comprehensive guide. How to Harvest Dill? Fresh dill clips easily, but it soon starts to droop. Sounds familiar to Cilantro, right? Its flower umbels may look lovely in a mixed bouquet, but after a few hours, don't be shocked if they start to wilt. When harvesting dill for recipes, use it as soon as possible because its flavor starts to fade after a few days. Cut off the flower stalks of dill after the yellow blooms have faded but before the seeds start to ripen and come away from the umbel. Cover the entire flower head with a small paper bag that has a few tiny holes for ventilation. Hang the plant upside down in a cool, dry place. Watch for the seeds to fall and collect them in the bag's bottom. The seeds should be kept in a cool, dry, and dark area in an airtight glass container. When and How to Plant Dill? Dill grows best outside and is simple to start from seed. Plant the seeds directly into the ground, 1/4 inch deep and spaced 1 to 2 inches apart, in the springtime following the last frost. If you want the dill plants to be able to self-sow, plant the seeds in tufts so the seeds can fall and sprout the following year. Or you can plant them in rows spaced about 6 inches apart. You might want to think about succession planting if you want a reliable supply of dill. During the growing season, start by planting a small number of seeds from the packet at a time and then a few more every week. Typically, seeds take 7 to 14 days to germinate. Also, dill can be grown from transplants grown in nurseries planted in the ground or in containers in spring. You can plant dill outside a few weeks before the last predicted spring frost because it can withstand light frost. To achieve lush growth and stop crowded seedlings from producing seed heads, which stops the production of foliage, thinning is essential. Every 12 to 24 inches, reduce the number of seedlings to just the strongest one once they reach 3 or 4 inches in height. As they get bigger, some start to flop. Plants can be kept upright by placing a stake or a sturdy twig in the ground close to the plant's base. To loosely secure the plant to the stake, use garden twine. You can start the dill seeds indoors four to six weeks prior to the last frost. And you can move the seedlings to the ground once the risk of frost has passed. Transplanting mature dill does not work well, so plant your seedlings where they will be able to grow and thrive. Where To Plant Dill? Dill should be planted in a spot with well-drained soil and at least 6 to 8 hours of daily full, direct sunlight. Particularly for cottage gardens, the delicate foliage gives garden beds and borders textural interest. Choose a location for your dill that will shield it from the wind if possible. Just like spinach, high winds can easily damage its stalks if you do not stake the dill. You can plant dill's fragrant foliage in perennial garden container plantings. Or you can plant them alongside other herbs or vegetables in a traditional kitchen garden. In an edible garden, cruciferous vegetables such as Brussels sprouts, collard greens, broccoli, and cabbage are good companion plants for dill. Dill draws beneficial insects like ladybugs and bees and drives away common brassica pests like loopers and cabbage worms. But avoid planting dill close to carrots. Carrots can be stunted by dill, and because they are closely related, dill can cross-pollinate with carrots to produce inferior hybrid plants. Planting dill close to tomatoes is also not recommended. Mature dill will probably stunt your tomatoes' growth, even though some studies have indicated that tomatoes and dill can be beneficial companions when they are young. How to Propagate Dill? Seed is the most effective method of dill propagation. Cuttings can also propagate Dill, though this isn't as dependable. Seed: Direct sow the dill seeds in early spring at a depth of 1/4 inch in a prepared garden bed. Dill does not tolerate transplanting well. Thin the seedlings so they are 12–24 inches apart when they are 3–4 inches tall. Cuttings: Using shears or scissors, cut off the stem with at least 3 to 4 inches of new growth to take a dill cutting. Place the cutting in a water-filled container, making sure to remove any leaves below the water's surface, and allow the roots to grow for two to three weeks. Fertilizer and rooting hormones are not required. Plant the dill in a container or on the ground once the roots are 2 to 3 inches long. Is Dill a Type of Weed? No, I am not talking about WEED weed (read: marijuana). Although dill isn't technically a weed, some individuals and spice companies call the plant dill weed, possibly due to its feathery leaves. Dill weed is a dried or fresh foliage plant. Flower umbels are yellow and used to make dill seeds. How Should Dill Be Stored for Optimal Quality? You can keep fresh dill in the fridge by wrapping its leaves in a moist paper towel. Or you can tuck its stems into a container of water. Fresh dill can be frozen by submerging it in water in ice cube trays. Place the cubes in cooked dishes that have enough moisture to withstand them. Dill seeds and leaves can also be easily dried for later use, though the flavor is a lot more muted. Water and Soil Sow dill in soil that is moist but well-drained. If there is a lot of clay in your soil, add organic matter to the top few inches to aid in drainage. If you have trouble with poor soil drainage, plant this herb in raised beds or containers. Growing dill requires proper irrigation. As the seeds germinate, keep the soil evenly moist. Dill plants require one to two inches of rain or extra water each week once they begin to grow. Humidity and Temperature Dill tolerates temperatures as low as 25ºF, but 70ºF is the ideal temperature for it. Dill often bolts, sending up flower stalks to set seeds when temperatures rise. This annual herb dies after it flowers and produces seeds. Get rid of the flowers to prolong the plant's growing season. Apply Fertilizer While most herbs, including dill, don't require extra fertilizer, you can give them once or twice during the growing season by applying a balanced 10-10-10 fertilizer. When planting, either mix a liquid fertilizer with water or etch a time-release fertilizer into the soil. Refer to the product label for instructions on how much to use. Trimming Dill should be pruned early in the growing season to prevent limb bending. Cut off the top leaves of the plant to promote more growth of the lower leaves. Food preparation and cooking can be done with anything that has been pruned. Repotting and Potting You can grow dill in pots on a sunny balcony or deck, even if you don't have an outdoor garden. Due to the deep taproot that dill plants have, choose a container that is at least 12 inches deep. Because clay and terracotta pots don't retain as much moisture as plastic or glazed ceramic pots. They are ideal for growing dill. Make sure the container you select has good drainage and is big enough to allow you to space your plants 12 to 24 inches apart. It is best to start over in a new, larger container. Especially if your dill plant outgrows its current one because it does not take well to transplant. If the temperature where you are planting is not too high, you can keep planting seeds into the summer. Types of Dill Dills can be of many types with each of their distinct looks and flavors. Here are the three different types of dill you can grow in your kitchen or backyard. Long Island Mammoth Also known as Long Island Mammoth this one is an old-time favorite. Its fern-like leaves can be dried and stored for a long time, or they can be harvested fresh. It produces big clusters of yellow flowers with flat tops. They turn into brown seed heads, and they can reach a height of five feet. Fernleaf Grown to a height of only 18 inches, Anethum graveolens, or Fernleaf, is a highly productive dwarf variety. It works well in container gardens or small in-ground beds. Its feathery, delicate foliage has a great flavor of dill. From midsummer into fall, it blossoms. Bouquet The 'Bouquet' cultivar produces plants up to thirty inches tall with fine bluish-green foliage. The enormous, six-inch-diameter yellow flower heads are ideal for drying, creating an enduring arrangement. Or you could chop them for fresh floral arrangements. How to Keep New Dill Fresh? Dill weed quickly wilts after harvesting and gradually loses its distinctive flavor and aroma. If you know how to store your freshly harvested dill, this shouldn't be a problem. Here are two straightforward techniques that you can use: Put It in the Crisper Drawer of the Refrigerator Loosely wrap the recently cut and cleaned leaves in damp kitchen towels before putting them in a container or sealed bag. Put the container in the crisper drawer of the refrigerator, which has a lower humidity than the other sections of the appliance. Utilize the herbs before they begin to wilt and dry out, which should happen in a few days. Put It in Water To make this method function, when harvesting the herb, you must cut off the entire stem. After gathering the stems, put them in a glass of water and seal the opening with a plastic bag. Every day, change the water. Unlike potatoes, dill leaves can remain fresh for up to a week when stored in this manner. How to Freeze Fresh Dill? Freezing is the best way to preserve extra dill for later use if you've harvested more than you can use at once or in a few days. Dill freezes most effectively when chopped into smaller pieces and added to ice cube trays with just enough water to cover the freshly minced dill. This allows the herbs to be kept for four months or longer. This will ensure you always have dill on hand for when a recipe calls for it. How to Dry Fresh Dill? Dried fresh dill is a popular method if you're searching for another way to store dill for a long time. The herb has many uses, even though it won't have as much flavor as when it's fresh or frozen. All year long, you can use it as a herb in cooked dishes or to make tea. Stick to hang-drying if you don't want much of the flavor to be lost. This is a very easy method to use. All you must do is gather a few dill leaves and then bind them with a string. Later, place them in an area with adequate ventilation upside down.  Place them in an airtight container once they're crumbling and dry. Even though fresh dill is always preferable, make sure to save some for later use. Particularly if you don't have a year-round indoor herb and spice garden. Wrapping Up Growing dill is a great way to add flavor to fish and seafood dishes. A little goes a long way because fresh dill leaves have a strong licorice flavor. It is best that you add dill toward the end of cooking, in salads, or as a garnish for soups. Because once cooked, it tends to lose its flavor. If you have thoughts to share or questions to ask about how to harvest dill, please leave a comment below. We would love to hear from you! Read Also: Asparagus 101: When, How, And How Often To Harvest? How To Harvest Sunflower Seeds: A Fun And Easy Activity For The Whole Family How TO Harvest Lemongrass: Tips AND Tricks FOR Growing AND Using This Versatile Herb

READ MOREDetails