No doubt, table saws are a piece of an indispensable tool for any professional woodworker. Are you are looking to buy a new table saw to execute a particular project or you want to replace the one you have before with a regular saw? It is essential you acquaint yourself with the most recent improvement that has been introduced to the saws to enhance their efficiency and accuracy.
Take it; table saws aren’t just a simple tool. Even ace woodcutters often experience difficulties maintaining a tone with the fast changes going on in the industry.
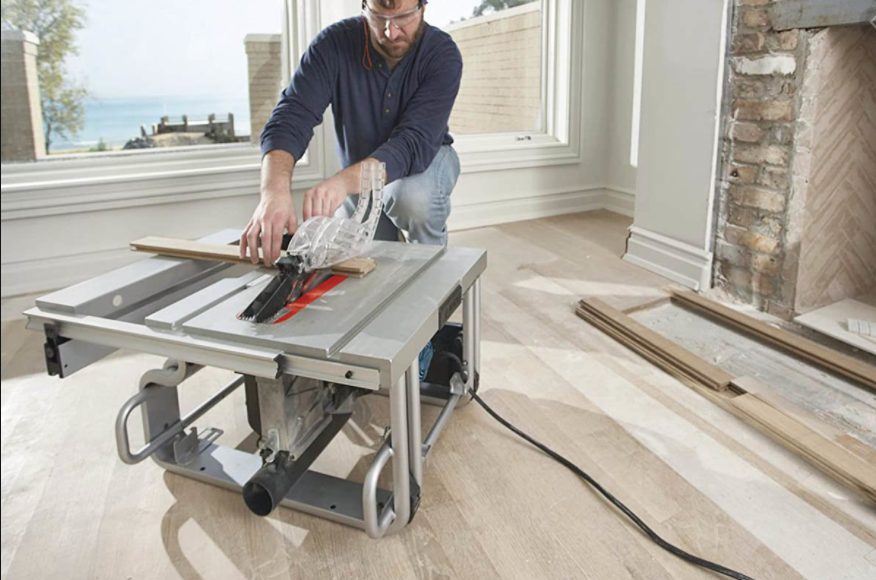
10 Tips to Pick the Best Table Saw for Home Improvement Projects
We present here the 10 top tips that can aid your selection of the best table saws for home improvement projects:
1. Examine the Saw Blade Design :
The blade of any table saw is one of the most critical components you should consider. There are quite some things you need to know about the structure of the table saw blade. You must also mind the interrelated parts such as the tooth arrangement and the number of teeth.
Check for the thickness of the blade and ensure that it will not break during use. We’ve gone past the era of thin metal blades that are very prone to twisting and snapping off. Good blades are now fabricated from the best grade of durable carbide, coated with laser-cut covering for complete safety, sharpness, and accuracy. The sharpest blades use advanced laser-cut plates that dampen vibrations and secure stability in high-tension cutting.
2. Check Table Saw Motor :
Another thing to consider when buying the best table saw is the motor. You might be familiar with the term “horsepower” rating of the table saw. However, the drive employed by the engine to send the power to the blade is another essential factor to consider when sourcing for the ideal table saw to purchase.
For instance, as a rough estimate, the table saw motor units delivering up to 2 horsepower can conveniently cut a 2-inch thick board. Should you need to saw thicker boards, you can go for a bigger motor, that uses around 250 volts, that can deliver higher force and torque for critical woodwork projects.
3. Consider the Table Saw Fence :
Conventionally, woodworkers believe that the fence that comes with a table saw is its lifeline. By merely equipping a table saw with a durable one, the brands are deemed better than others. The primary use of the fence is to aid the blade is rotating along the width of the board while cutting it.
The best table saws will certainly advocate for a flexible fence as it is an essential component, making it possible to achieve a transverse and longitudinal bending anytime needed. Sometimes, it might be difficult to bend the fence, use the lubricant to overcome the friction.
4. Check the Miter Gauge :
The importance and use of miter gauge are crystal clear. It is primarily a piece of shielding device cased in the miter slot. The chief part of the miter gauge is made up of a crescent-like section that rotates among several angles enabling cuttings at different angles.
It also comes with a bevel lock that enables it to be adjusted to desirable angles. The straight end of the gauge must align perfectly along with the board and passed towards the blade to give perfect angled cuts.
5. Dust Control :
Table saws have diverse ways of packing up and eliminating the dust emanating from the cutting of the wood. You can buy a saw with a port attached to the rear end, coupled to a vacuum. This will usher the dust to the base of the table saw.
Some other table saws feature a shroud that shields the blade and this will re-channel the dust that gathers over the table saw. The ideal table saw is the one that incorporates these two features to give you the best dust control. You can also lookout for a slanting shaft that will aid in re-channeling the dust to the significant dust compartment.
6. Safety Features :
That the table saw is a power cutting tool implies that it can cause serious harm should an accident occur. Therefore, it is necessary to look for brands that feature a range of safety mechanisms. For example, you can check for the brands with flesh detection techniques, which halts the rotation whenever your finger touches the blade of the saw. It is equally important that you look for the anti-kickback components which are safety devices that hinder the stock from being flung in along your path.
7. Magnetic Switch :
Even as this might look like a vestigial feature, it is imperative. Just as it sounds, it is a switch regulated by a magnet that turns off the saw automatically if power is taken while you are cutting. This makes the table saw safer, as opposed to the conventional saw that will remain switched on even while electricity is cut off and can come up when electricity supply is restored, wreaking great havoc in the process. The magnetic switch keeps the saw off in cases of power outages and prevents unintentional starts.
8. Portability :
Perhaps you plan to be using your table saw at more than one job site, then toy may want to look at how portable it is. The implication of this is that you may need to check the overall fabrication and measurements of the table saw to be cork sure it is the ideal one for your workshop size. If it comes with a stand, select the one that can be easily folded and one whose wheels are working.
9. Precision and Neatness of Cut :
The primary reason anyone will be purchasing a table saw in the first instance is to get perfect cuts without much stress. When selecting the ideal table saw, make certain you chose the one that can rip through boards easily. As for the precision, you need to make sure that the miter gauge is perfect to make bevel cuts, crosscuts and straight ones with ideal accuracy.
10. Drive Belt Fabrication :
The last tip on our list to be considered when buying the table saw is the drive belt. The drive belt transmits power from the electric rotor to the saw blade. Make sure it is sturdy and strong enough to transmit the rotation as required.
Image credit: https://www.bobvila.com/
Conclusion :
There are some things to consider when shopping for +a table saw. However, we have listed ten things to consider before hitting the market for purchase. We sincerely believe this tips will guide your investment and help you in buying the ideal saw for you.
Read Also :