Professional headshots and regular portraits may seem similar, as both are photography forms meant to capture an individual’s likeness. However, the distinctions are crucial, particularly in a professional context.
A professional headshot is tailored to convey a person’s professional identity and is often required for corporate profiles, business websites, and LinkedIn pages. These headshots are designed to create a strong first impression, showcasing the subject in a polished and approachable manner.
Conversely, a regular portrait captures a person in a more personal and artistic fashion, often reflecting their personality, lifestyle, or an artistic concept. Portraits are less rigid in styling, composition, and use of backgrounds, allowing for more creative freedom.
Portraits might be full-body shots or tightly cropped images set in various environments and with varying lighting and mood, contrasting with a professional headshot’s usually consistent illumination and composition.
Key Takeaways
- Professional headshots are curated for professional branding.
- Portraits offer more freedom and are personal or artistic.
- Lighting and cropping are key differentiators between the two.
Fundamentals of a Professional Headshot

Before exploring the key components of a professional headshot, it’s important to understand that they demand precise technical execution, thoughtful composition, and careful attention to the portrayal of the subject.
Technical Aspects
Professional headshots stand out due to their exceptional lighting and focus, which require a photographer to make meticulous adjustments. The right lighting is crucial; it should illuminate the subject’s features without harsh shadows or overexposure. A high-resolution camera is also essential to capture the detail needed for a headshot, ensuring that the final image is crisp with a clean focus.
Composition and Aesthetics
The framing and cropping in a professional headshot are deliberate, typically adhering to industry standards—such as the top of the shoulders and head being visible, with the subject’s eyes positioned at or just above the center line. Backgrounds are simple and unobtrusive, highlighting the subject’s conversation with the camera.
Subject Presentation
In a professional headshot, the subject’s presentation is key. Professional attire is recommended, and personal grooming is crucial. The subject’s expression is approachable yet authoritative, portraying confidence. The outcome is a portrait showcasing professionalism and character, suitable for professional contexts such as professional networking.
Impact of Headshots in Professional Settings

A professional headshot can be a cornerstone of a person’s online presence, significantly influencing first impressions and branding effectiveness.
Online Professional Platforms
LinkedIn has become the quintessential online platform for professionals. A polished headshot here enhances a LinkedIn profile, signaling credibility and competence. It is the first element that captures attention, laying the groundwork for potential connections. On resumes, a professional headshot can differentiate a candidate, especially in industries where appearance and personality are integral, like sales or public relations.
A headshot is a critical tool for a casting director’s selection process in entertainment. Actors and models must convey versatility and professionalism in a single image, often determining if they get considered for a role.
Corporate Branding and Marketing
In corporate contexts, professional headshots embody the ethos of the company. On corporate websites and business cards, they help build a personal connection with clients. Companies reinforce their brand and showcase their team’s professionalism through consistent, high-quality headshots across various marketing materials.
Entrepreneurs utilize headshots to establish a personal brand, an invaluable asset in attracting partnerships and customers. Reflecting confidence and professionalism, headshots are crucial for entrepreneurs presenting themselves on business platforms and online profiles.
For businesses that want to ensure they portray high professionalism, partnering with a professional headshot studio is a strategic move. It presents a unified brand image that fosters trust and reliability.
Feel And Mood Of Portrait And Headshot

There is a massive difference between the mood and feel of portraits and headshots. When a headshot is taken professionally for business purposes, it will exude a jolly vibe. The aim of a headshot is to communicate a particular message to the viewers.
In other words, when a headshot of a particular person is captured, they communicate friendliness, trustworthiness, reliability, and many other good things. Usually, these types of headshots are used for LinkedIn profiles and business websites. The use of a headshot also depends on the field you are trying to achieve.
However, professional headshots do not have to be about bonhomie always. They can be shot in different ways to express toughness, concentration, and knowledge.
When it comes to a professional portrait, the outcome usually is very straightforward. The shot is taken craftily to complement a story or article. So, for a portrait shot, there is always a proper theme.
A professionally captured portrait expresses a lot of mood, and there is a lot of drama in those photographs. In a portrait, a subject does not look straight into the camera. The subject remains busy with some activities while the photographer captures them.
To cut a long story short, a portrait is about weaving a story and conveying that to others. A headshot, on the other hand, is about introducing yourself to others. A headshot is also suitable for communicating a message quickly.
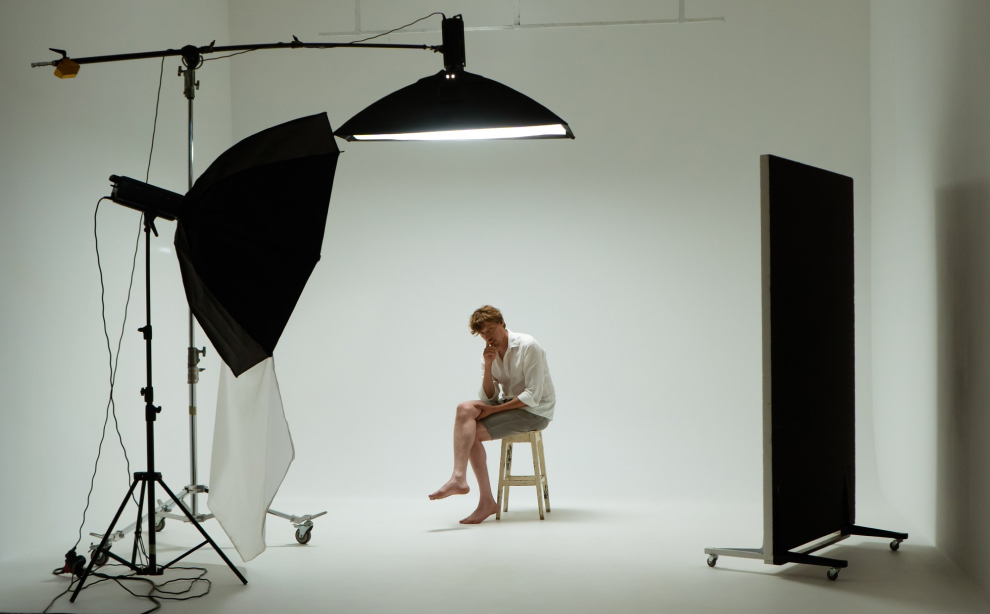
The Lighting Setup Of A Portrait And A Headshot

Lighting plays a very crucial role in determining how a photograph will look. I have already discussed how the mood and feel of headshots and portraits differ.
When a photographer captures a headshot, they will use big light modifiers. In the case of outdoor photoshoots, the photographer will use concrete or building pavements to get the headshots right.
Further, when a headshot is captured, the subject has less shadow. There is an absence of shadow to keep the overall look of the headshot pleasant. Once again, no drama is expected or required in a professionally captured headshot.
On the other hand, professionally captured portraits have a more dramatic lighting setup. The photographer has to create drama through the lighting setup. Also, keeping in mind the aesthetic appeal of a portrait, using conventional modifiers is often avoided in professional portraits.
Here are some other modifiers that are used in capturing professional portraits.
- Color gels
- Mirrors
- Glass
To reiterate, lighting decides the mood and expression of a particular photograph. So, use the lights and modifiers according to the type of photograph you want to click and what you want to communicate.
The Use Of Lenses In Headshot And Portraits
When a professional headshot is captured, a photographer will usually use an 85mm or above long focal lens. Thanks to the use of a long-focus lens, there is hardly any facial distortion in headshots.
Lenses with a shorter focal length are used in clicking professional portraits. A photographer will use 24mm to 50mm lenses to depict the surrounding.
Conclusion
Professional headshots are distinct in both purpose and execution. They employ meticulous post-processing to ensure a polished yet natural look, incorporating adjustments like color correction and skin retouching.
The subject’s engagement with the camera is direct, generally from the shoulders up, differentiating them from the broader scope of a portrait. Headshots provide a professional representation, focusing on clarity and simplicity, while portraits offer a more expansive narrative.
Read Also:
- 5 Corporate Video Production Styles
- Photography and Number of Techniques
- How to Best Photograph a Corporate Event