Does Your Flat Roof Need To Be Replaced? Spot The Warning Signs

Published on: 16 July 2021 Last Updated on: 10 January 2025
flat roof

Most homeowners with flat roofs know that summer is the perfect time to inspect flat roof membranes to ensure there are no tears, rips, or punctures. But if you don’t have a lot of experience with membranes, it isn’t always easy to know what damage looks like. 

Understanding the warning signs that your roof may need to be replaced is essential for all homeowners, but especially for those whose houses include areas of flat roof: while flat roofs have many distinct advantages, they do wear out more quickly, so being able to monitor the state they are in is important. 

4 Warning Signs Of The Problematic Repair Need Roof 

4 Warning Signs Of The Problematic Repair Need Roof 

Needless to say, if you are experiencing ceiling leaks, the spread of mold, or other internal issues related to the roof, you should call an expert in flat roof repairs to address the problem immediately. But if you want to be proactive about your roof, here are some things you can look for:

Check out the four signs, which are quite serious clear signs for repairing your flat roof. You should not neglect the repair work if you are finding any of these signs.

1. Ponding Water

The first warning sign that repairs will soon be needed is drainage issues. If water stays on your roof for days after it rains, then your roof is probably in trouble. 

Flat roofs are designed to channel water through internal and external drains quickly, and if you have noticed little ponds forming on the roof deck, you’ll want to get the problem looked at. 

The main reason for the ponding water is the uneven surface of the roof and mismanagement of the drainage system. So to prevent it, always pay attention to smooth out the surface of the roof. And if your roof is showing these types of ponding problems. Start the repairing process as soon as possible.

You may also like: Top Roofing Tips

2. Wrinkles In The Membrane

One of the most common types of roofing membrane is EPDM rubber. These membranes are meant to adhere tightly to the roof deck, but over time they can grow loose in certain areas, leading to wrinkles or bubbles. 

While these problems do not pose an immediate threat, they do indicate that your membrane will soon need to be replaced.

These types of cracks are very hard to find, especially with your naked eyes. For finding the cracks and the damaged parts, water is the best medium. If you find small bubbles in certain areas of the flat roof in the rainwater. Pay immediate attention to solve the issues. Because from here the problems are going to start.

3. Flashing Separating From Roof

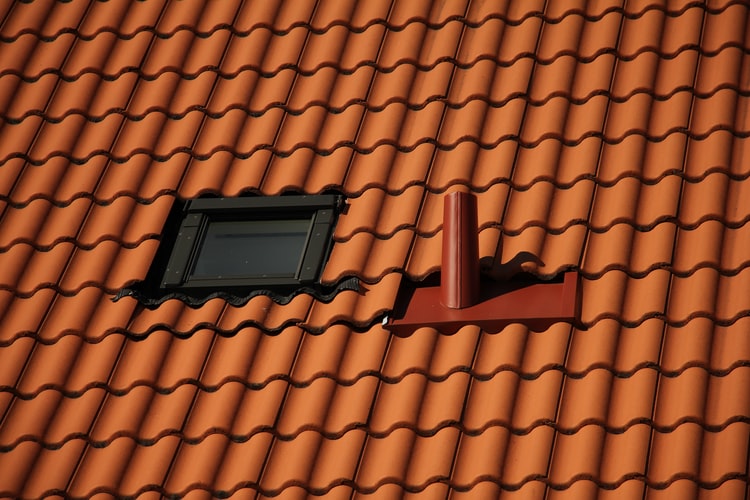
In places where your roof abuts a wall or parapet, it is common to reinforce the seam using metal flashing. While this flashing is designed to last for decades before it needs to be replaced, it can start to separate from the roof over time, opening a gap that can lead to leaks. 

If you have noticed problems with your flashing, you should call a flat roof repair company for a professional inspection. 

You may also like: Roof Repair: Should You Hire Roofers or DIY?

4. Open Seams

Most roofing membranes are applied in strips with overlapping seams that are closed using a sealant. But in cities like Toronto that see major seasonal shifts in temperature, these seams can open over time. 

Even a small open or torn seam poses an immediate risk, so if you’ve noticed this problem on your roof, call flat roof repair Toronto experts who can help you reseal the hole or replace the damaged section.

Flat roofs have many advantages over pitched roofs — they’re cheaper, more efficient, and easier to replace. But they also require more regular maintenance, especially in spring and fall. 

Conclusion:

You should inspect your flat roof regularly, and if you notice any of the problems above, get in touch with a professional roofing company for a professional consultation to see whether or not the time has come for it to be replaced. Once you start repairing in time, your entire house repairing cost is going to reduce in seconds. Small cracks are repairable. But the big gaps are challenging. So it is better to start repairs in time.

Read Also:

Content Rally wrapped around an online publication where you can publish your own intellectuals. It is a publishing platform designed to make great stories by content creators. This is your era, your place to be online. So come forward share your views, thoughts and ideas via Content Rally.

View all posts

Leave a Reply

Your email address will not be published. Required fields are marked *

Related

Bugs

Things to Take Care of to Keep Bugs Out of Your House

Are you tired of bugs, insects, or pests in your house? Rather than critically thinking about how to get rid of them once, a bug has entered your home, go on offense to avoid them from entering. Mentioned below are different ways to prevent the bugs from entering the house. However, if the pest problem persists, contact Pointe Pest Control. Here are things to take care of to keep bugs out of your house: 1.   Trim any shrubs or trees that touch your home. This is one way to make sure that bugs don’t enter. Mulch in garden beds can be used as a safe house for bugs. So as opposed to using mulch in regions that touch your foundation, place less appealing ground spread, for example, rocks. 2.  Anything that interfaces your home to the outside should be looked at carefully: Windows, vents, funnels, stacks, and rooftop shingles are only a portion of the spots bugs will enter through. Fix whatever makes a potential passage point like torn window screens or damaged doors. On the off chance that you discover open spaces close to channels or vents, use caulk to fill little splits or steel wool for bigger holes. 3.  Some portion of what gives bugs a bum rap is that they incline toward messes. Keeping your home clean is the most ideal approach to ward bugs off, particularly the kitchen where scraps and other leftovers lurk. Regular cleaning should be done. What's more, on days you don't want to throw the garbage, make sure your dustbins are enclosed and food covered. Cockroaches love the smell of paper and detest light, so get rid of messy things where bugs can assemble, particularly things like piles of magazines, boxes or packs. 4. To lessen flying pests around entryways and windows, supplant mercury vapor lights with high-pressure sodium vapor or halogen lamps. Bulbs that have pink, yellow, or orange colors will be least alluring to the bugs. You should change the area of your light if plausible. While it is entirely expected to put lights on outside walls close to entryways, it is smarter to situate the light farther away from your home on a post. This will keep the vast majority of pests by the shaft. Simply ensure the light reaches the entryway to keep it well-lit for safety purposes. 5.  A few bugs, for example, rodents, have a magnificent sense of smell. Furthermore, if there's an open food compartment someplace in your home, chances are they will focus on it. Store nourishments, for example, oat and saltines, in reusable holders or resealable sacks if the packaging is not sealed. Make sure that you clear out your pantry all the time to dispose of ruined food or different things you don't want to eat. This will assist with limiting the attraction for any pantry bugs. These are some of the ways you can use to avoid bugs from even entering your house. You must use these methods before the pests attack instead of finding ways to kill them after they ruin your peace. Read Also: Ways to control and get rid of pests What you should expect from a pest control visit

READ MOREDetails
Home Remedies

Top Home Remedies To Make A Floor Non-Slip

You may not realize that a floor is slippery until you or a loved one slips over it. This is often the case with entrance halls, or with the garage. With your shoes on, you probably have enough grip. But take them off, and it’s an accident waiting to happen. Why use epoxy for garage floors? Go for polyaspartic coatings for the ultimate protection from a sudden slip! Marble floors can also be an issue, as can garage floors. These are usually concrete but, once the concrete gets oil and other compounds on it you’ll realize that it’s also slippery. The good news is there are several home remedies that can reduce the slipperiness of the floor. Let's Check Out Top Home Remedies To Make A Floor Non-Slip: 1. Epoxy Coating This is the most expensive and time-consuming option. It involves layering an epoxy coating on top of an existing concrete floor or creating a new floor with epoxy. You can undertake this job yourself however if you want the best possible finish it’s best to use the professionals in epoxy floor coatings. They’ll do the job faster, and neater, and it will come with a guarantee. In fact, the cost in the long term is significantly cheaper than most options. This is because epoxy flooring is very tough and durable. You can also choose your color and even a pattern you want to emboss not the floor. This guarantees your epoxy flooring doesn’t just look stunning and offers a non-slip solution. It is also unique to your home. Related Resource: Use Floor Polishing for Keeping Your Flooring Looking New 2. Vinegar & Water Vinegar is a powerful cleaning agent. If you add some to warm water you’ll be able to mop your floor thoroughly. You should proceed when dealing with a hardwood floor, they don’t generally like moisture. The vinegar will remove all the debris on the floor, eliminating issues that can cause the floor to be slipperier. It should be noted that vinegar and water clean the floor to make it safer, it doesn’t add a non-stick coating. 3. Non-stick Products There are an array of non-stick products on the market. It’s worth noting that they are not all created equally. You’ll need to consider which products are designed for your type of floor. Then, it’s a good idea to look at different reviews to help you choose the one that suits your needs best. Once you have chosen a product you’ll need to read the instructions and do as it says. Some can be used neat, others require the addition of water. Apply them in accordance with the guidelines and, once they have been on for long enough, make sure you dry the floor thoroughly. 4. Use Rugs Another way to reduce slippery floors is to add rugs to the most dangerous spots. You’ll need to invest in rubber-backed rugs as these will stick to the floor where you put them. The rugs will then give grip and comfort to anyone walking over them, allowing people to move around the home in confidence. Don’t forget, before you apply any product to your floor it’s important to sweep it and then mop it. This removes the debris that could cause an issue. Read Also: Treatments and home remedies to tackle tinnitus 5 Tips on effectively picking a tile floor cleaning machine Ideas for Modern Flooring Designs for Home Improvement Plans

READ MOREDetails
Toilet Flush Button

Toilet Flush Button: Understanding The Nuts And Bolts

Though our bathrooms play a critical role in daily life, they're often forgotten until a problem arises. Of all its components, one that stands out is the toilet flush button's use - and understanding. This article looks closely at its workings, maintenance needs and replacement considerations. The Fundamentals Of The Toilet Flush Button What Exactly Is A Toilet Flush Button? A toilet flush button is the mechanism responsible for initiating the flushing process in your toilet system. Situated on the tank's exterior, we press or push this component when using our toilet to flush out its contents into the sewage system. By activating this flush button, we begin an action chain within our bathroom that sends water from its tank into our bowl to flush away its contents into sewer lines. How Does The Flush Button Work? The magic of the toilet flush button lies in its ability to control a more complicated mechanism. Pressing it lifts a lever connected to a chain inside the tank; that chain connects to a flapper (or flush valve seal), covering up drain holes at the bottom. When the flapper is raised, water stored in the tank begins rushing from its source into the bowl through its drain hole and siphon tube into the sewage system. As soon as this process completes, however, the flapper falls back down, sealing off its drain hole once more - and replenishing its supply in readiness for another flush cycle. Maintenance Of The Toilet Flush Button Regular Cleaning Regular cleaning of your toilet flush button is vital to its optimal operation, as dirt can clog the switch and make it less responsive, leading to inconvenient situations for users. A non-abrasive cleaner and soft cloth should be used for exterior cleaning; internal components should be checked regularly to avoid build-up and potential mechanical problems. Checking For Wear And Tear Given how often flush buttons are used, wear and tear are inevitable. Look for signs of damage, such as cracks or looseness. If the control becomes less responsive when pressed or sticks down without returning up when released, this may indicate internal components need to be reviewed for potential problems. Troubleshooting Common Problems Is The Button Hard To Press, Or Is It Sticking A toilet flush button that is difficult to press or sticks down often points to a problem with the connected lever or chain inside the tank. It could be that the chain is too tight or too slack, or the lever needs to be aligned or fixed. A careful inspection and adjustment of these components usually solve the issue. The Button Doesn't Activate The Flush If the button doesn't activate the flush, the issue could be that the switch is no longer effectively connected to the lever, or the flapper isn't lifting. A look inside the tank should reveal the issue. The button, lever, or flapper may need to be replaced. Replacing The Toilet Flush Button When Should You Replace The Button? As with any mechanical component, toilet flush buttons have a finite lifespan. Over time and through regular use, their controller may wear out or become damaged, requiring replacement. Signs to replace it include physical damage to its housing and sticky buttons or ones that no longer activate flushing actions. Looking for a portable toilet rental might also be necessary if you need to fix your toilet for a couple of days. Toilet Flush Buttons: More Than Meets The Eye Though seemingly simple, toilet flush buttons are critical in maintaining sanitation in homes and public spaces. Understanding their inner workings helps us better appreciate their importance, maintain them properly, and effectively troubleshoot any potential issues with them. So next time you press one, remember its critical function while giving it some love and consideration. Conclusion: Understanding how a toilet flush button works may initially seem complicated, but understanding its mechanics is crucial to efficient bathroom operations and sanitation practices. Knowing their inner workings could save us from future inconvenience or repair costs. Maintaining the toilet flush button regularly is vital to prolonging its lifespan and guaranteeing reliable performance within a plumbing system, thus streamlining home maintenance. By periodically inspecting it for signs of wear and tear, individuals can identify and address potential issues early on and prevent more significant ones from developing into larger problems later. By taking proactive measures like this one, individuals save both time and money on costly repairs and ensure an effortless toilet operation experience. Maintaining a flush button is an accessible DIY project for anyone, provided they possess basic knowledge and the appropriate tools. Even if it eventually succumbs to wear or damage despite regular maintenance efforts, replacing the button remains straightforward, making this an achievable DIY project for homeowners. Read Also : Mirror Decorating Ideas To Style Your Bathroom Using Feng Shui In Your Bathroom Design The Different Kinds Of Toilets

READ MOREDetails