Gel Blasters Vs. Airsoft Guns – What To Choose For Your Next Game

Published on: 02 May 2023 Last Updated on: 12 September 2024
Gel Blasters

If you are looking for high-adrenaline activities that will get your heart pumping – you should play airsoft or any other game that involves toy guns. If you are not into airsoft, you could opt for gel plaster guns.

But – how are gel plaster guns different from airsoft guns? If you are wondering about the same thing, then you are here at the right place.

Let us assess the essential differences between both toy guns and determine how the gel blaster guns are a better alternative to airsoft guns.

Keep reading!

What are Gel Blaster Guns?

Also known as gel blasters, gel blaster guns shoot gel beads. The gel beads contain water, which makes them a safer alternative to the plastic pellets used in airsoft guns. The gel beads are ideal for CQB skirmishes as well.

What are Airsoft Guns?

Airsoft Guns

Airsoft guns are the first type of toy guns introduced to the world. Originating from Japan, airsoft guns were made as an alternative for civilians who were prohibited from owning real guns. Despite their incredibly realistic experience, airsoft guns are essentially toys.

Airsoft guns are banned in some countries due to the high velocities with which they shoot plastic pellets.

The Essential Differences between Gel Blaster Guns & Airsoft Guns

Both guns – the airsoft guns and gel blasters are fun to use in outdoor battle games. But – there are a few differences between both toy guns, including safety, ammunition, and legal aspects.

Safety

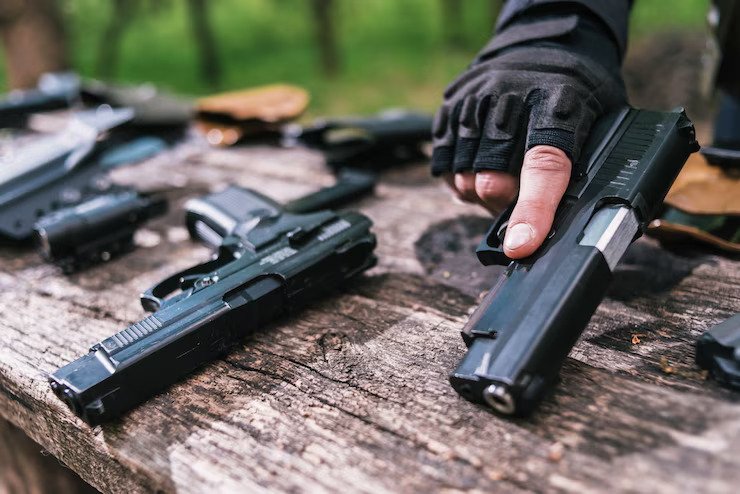
Despite the fact that airsoft guns and gel blaster guns are toy guns – these two aren’t the same when it comes to safety. The pellets used as ammunition for the airsoft guns are made of hard plastic, which makes them painful.

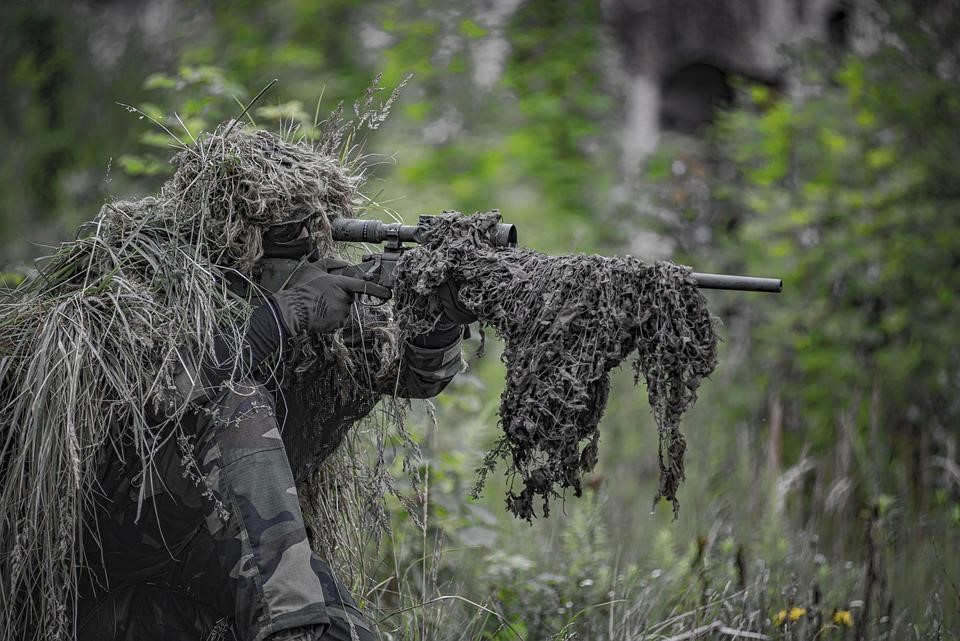
This aspect perfectly explains why you might want to get one of the top-rated sniper gel blasters in Australia – especially – if it is your first game. Compared to gel blasters, the pellets shot by airsoft guns can cause injuries.

Gel balls – on the other hand – burst upon contact, which could make it impossible for them to bruise them. Nonetheless, it is essential to mention here that irrespective of whether you are playing with airsoft guns or gel blasters, you will always want to wear your protective gear.

You will want to wear full-body protection – including a helmet and gloves- for airsoft guns. If you are getting your game mode on with gel blasters, you will want to ensure eye protection.

Ammunition

Both toy guns use different materials for ammunition. Gel blasters use gel balls that are made of sodium polyacrylate, which perfectly explains why gel balls are known as jelly or water beads. Before you use these gel balls as ammunition, you will want to soak them in water for at least four hours.

You will want to allow the gel balls to soak properly so they can reach their full momentum. On the other hand, airsoft guns use plastic pellets which are about 6mm to 8mm in size. The plastic pellets are also known as bbs.

Read Also:

Arnab is a professional blogger, having an enormous interest in writing blogs and other jones of calligraphies. In terms of his professional commitments, He carries out sharing sentient blogs.

View all posts

Leave a Reply

Your email address will not be published. Required fields are marked *

Related

Camera Gimbal

6 Tips to Shoot Hyperlapses Quickly and Easily Using a Camera Gimbal

Hyperlapses are generally eye-catching. Traditionally, shooting a Hyperlapse video required you to attach your camera to a tripod as you carefully marked the ground distance. The ground was supposed to be an even one. However, this approach was slower and tiresome. Today, you don’t need a tripod. All you need is a DSLR camera gimbal or any handheld stabilizer that will work with your camera. The gimbal will allow you to shoot the Hyperlapses fast and easily. To achieve this, you need to observe the following 6 tips. 1. Set Your Camera Right: You start by fitting the camera firmly on the gimbal. This will enable you to shoot the Hyperlapses in a stable way. Then, you should adjust the digital camera to shoot either 4K videos or short-interval shots. Thee 4K setting is better since it allows you to add the ramping speed afterward. Lastly, If the footages are not stable, erase the tracking points. 2. Walk Cautiously When Shooting: Shooting with a gimbal doesn’t give you the freedom to walk unsteadily and fast during the production. You need to walk uniformly and slowly to ensure that the quality of the Hyperlapses is not compromised. Once you press record, you should walk towards your target with the gimbal level well-maintained. A handheld gimbal will deliver stable Hyperlapses provided that you don’t hurry the shots. 3. Shoot Longer than Necessary: For the sake of post-production editing, it’s important to shoot the Hyperlapses longer. You have to remember that Hyperlapses are often unpredictable. With longer footages, it becomes easy to omit the unstable parts and keep the stable ones. Moreover, the editing is fast-achieved. 4. Always Focus on a Fixed Point: You can do this by switching to the lock mode. The mode allows you to shoot the Hyperlapses easily and not to lose the focus. You shouldn’t lose your target as this may cause the gimbal to fail you. You just need to prioritize on achieving a better view during the entire shooting path. 5. Enhance Motion Blur with ND Filters: People in motion and blinking cars may interfere with your Hyperlapses by limiting your exposure. To enjoy longer exposures during a daytime shooting, you should enhance the motion blur. The best way to do it is to use the ND filters. While encouraging longer exposures, the filters enable you to shoot amazing still images that are good in quality and balanced. 6. Create Parallax By adjusting the Gimbal Settings: Finally, it’s important to create parallax if you want a different motion dimension in your shots. To create parallax, you should: Open the gimbal assistant software to access the control panel feature. Click on it and adjust the shutter speed to the lowest value possible (one second). Once you are done, you can press record and start to shoot. Put simply, a handheld gimbal can help you shoot quality and stable footages. The experience is enjoyable but you have to do it right. With the above 6 top tips, you can be able to shoot Hyperlapses comfortably with the stabilizer. This ensures that the post-production is also done seamlessly. Read Also: How To Pick The Best Trail Camera 2019 “Best Guide For The Users” What Is A CMOS Camera?

READ MOREDetails
Camera Inspection

What Can A Professional Sewer Line Camera Inspection Do For You?

Sewer cameras are heaven-sent for plumbers. As the name implies, the device helps plumbers inspect hard-to-reach plumbing lines underground without needing to dig. It is a simple contraption consisting of a long, snake-like rod with a miniature camera attached to the end. The slinky design allows plumbers to navigate the camera into the pipes and lets them see if there's damage or leaks in the pipelines without going underground themselves. What Is Involved in a Sewer Camera Inspection?   In the days of yore, inspecting a sewage system was no easy feat. Plumbers would have to get dirty and go underground themselves just to check if there's anything amiss in the system. Sometimes, plumbers would have to do this several times to ensure they covered everything. With the development of sewer cameras, sewage system inspections are done much more efficiently and conveniently. A sewer camera inspection can quickly identify any problems in your sewer pipes, eliminating any guesswork and allowing plumbers to identify and resolve minor plumbing problems before they worsen. Types of Sewer Cameras There are currently two types of sewer cameras, and both are listed below.  1. Reel-Based   This camera is equipped with a large-sized cable reel. Plumbers often use it when they inspect sewer and long drain pipes. The cable can be connected to a video recorder or a laptop through which the required pipe images are relayed.  2. Hand-Held     This sewer inspection camera is well-known for its portability. It is commonly used to check blocked drains in residential areas. Plumbers typically have this camera in their hands while they perform a sewage inspection. Since it is lightweight, plumbers can easily bring this camera around while they work. Benefits of Using a Sewer Camera A Denver plumbing expert said a sewer camera inspection is the best way to find out what is happening beneath your house. Specifically, this modern plumbing device offers the following:  1. Timely Repair It is better to prevent plumbing issues than allow them to worsen and cause costly repairs later. A sewer camera inspection can help you achieve this. It can even be expanded so old plumbing fixtures can be included, and hidden issues can be detected. 2. Soil Assessment One common problem in any plumbing system is a broken or leaking sewer line, which could be due to soil movement, as it can cause pipes to move and crack. A sewer camera inspection can help you determine this and fix the problem in no time. 3. Quick and Accurate Diagnostics   Sewer cameras relay the images back to the overground monitor in real time. It means it will be a lot quicker than traditional inspection methods, where a plumber would have to get down literally and dirty. Diagnostic mistakes are also cut down to a minimum because plumbers can check several times just to make sure they have made the correct findings. 4. Lawn Protection     Before sewer cameras, the only way to locate a crack in your water pipes was to dig a large hole through your lawn. Digging can cause damage to your grass, shrubs, plants, and trees. As mentioned earlier, sewer cameras require no digging. This saves you money and time, but more importantly, you get to keep the beauty of your lawn. 5. Quick Clog Identification The typical sewer camera can detect all kinds of blockages and identify the source. If the clog cannot be found in the drain area, it is usually located in a deeper part of the pipelines. Sewer cameras make it easier and faster for plumbers to locate the problem, even if it's deeper underground. 6. No Permits Previously, plumbers had to secure a permit before they could dig in your yard. These days, they can just use the sewer camera to see right through your pipes and identify the problem. 7. Better Property Appraisal     A plumbing inspection is not necessary to determine a property's value. However, it can help you better understand its true worth. Sewer camera inspections can help you identify potential plumbing problems and make any necessary repairs. A property with no plumbing problems can attract more potential buyers and increase the market value of your property. 8. Retrieve Lost Valuables Although this can be considered a bonus, a sewer camera can locate valuables, such as an earring or a necklace that was accidentally flushed down the drain. If the plumber finds anything of value in your pipelines during an inspection, you can ask them to retrieve the item for you. 9. Future Problem Prevention   Old plumbing pipes can cause irreparable damage to your walls and even your basement. This often remains unnoticeable until it is too late. A plumbing camera can perform a quick inspection of your home, identify a problem, and you can have it fixed before it becomes serious. Key Takeaway   Modern technology has enabled man to create many advanced equipment and devices. The sewer camera is a prime example since it has become invaluable in the plumbing industry, making underground sewage inspections much faster and easier. A broken underground pipe that could only be reached through a dug hole in your yard can now be analyzed through a remote monitor. This allows for a faster and better resolution of many plumbing problems and inspires many homeowners to contact a plumber when they need help with their plumbing. Additional: Thermal Mass Flow Meter – What To Know? Is Steel/Iron Ore A Good Career Path In 2021? Best Paying Jobs In Industrial Machinery/Components Tired Of Seeing Your Old House? Here’s What You Need To Know

READ MOREDetails
audio renderer error

How To Fix Audio Renderer Error In Windows 10

Are you getting an “audio renderer error, please restart your computer” error message in your Windows 10 system? In case you still have not restarted your computer, then you can start by clearing your browser cache. And then restart your computer. If the audio renderer error on YouTube still persists, there are several other tactics or troubleshooting steps that you can try to eliminate this issue. Causes Of Audio Renderer Errors Here are different reasons why you might face audio renderer Errors – Driver Issues One of the reasons why you face audio renderer errors is because the driver is getting corrupted or outdated. When the drivers aren’t working properly, it can cause communication errors Between the hardware and the operating system. Most users report that updating the drivers or rolling them back often resolves the issue. Hardware Conflicts Hardware complex can also cause the audio devices to Trigger these errors. Got example would be when a computer has both the headphones and the speakers connected. This can cause a struggle within the computer to determine which device should deliver the output. In this case, it's best to disconnect one of the devices. Software Conflicts The software conflicts in the computer can also interfere with the audio playback. This happens when the web computer has installed different extensions or third-party audio and has enhancement tools. Sometimes, the system updates also in advertently affect the audio setting, causing conflict within the software and audio rendering processes. Updating Windows Operating System Sometimes, updating the Windows operating system can also disturb the existing audio on the favorite configuration, leading to audio issues. In many cases, it's best to check if the audio is working after major operating system updates. Corrupted Systems Corrupted system files can also lead to audio-rendered errors. It's best to run system file checks for or troubleshoot utilities to identify and solve these issues. Fixing Audio Renderer Error In Windows 10 Here are the ways to techniques that will help you fix the YouTube audio renderer error in Windows 10. If you are getting no sound on YouTube Windows 10, you should definitely try these steps and check whether the issue is solved or staying. 1. Replug Or Unplug The Sound Device In case you have any external wired audio device connected with your system, like a pair of earphones, headphones, or speakers, then unplug the device and start the youtube video. If the audio is playing, then connect the device again and check for the issue. Sometimes, when you connect too many external devices to your computer, this audio renderer error may occur. At that time, connect only the default audio device and disconnect the rest to solve the issue. If this error is still showing, try the next suggestion. 2. Close The Audio Mixing programs Audio mixing programs, like Mixcraft, often take exclusive control of your system’s audio drivers and prevent your browser from using them. In case you have a program like this, and it is running in the background before you start watching Youtube, completely exit the program. On the other hand, you also can prevent those programs from taking control of your audio devices. For example, let’s go through the steps for Mixcraft. Open File. Go to Preferences. Go to Sound Device. Search for Exclusive Mode. Now, uncheck the box or turn off the switch. 3. Disable And Enable Sound Devices While trying to fic audio renderer error in Windows 10, you can disable and then again enable sound devices to fix the issue. Here are the steps to do that.  Right-click on the Start Button. Now select the Device Manager. Expand the option Audio inputs and outputs. Now, right-click on your default audio device name. Suppose you are unable to figure out where to click, as there are a lot of options. Right-click on the volume icon. Choose Disable device. Select the Yes option to confirm. Again, right-click the Audio device. Now, Enable the device. 4. Run The Audio Troubleshooter Now you have done with the three fixing techniques, but the audio renderer error is still there. You can try to fix the issue by using the audio troubleshooter in your Windows 10 system. It will not only be able to detect the underlying problems but also help to fix the issue. Follow the below steps to do that. Open the Start menu. Now, type troubleshoot settings. Now select Open. Select the option named Additional Troubleshooters. Select Playing Audio. Now select Run the troubleshooter. Now follow the on-screen suggestions or instructions to solve the issue of the YouTube sound cutting out. 5. Rollback Audio Drivers Are you facing the audio renderer error just after updating any sound card or audio playback device-related driver? If yes, then try rolling them back. But in case there is no update, you can not try to roll back them. Audio Playback Device Right-click the Start button. Select Device Manager. Expand the option Audio inputs and outputs. Now, right-click on your default audio device name. Choose Properties. Switch to the tab named Driver. Now select Roll Back Driver. Audio Card Drivers Open the Device Manager. Expand the options for Sound, videos, and game controllers. Right-click on the Audio card driver. Now select Properties. Switch to the tab named Driver. Then Select Roll Back Driver. In case you are multiple audio drivers, repeat steps 2 to 4. 6. Update Audio Drivers What if you can not rollback your audio drivers to fix the audio renderer error issue? You can try updating them instead. Audio Playback Device Right-click the Start button. Select Device Manager. Expand the option Audio inputs and outputs. Right-click on the default output device. Choose the Update driver. Select the option named Search automatically for drivers. Now apply the last driver updates if you get the option. Audio Card Drivers Open Device Manager. Expand the option Sound, videos and game controllers. Right-click on the Sound card driver. Select the Update Driver. In case you see multiple devices, repeat the third and fourth steps.  7. Update Windows 10 An outdated system often becomes the reason for many technical glitches and abnormalities to crop up. Updating your Windows 10 may eliminate the audio renderer error. So, update it now. Open the Start menu. Now type there Windows Update. Hit Enter. Now select Check for updates. If any update is available, install it. Just below the Check for Updates option, there will be another option named Optional Updates. Select it in order to install any updates related to audio. Update Web Browser An outdated web browser can also be the main reason behind audio renderer errors. Though popular web browsers such as Firefox and Chrome are designed for automatic updates, there is no harm in double-checking. And if there is, any update is available. Install it. 8. Disable Hardware Acceleration Hardware acceleration is used by your browser in order to speed up things. But this feature also can cause audio renderer errors in Windows 10. So, you can disable hardware acceleration to avoid this issue. Google Chrome Open the Chrome menu. Select Settings. Expand Advanced. Choose System. Search for Use hardware acceleration when available. Turn the switch off. Mozilla Firefox Open the Firefox menu. Select Settings. Scroll the General tab down. Search for the Performance section. Search for Use hardware acceleration when available. Uncheck the box. Final Tips All the tactics that are mentioned above are more than enough to solve the audio renderer error in Windows 10. But if it persists, you also can update the bios and check whether the issue is solved or not. If you have any other technique to solve this issue, you can share that with our readers. Read Also: How Many Jobs Are Available In Real Estate Investment Trusts? 2021 How to Download Game Of Thrones Putlocker Online for Free? How to Plant Grass Seed on Hard Dirt? – Latest Update 2021  

READ MOREDetails