Published on: 05 November 2018
Last Updated on: 24 February 2020
Glacing is a process where you preserve fruit in sugar syrup. The process helps in making the fruits sweeter and allowing them to last long. Usually, you can find glace fruits in cakes, bread and other types of pastries. The most common fruits are pears, cherries, and plums. They already taste great as whole fruits, but the flavours come to life, even more, when you choose the glazed version. If you are running a pastry business, you might be familiar with glace fruits as you use them often.
You can choose to glace the fruits if you want to use homemade glace fruits for your business. To glace them, you need to have a pound of fruit that you want, four and a half cups of white sugar and a half cup of corn syrup. It is an excellent idea to glace them at once to avoid going through the entire process several times.
You can peel the fruits or slice them into quarters depending on the type of fruit that you are glacing. You will then place the sliced or peeled fruits at the bottom of the saucepan. Add water, and allow it to simmer until it becomes tender. Take the fruit out of the saucepan and place it on a shallow dish. Remove the water from the pan except for about a cup. Add a half cup each of the sugar and corn syrup into the water. Turn the heat on until the sugar starts to dissolve. Allow it to boil and place the mixture over the fruit. Let it stay there overnight.
On the following day, take the syrup out and place it in a pan. Add another half cup of sugar and allow it to dissolve in heat. When the mixture boils, start putting in the fruits again. After a while, take everything out and transfer it to a container where you can leave it for the next five days. Repeat the process, and keep the fruits there for the next two days. After another repetition, the syrup will start looking like honey. Return the fruits to the mixture and let them soak there for about ten days to 3 weeks.
It is up to you to decide how long you will allow the fruits to soak in the mixture. After that period, take the fruits out from the syrup and arrange them on a wire cooling rack. Let the fruits dry in a warm place or put them inside a dehydrator. Once you can no longer feel a sticky surface, you can take the fruits and place them in a jar. If you want to eat the fruits, you can rehydrate them or put them directly on cakes and pastries.
You don’t need to go through this process:
It might seem like a long process to glace fruit. Aside from the effort, you put into it, you also need to wait for quite some time before you can finally use the fruits. If you are running a pastry business, you already have a lot on your plate, and you don’t want to waste more time to glace the fruits. If you don’t want to wait, you can buy them online. You can find stores that sell glace fruits in bulk. You can get them at a low price too. As long as you don’t see chemicals or preservatives added, it is okay to use these glace fruits.
I enjoy writing and I write quality guest posts on topics of my interest and passion. I have been doing this since my college days. My special interests are in health, fitness, food and following the latest trends in these areas. I am an editor at Content Rally.
If there is something that I have learned in life, it is about gardening. Well, almost everything if not all. And if there is one thing that took me some time to master, it was knowing how to harvest potatoes at home!
Potatoes are one of the most versatile and popular vegetables in the world. They can be cooked in many different ways, such as boiled, baked, fried, mashed, or roasted. Moreover, they are also rich in carbohydrates, fiber, vitamin C, potassium, and antioxidants.
But how do you grow and harvest your own potatoes at home? You see, potatoes are not like cilantro or other plants. These are tubers.
In this article, I will show you everything you need to know about how to harvest potatoes, from planting to storage.
So, if that is something that you are interested in knowing, then I have you covered! Keep on reading this blog till the end to learn more...
How to Plant Potato Seeds or Tubers?
The first step in how to harvest potatoes is to plant them. You can start with either potato seeds or tubers. Potato seeds are small, round, and black, and they are usually sold in packets.
Potato tubers are the actual potatoes that you eat, and they have eyes or buds that can sprout new plants.
You can buy certified seed potatoes from a nursery or garden center, or use organic potatoes from the grocery store.
Here are some if the steps that you must take to plant them:
Planting Potato Seeds
To plant potato seeds, you need to sow them indoors in pots or trays filled with moist potting soil.
Place them in a sunny spot and keep the soil moist but not soggy.
The seeds will germinate in about two weeks and produce small green shoots.
When the shoots are about 3 inches tall, you can transplant them outdoors in your garden or in containers.
Planting Potato Tubers
To plant potato tubers, you need to cut them into pieces, each with at least one eye.
You can do this a few days before planting to let the cut surfaces heal and prevent rotting. Alternatively, you can plant whole small potatoes with several eyes.
To prepare the soil, you need to loosen it and add some organic matter, such as compost or manure.
You also need to make sure the soil is well-drained and slightly acidic, with a pH of 5.0 to 6.0.
You can use a soil test kit to check the pH level and adjust it with lime or sulfur if needed.
Planting Potato Pieces
To plant the potato pieces, you need to dig a trench about 4 inches deep and 12 inches wide.
Place the pieces about 12 inches apart, with the eyes facing up.
Cover them with 3 inches of soil and water well.
As the plants grow, you need to hill up the soil around them to cover the lower stems and prevent the tubers from being exposed to sunlight, which can turn them green and bitter.
You can also mulch the soil with straw, leaves, or grass clippings to retain moisture and suppress weeds.
How to Care for Your Potato Plants?
The second step in how to harvest potatoes is to care for your potato plants. You need to water them regularly, especially during dry spells, to keep the soil moist but not waterlogged. You also need to fertilize them every two weeks with a balanced organic fertilizer, such as fish emulsion or seaweed extract. Also, you can add some wood ash or bone meal to provide extra potassium and phosphorus, which are essential for tuber formation.
You also need to protect your potato plants from pests and diseases, which can reduce your yield and quality. Some of the common potato pests are:
Colorado potato beetles, which are yellow and black striped insects that feed on the leaves and can defoliate the plants. You can handpick them and drop them in a bucket of soapy water, or use an organic insecticide, such as neem oil or pyrethrin.
Potato leafhoppers, which are small, green, winged insects that suck the sap from the leaves and cause them to curl and yellow. You can spray them with a strong jet of water, or use an organic insecticide, such as garlic or hot pepper spray.
Wireworms, which are thin, brown, worm-like larvae that bore into the tubers and cause holes and tunnels. You can trap them with pieces of carrot or potato buried in the soil, or use beneficial nematodes, which are microscopic worms that parasitize and kill the wireworms.
Common Potato Diseases
One of the most common reasons why a potato cannot grow or survive is the diseases. If you were wondering what some of these can be and how to deal with them, I have you covered!
Some of the common potato diseases are:
Late Blight: It is a fungal disease that causes brown spots on the leaves and stems, and black or brown lesions on the tubers. It can spread rapidly and destroy the entire crop. You can prevent it by planting resistant varieties, avoiding overhead watering, and removing any infected plants and tubers. You can also use a fungicide, such as copper or sulfur, as a preventive measure.
Scab: This is a bacterial disease that causes rough, corky patches on the tubers. It does not affect the taste or edibility of the potatoes, but it reduces their appearance and storage quality. You can prevent it by planting resistant varieties, maintaining a slightly acidic soil pH, and avoiding excessive nitrogen fertilization.
Potato Virus Y: Lastly, this is a viral disease that causes mosaic patterns, mottling, or yellowing on the leaves, and misshapen or knobby tubers. It can reduce the yield and quality of the potatoes, and it can be transmitted by aphids or infected seed potatoes. You can prevent it by planting certified virus-free seed potatoes, controlling aphids, and removing any infected plants and tubers.
How to Determine When Your Potatoes Are Ready to Harvest?
The third step in how to harvest potatoes is to determine when they are ready to harvest. This depends on the type and variety of potatoes you planted, and the size and maturity you want.
There are two main types of potatoes: early and late.
Early potatoes are ready to harvest in about 10 to 12 weeks (about 3 months) after planting, and they produce small to medium-sized tubers that are tender and thin-skinned. They are best for boiling, steaming, or roasting.
Late potatoes are ready to harvest in about 15 to 20 weeks (about 4 and a half months) after planting, and they produce large, starchy tubers that are firm and thick-skinned. They are best for baking, mashing, or frying.
Early Harvesting
To harvest early potatoes, you can start digging them up when the plants begin to flower, or when the lower leaves start to yellow.
You can use a garden fork or a spade to gently lift the plants and tubers from the soil, or you can use your hands to feel for the tubers under the soil.
You can harvest as many or as few potatoes as you need, and leave the rest in the ground until you are ready to use them.
You can also harvest some of the young, tender leaves and stems, which are edible and nutritious.
Late Harvesting
To harvest late potatoes, you need to wait until the plants have died back completely, or until the first frost.
This allows the tubers to develop a thicker skin, which helps them store better.
You can use a garden fork or a spade to dig up the entire row of plants and tubers, or you can use a potato digger, which is a special tool that lifts and separates the tubers from the soil.
You need to be careful not to damage or bruise the tubers, as this can cause rotting or spoilage.
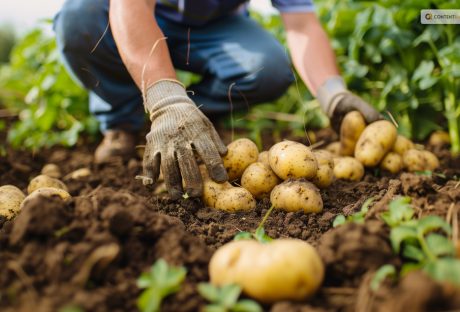
How to Dig Up, Cure, and Store Your Potatoes?
The final step in how to harvest potatoes is to dig up, cure, and store your potatoes. This is important to preserve the quality and shelf life of your potatoes, and to prevent them from sprouting, rotting, or shrinking. Here are the steps to follow:
Digging Up
After digging up your potatoes, you need to brush off any excess soil and remove any damaged, diseased, or green tubers.
Do not wash your potatoes, as this can remove the protective skin and invite bacteria and fungi. You can wash them just before cooking or eating them.
Curing
You need to cure your potatoes for about two weeks in a cool, dark, and well-ventilated place, such as a basement, garage, or shed.
This allows the skin to harden and heal any minor cuts or bruises and enhances the flavor and texture of the potatoes.
The ideal temperature for curing is between 50°F and 60°F, and the ideal humidity is between 80% and 90%.
You can spread your potatoes in a single layer on a newspaper, cardboard, or wooden crate, and avoid exposing them to light, which can turn them green and bitter.
Storing
You need to store your potatoes in a cool, dark, and dry place, such as a cellar, pantry, or closet. The ideal temperature for storage is between 40°F and 50°F, and the ideal humidity is between 65% and 70%.
You can store your potatoes in paper bags, cardboard boxes, mesh bags, or wooden crates, and check them regularly for any signs of sprouting, rotting, or shriveling.
You can also store your potatoes in a root cellar, which is an underground or partially underground structure that maintains a constant temperature and humidity.
Additionally, you can also store your potatoes in a clamp, which is a mound of straw, hay, or leaves covered with soil, that insulates and protects the potatoes from frost and rodents.
Wrapping It Up!
If you want to know about how to harvest potatoes, I hope that this blog has been of help to you. However, if there are any other queries related to the same, please feel free to let me know.
All that you need to do is scroll down till you reach the bottom of the page. Then leave your comments and suggestions in the box below. And I will be there to answer them all for you!
Read Also:
How to Harvest Lettuce: A Step-by-Step Guide for Fresh and Crispy Salads
Everything You Need To Know About Harvesting Basil!
Asparagus 101: When, How, And How Often To Harvest?
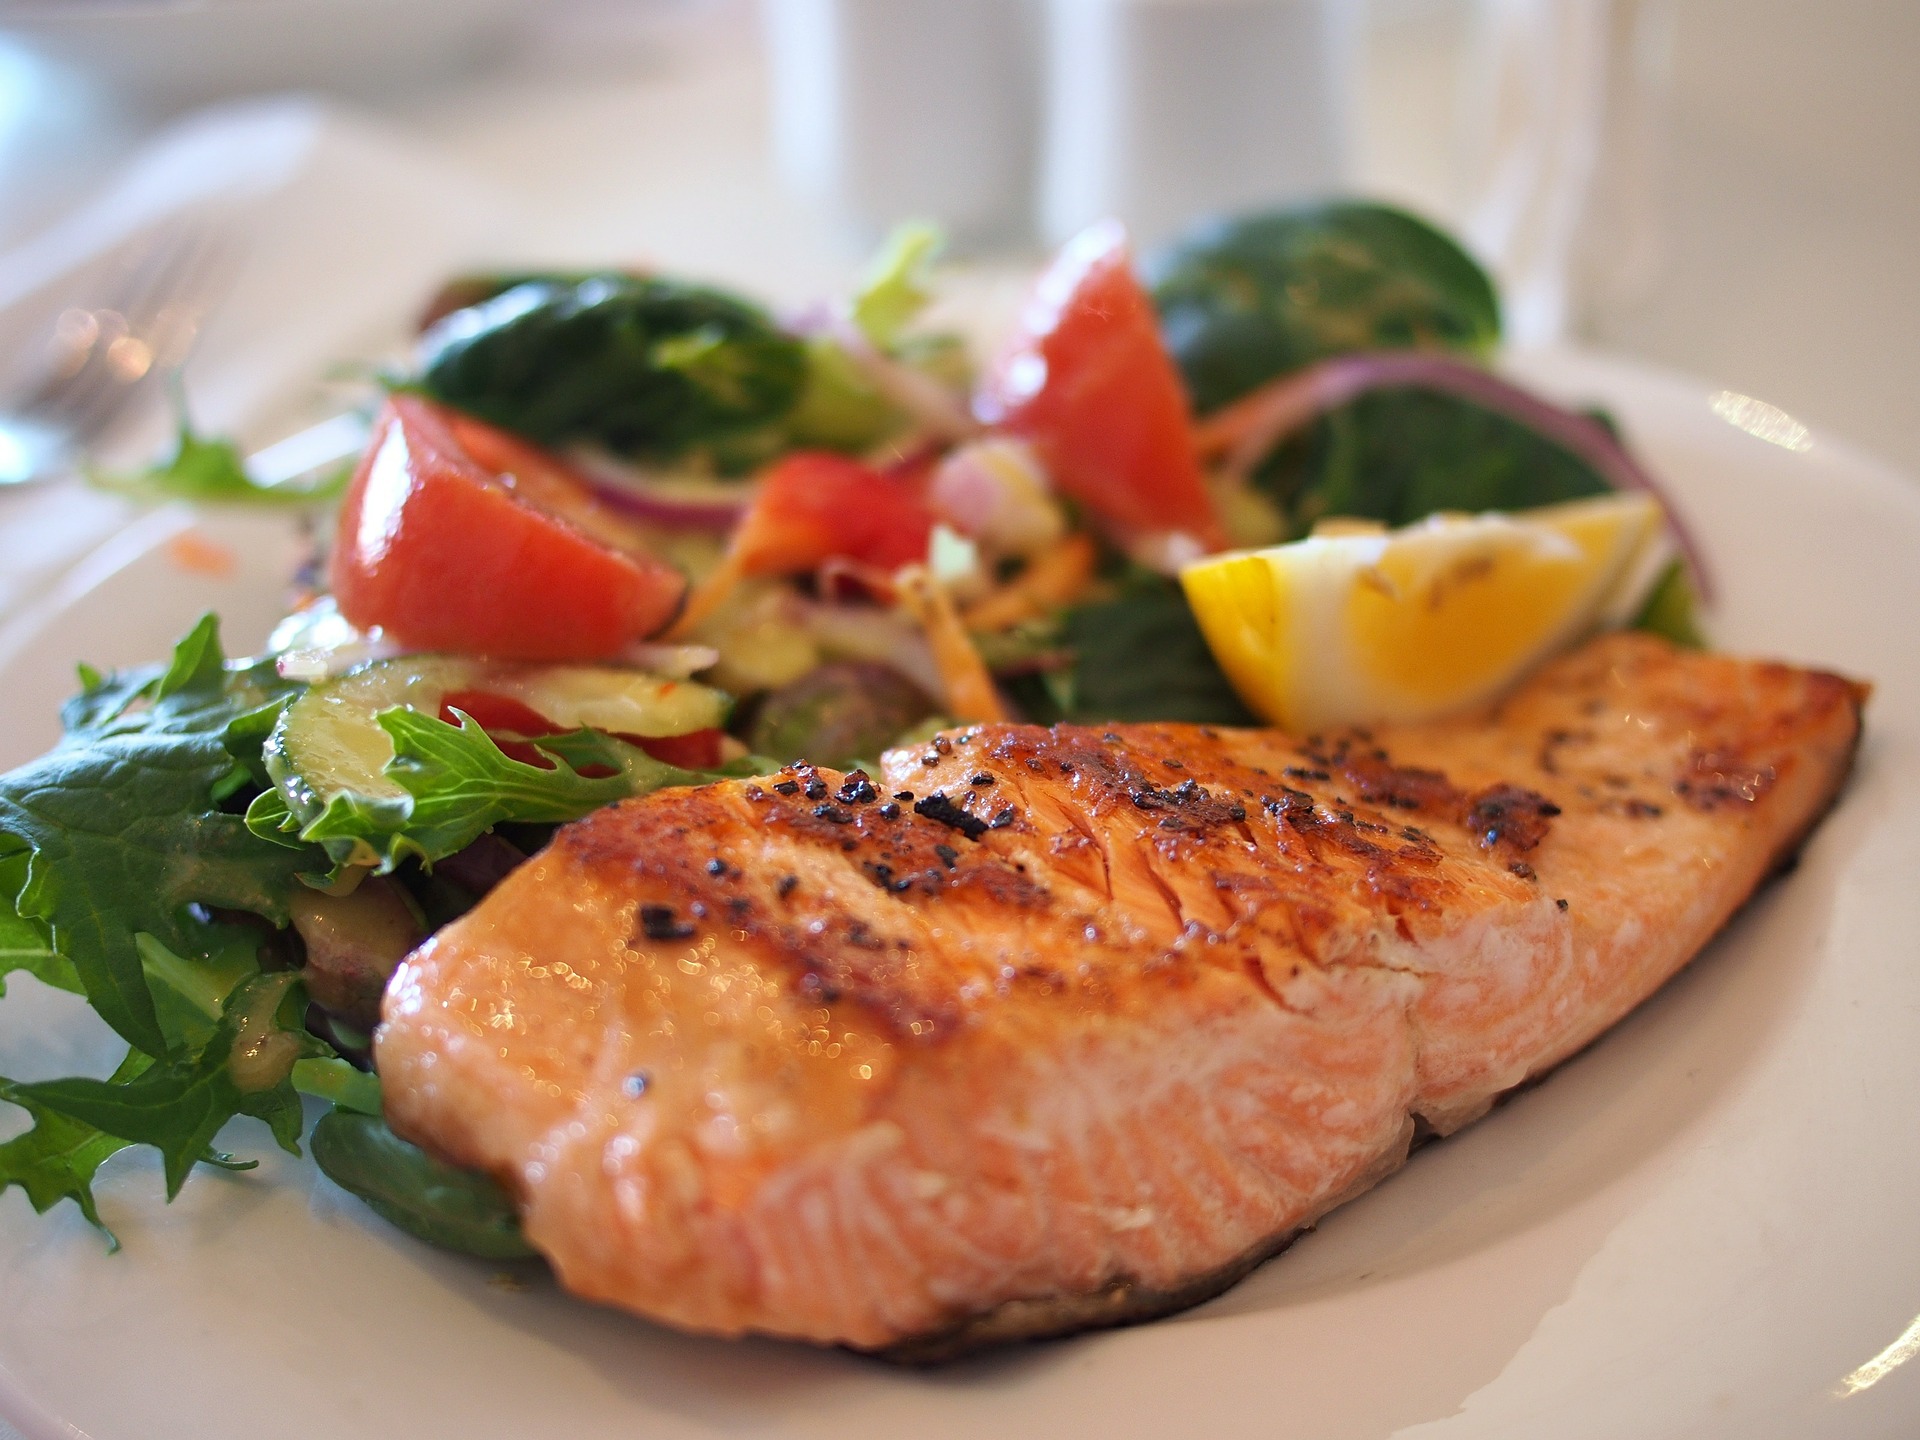
Fish fillets are a versatile and convenient seafood option, offering a healthy and delicious base for countless dishes. Their popularity stems from their ease of preparation, having already been cleaned, deboned, and portioned, ready for the pan or oven. But beyond their culinary appeal, fish fillets offer a fascinating journey from the ocean's depths to our plates.
Understanding the world of fish fillets involves delving into various aspects, from the different types and their origins to the various factors that influence fish fillets prices. This article will serve as your guide, uncovering the secrets of this delicious and nutritious food source.
A Variety Of Flavors And Textures
Fish fillets come in a dazzling array of varieties, each boasting unique flavors, textures, and nutritional profiles. Some of the most popular choices include:
Salmon: Renowned for its rich, oily texture and vibrant pink hue, salmon fillets are a versatile option for grilling, baking, or pan-frying. They are also an excellent source of omega-3 fatty acids, crucial for heart health.
Cod: This mild-flavored white fish offers a firm texture and versatility in cooking methods. Cod fillets are perfect for fish and chips, baking with herbs and lemon, or incorporating creamy sauces.
Tilapia: A light and flaky fish, tilapia is a budget-friendly option with a delicate flavor. It absorbs marinade well, making it ideal for experimentation with various spices and herbs.
Dory: This white fish boasts a firm texture and a slightly sweet flavor. Dory fillets are often used in fish tacos, baked en papillote, or served with a simple lemon butter sauce.
Snapper: This firm-fleshed fish features a sweet and delicate flavor. Snapper fillets shine on the grill or baked with fresh herbs and vegetables.
Exploring Different Origins
The origin of a fish fillet can significantly impact its flavor, texture, and even price. Here's a brief overview of some prominent fishing regions:
Atlantic Ocean: This vast body of water provides popular species like cod, salmon, and haddock.
Pacific Ocean: A haven for tuna, mahi-mahi, and numerous other flavorful fish.
Mediterranean Sea: Renowned for its abundance of sea bass, dorada, and branzino.
South China Sea: Offers a diverse range of fish, including tilapia, grouper, and bream.
Unveiling The Factors Affecting Fish Fillet Prices
Understanding the various factors influencing fish fillet prices allows for informed decision-making. Here are some key considerations:
Species: Certain types like salmon and tuna generally command higher prices due to their popularity and demand.
Fishing method: Sustainable practices like line-caught or wild-caught fish often carry a premium compared to farmed fish.
Freshness: The fresher the fish, the greater the price, as it ensures optimal flavour and quality.
Processing: Filleting and packaging processes can add to the cost of the final product.
Seasonality: Some fish are available year-round, while others have specific peak seasons, impacting prices.
What To Look Out For When Procuring Fish?
When you are procuring fish fillets from the market, be it for regular use of special domestic occasions, you have to be mindful of some of the important points. It helps you understand your requirements. The following guide can help you get the best fish fillet from the store.
Firstly, you must get the fresh fishy smell when you walk into the store. It is one of the main indications for getting the best fish from the store.
Secondly, look that the fish is on the ice and the ice is clean. You must take a look at the elements that have a direct relationship with the hygiene and taste of the fish. The fillets must look firm and not rugged.
Rugged marks on the fish indicate that they are mishandled. Also, try to learn when the fish is frozen. This way, you could understand your needs and requirements. It is one of the ways to get fresh fillets.
You can also get an idea of the freshness of the fish by giving a good look at the different body parts. Fishes with a shiny surface and also slime on the surface is one indication that it is fresh fish. The fins of the fish must be clearly defined. It is one of the hallmarks of getting fresh fish. Moreover, getting the best quality is undoubtedly one of the hallmarks of great taste. Hence, you have to understand it here to better understand it.
Maintaining The Quality Fish Back Home
It might be that you procured fresh fish from the store. But that does not imply, you are consuming it that very day. So you must preserve it well in your home when buying the best fish. Here, we discuss some ways you can maintain the high quality of the fish by storing them back in your home.
Once you have made your purchase, you must ensure that you give the fish the ice it requires. You can take containers with ice. After buying them from the freezer, you can offer them freshness. Whenever the fish is brought out from the ice, it starts degrading.
Store your fish in the coldest parts of your freeze. It is one of the ways to keep your fish fresh for a longer time. You can also use the salt to preserve the freshness of the freezer for a couple of days before eating. However, you must try to use your fish fillets as soon as you buy them from the store. It is the best way to consume them. It's simple… eat the fish when it is fresh.
Sustainability And Ethical Considerations
As with any food choice, it's crucial to consider the environmental and ethical implications of our seafood consumption. Opting for sustainably sourced fish fillets, certified by organizations like the Marine Stewardship Council, ensures a healthy ocean for future generations.
Conclusion
Fish fillets are a delicious and convenient way to incorporate seafood into our diet. By understanding the diverse varieties, their origins, and the factors influencing their prices, we can make informed choices while enjoying the bounty of the sea. Remember to prioritize sustainability and ethical practices to ensure a healthy and vibrant ocean for years.
Read Also:
The Diet To Follow For A Healthy Gut
Why A Pescatarian Diet Is Beneficial
Why have a diet chart for weight loss?
Your wedding is the ultimate opportunity to celebrate the love you have for your spouse-to-be as well as the love and friendship you share with your guests. It’s the chance to get creative with your plans and show your guests how much you want them to have a good time and how much you appreciate them.
How do you give your guests a delicious meal without breaking the bank? Simply team up with an expert caterer and they can walk you through the best options for your wedding so you can showcase your personality and satisfy the stomachs of your guests. Want to know what you should skip and what you shouldn’t miss for your wedding food? Read on.
Don’t Miss It: Local Food Options:
Statistically speaking, your wedding is going to generate a decent amount of waste. Even if you only consider the food waste that comes out of preparing multiple meals as well as the plastic and glass that collects from the bar, that’s a sizeable amount of resources. Then if you think about the gas your guests will have used to arrive at the venue and the electricity that goes into powering your wedding, your nuptials will create an impact.
If you’re green-focused then you will have likely already considered sourcing your wedding food and drinks from local outlets. And even if the environmental impact of your wedding isn’t at the top of your list priorities, local options offer the promise of fresh food and unique types of drinks that your guests might not have had elsewhere.
Skip It: the Boring Buffet:
No one needs another boring buffet with rubbery chicken, flavourless iceberg lettuce, and too-oily roast potatoes. When the food comes out at your wedding, that’s the chance to brighten the faces of your guests with something exciting. Whether you serve your food buffet style or sit-down style, the meal options of your event venue can be spiced up with the help of an event caterer.
Don’t Miss It: A Unique Cake:
Are you going for a traditional, white wedding cake? Have you thought of what else you can serve? One way to impress your guests with something unexpected is through the dessert. You’ve gone so far as to customize every other aspect of your wedding, why stop at the cake? Maybe your love for donuts means you’d like to have a gourmet donut station in place of cake. Maybe you’d like to create a tower of pretty-looking cupcakes that anyone can come up to and eat as they like. Don’t limit yourself!
Skip It: Sugary Snacks:
When your guests arrive at the reception, they’re probably hungry in anticipation of the main meal. Don’t make the mistake of serving only overly sugary snacks like brownies and cookies. This type of food will just give your guests a sugar rush followed by an unpleasant crash. And for your guests without a sweet tooth, you can opt for a savoury-sweet dessert option like cheese and fruit that will still end the meal on a nice note without overdoing the sugar.
With all this in mind and an open-minded attitude to unique culinary options from skilled caterers like The Food Dudes, you can ensure your wedding meal and snacks will reflect your style and impress your guests.
Read Also:
Finding The Perfect Place To Have Your Wedding
Make Your Pre-Wedding Amazing: 8 Bridal-Shower Planning Ideas