Google Play Cancel Subscription: The Ultimate Guide To Managing Your App

Published on: 11 October 2023 Last Updated on: 30 October 2024
Google Play Cancel Subscription

Are you searching for how to cancel a subscription on Google Play? Well, you are not the only one. In the fast-paced digital age we live in, it’s common for many of us to sign up for various app subscriptions.

These subscriptions can range from streaming services to premium versions of our favorite apps. Thus promising a world of convenience and entertainment at our fingertips. However, as time goes on, we often find ourselves with a growing list of subscriptions, some of which we no longer use or need.That’s why it is important to understand how to cancel these subscriptions on Google Play! If you were looking for a guide to the same, you have reached the right place! So, keep on reading this article till the end to learn more…

Why Cancel A Subscription On Google Play?  

Why Cancel A Subscription On Google Play? 

The decision to cancel a subscription on Google Play is not one we can take lightly. There are several valid reasons why you might want to drop a subscription. Understanding these reasons can help you make an informed choice about your digital expenses. By understanding the reasons why you might want to cancel a subscription, you can make more deliberate choices. These can be about the services you choose to subscribe to. Thus, you can ensure that your money is being used to enhance your digital experience.

Let us delve into the reasons behind why you might consider canceling a subscription on Google Play!

1. You No Longer Use It  

It’s common to download an app or sign up for a service with the best intentions, only to find that you rarely use it after the initial excitement wears off. Life gets busy, and our interests change. That fitness app you subscribed to a few months ago now collects virtual dust on your phone. Simply because you’ve found other ways to stay active.  Perhaps you subscribed to a news app but have since switched to other sources for your daily headlines. In these cases, canceling the subscription frees up your digital and financial space for services you value and use.

2. Financial Reasons  

We all have to manage our finances, and sometimes subscriptions can accumulate to the point where they strain your budget. When you take a closer look at your bank statement, you might realize that you’re paying for many subscriptions. Some of which you’ve forgotten about or no longer find valuable.  It’s essential to focus on your spending. Canceling unused or less essential subscriptions can help you. How? Well, simply by redirecting your money to things that matter more.

3. Trial Period Ends  

Many apps and services offer enticing free trials to get you hooked. While these trials can be an excellent way to test a service, they often automatically convert into paid subscriptions once the trial period ends.

If you’ve tried out a subscription service during a free trial and found it’s not what you were looking for, you’ll want to cancel before it starts costing you. This prevents unexpected charges and ensures you’re only paying for services you genuinely want.

4. You Got What You Needed  

Sometimes, you subscribe to access specific content or features, and once you’ve obtained what you need, continuing the subscription may no longer be necessary. For instance, you might have subscribed to a streaming service to binge-watch a particular series.

Once you’ve watched it, you’ve essentially achieved your goal, and there’s no need to keep paying for the service. In such cases, canceling the subscription allows you to move on without ongoing costs.

Understanding Google Play Subscription Types  

Understanding Google Play Subscription Types

To effectively manage your subscriptions on Google Play, it’s essential to grasp the two main subscription types offered: in-app subscriptions and Play Pass. Each type serves a unique purpose and is billed differently. Let me break them down to help you make informed decisions about your digital subscriptions.

1. In-App Subscriptions  

In-app subscriptions are the most common type of digital subscriptions on Google Play. They are subscriptions you buy through a specific app or service. Your Google Play account then bills these subscriptions. Examples of in-app subscriptions include streaming services like Netflix and music streaming platforms like Spotify Premium.

Here’s what you need to know about in-app subscriptions:

  • App-Dependent: In-app subscriptions are entirely dependent on the app or service you’re using. These subscriptions typically grant you access to premium features, content, or an ad-free experience within that specific app.
  • Billed Through Google Play: When you subscribe to a service through an app, the payment is processed via your Google Play account. This means that your subscription charges are consolidated, making it easier to manage multiple subscriptions in one place.
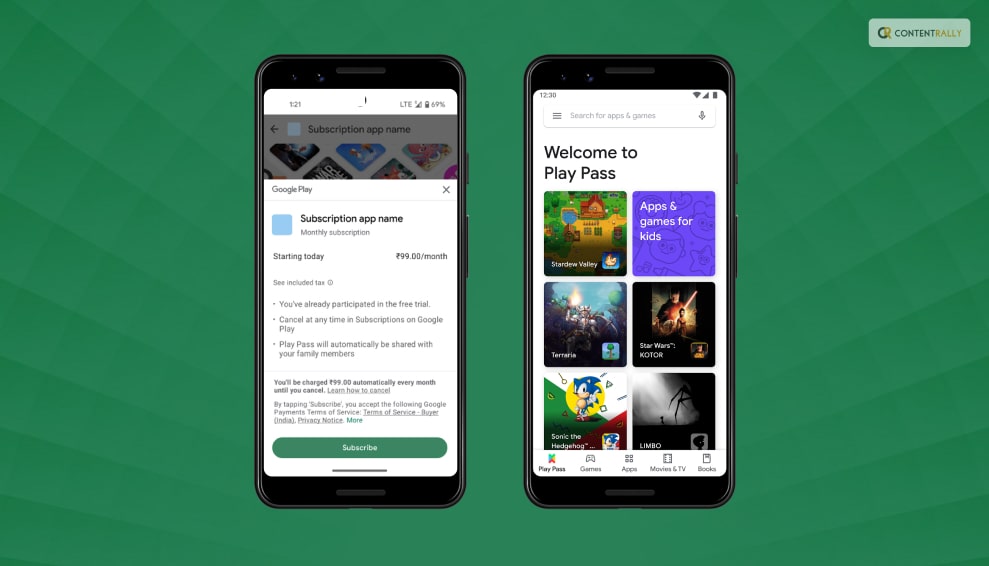
2. Play Pass  

Play Pass is a subscription service offered directly by Google. It provides subscribers with access to a curated selection of apps and games on the Google Play Store without ads or in-app purchases.

Some of the apps and games available through Play Pass include Stardew Valley, Monument Valley, AccuWeather, and Pocket Casts, among others.

Here are the key points to understand about Play Pass:

  • Google’s Subscription Service: Play Pass is a subscription service provided by Google itself. Unlike in-app subscriptions, it’s not tied to a specific app or service but rather grants access to a variety of apps and games.
  • Monthly Billing: Play Pass operates on a monthly billing cycle. You pay a fixed fee each month to access all the included apps and games. This fee is billed through your Google Play account.
  • Diverse Content: Play Pass offers a diverse range of content, including games, productivity apps, fitness apps, and more. It’s an excellent choice if you want to explore various apps without ads or in-app purchases.
  • Free Trials: Google often offers free trial periods for Play Pass, allowing you to test it out before committing to a subscription.
  • Accessibility: Play Pass can be accessed by multiple family members, making it a cost-effective option for households with multiple Android devices.

Choosing The Right Subscription Type  

Understanding the difference between in-app subscriptions and Play Pass is crucial for effectively managing your digital subscriptions on Google Play. Each type caters to distinct preferences and needs, whether you’re looking to enhance a specific app’s functionality or explore a curated selection of ad-free apps and games.

The choice between in-app subscriptions and Play Pass depends on your specific needs and preferences:

  • In-App Subscriptions: Opt for in-app subscriptions if you’re particularly fond of a specific app or service and want to unlock its premium features. This is the choice for personalized subscriptions tailored to your unique interests.
  • Play Pass: Consider Play Pass if you enjoy exploring a variety of apps and games and prefer an ad-free experience across multiple applications. It’s an excellent choice for those looking for diverse content without additional costs.

How To Cancel A Google Play Subscription?  

How To Cancel A Google Play Subscription?  

Managing your app subscriptions on Google Play is a crucial aspect of responsible digital spending. Whether you’re looking to cut costs, declutter your digital life, or simply unsubscribe from a service you no longer use, understanding how to cancel your subscriptions is essential.

Here are some of the things that you can do to cancel your Google Play subscription:

Method 1: Using The Google Play Store App  

Method 1: Using The Google Play Store App

1. Open the Google Play Store: Begin by locating and tapping on the Google Play Store app icon on your Android device’s home screen or in your app drawer. This opens the Google Play Store, your gateway to managing subscriptions.

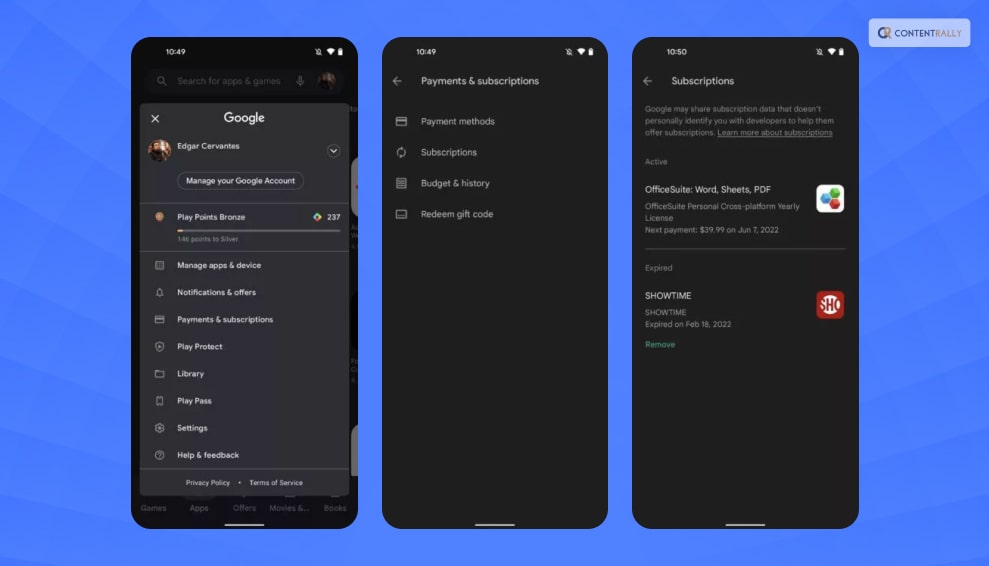
2. Access Your Account: In the top-left corner of the Google Play Store app, you’ll see three horizontal lines (often referred to as the “hamburger” menu). Tap on these lines to open a menu. Scroll down this menu until you find the “Subscriptions” option, and tap on it.

3. Select The Subscription: Inside the “Subscriptions” section, you’ll see a list of all the subscriptions associated with your Google account. Browse through the list and locate the subscription you wish to cancel. Once you find it, tap on it to access its details.

4. Cancel Subscription: Within the subscription details, you’ll see an option that says “Cancel subscription.” Tap on this button to initiate the cancellation process.

5. Confirm: Google Play will prompt you to confirm your decision to cancel the subscription. Take a moment to review the details, including the date until which you’ll have access to the service, and ensure it’s the correct subscription. Once you’re certain, tap “Cancel subscription” once more to confirm.

6. Done: Congratulations, your subscription is now canceled! You’ll retain access to the service until the end of your current billing period, after which you won’t be charged further.

Using the Google Play Store app to manage your subscriptions offers a user-friendly and convenient way to cancel subscriptions directly from your Android device. It’s a quick process that puts you in control of your digital expenses, ensuring that you only pay for the services you genuinely need and want.

Method 2: Using The Google Play Website  

Using The Google Play Website

Using the Google Play website to manage your subscriptions offers the advantage of a larger screen and may be more convenient if you’re already working on your computer. It’s a simple and effective way to keep your digital expenses in check and ensure you’re only paying for the services that truly matter to you.

Here’s a step-by-step guide:

1. Visit The Google Play Website: Open your web browser and navigate to [play.google.com](https://play.google.com).

2. Login: Sign in to the Google account that is associated with the subscription you want to cancel. Make sure you’re using the same account you used when you subscribed to the service.

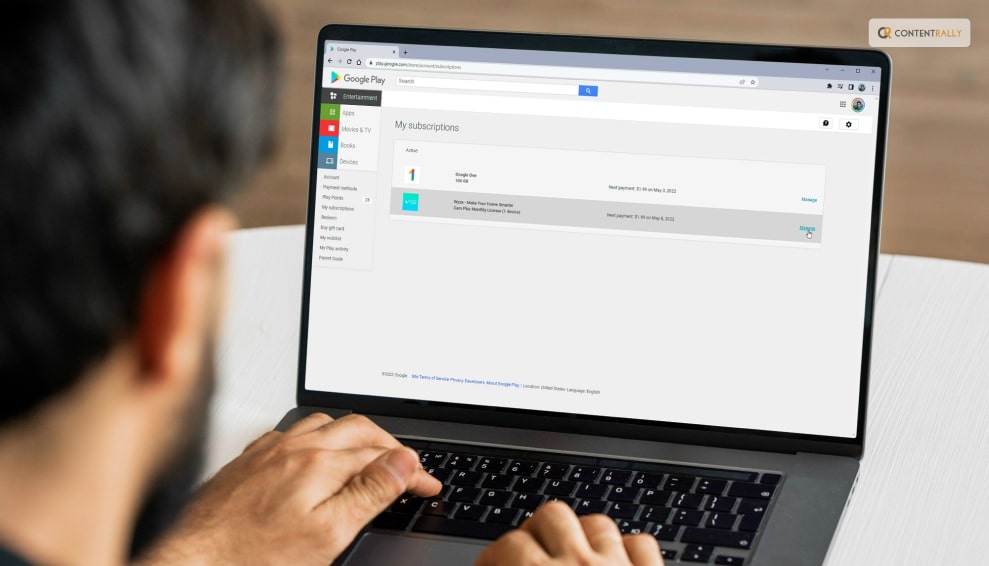
3. Access Subscriptions: Once you’re logged in, you’ll see a menu on the left-hand side. Click on “Subscriptions.” This will take you to a page that lists all your active subscriptions.

4. Choose The Subscription: Locate the subscription you wish to cancel from the list. It will display the app or service name, the renewal date, and the cost.

5. Cancel Subscription: Click on the “Manage” button next to the subscription you want to cancel. This will take you to the subscription details page.

6. Confirm Cancellation: On the subscription details page, you’ll find information about the subscription and a “Cancel Subscription” option. Click on it.

7. Review And Confirm: Google Play will present you with the details of the cancellation, including when your access to the service will end. Carefully review this information. If you’re sure you want to proceed, click “Cancel Subscription” once more to confirm.

8. Completion: Congratulations, you’ve successfully canceled your subscription using the Google Play website. You’ll continue to have access to the service until the current billing period expires.

Managing Multiple Subscriptions  

Managing Multiple Subscriptions  

If you’re juggling multiple subscriptions, staying organized is crucial. Here are some tips to help you manage them effectively:

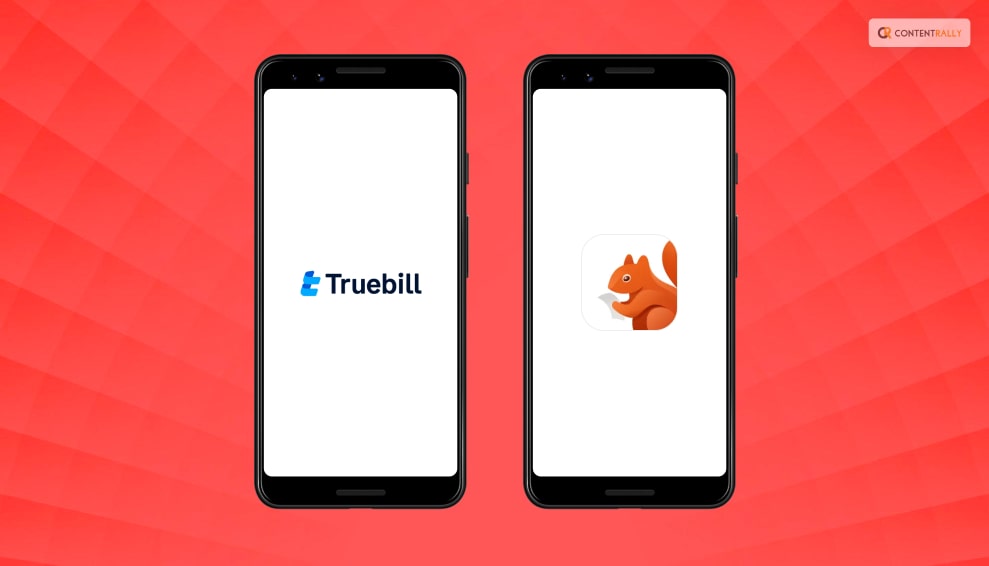
1. Keep Track: Make a list of all your subscriptions, including the renewal dates and costs. Apps like “Truebill” or “Bobby” can assist in tracking your subscriptions.

2. Prioritize: Review your list and determine which subscriptions are essential and which can be canceled.

3. Set Reminders: Use calendar reminders or apps to notify you a few days before a subscription renews. This gives you time to decide whether to keep or cancel it.

4. Bundle Or Share: Some services offer family or group plans. Consider sharing costs with friends or family members to reduce expenses.

5. Be Vigilant: Periodically review your bank or credit card statements to ensure you’re not being charged for subscriptions you canceled.

Troubleshooting Common Issues  

Troubleshooting Common Issues  

While canceling subscriptions on Google Play is usually straightforward, you might encounter some issues. Here’s how to address a few common ones:

1. Forgotten Account: If you can’t remember which Google account you used for the subscription, check your email for billing receipts. This will often show the associated account.

2. No “Cancel” Option: If you don’t see the “Cancel subscription” option, it might mean the subscription isn’t billed through Google Play. Contact the app’s support for assistance.

3. Refund Requests: If you believe you were charged for a subscription you canceled, contact Google Play support within 48 hours. They can investigate and possibly issue a refund.

Wrapping It Up!  

So, go ahead and take charge of your subscriptions. Cancel what you no longer need, enjoy the services you love, and keep your tech life in balance. Your wallet will thank you, and you’ll have a newfound sense of control over your digital world.

In case you were searching for ways to cancel your subscription to Google Play, I hope that this blog has been of help to you. If there are any other queries related to the same, feel free to let me know. All that you need to do is scroll down till you reach the bottom of the page. Then leave your comments and queries in the box below. And I will be there to answer them all for you!

keep Reading About:

Ankita Tripathy loves to write about food and the Hallyu Wave in particular. During her free time, she enjoys looking at the sky or reading books while sipping a cup of hot coffee. Her favourite niches are food, music, lifestyle, travel, and Korean Pop music and drama.

View all posts

Leave a Reply

Your email address will not be published. Required fields are marked *

Related

my activity google

Privacy In The Digital Age: Managing Your ‘My Activity’ On Google

In today's digital age, it's no secret that our online activities leave traces behind. Whether it's the websites we visit, the videos we watch, or the searches we make, all of this data is stored somewhere in the vast web of the internet. For those of us who rely on Google services, this information can be found in a place aptly named "My Activity." You might be wondering, what exactly is My Activity, and why should I care about it? Well, dear reader, let's embark on a journey to uncover the secrets of this digital treasure trove. Keep reading this blog till the end to learn more… What Is "My Activity" On Google? Google is like that trusty friend who helps you find answers to everything, from "How to make the perfect omelet" to "What's the weather like in Fiji right now?" But here's the deal, while Google is amazing at finding stuff for you, it also keeps a record of what you've been up to - enter "My Activity." So, what's "My Activity"? Well, it's like your digital diary, but instead of scribbles about your day, it stores the trail of your online adventures. Every time you fire up Google Search, binge-watch cute cat videos on YouTube, or ask Google Maps for directions to that secret taco joint, My Activity quietly takes notes. Now, before you start panicking and imagine a team of robots analyzing your life, hold on. My Activity isn't some covert operation aimed at spying on you. It's more like a friendly librarian who keeps track of the books you've borrowed. It helps Google serve you better, offering personalized recommendations, and it's there for you to manage, too. Balancing Act Balancing the convenience of personalized online experiences and safeguarding your privacy is crucial in the digital age. Embracing The Balance: Your Digital Tightrope Act Picture this: You've just finished watching a YouTube video about cooking a mouthwatering lasagna. Now, as you scroll through your social media feed, you notice an ad for a cookbook filled with Italian recipes. Coincidence? Not really. It's the magic of personalization at work, and it's all thanks to the data collected through your online activities. But wait, didn't we just talk about privacy concerns and managing your digital footprint? Yes, we did. And that's where the concept of "Embracing the Balance" comes into play. Convenience Vs. Privacy On one side of the scale, you've got convenience. Personalized recommendations, tailored search results, and customized ads are all part of the online experience we've come to expect. They make our digital lives more efficient and enjoyable. Imagine if every time you searched for something, you had to sift through pages of irrelevant results. Or if YouTube showed you videos that had nothing to do with your interests. It would be like searching for a needle in a haystack, and frankly, no one has time for that. But here's the catch: all this personalization relies on the data you generate while using online services. Your searches, clicks, and views are the building blocks of your digital profile, and companies like Google use this data to fine-tune your online experience. On the other side of the scale is privacy. Concerns about data breaches, unauthorized access, and the potential misuse of personal information have never been more relevant. With every digital step you take, you leave a trace, and that trace is recorded in your My Activity. Finding The Middle Ground So, how do you strike the right balance between the convenience of personalization and safeguarding your privacy? It's a bit like walking a tightrope – you need to find that sweet spot. 1. Regular Check-Ins: The first step in this balancing act is awareness. Make it a habit to visit your My Activity dashboard regularly. It's like looking at your bank statement to keep track of your finances. By checking in, you become aware of what data is being collected. 2. Data Minimalism: Think of it this way: you wouldn't share every detail of your personal life with a stranger, right? Similarly, you don't have to let every online service track your every move. Be selective. Turn off tracking for services where it isn't crucial. 3. Use Incognito Mode: Think of Google's Incognito mode as your invisibility cloak. When you use it, your searches and browsing activity aren't saved to your My Activity. It's perfect for those times when you want to keep your online explorations private. 4. Secure Your Account: Protecting your online identity is vital. Use strong, unique passwords for your Google account and enable two-factor authentication. Regularly review your security settings to ensure your account is locked down. The Art Of Digital Balance Balancing between personalization and privacy isn't about sacrificing one for the other. It's about making informed choices. Just like you decide what to share with friends and what to keep to yourself in your offline life, you can do the same online. Remember, My Activity isn't your enemy; it's a tool that puts you in the driver's seat. You can review, delete, or adjust your data as you see fit. It's your digital diary, and you're the author. So, embrace the balance. Enjoy the perks of a personalized online world, but also take charge of your digital presence. Be aware, be selective, and be secure. In doing so, you'll find that navigating the digital tightrope becomes a breeze, and you can savor the best of both worlds – a convenient online experience with your privacy intact. Why Should You Care? Alright, you might be thinking, "My Activity, Google's got it covered, right? Why should I even bother?" Well, hold onto your digital hats, because there are some pretty good reasons why you should care about what's cooking in your My Activity pot. 1. Privacy Party: Imagine you're having a party at your place, and you've invited a bunch of friends over. You'd want to have some control over what's happening, right? Well, think of your online activities as that party. My Activity on Google is like the guest list; it shows you who's been invited (your clicks, searches, and wanderings). By knowing who's at your digital shindig, you can decide if you want to let them stay or politely ask them to leave. 2. Tailored To You: Ever noticed how your Netflix suggests shows that you actually want to watch, or Amazon knows exactly which kitchen gadget you've been eyeing? That's personalization at its finest! And Google's got a slice of that pie too. By keeping tabs on your My Activity, Google can offer you search results, ads, and recommendations that fit your interests like a glove. It's like having a personal shopper for the internet. But here's the catch – for this magic to work, Google needs to know a bit about you. 3. Be The Boss: Let's say you had a wild night out, and now you want to erase all evidence. In real life, you can't do much about those embarrassing photos your friend posted on social media. But in the digital realm, you're the boss. With My Activity, you can cherry-pick stuff you want to delete. That funny cat video you watched 27 times? Gone. That late-night search for "how to cook a perfect omelet"? Poof! You can even wipe the slate clean for an entire day if you want to keep things under wraps. It's your data, and you're in charge. 4. Security Sherlock: Your digital kingdom is precious, and you want to keep it safe, right? Your My Activity page on Google can help with that too. By keeping an eye on what's going on in your online world, you can spot any suspicious activity. Imagine seeing a search for "How to change my Google password" that you didn't do – that's a red flag! It's like having a digital Sherlock Holmes on your side, solving mysteries and keeping your online abode secure. So, there you have it. These are the reasons why you should give a hoot about your My Activity on Google. It's not just a digital diary; it's a tool that can empower you to take charge of your online presence, get the best of personalized internet experiences, and ensure your digital castle stays fortified. But remember, like with great power comes great responsibility. So, keep an eye on your My Activity, be mindful of what you share, and enjoy the perks of a personalized online world, all while keeping your digital secrets safe and sound. Cheers to navigating the digital maze like a pro! Read More: How To Play Google Thanos Snap In 2023? Navigating My Activity Alright, now that we've cracked open the treasure chest that is "My Activity" on Google, let's dive a bit deeper into how to navigate this virtual diary of your online adventures. Think of it as your secret journal, except it's filled with digital breadcrumbs of your Google-related activities. Just remember one thing— Google's My Activity isn't some Big Brother scheme to invade your privacy. It's a tool provided by Google to give you more control over your digital footprint. Whether you want to reminisce about that epic road trip you mapped out on Google Maps or keep your late-night Netflix binging on the down-low, My Activity Google has got your back. Accessing My Activity First things first, how do you even get to this magical land of data tracking? It's quite simple, really. Just make sure you're logged into your Google account, and then visit [https://myactivity.google.com/](https://myactivity.google.com/). Voila! You're now in the control center for your digital tracks. Viewing Your Activity Once you're in, you'll be greeted with a chronological list of your recent online endeavors. This could include your Google searches, YouTube video views, places you've navigated to on Google Maps, and more. It's like a timeline of your digital life. But wait, there's more! If you want to zero in on a particular moment in time, you can filter your activities. Click on the search bar at the top, and you can search for specific keywords, dates, or even Google services. So, if you're trying to find that mouthwatering recipe you Googled a few weeks ago or the cute cat video you watched last night to brighten your day, this search feature will be your best buddy. Deleting Your Activity Alright, let's say you want to do a little digital spring cleaning. Maybe you've been binge-watching those embarrassing cat videos, and you'd rather keep that on the down-low. No worries, you're in control. To delete an individual item, click on the three dots next to it and select "Delete." Poof! It's gone. Nobody will ever know about your secret cat video obsession. But what if you want to erase your tracks from a particular day? Easy peasy. Click on the trash can icon at the top right corner of the screen, and you can choose to delete items from the past hour, day, week, or forever. Be careful with that last option, though – it's like wiping your entire digital slate clean. Adjusting Settings If you're more of a "preventative maintenance" type of person, you can adjust your settings to limit what Google tracks in the first place. Click on the "Activity controls" link on the left side of the screen, and you'll find a treasure trove of options. Here, you can toggle on or off various tracking features, such as "Web & App Activity" (which records your searches and interactions with websites and apps), "Location History" (which tracks your physical whereabouts), and "YouTube History" (which keeps tabs on your video-watching habits). Now, keep in mind that turning off these features might affect your personalized experiences. For instance, if you switch off "Web & App Activity," you might not get those handy search suggestions or tailored ads anymore. It's all about finding the right balance between privacy and personalization. The Final Word In the grand tapestry of the internet, My Activity is just one thread, but it's an important one. It's a reflection of our digital lives, a reminder that our actions online are not ephemeral, but rather, they leave a lasting imprint. So, the next time you find yourself in the depths of Google's My Activity, take a moment to reflect on your digital journey. It's a tool that empowers you to manage your online presence, customize your experiences, and ensure your privacy remains intact. In this digital age, where our online and offline lives are increasingly intertwined, understanding and managing our digital footprint is not just a matter of convenience; it's a responsibility we owe to ourselves and our online identities. So, navigate My Activity on Google with confidence, and embrace the power it gives you to shape your digital narrative. Read Also: Ads.Google.Home: Create Google Ads And How Everything You Need To Know About Google Play Refund Learn Everything About Google Verification Code Scams In 2023 Google Meet Code 101: Learn All About The Platform’s Meeting Code

READ MOREDetails
Report Indicates Where Users Start Or Exit The Conversion Funnel

What Report Indicates Where Users Start Or Exit The Conversion Funnel?

What report indicates where users start or exit the conversion funnel? Actually, the conversion funnel is a phrase used in e-commerce to describe the journey a consumer takes via a search engine or internet advertising, converting to a sale, or navigating an e-commerce website.   This is exactly the way to visualize the flow and conversion path of potential customers into paying customers. These visitors can be generated via a number of methods such as cold outreach, paid ads, social media, content marketing, and SEO.  A Simple Guide To Conversion Funnel [caption id="attachment_28122" align="alignnone" width="693"] https://www.megalytic.com/blog/understanding-the-funnel-visualization-in-google-analytics[/caption] Funnels help us to view the process easily by provisioning us a visual representation of the conversion data between each step. This enables you to: Be aware of bugs, technical nuisances, and browser issues. Determine what language or copy might be modifying our customer’s emotional behavior during sign-up or checkout. Discover what steps are causing errors or customer confusion. A standard funnel visualization report might command such discrepancies, and it is not soft enough to cope with sudden user behavior. However, in these types of cases, the Google Analytics goal glow report is useful to a great extent.  You can track the conversion funnel in Google Analytics by using your funnel visualization report for insights and analysis. According to our research, pageviews can occur non sequentially for funnel matches. All You Need To Know About Google Analytics Goal Flow Reports A Goal Flow report illustrates your sales funnel. It describes how efficiently visitors to your eCommerce site are driving the route from awareness to sales, to desire, and to interest. This report is going to help you identify loops and stuck points. At the same time, it can provide strong insights that can leverage to boost returns on investment (ROI) and conversion rates.  Besides, you can create your own custom report and track the same via Google Analytics report. To access the goal flow reports, navigate to Conversions >> Goals >> Goal Flow.  You would never know the goal flow and visualization reports without having to implement a goal and setting up a funnel.  What Can You Do With The Goal Flow Report? [caption id="attachment_28123" align="alignnone" width="693"] https://www.megalytic.com/blog/understanding-the-funnel-visualization-in-google-analytics[/caption] Now, with the goal flow report, you can review questions such as: Is there one segment of traffic that acts differently? Is there a spot where traffic loops behind? Are there many surprising exits from a step in the core of the funnel? Where do users enter my funnel? In addition to this, you can determine information such as: Exit points Funnel steps skipped Stuck points Internal loops Conversion rates Drop-off points Percentage of traffic completing your goal Percentage of traffic visiting certain pages The popularity of landing pages Sources of traffic. What Report Indicates Where Users Start Or Exit The Conversion Funnel? The answer to your question What report indicates where users start or exit the conversion funnel? is Goal Flow. This report is used to perform a funnel analysis. Moreover, start and exit in the goal funnel provides you an overview of which steps users exits or enters in your conversion process. This is a very important part that you need to understand in detail. All the points in the funnel are vital to complete a conversion successfully. The goal flow report also displays the path your traffic traveled towards goal conversion. This report helps you know if unexpected problems or visitors are driving your content as expected.  Therefore, to view the goal flow report, you need to Sign in to your Google Analytics account, and then you can open the reports to view the same.  The Final Thoughts What report indicates where users start or exit the conversion funnel? Goal Flow is the correct answer to this query. The above-explained information describes the reasons for this. However, if you come across any doubts, you can mention them in the comment section below! More Resources: 5 Smart Ways to Boost your Credit Score The Importance of Writing Business Reports in College Different Types of Conversions to Make the Most of Spare space

READ MOREDetails
how to change google play country

Breaking Boundaries: A User’s Manual On Altering Google Play’s Country

This is an opportunity that comes once a year. But this can be useful for just about anyone. For instance, you decide to move to a different country which could require you to change the country on Google Play to access certain application that is available in select regions. Other than local entertainment books and movies, there are essential services like banking, food, and commuting to be considered, which is dependent on the geographical location Google can detect. But it must be kept in mind that this location cannot be changed or switched back for the next year. You will also not be able to utilize the previous balance you may have had on Google Play from the country you changed from. You need to use this amount before you change to another location. Also, don't forget to cancel subscriptions that you will not be using. If you want to know how to change Google Play country on your device to download and access apps from other regions, we have the best tips for you. This article will help you understand why you cannot access those apps and how you can. How To Change Google Play Country On Desktop?   On your internet browser, enter pay.google.com, then click on Settings. Select Payments profile. From there, go to Country/Region. Click on the pencil icon that will allow you to edit. Google will then ask you to make a payment profile for the lew region or country you select. Select Create a new profile and follow the steps that take you forward. Once the process is completed, the Store will change the location to the new one you just selected. Sometimes the changes can take up to 48 hours to get processed to match the current IP address. If you are not in a different location, you will have to use VPN. If you don’t find the option for Country and Profiles, it could mean that Google is not allowing the country to change. Various factors could lead to this, like you have changed location recently, or you are in a country that does not allow changing of region. In case you are abroad for a short while, and you require an app to be available that is also available in your home location, simply run a search on. Sometimes the same app is also available in other countries. How To Change Country On Google Play On Phone?   Open the Google Play Store app on your phone or tablet. Click on your profile at the top right corner to access Settings. After that, click on General and the Account and device preferences from the next menu. Choose the country you have to add to the Google account in the Country and Profiles section. Here Google will show countries that are related to the IP address of your present country. You have to physically be in a different region or use VPN to access other locations. Select the country available and go through the steps with the on-screen instructions in order to add the payment method for the desired country. Using A VPN To Change Google Play Country   Once your IP address changes, the region or country of the Play Store will also change. One way to change the location is to trick the app into thinking your location has changed with the help of a VPN. For this, you will need to clear out your cache and data. You will also need a valid payment method for the country you choose. How To Change Google Play Country Without Payment Method?  If you want to change the Google Play country without having to add a payment method, here is how: Connect to a VPN server in the region you want the location to change to. Create a new Google account that does not have a payment method linked to it. Clear all the backed-up data you may have on your device. This you can do by going to settings and clicking on Apps, selecting the Play Store App, and clicking on Clear Data. Now open the app using the new account. Your location should now change to the new region you selected. How To Change Google Play Country On iPhone?   For users trying to change the region of iOS devices, it is possible to do so with a little tweak here and there. You can change the country setting to show you apps based on your IP address. If you can actually move to a different country, well and good. If not, you can use some help to switch regions for any device running on iOS. Third-party apps like Aiseesoft AnyCoord can help you change your location. It can help you switch IP addresses on iPhones iPads, and even Macs. What Happens To My Google Play Pass When I Change Countries?  Google Play Pass subscriptions are set to automatically renew. If it is available in the country you are in, it will remain untampered. Even if it is not available, you can get access to the apps that you already have preinstalled on your device. But when you change location, you will not be able to install or check out other apps on Play Pass. Whereas other apps will not be available at all. Wrapping Up   If you want to know how to change Google Play country on your device, we hope this article helps. If nothing else is worse, a VPN is always a good resort. It can easily change your IP address and make apps accessible to you that you need while being in a region that does not permit its use. You must also keep a payment method handy in case you need to sign up with one. Or you could simply open a new Google account to make your situation easier. It is an easy process, all you need to know is how to use technology to your advantage and not let you stop from experiencing life. If you have thoughts to share or questions to ask, please leave a comment below. We would love to hear from you! Keep Reading: Google Play Movies: Your Ticket To A World Of Film And Fun Google Play Gift Card Balance: Everything You Need To Know About It Google Play Cancel Subscription: The Ultimate Guide To Managing Your App

READ MOREDetails