Top Home Remedies To Make A Floor Non-Slip

Published on: 01 July 2022 Last Updated on: 07 February 2024
Home Remedies

You may not realize that a floor is slippery until you or a loved one slips over it. This is often the case with entrance halls, or with the garage. With your shoes on, you probably have enough grip. But take them off, and it’s an accident waiting to happen. Why use epoxy for garage floors? Go for polyaspartic coatings for the ultimate protection from a sudden slip!

Marble floors can also be an issue, as can garage floors. These are usually concrete but, once the concrete gets oil and other compounds on it you’ll realize that it’s also slippery.

The good news is there are several home remedies that can reduce the slipperiness of the floor.

Let’s Check Out Top Home Remedies To Make A Floor Non-Slip:

cleaning floor

1. Epoxy Coating

This is the most expensive and time-consuming option. It involves layering an epoxy coating on top of an existing concrete floor or creating a new floor with epoxy.

You can undertake this job yourself however if you want the best possible finish it’s best to use the professionals in epoxy floor coatings. They’ll do the job faster, and neater, and it will come with a guarantee.

In fact, the cost in the long term is significantly cheaper than most options. This is because epoxy flooring is very tough and durable.

You can also choose your color and even a pattern you want to emboss not the floor. This guarantees your epoxy flooring doesn’t just look stunning and offers a non-slip solution. It is also unique to your home.

Related Resource: Use Floor Polishing for Keeping Your Flooring Looking New

2. Vinegar & Water

Vinegar is a powerful cleaning agent. If you add some to warm water you’ll be able to mop your floor thoroughly. You should proceed when dealing with a hardwood floor, they don’t generally like moisture.

The vinegar will remove all the debris on the floor, eliminating issues that can cause the floor to be slipperier.

It should be noted that vinegar and water clean the floor to make it safer, it doesn’t add a non-stick coating.

3. Non-stick Products

There are an array of non-stick products on the market. It’s worth noting that they are not all created equally. You’ll need to consider which products are designed for your type of floor. Then, it’s a good idea to look at different reviews to help you choose the one that suits your needs best.

Once you have chosen a product you’ll need to read the instructions and do as it says. Some can be used neat, others require the addition of water.

Apply them in accordance with the guidelines and, once they have been on for long enough, make sure you dry the floor thoroughly.
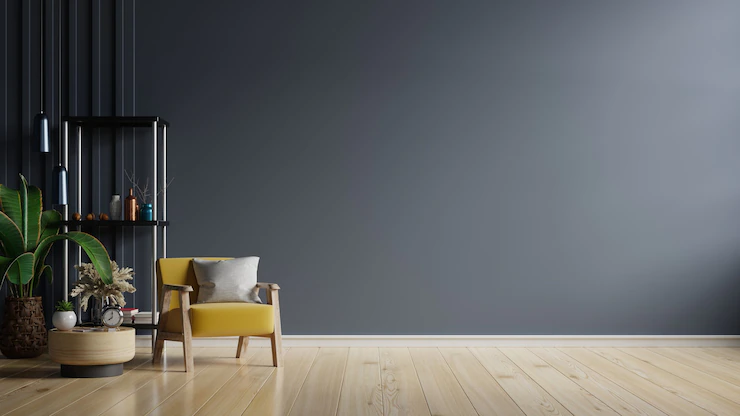
4. Use Rugs

Another way to reduce slippery floors is to add rugs to the most dangerous spots. You’ll need to invest in rubber-backed rugs as these will stick to the floor where you put them.

The rugs will then give grip and comfort to anyone walking over them, allowing people to move around the home in confidence. Don’t forget, before you apply any product to your floor it’s important to sweep it and then mop it. This removes the debris that could cause an issue.

Read Also:

Arnab is a professional blogger, having an enormous interest in writing blogs and other jones of calligraphies. In terms of his professional commitments, He carries out sharing sentient blogs.

View all posts

Leave a Reply

Your email address will not be published. Required fields are marked *

Related

Interior Designer

How to Make Your Home Look Like You Hired An Interior Designer

Buying a house is always thrilling and exhilarating for young people or couples when first starting out. Finding a beautiful place to live in the ideal neighborhood can really get your juices flowing and set your imagination running wild. Some people seem to get tripped up afterward when they attempt to turn their new house into a welcoming and inviting home. Does this sound familiar to you? Interior design is a difficult skill to master if you’re new to the game. That’s why it’s often best to hire an interior designer to lend a helping hand. But, if hiring an expert isn’t in the cards for one reason or another, then consider the next best thing. Consider learning a few clever interior design tricks that’ll make your home look elegant, luxurious, and so amazing that your friends and family members will be floored to learn that you didn’t have any professional help whatsoever. If this seems even a little bit exciting to you, please stick around to discover our best expert tips and tricks. How to Use Colors Effectively Like You Hired An interior designer When painting your brand spanking new house to make it look and feel more like a home, remember to use colors effectively. As an example, you should always make it a point to begin the basic color palette like green, blue, and orange. But instead of painting your home with these colors, you can create new colors by mixing and matching. And you can use these freshly discovered colors to paint your walls, windowsills, closets, and kitchen cabinets which you’ll find more info on by clicking the link. It’s going to be easier to mix and match the colors than you think. First, take a well-known primary color like royal blue. Next, find another complementary color and mix them up to create a new and better color. You can do this throughout your entire home to give it a makeover from top to bottom. In fact, you may want to consider the 50/150 rule. One of your batches of paint should be 50% lighter while the other batch should remain 150% darker. Add Eye-Catching and Pleasing Textures Just as important as altering your colors, textures will make a world of difference to the look, feel, and vibe of your new place. When you first walk into a room in your home and get a glance of the place, it may seem like it’s all one shade. But then you focus even further and realize that there are lots of different textures and shades of color all threaded throughout the furniture like the lamps, cushions, sofa, throw rugs, pillows, and everything else. Or maybe you walk into a specific room and notice none of these things. That’s when adding different textures is incredibly important to the overall look and feel of your new place. You can add colorful silk cushions on the couch, shiny and colorful lamps on the desks, a beautiful teal green, royal blue, or brown leather sofa, or whatever your heart desires. Just make sure the different textures and colors go well together and you’ll create a pleasing look that looks like it was created by a professional interior designer. Glass Showers of the Way to Go A traditional bathtub with a shower and a shower curtain is certainly functional and definitely nice to an extent. But if you really want to go above and beyond and make it look like an interior designer designed your place, you should add glass showers to your bathroom. Not only are these showers incredibly attractive, but they are also roomy, spacious, and very accommodating. You’ll have lots of space to move around and breathe and you can install a stand for your shampoos, conditioners, shaving supplies, toothbrush, toothpaste, or just about anything else you might want on hand while taking a shower. Even better, a large shower makes your bathroom looks so much bigger and the glass door is incredibly attractive to boot. So you’ll definitely get a kick out of glass showers in your bathroom and you’ll really enjoy and appreciate this new addition that looks like it came straight from the mind of an interior designer. Final Thoughts Did any of this information help you? Or do you feel even more confused than ever? If we’ve answered some of your questions then you should definitely use this information to design your new house and make it feel like a home. If not, feel free to hire an interior designer to help you make it look absolutely perfect. The choice is yours so we’ll leave it up to you. Read Also: Top Expert Tips For A Stunning Condo Interior! Experts Recommend: Top Interior Design Trends For 2017 5 Factors To Consider In Choosing The Right Floor Colors

READ MOREDetails
neon painting sign

Beautify Your Place With This Green Neon Painting Sign

A neon painting sign is attractive lighting that you can use for your home, business, or event. It has built-in tubes containing neon gas and electrodes. These signs help to add lights and colors to any space. Many people are already using LED green neon signs as they are better than another lighting. These signs come in various designs and shapes. You can also personalize a neon light sign as per your preference. Sometimes, finding the best design of a neon painting sign is tough. So, in this article, we will tell you about a neon sign painting of a leaf, so keep reading: What New About Neon Leaf Light? Neon leaf lights are the beautiful green neon painting sign that has a design of a ficus plant. This neon light is perfect for use at your home or plant nursery. It has an attractive design and it glows in green color. This green neon light sign will make your mood good during stressful times.  LED backlights and PVC tubing are used for making neon leaf lights. The neon lights are lightweight and also use less energy. You can easily mount or hang this neon light on the wall of your maintenance room or bedroom. This super bright neon light comes with pre-drilled holes and acrylic backing. You can also control the lighting of this sign with remote control. It also has a 6ft long cord, 3ft long cable with a wall plug and switch. Leaf Painting neon light is available to purchase on Echo Neon. 5 Benefits Of This Green Neon Painting Sign You will get many advantages after using this super bright neon light at your home or plant nursery.  Below you can check the reasons for using this green neon painting sign: 1. Best For Home Decor Neon leaf light is perfect for home decor. This light will add brightness and color to your space. It will also make your home look unique. So, this green neon light is best to use at home. 2. Use Less Energy Neon leaf light has LED lights that use less energy. It is not like the traditional signs that use more energy and also create noise. You will not face any problem with the leaf design neon painting sign. 3. Safe To Use This green neon painting sign is safe to use as it does not contain harmful gases like the traditional signs. This neon light has LED lights with  PVC tubing, so the build quality of this type of neon light is best. 4. Affordable Neon leaf light is affordable than other types of neon painting signs. It requires less maintenance and you can easily clean it. There is no need to replace this neon light for a long time as it has a long lifespan. 5. Easy Installation Installing this neon painting sign is much simpler. It has acrylic backing and pre-drilled holes, so you will not face any problem in installing it. After installing this sign, it will look best in your home. Price Of Neon Leaf Light So, this neon painting sign painting is available on Echo Neon. They charge reasonable prices for their neon signs. You will not regret spending money on this beautiful neon light sign. So, the Leaf painting sign is available on Echo Neon at the price of $349.00. For remote control, you have to pay $10 more. Shipping Of Neon Leaf Light You can order neon leaf light from Echo Neon. They deliver their neon signs in the UK, Australia, US, Canada, etc. For the standard delivery, they take around 2-3 weeks. It includes the production process and shipping. Then, for fast shipping, they take two weeks from the order date. About Echo Neon Echo Neon is a famous online neon site where you can find different types of neon signs. They are selling read and custom-made neon signs to customers. Even, they have a team of professionals who sell handmade attractive neon signboards. They use PVC tubing and LED lights for producing their signs.  Echo Neon signs have a long lifespan than the other types of signs. That's the reason their neon signs are safe and eco-friendly. Their signs have acrylic backing and pre-drilled holes. You can control the lighting of their LED signs with remote control. You can also customize a neon painting sign through them. Designing a neon sign with its customization tool is much simpler. You can choose any font, coloring, and shape. So you can also purchase premium quality neon signs from this online neon site. Read Also: A Rundown of the Basic Led Lighting Grow These Flowering Plants In Your Home Garden Give Amazing Look Using Balloon Centerpieces in Wedding

READ MOREDetails
Commercial Door repair

10 Pro Tips To Minimize Commercial Door Repair & Maintenance Cost

Got the damaged door in your commercial premises? If so, you should get it repaired as soon as possible. It’s because the aesthetic and safety of commercial door repair are one of the most important things which are overlooked most of the time. If you don't keep your doors in shape, it can lead to various problems. When someone arrives at your business, the entry door is the first thing to be noticed. If it is cracked or damaged, you are presenting a bad impression. If doors are well maintained, it gives you peace of mind that your business is secure. Protect your door and door will protect you ….. Maintain your doors from time to time to give them long life and also to reduce repair costs. It is better to maintain a door than waiting for it to get damaged. A damaged door will cost you four times replacing and repair. 10 Pro Tips To Minimize Commercial Door Repair & Maintenance Cost Here are few tips on how to maintain your commercial door 1. Test Your Door: First, check your door’s functionality by making frequent open and close. Check, is it working smoothly or it’s jerky? 2. Lubricate all Moving Parts Of The Door: Lubricate often to increase your garage door’s lifespan. If you are using a commercial wood door, properly clean it with cloth, it will help in avoiding dust to get a deposit on it. 3. Inspect Loose Parts: It is best to properly check the hardware of the door to avoid any loose become worse. Read Also: Roof Repair: Should You Hire Roofers or DIY? 4. Replace Weather Seals: The weather seals are soft rubber on the bottom or sides of commercial or garage doors. These weather seals protect you from the air and weather conditions. If these seals are worn out, they may cause many problems. To keep your building safe, it is important to maintain them regularly. 5. Clean Door Sensors: In automatic doors, sensors are installed, which monitor objects passing through them. Sometimes the sensors of these doors are overlooked during cleaning, which in turn cause the door to jam. So, regularly clean sensors! 6. Apply Paint: To prevent metallic part of your door from rust, apply a coat of paint on your door by time. Choose the same color of paint as already done on your door to create a brand new look. 7. Inspect Door Panels For Cracked Or Broken Glass: Keep an eye on the glass panel of your door, if it is cracked or broken, replace it immediately because it may cause harm to someone also projects a bad impression of your business. 8. Hire Professional:   Call a professional to ensure the functionality of your automatic doors because a professional has experience in dealing with such doors. They will easily inspect the problem that can become a big issue later. 9. Check Cables: Garage doors are lifted up or down with the support of cables; you should check your cables regularly, but never tinker with lift up cable as it has much force to injure or kill. But you can check the condition of the cable, so you know when to hire a professional. 10. Test Auto-Reverse Safety Feature: Put some cloth or wooden piece on the ground in the path of the door and check if a door, go back after touches the cloth or wooden piece. If it lacks this safety measure, then it’s time to buy a new one. If you are not aware of how to maintain your door, then you can seek help from a professional who provides door services. So, those were some of the most effective tips you can use to ensure the longevity of your commercial door! Read Also: 5 Factors To Consider When Buying A New Garage Door Should You Replace Or Rekey Locks? — What Locksmith Richmond Says

READ MOREDetails