Is Indian Food Healthy? – Major Nutritional Benefits of Indian Cuisine

by

03 December 2024

Food

Is Indian Food Healthy

Is Indian food healthy? – Of course, they are. There are plenty of Indian dishes that are rich in nutrients, spices, and whole foods.

Although there are innumerable gastronomic options, there are many healthier options. In fact, some food recipes are based on Ayurveda, which is Ancient India’s system of medicine.

In this article, you will learn about the nutritional benefits of Indian food and the balanced dietary profile of Indian food. Also, you will learn about the health benefits of Indian food and healthy Indian cooking techniques.

Moreover, you will also learn about common myths about Indian food. Hence, to learn more, read on to the end of the article.

Is Indian Food Healthy?

healthy Indian food

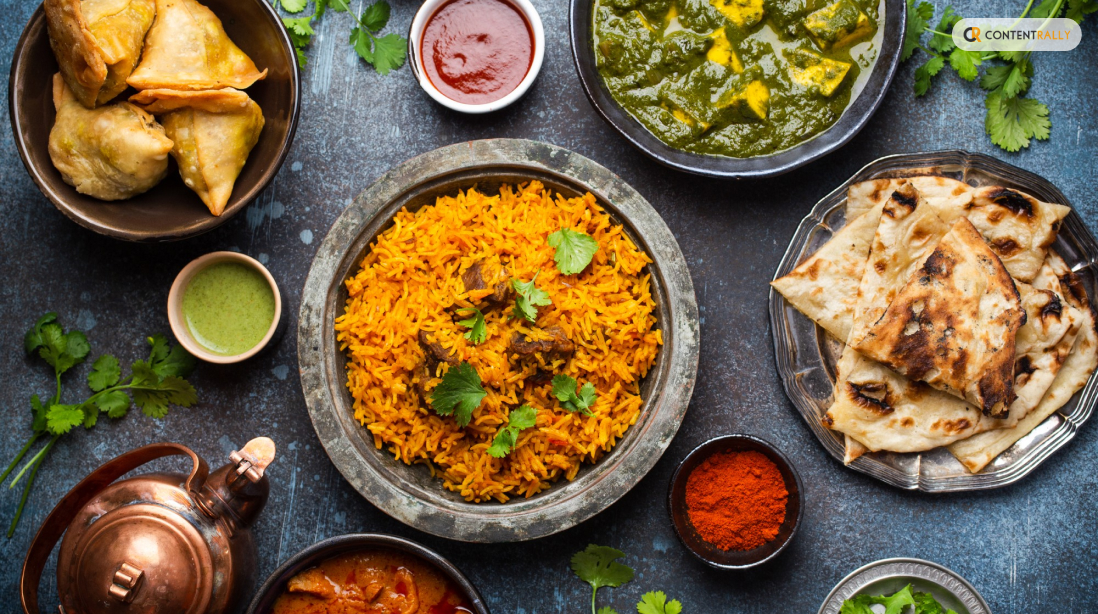
Indian cuisine has a variety of food options consisting of both healthy and unhealthy options. Here, this article aims to consider only healthy Indian food.

Generally, in Indian food, you will find a blend of diverse flavors and healthy food traditions. In fact, apart from satisfying your taste buds, Indian food will improve your health.

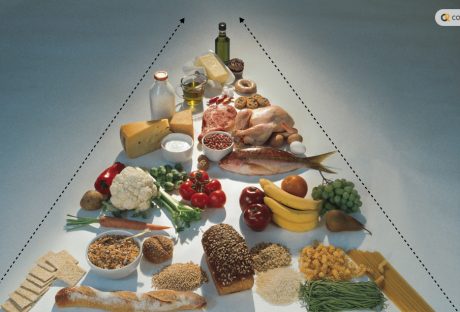
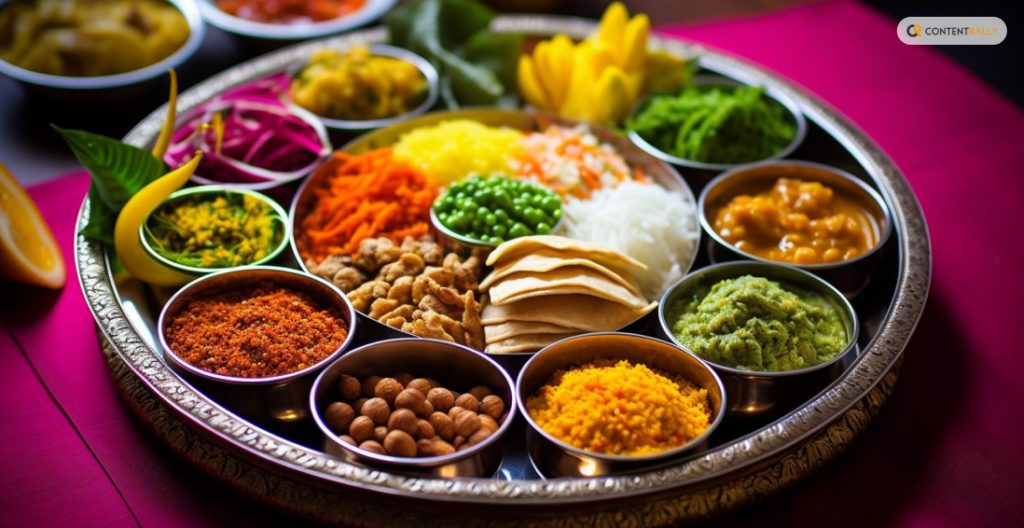
One of the most notable aspects of Indian food is that you will find a rich array of ingredients. Traditionally, the Indian diet uses a variety of whole grains, fruits, legumes, and vegetables.

Interestingly, each of them contributes significantly to health benefits. Whole grains like whole wheat, brown rice, and millet play a significant part in Indian meals.

Apart from that, Indian food items are rich in antioxidants. This is because they have many spices that are full of antioxidants. For example, antioxidants in cloves and ginger contain anti-inflammatory properties. Apart from that, cardamom also contains antioxidants.

Basically, antioxidants are molecules that prevent oxidation damage in your body cells. Moreover, it also reduces when damage is done. Hence, Indians mostly follow a diet that is high in antioxidants. As a result, there are fewer risks of diseases like heart disease and cancer.

Balanced Dietary Profile Of Indian Food

Here is a balanced dietary profile of Indian food that you need to know about:

Food ItemsBalanced Dietary Profile
Fruits and VegetablesGenerally, an everyday Indian diet includes 400 grams of vegetables and 100 grams of fruits.
Cereals and PulsesEach day, a balanced diet consists of 250 grams of cereals.
DiaryA balanced Indian diet consists of 200-250 ml of milk and milk products daily.
ProteinIndian food contains 85 grams of protein in the form of eggs, animal protein, and pulses daily.
Nuts and Seeds35 grams of nuts and seeds daily also fall under a balanced diet.

To ensure a balanced diet, you must cook your food well and make sure that the food is soft and less salty and spicy. Although Indian food has a lot of spices, the healthy options contain multiple healthy spices in the right amount.

Moreover, when consuming meat, milk, poultry, or any animal protein, make sure they are moderate in number. Furthermore, when you have a balanced diet, you must drink plenty of water and take fewer beverages.

Health Benefits Of Common Indian Ingredients

Health Benefits of Common Indian Ingredients

The following are the health benefits of common Indian food ingredients:

1. Spices

Since ancient times, India is known as the land of spices. Even today, India is the biggest exporter of spices in the world. Moreover, Indian food contains a variety of spices.

Here are some spices and their benefits:

  1. Turmeric: It contains curcumin. This item has antioxidant and anti-inflammatory properties.
  2. Cumin Seeds: They help in the digestion process and boost the immune system of your body.
  3. Coriander Seeds: These help you to regulate your blood sugar levels.
  4. Cardamom: It helps you to lower blood pressure levels.
  5. Cinnamon: This spice can reduce heart risks.

2. Vegetables, Pulses, And Lentils

Indian foods contain vegetables in food items. These vegetables provide vitamins inside your body. Also, vegetables lower cholesterol and improve vision. Moreover, many pulses contain vitamins A, B, C, and E. Apart from that, they also contain minerals like iron, potassium, and zinc.

On the other hand, lentils and vegetables also promote heart health. This is because they have less saturated fat and high fiber.

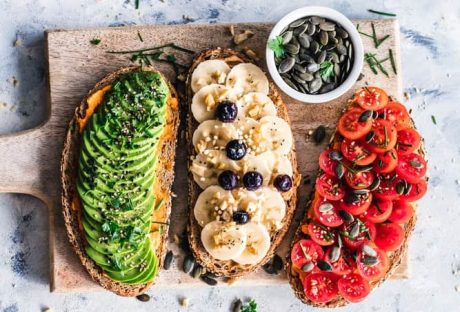
3. Whole Grains And High Fiber Foods

Healthy Indian food items contain whole grains like wheat flour and brown rice. These items provide fiber, carbohydrates, and protein.

On the other hand, chickpeas, and other fruits and vegetables help you in the digestion process. Thereby, you can maintain a healthy weight and ensure there are no risks of chronic diseases.

Indian Cooking Techniques And Their Impact On Health

Indian Cooking Techniques and Their Impact on Health

Generally, Indian cooking techniques preserve nutrients in the food items (vegetables, seafood, and meat). On the other hand, there are tempering methods and slow-cooking techniques, with the help of which you can ensure you get all the nutrients in your body.

Here are some of the major Indian healthy cooking techniques that you must know about:

1. Steaming

This is one of the healthiest cooking methods, where you ensure all nutrients in the food stay. Here, you cook the food with minimum water and little to no oil. In this case, you preserve all the vitamins and minerals in vegetables, fish, and meat.
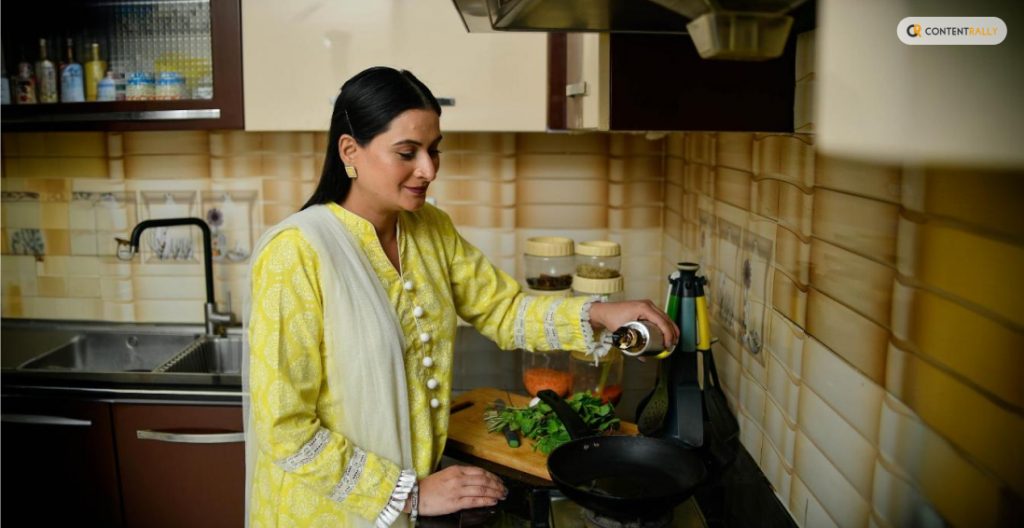
2. Tadka

In this technique, you have to heat spices  quickly in a little oil. Then, you have to add them to the main dish. Thereby, you add flavor without increasing the fat content in the food.

3. Dum Cooking

Dum is a slow-cooking method. Basically, you have to seal food in a pot-shaped cooker and add a small amount of liquid. Hence, you  can allow flavors to develop inside the food. As a result, there is no need for excessive oil in the food.

4. Grilling

As you might already know, grilling is a simple way to cook vegetables and meat. Meanwhile, with this process, you can retain all the nutrients in the food. Also, you can add a nice-looking character to the food.

5. Pressure Cooking

In this way, you can cook food quickly with a low amount of water. As a result, you preserve most of the nutrients in the food item. Apart from that, this process also helps you to reduce your cooking time.

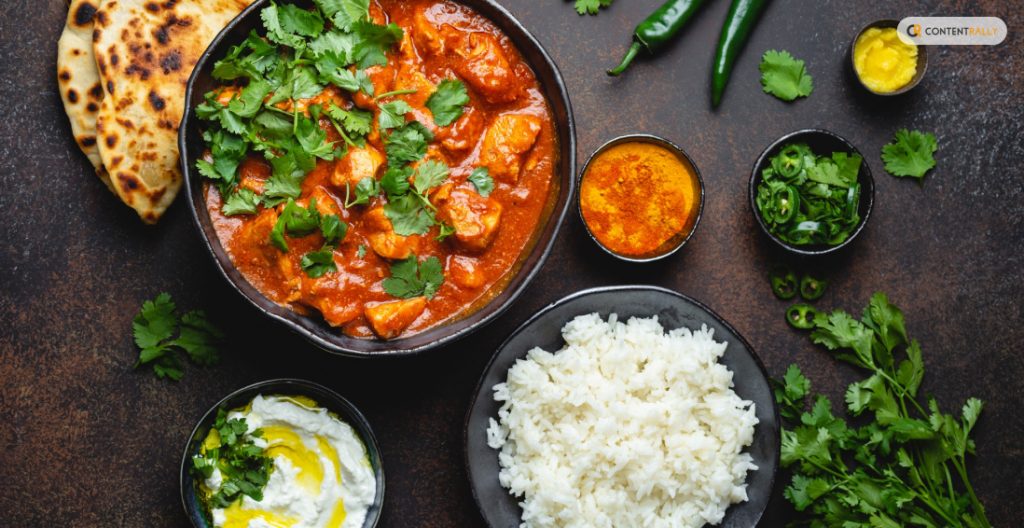
Why Is Indian Food One of the Healthiest Cuisines in the World?

Why Is Indian Food One of the Healthiest Cuisines in the World

Indian food is one of the healthiest cuisines in the world. This is because of good reasons. One of the major reasons is that it relies heavily on lentils, whole grains, vegetables, and diverse spices with low health benefits and saturated fats.

As a result, these food items are rich in nutrients and are dense with fibers when prepared with traditional techniques.

The following are some of the major reasons why Indian food items are healthy:

  • Stable ingredients in Indian food are high in fiber.
  • Due to India being a large and diverse country, a wide variety of vegetables are available. As a result, all the essential vitamins and minerals are available through food.
  • Moreover, a variety of spices available in India come with potential health benefits.
  • Traditional Indian food items use less amount of oil in cooking. Also, they focus mostly on healthy fats like ghee (moderate amount, of course).
  • Lentils are common in Indian cuisine and offer a complete profile of amino acids.
  • Many Indian foods feature fermented items like yogurt, which improve your gut health.

The Vegetarian Advantage of Indian Cuisine

The Vegetarian Advantage of Indian Cuisine

India has an extensive variety of dishes full of flavors and delicacies. However, most consist primarily of lentils, vegetables, legumes, and whole grains.

This provides a nutritious, high-fiber, and well-rounded diet for vegetarians. Apart from that, these food items are full of diverse vitamins and many protein sources.

There is a vast array of vegetarian dishes in Indian cuisine. Moreover, due to the high range of species, it enhances the taste and offers potential benefits.

Common Myths About Indian Food Being Unhealthy

Common Myths About Indian Food Being Unhealthy

Here are some myths about Indian food that you will find common (however, they are just myths):

  1. Indian food is unhealthy and fatty”: This is a common misconception in the West because most Indian restaurants in Western Countries add a lot of oil and ghee to food items. However, this is not the case in Indian households.
  2. Indian foods are spicy”: When people think of spices, they align it with the word hot. Actually, India produces a lot of healthy spices. By adding those spices to food, you can make your food healthy.
  3. Indian desserts are too sweet”: Again, this is a myth as desserts differ with changing regions. Some regions in India create homemade desserts which are actually healthy.

Try Indian Food Now

Is Indian food healthy? – Now you know the answer to this question. You can see that there are multiple myths about Indian food, and they multiply with misinformation on social media.

India is the land of Yoga and Ayurveda. Hence, multiple healthy food options are available if you cook with the right ingredients.

Do you have more information about healthy Indian foods? Please share your opinions in the comments section below.

Read Also:

A passionate writer and an avid reader, Soumava is academically inclined and loves writing on topics requiring deep research. Having 3+ years of experience, Soumava also loves writing blogs in other domains, including digital marketing, business, technology, travel, and sports.

View all posts

Leave a Reply

Your email address will not be published. Required fields are marked *

Related

Cake Makers

The Best Ways Cake Makers Can Pack Their Cakes

Whether you make cakes for friends and family or run a business supplying cakes for celebrations, you’ll know how much work goes into making each and every one of your creations. That’s why it’s so important to package your cakes in a way that keeps them in perfect condition, so they can be taken home by the customer or delivered to a venue without getting squashed or the decorations getting ruined. Here are some tips to help you properly pack your cakes. Here are The Best Ways Cake Makers Can Pack Their Cakes: 1. Use cake boxes Those who are serious about running a cake business should consider looking for wholesale cake boxes, which are a good way of packing up your treats. You need to ensure you get the right size box for the best results. A box that is too big will mean the cake can move around and get damaged, but you should leave a little extra space to be able to take the cake in and out of the box. Also, consider the kind of products you’re selling and what type of box would work best. For example, you can buy boxes for cupcakes, individual slices, and even wedge-shaped boxes for bakeries that offer takeaways. Presentation is key when it comes to cakes. If you’re selling cakes that are given as gifts, choose boxes with windows so the product can be seen, and consider using decorative touches such as bows. 2. Secure cakes for transport It’s also important to make sure cakes are secure when you pack them, as they are likely to be transported in a car or carried around. You should use a cake board, which can be decorated nicely for a professional finish, as this will stop the cake from rattling round in the box. 3. Transport cakes carefully If you are delivering the cake yourself, here are some ways you can keep it looking good: Never stack a tiered cake before you put it in your car or van – put each tier in separate boxes then stack at the venue Place the box on a flat surface, for example, in the boot of your car Make sure there aren’t any other objects in the boot that could squash your cake Use a non-slip surface such as a yoga mat underneath the cake box Drive carefully and avoid sudden braking  4. Finish off the cake box with decorations While a plain cake box is nice and neat and professional, you may also want to add some decorative touches, especially if you’re making themed seasonal cakes. For example, during the Christmas period, you could add a red bow or sprig of holly, or during the wedding season, you could add a trim of lace. This will just finish off the presentation and make sure it looks special. When it comes to making cakes, presentation is everything, so it’s worth spending a little more to get high-quality boxes and ensuring things like cake boards are used, so when the cake arrives at the customer’s home, everything is perfect. Read Also: Beautiful And Unique Anniversary Gifts For Your Beloved Wife Cooking Tips: Simple Fundamental Cooking Ideas To Make Food

READ MOREDetails
How to harvest potato

How to Harvest Potatoes: A Complete Guide from Planting to Storage 

If there is something that I have learned in life, it is about gardening. Well, almost everything if not all. And if there is one thing that took me some time to master, it was knowing how to harvest potatoes at home!  Potatoes are one of the most versatile and popular vegetables in the world. They can be cooked in many different ways, such as boiled, baked, fried, mashed, or roasted. Moreover, they are also rich in carbohydrates, fiber, vitamin C, potassium, and antioxidants. But how do you grow and harvest your own potatoes at home? You see, potatoes are not like cilantro or other plants. These are tubers.  In this article, I will show you everything you need to know about how to harvest potatoes, from planting to storage. So, if that is something that you are interested in knowing, then I have you covered! Keep on reading this blog till the end to learn more...  How to Plant Potato Seeds or Tubers?  The first step in how to harvest potatoes is to plant them. You can start with either potato seeds or tubers. Potato seeds are small, round, and black, and they are usually sold in packets. Potato tubers are the actual potatoes that you eat, and they have eyes or buds that can sprout new plants. You can buy certified seed potatoes from a nursery or garden center, or use organic potatoes from the grocery store.  Here are some if the steps that you must take to plant them:  Planting Potato Seeds  To plant potato seeds, you need to sow them indoors in pots or trays filled with moist potting soil. Place them in a sunny spot and keep the soil moist but not soggy. The seeds will germinate in about two weeks and produce small green shoots. When the shoots are about 3 inches tall, you can transplant them outdoors in your garden or in containers.  Planting Potato Tubers  To plant potato tubers, you need to cut them into pieces, each with at least one eye. You can do this a few days before planting to let the cut surfaces heal and prevent rotting. Alternatively, you can plant whole small potatoes with several eyes. To prepare the soil, you need to loosen it and add some organic matter, such as compost or manure.   You also need to make sure the soil is well-drained and slightly acidic, with a pH of 5.0 to 6.0. You can use a soil test kit to check the pH level and adjust it with lime or sulfur if needed.  Planting Potato Pieces  To plant the potato pieces, you need to dig a trench about 4 inches deep and 12 inches wide. Place the pieces about 12 inches apart, with the eyes facing up. Cover them with 3 inches of soil and water well. As the plants grow, you need to hill up the soil around them to cover the lower stems and prevent the tubers from being exposed to sunlight, which can turn them green and bitter. You can also mulch the soil with straw, leaves, or grass clippings to retain moisture and suppress weeds.  How to Care for Your Potato Plants?  The second step in how to harvest potatoes is to care for your potato plants. You need to water them regularly, especially during dry spells, to keep the soil moist but not waterlogged. You also need to fertilize them every two weeks with a balanced organic fertilizer, such as fish emulsion or seaweed extract. Also, you can add some wood ash or bone meal to provide extra potassium and phosphorus, which are essential for tuber formation.  You also need to protect your potato plants from pests and diseases, which can reduce your yield and quality. Some of the common potato pests are:  Colorado potato beetles, which are yellow and black striped insects that feed on the leaves and can defoliate the plants. You can handpick them and drop them in a bucket of soapy water, or use an organic insecticide, such as neem oil or pyrethrin.  Potato leafhoppers, which are small, green, winged insects that suck the sap from the leaves and cause them to curl and yellow. You can spray them with a strong jet of water, or use an organic insecticide, such as garlic or hot pepper spray.  Wireworms, which are thin, brown, worm-like larvae that bore into the tubers and cause holes and tunnels. You can trap them with pieces of carrot or potato buried in the soil, or use beneficial nematodes, which are microscopic worms that parasitize and kill the wireworms.  Common Potato Diseases  One of the most common reasons why a potato cannot grow or survive is the diseases. If you were wondering what some of these can be and how to deal with them, I have you covered!  Some of the common potato diseases are:  Late Blight: It is a fungal disease that causes brown spots on the leaves and stems, and black or brown lesions on the tubers. It can spread rapidly and destroy the entire crop. You can prevent it by planting resistant varieties, avoiding overhead watering, and removing any infected plants and tubers. You can also use a fungicide, such as copper or sulfur, as a preventive measure.  Scab: This is a bacterial disease that causes rough, corky patches on the tubers. It does not affect the taste or edibility of the potatoes, but it reduces their appearance and storage quality. You can prevent it by planting resistant varieties, maintaining a slightly acidic soil pH, and avoiding excessive nitrogen fertilization.  Potato Virus Y: Lastly, this is a viral disease that causes mosaic patterns, mottling, or yellowing on the leaves, and misshapen or knobby tubers. It can reduce the yield and quality of the potatoes, and it can be transmitted by aphids or infected seed potatoes. You can prevent it by planting certified virus-free seed potatoes, controlling aphids, and removing any infected plants and tubers.  How to Determine When Your Potatoes Are Ready to Harvest?  The third step in how to harvest potatoes is to determine when they are ready to harvest. This depends on the type and variety of potatoes you planted, and the size and maturity you want. There are two main types of potatoes: early and late. Early potatoes are ready to harvest in about 10 to 12 weeks (about 3 months) after planting, and they produce small to medium-sized tubers that are tender and thin-skinned. They are best for boiling, steaming, or roasting.  Late potatoes are ready to harvest in about 15 to 20 weeks (about 4 and a half months) after planting, and they produce large, starchy tubers that are firm and thick-skinned. They are best for baking, mashing, or frying.  Early Harvesting  To harvest early potatoes, you can start digging them up when the plants begin to flower, or when the lower leaves start to yellow. You can use a garden fork or a spade to gently lift the plants and tubers from the soil, or you can use your hands to feel for the tubers under the soil. You can harvest as many or as few potatoes as you need, and leave the rest in the ground until you are ready to use them. You can also harvest some of the young, tender leaves and stems, which are edible and nutritious.  Late Harvesting  To harvest late potatoes, you need to wait until the plants have died back completely, or until the first frost. This allows the tubers to develop a thicker skin, which helps them store better. You can use a garden fork or a spade to dig up the entire row of plants and tubers, or you can use a potato digger, which is a special tool that lifts and separates the tubers from the soil. You need to be careful not to damage or bruise the tubers, as this can cause rotting or spoilage.  How to Dig Up, Cure, and Store Your Potatoes?  The final step in how to harvest potatoes is to dig up, cure, and store your potatoes. This is important to preserve the quality and shelf life of your potatoes, and to prevent them from sprouting, rotting, or shrinking. Here are the steps to follow:  Digging Up  After digging up your potatoes, you need to brush off any excess soil and remove any damaged, diseased, or green tubers. Do not wash your potatoes, as this can remove the protective skin and invite bacteria and fungi. You can wash them just before cooking or eating them.  Curing  You need to cure your potatoes for about two weeks in a cool, dark, and well-ventilated place, such as a basement, garage, or shed. This allows the skin to harden and heal any minor cuts or bruises and enhances the flavor and texture of the potatoes. The ideal temperature for curing is between 50°F and 60°F, and the ideal humidity is between 80% and 90%. You can spread your potatoes in a single layer on a newspaper, cardboard, or wooden crate, and avoid exposing them to light, which can turn them green and bitter.  Storing  You need to store your potatoes in a cool, dark, and dry place, such as a cellar, pantry, or closet. The ideal temperature for storage is between 40°F and 50°F, and the ideal humidity is between 65% and 70%. You can store your potatoes in paper bags, cardboard boxes, mesh bags, or wooden crates, and check them regularly for any signs of sprouting, rotting, or shriveling. You can also store your potatoes in a root cellar, which is an underground or partially underground structure that maintains a constant temperature and humidity. Additionally, you can also store your potatoes in a clamp, which is a mound of straw, hay, or leaves covered with soil, that insulates and protects the potatoes from frost and rodents.  Wrapping It Up!  If you want to know about how to harvest potatoes, I hope that this blog has been of help to you. However, if there are any other queries related to the same, please feel free to let me know. All that you need to do is scroll down till you reach the bottom of the page. Then leave your comments and suggestions in the box below. And I will be there to answer them all for you! Read Also: How to Harvest Lettuce: A Step-by-Step Guide for Fresh and Crispy Salads Everything You Need To Know About Harvesting Basil!

READ MOREDetails
Cocktail Party

7 Delicious & Exotic Snacks For Your Next Cocktail Party

Are you that lucky cocktail party host this weekend among your friends? If you are, then you must be wondering what exception you can make this time that people will love. We know that you can manage the ‘cocktail’ part. So, we have gathered seven delicious & exotic snacks for your next cocktail party that will win the hearts of your guests and makes you the star host of the month! However, these snack ideas are so overwhelmingly good that people may request you to make them again and again. Here, you will find quick and easy dishes to prepare, although you may need to visit the supermarket to get the ingredients. Without further ado, let’s get started with the recipes so that you can pick which snacks you want to prepare and make the list of ingredients. 1. Salmon Tartines for Fish Lovers Recipes with Salmon and avocado are always a delicacy; when you prepare it with wasabi, it will deliver a heavenly feel with your fast bite. And guess what, you need only 15 minutes to make it. Ingredients: To prepare this dish, you have to gather the following ingredients: Puff pastry, Sashimi-quality salmon, Mirin, One avocado, Low-sodium soy sauce Ginger, Lime juice, Caster sugar, Rice vinegar, and Wasabi paste. Cooking Method: To prepare the recipe, follow the steps below: Preheat the oven to 200 degree Celsius and cut the pastry according to your preferred shape; place them on a lined tray over the baking paper and bake for 10-12 minutes till golden in color and allow them to cool down. Your tartine base is ready. While baking, process the avocado with wasabi. To do that, take a small pan and dissolve sugar in water over low heat. When it cools down, take an avocado, wasabi, lime, and sugar in a blender, add salt or any other seasoning if you want, and set aside. Prepare a dressing by mixing mirin, vinegar, soy sauce, and ginger in a small pot. After you have prepared everything, take a pastry base and place avocado, salmon, and cress. Serve with a drizzle of dressing. 2. Elk Jerky Cheeseboard for Slow Eaters How about serving an Elk Jerky cheeseboard at your cocktail party? This cheeseboard is a great addition to the food you can serve because it not only has a posh vibe but also serves a unique version of your regular charcuterie board due to the gamey elk. Elk goes well with many reds including Cabernet Sauvignon, which can complement this strong-flavored jerky with its earthy notes. You can also pair it with lighter-style cocktails made from scotch, gin, or tequila, as they go well with these types of dried meat. You can add a variety of cheese to such a board, including emmental, brie, gouda, and blue cheese. 3. Carrot Muffin for Sweet Tooths  If you want to prepare a carrot muffin for your cocktail party ahead of time and you love baking, then this dish is a must for you to try. Ingredients: This dish is easy to prepare and only needs eight ingredients. They are: Yogurt (Greek style), Ready mixture for making carrot cake, Carrots, Pecans, Eggs, Aperol, Pure cane sugar, and Vegetable oil. Cooking Method: To prepare the recipe, follow the steps below: First, you will make a labneh. Take a bowl and set a fine sieve over it. Put the yogurt inside, wrap it with the sieve, and hang it over the bowl in the refrigerator overnight. Preheat the oven to make muffins at 170 degrees Celsius. Grate the carrot coarsely and mix it with the cake baking mix. You can add pecans to the mix. Take the muffin glasses, and bake them for at least 35 minutes. To make sure they are evenly baked, insert a skewer in the center, and if it comes out clean, your muffins are ready. If you want to soak the muffins with Aperol syrup, place water, sugar, and Aperol on a small pan and keep stirring until the sugar is dissolved over medium heat. Place the muffins in a line and pour syrup over them. Let the muffins soak in the syrup for 5 minutes. Add the icing mix with labneh to make frost, and use your creative ideas to décor the muffins. 4. Four Crispy Buffalo Wings for Savory Hunters Nothing can beat the taste of chicken wings. And the crowd will devour it within a minute if you can make it extra crispy outside and juicy inside. Here’s the recipe: Ingredients: To make Buffalo wings, you’ll need the following: Chicken wings (defrost if frozen), Baking powder, Salt, Butter, Franks hot sauce, Sugar. Cooking Method: To prepare the recipe, follow the steps below: Tap the wings with tissue paper to absorb the extra water after washing. Toss the wings with baking powder and salt; it will absorb the extra moisture from the chicken's skin, making it crispier. We are not using hot oil in this recipe as we are going to bake the wings. The science behind baking the wings and making them crispy is to start baking using low temp at first and increasing the temp after a few minutes. Set the tray on the lower shelf of the oven at 250F/120C. Low temperature will melt the fat first, and high temperature will make the skin super crispy when you place the wings on a higher oven shelf at 425F/220C. 5. Sausage Rolls for Meat lovers You know that your friends love meat. But you don’t want to worry about arranging a bbq in the backyard. So, prepare these bite-size sausage rolls to calm the meat cravings of your guests. Ingredients: To make sausage rolls, you’ll need: Pork, Onion & Garlic, Breadcrumbs, Puff Pastry, Bacon, Fennel Seeds, Salt & Pepper. Cooking Methods: Follow the easy-peasy steps below to cook off sausage rolls: Take a pan and cook bacon, onion, garlic, and celery, Mix with the pork, Place the puff pastry, put the mix on it, roll it over, and cut it into small portions. Place them on a baking tray and brush with egg. Bake them for 30 to 40 minutes until golden brown. This snack serves its best when you are keeping the option of exciting games at your party. Whether it’s a two-player board game or a multiplayer one, people can have more fun when they have something delicious to eat. 6. Coconut Shrimp for Peaky Eaters Every party has those guests who will not eat anything that’s too oily or too sweet. To tackle those peaky eaters, you can cook coconut shrimp, which will go well with whiskey cocktails. If you are not hiring any bartenders and decided to become one for the day, check out these whiskey cocktail recipes for home bartenders! Ingredients: You will need the following items for this quick bite. Jumbo Shrimp, Flour, Shredded coconut, Beaten egg, Pepper, Pranko breadcrumbs, Garlic powder, Oil and salt to taste. Cooking Method: Follow the steps below to have the best shrimp dish of your life. Wash the shrimp and season them in a bowl with pepper and salt, Take two flat dishes. Mix flour and garlic powder in one of them; in the other, mix coconut and breadcrumbs. Take one shrimp and dredge it in the flour mixture; after that, dip it in the beaten egg and dredge again in the coconut mix. Follow the steps for each shrimp. Refrigerate for an hour (or overnight if you want to prepare the night before and serve hot the next day). Deep fry in a pan full of oil till golden brown color and season with salt and pepper after the whole batch is done. Place them on a baking sheet with a cooling rack so that they can absorb the dripping oil.  Serve it with sauce or mango salsa. 7. Salsa for Lazy Hosts When it comes to cocktail parties, you need easy, quick recipes that will take less time to prepare so that you don’t get stuck in the kitchen while others are enjoying the evening, and this salsa will take only two minutes. Ingredients: Here goes the items you need to get together: Crushed tomato, Coriander leaves, Green chiles, Garlic, Lime, Jalapeno, Cumin, and Sugar. Serve with tacos, fajitas, burritos, nachos, or quesadillas. You can buy them at any store. Cooking Method: All you need to do is blend all the ingredients mentioned above. However, make sure to use good quality canned tomatoes, if not fresh ones. You need to blend for a few seconds and see the consistency. Keep blending if you like it smoother. But don’t blend too much if you like it chunky. Conclusion: With this list of seven delicious & exotic snacks for your next cocktail party, you will be able to welcome your guests with warm hearts and warm food on the counter. Even though cocktails are the main stars of your party, these bite-size, easy-to-prepare snacks will make your evening even better alongside the drinks. Prepare the snacks while ensuring the recipes have variety, such as spicy, sweet, savory, vegetarian, and non-veg options. Read Also: 14 Whiskey Cocktail Recipes For Home Bartenders Tips And Suggestions On How To Wear Cocktail Dresses Why should you go to a pool party in Vegas?

READ MOREDetails