Published on: 12 July 2021
Last Updated on: 10 January 2025
Sometimes, it's better to show than tell. That applies perfectly to your webinar. Maybe you want to show webinar attendees how to use your new product. Or perhaps, you plan on showing graphs and charts to drive a specific point home. Sure, you can describe these to your audience with the Mac screen recording software. But wouldn't it be better to show them instead?And suppose you are planning on using automated webinars to promote your products or services, establish industry authority, and build trust between your company and your target consumers. In that case, you'll need to find the best screen recording tools for webinars.Here's a brief rundown of the best screen recording software to choose from.
A Few Important Things To Remember Before You Record A Webinar
In the last few years of the pandemic, teachers, for example, have been forced to become aware of online streaming platforms and webinars. They have to hold sessions, take classes, become part of conferences and more. A good idea would be to learn from webinars for teachers and get the necessary knowledge to do better when you hold one on your own.
Before choosing a webinar Mac screen recording software, you should understand a few things out of the way. First, new things incorporating are always good when you are well aware that your work’s software is becoming simpler.
For starters, you need to decide whether you are just going to share your screen with your viewers or if you are going to show your face on the screen.
Most screen recording tools allow you to show your face while you are sharing your screen. Deciding on this is critical. It may take some trial and error to set the best configuration if you choose to show yourself while sharing and recording your screen.
Next, you'll have to decide whether you are going to share a slide deck with your audience or just yourself while doing a presentation.
For the former, you'll need to use presentation software like PowerPoint and Keynote. Alternatively, you can just display images on a slideshow using software like Canva.
Finally, you have to make sure that you have everything that you need to record a webinar, from a good microphone to the right location that's free from unwanted background noise and other distractions.
5 Top Screen Recording Software To Choose From
With these prerequisites out of the way, it's now time to choose the right Mac screen recording software for the webinar recording. Here's a brief description of each option.
1. Camtasia
Camtasia is a screen recording software that works with both macOS and Windows. One unique advantage of this software is that you can work on a project on either operating system. For example, you can record your screen on your Mac and then have someone who's using a Windows computer edit and polish your recording.With Camtasia Mac screen recording software, you can record your whole screen or just a portion of it. Camtasia is also available on mobile, enabling you to use media stored on your smartphone.Camtasia also has video editing capabilities, enabling you to polish your recorded webinar before publishing and sharing it with your target audience.
2. Screenflow
Screenflow is another good Mac screen recording software that is a perennial favorite of people who host webinars.And there are a few reasons why. For starters, the software is affordable, making it accessible to small business owners.The software is also versatile. Aside from using it to record your screen, you can also use it to record your webinars.Other notable features include annotations, filters for both audio and video, zoom and pan motions, and more.
3. Screencast-O-Matic
Screencast-o-Matic is a browser-based screen recorder.Before you can use this software to record a webinar, you will need to download and installan application and get an annual membership subscription.After installing the software and creating an account, you can then record your upcoming webinar.Although the software has a few nifty features like zoom and drawing on the screen, you have to take note that you can't record your entire screen. Instead, you can only record an area on your screen.
4. Tiny Take
If you're bootstrapping, Tiny Take is one option you should strongly consider looking into.Although this Mac screen recording software used to record a webinar may seem basic to some people, it's free and does an adequate job of recording your screen. It comes with basic features like zooming, panning, and a bunch of special effects.
5. Zoom
Over the past few years, Zoom has emerged as a popular platform for holding meetings online.But unknown to some users, you can also use Zoom to record your screen. Plus, it has a free screen recorder feature, perfect for smaller businesses looking to minimize their expenses.You can then save your recording in mp3 or mp4 format. Take note that mp3 is audio-only. Meanwhile, the mp4 format records both audio and video, which you can polish through video editing.
Webinar Recording For Your Next Show And Tell
Showing yourself in front of an audience is a great way to humanize your company. Instead of just showing a product or a service, your prospective buyers can see and identify with another person who faces the same problems as they have.But sometimes, showing yourself in front of the audience is not enough. To explain and make a complex idea more accessible or to back up certain points, you might need to use a robust Mac screen recording software for your screen.Read Also:
Content Rally wrapped around an online publication where you can publish your own intellectuals. It is a publishing platform designed to make great stories by content creators. This is your era, your place to be online. So come forward share your views, thoughts and ideas via Content Rally.
In today's digital world, a website is a crucial aspect of any business or organization.
It serves as the online face of your business and can be an excellent tool to attract and engage with potential customers. However, creating a website is not as simple as it seems.
It requires expertise in website development services which include website design, website development, website maintenance, and website optimization. In this article, we will discuss everything you need to know about website development services, and it's benefits.
What are Website Development Services?
Website development service refers to the process of creating, designing, and maintaining a website. This process includes everything from designing the layout and graphics to programming the website's functionalities.
Website development services can deliver by freelance web developers or web development companies.
Types of Website Development Services
There are several types of website development services that businesses and organizations can opt for. These include:
Front-end Development:
This type of website development service deals with the website's user interface (UI) design. Therefore, it will include the layout, graphics, and overall look and feel of the website.
Back-end Development:
This type of website development service deals with the server-side programming and database management required to run a website.
Full-stack Development:
This type of website development service covers both front-end and back-end development. Therefore it includes everything needed to build a fully functional website.
E-commerce Development:
This type of website development service specializes in developing e-commerce websites and includes features such as shopping carts, payment gateways, and inventory management.
Website Development Process
The website development process involves several steps, including:
Planning: This involves defining the website's purpose, target audience, and website goals.
Design: This involves creating the website's layout, graphics, and overall look and feel.
Development: This involves writing code and programming the website's functionalities.
Testing: This involves testing the website's functionalities to ensure that it is bug-free and works correctly.
Launch: This involves making the website live on the internet.
Maintenance: This involves keeping the website up to date and fixing any bugs or issues that arise.
Benefits of Website Development Services
Here are some benefits of investing in website development services:
Increased online presence: Hence a well-designed and optimized website can help improve your online presence and attract more visitors to your website.
Improved user experience: A well-designed website with a user-friendly interface can help improve the user experience. Also, it increases the time users spend on your website.
Competitive advantage: A well-designed and optimized website can give your business a competitive advantage over your competitors.
Better brand awareness: A well-designed website can help improve brand awareness. Therefore it creates a positive image of your business.
Choosing the Right Website Development Service Provider
Selections of the right website development service are another important thing. If you want to have the best services, theses are the first thing that you must know. Your website development service requirements and what types of services your website development service can provide you. To select the best website development services you can match up the following qualities.
Therefore choosing the right website development service provider can be a daunting task.
Here are some factors to consider when choosing a website development service provider:
Expertise and experience: Look for a website development service provider with expertise and experience in your industry.
Portfolio: Check the website development service provider's portfolio to see their previous work and ensure that their style and quality match your requirements.
Pricing: Compare pricing from different website development service providers and choose the one that offers the best value for your money.
Customer service: Look for a website development service provider that offers excellent customer service and is responsive to your needs.
Conclusion
Website development services are essential for businesses and organizations that want to establish a strong online presence. Hence from designing the website's layout to programming its functionalities, web development services can cover everything which required to build a fully functional website. By investing in web development services.
Read Also:
How You Benefit From Getting Custom Approach To Software Development
Looking To Build A Photography Website: Here Is How You Can Build One
Ecommerce Software Development Trends
I have talked about a lot of tech delicacies with you guys. And God knows how much I love it.
But today, I particularly excited to talk about something. And I am excited because I LOVED this one.
Apart from that, this particular AI tool is always buzzing in the news. Some websites, like CNBC, are claiming that this is a huge threat to US dominance!
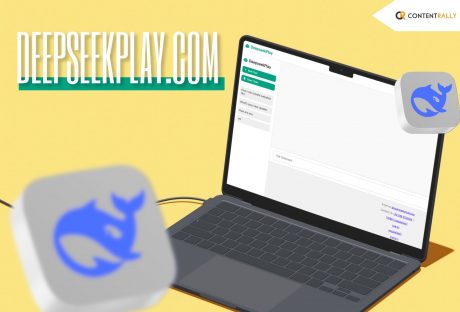
Deepseekplay Com is an AI platform that recently launched a free, open-source large language model.
This model, developed by a lab called DeepSeek, took just two months and less than $6 million to create using Nvidia's H800 chips.
These developments have raised concerns about whether the United States is losing its edge in artificial intelligence.
They also question the large spending by Big Tech on AI models and data centers.
In tests by independent sources, DeepSeek's model performed better than:
Meta's Llama 3.1
Anthropic's Claude Sonnet 3.5
OpenAI's GPT-4o
It showed better accuracy in tasks like problem-solving, math, and coding.
What Are The Features Of Deepseekplay Com?
This platform is becoming extremely famous, almost the talk of the town, due to its features.
So, how can I not talk about it too? Let’s take a closer look:
Easy To Use
The website is straightforward and user-friendly. Anyone, including children, can navigate it easily.
I absolutely loved the large search bar. Additionally, you will find clear categories that will help you find what you’re looking for quickly.
No Account Needed
You don't need to create an account to access the features. This means you can use the site without sharing any personal information.
It's perfect for those who prefer privacy.
Clean And Fast
The website loads quickly and functions well on all devices. It doesn’t have heavy graphics that can slow down your experience.
This ensures a smooth browsing experience whether you're on a computer or smartphone.
Wide Range Of Ai Tools
There are many different AI tools available, organized into helpful categories.
These include writing assistants, image creators, and tools for business and learning. You can easily find the right tool for your needs.
Shows Tool Prices
Each tool shows if it’s free, has a freemium model, or is paid. This clear pricing information helps you understand what to expect.
Knowing the cost upfront makes budgeting easier.
Updated Regularly
The site is constantly updated with new tools and improvements. This keeps the selection current and useful for users.
Regular updates also ensure that older tools remain effective and reliable.
How To Get Started With Deepseekplay Com?
This platform is just so simple to use that you probably won’t even need a guide. But hey, you know how overprotective I am about you guys!
So, let’s just quickly check out the following steps:
Firstly, you have to open the site and reach the platform on your browser.
This is the point you will notice that each one of the tool cards is displaying its key details. They are pretty crisp, so you will read them at a glance.
By now, I suppose you will have a fair idea of what you are looking for. So, you have to use those keywords to get that.
Additionally, if you have nothing particular on your mind, you can just browse freely.
Why Should You Choose Deepseekplay.com, And Why Are People Doing The Same?
One of the many reasons why this platform looks appealing to people worldwide is that it is extremely simple.
Additionally, it is quite easy to use. Even if you are in an initial phase of using Artificial Intelligence, this platform will be suitable for you.
I like how it doesn’t overcomplicate things. In addition, it will give you an ad-free experience.
Also, I really like the explanations this site gives you pretty crisp and easy to understand. There’s a much-needed clarity that most sites miss out on these days.
Basically, I want to say that Deepseekplay Com facilitates your time-saving goals. Also, it lets you peacefully look for an AI editor.
In fact, you can also use this platform as a debugging tool as well as a keyword research tool.
Deepseekplay.com VS Other Platforms: A Detailed Comparison
Now that we have a fair idea about how Deepseekplay.com works and all the good things about it, it's time for a battle.
Okay, that was very extreme of me! I just want to show you how this platform stands in comparison with other platforms:
FeaturesDeepseekplay ComOther PlatformsLayoutIt is much simpler.Too many long pages that confuse users.Signing UpYou don’t need to create an account here to start.Generally requires you to create an account.Focus On AIComplete focus on AIFocuses on other stuff as wellPricingEach tool here has clear pricing that’s stated.Creates confusion around pricing
What Are The Users Saying About Deepseekplay Com?
The design of the site is simple yet highly effective. At the top, there's a large search bar.
Additionally, it is followed by categories underneath. Also, the tool cards are neatly arranged across the page.
It’s actually pretty calming to browse without all those flashy banners. In fact, you won't even have to deal with annoying pop-ups getting in the way.
Plus, it’s really fast! The mobile version works perfectly. In addition, the search results pop up in no time.
Whether you’re a student checking out tools on your phone or a professional using a tablet, the whole experience is smooth and enjoyable.
According to a user named jeckleach007 on TechRepublic, among all the AI tools, this one really stood out for him!
It was mentioned that DeepSeek is an incredibly powerful tool for:
App modifications
Tweaking existing applications
Automation
A friend of the speaker experimented with DeepSeek and a few other AI tools to modify a popular game, and the results were said to be impressive.
He reportedly used it to create a modified APK of the game, which featured new options like unlimited gems and coins.
Is Deepseekplay.com Safe?
Many users find it refreshing that they don’t need to share their email or any personal information.
There’s no sign-up process involved, which means no tracking or any hidden conditions that come with many online services.
Users can navigate the site freely without worrying about their data being stored or monitored.
You can simply browse, click, and head straight to the official tool site without any hassle.
Moreover, the added security of HTTPS encryption keeps your connection safe, even when you’re using public Wi-Fi.
This means you can explore and use the tools you need without constantly looking over your shoulder.
It’s all about providing a smooth and secure experience for users who value their privacy and want to keep things straightforward.
This approach makes it easier for people to access the resources they need.
And the best part? They can have it without the usual concerns about their personal information being collected.
Additionally, this platform doesn’t use that information in ways they didn’t agree to.
Overall, it’s a breath of fresh air in a digital world where privacy can often feel compromised.
Can Deepseekplay.com Replace Other AI Tools In The Future?
DeepSeekPlay.com is more than just a directory. AI fans can use it to save time, find new tools, and connect with others.
It cuts through the clutter and gives you what you need—useful AI tools. There are no ads, no sign-ups, and no complications.
The site is clean and updated, making it easy to discover the best in artificial intelligence.
If you want to learn about AI or improve your skills, bookmark DeepSeekPlay.com.
It could become your main resource for smarter and quicker work, creation, or learning.
Nowadays, type-c cable can be seen in the newest phones, laptops, and tablets. The cable was first published in 2014, but the technology became handy only in 2017-18, and it replaced the older standards of USB very quickly.
According to some reports, type c cable also offers new audio standards as a potential replacement for a 3.5 mm audio plug. The type C cable looks almost the same as a micro USB connector from a distance, but it is slightly thicker and more oval in shape. The thicker design brings its best feature which is unflappability.
Until now, the standard cable for us was the type of cable. We have even moved from USB 1 to USB 2 then USB 3 devices, but the USB connectors stayed the same. Fortunately, with the help of technology, we get type C cable that is much more powerful and easier to use than the old cables.
Difference between type C cable and the old USB cable:
The primary difference between the old USB port and the type C cable is the reversible connector feature. Both ends have a connector of the same size so that you can plug it in any way you want.
The one end of the Old ones are bigger and rectangular shape connectors that we use two plugs in two game consoles, desktops, and giant-screened laptops, and the other end was used to connect to small devices like phones. These two ends of the same cable are called type A and type B.
Advantages of type C cable:
It is compatible with USB 3.1 specifications, which makes it much more efficient in data encoding, and hence, it can transfer data at a speed of 10Gbps.
Type C cables are commonly used for charging portable devices. And with this type of cable, charging is much faster than the old ways.
In many ways, type C is much better than micro USB. For instance, type C can be used for both input and output power, where micro USB can only input power. Generally, type C uses 18 watts to charge phones and a maximum of 100 watts to charge laptops.
The type C cable can indeed perform faster than the others, and along with that, it is also the strongest one. This is why, for most people, type C cable is much more reliable.
Why should you use a type C cable?
Type C cable sets a new standard for USB connectors. It can carry a significantly high level of power and can be used to charge almost every device, and devices can be charged much faster.
Along with that, type C cable also offers you a high transfer speed that can transfer 4K videos. The most amazing part about the type C cable is its size. The cable is almost half in width and one-third in the height of a standard USB cable, making it even more user-friendly.
Read Also:
Headphones vs Earbuds: How to Choose for the Best Music Experience
Google Getting into Phones – And It’s Changing The Mobile Internet
Everything You Need To Know About Mobile Solar Generators
Reduce Your Exposure to Radiation When Using Your Mobile Phone
Practical Guide to Install Cabling in Your New House


 In the last few years of the pandemic, teachers, for example, have been forced to become aware of online streaming platforms and webinars. They have to hold sessions, take classes, become part of conferences and more. A good idea would be to learn from webinars for teachers and get the necessary knowledge to do better when you hold one on your own.
Before choosing a webinar Mac screen recording software, you should understand a few things out of the way. First, new things incorporating are always good when you are well aware that your work’s software is becoming simpler.
In the last few years of the pandemic, teachers, for example, have been forced to become aware of online streaming platforms and webinars. They have to hold sessions, take classes, become part of conferences and more. A good idea would be to learn from webinars for teachers and get the necessary knowledge to do better when you hold one on your own.
Before choosing a webinar Mac screen recording software, you should understand a few things out of the way. First, new things incorporating are always good when you are well aware that your work’s software is becoming simpler.
 With these prerequisites out of the way, it's now time to choose the right Mac screen recording software for the webinar recording. Here's a brief description of each option.
 Showing yourself in front of an audience is a great way to humanize your company. Instead of just showing a product or a service, your prospective buyers can see and identify with another person who faces the same problems as they have.
But sometimes, showing yourself in front of the audience is not enough. To explain and make a complex idea more accessible or to back up certain points, you might need to use a robust Mac screen recording software for your screen.
Read Also:
Showing yourself in front of an audience is a great way to humanize your company. Instead of just showing a product or a service, your prospective buyers can see and identify with another person who faces the same problems as they have.
But sometimes, showing yourself in front of the audience is not enough. To explain and make a complex idea more accessible or to back up certain points, you might need to use a robust Mac screen recording software for your screen.
Read Also: