Mirrors For Sale – Finding a Perfect Home Decorative Item

Published on: 04 January 2021 Last Updated on: 23 December 2024
Mirrors For Sale

A great way to update your home decor mirrors for sale in Brisbane can give your rooms a makeover. If you are thinking about selling your home, consider buying new mirrors for sale in Brisbane for potential buyers to view in your property. It’s a quick and easy way to improve the look of your property without incurring a major expense. You can find many different types of mirrors in Brisbane for sale, including antique mirrors, contemporary mirrors, wooden mirrors, folding mirrors, and more. No matter what style your home is decorated in, there is a mirror that will work perfectly in your space.

How to Find Mirrors Online in Brisbane?

 Mirrors

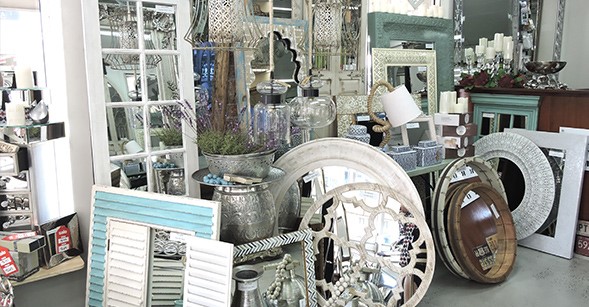
Finding mirrors for sale in Brisbane can be as simple as going to your local home improvement store, but if you prefer to shop online you should find a wider selection of mirrors here than you would ever find at any other store around. Mirrors are an excellent way to reflect light into small or large rooms to enhance the appearance of your home. For this reason, they have become an important feature of many new homes.

How can Mirrors help you in your home?

mirrors

  • In addition to improving the appearance of your home, mirrors can also help create an inviting atmosphere for visitors to your home. When used with proper lighting, mirrors can add drama and style to any room, including the bedroom.
  • A beautiful bedroom with well-placed mirrors can create a stunning space that mirrors reflect everything else in the room, creating a sense of openness and freedom. Mirrors are an excellent addition to any home.
  • Whether you are planning to sell your home or simply want to buy mirrors for home decorating in Brisbane, you will find a wide selection of mirrors at affordable prices.

Different types of Mirrors you can buy

Different types of Mirrors

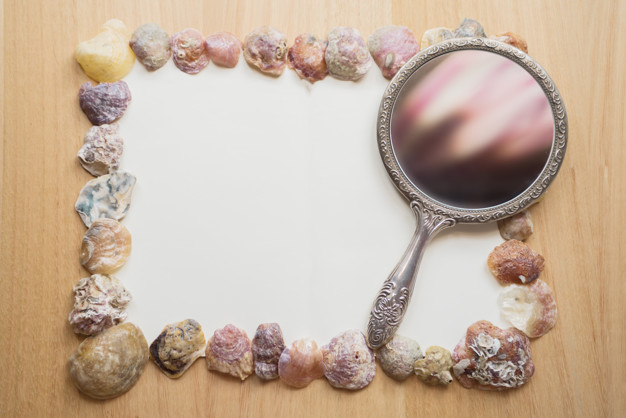
There are many different types of mirrors available, including antique and contemporary mirrors, cheap mirrors, designer mirrors, plastic mirrors, and more. With so many options available, there is no reason to pay full price for home decorating accessories. You can find affordable mirrors for sale in Brisbane that will fit into your budget and still add beauty and style to your home.

No matter what type of home mirror you are looking for, you can find it in Brisbane. If you are ready to update your home’s interior design, consider purchasing mirrors for sale in Brisbane. This way, you can be confident that you will be getting high-quality products that will last a long time. No matter what style you choose, mirrors are a practical and decorative addition to any home. You can use mirrors to add light to dark areas of your room or to highlight special artwork or features in your home.

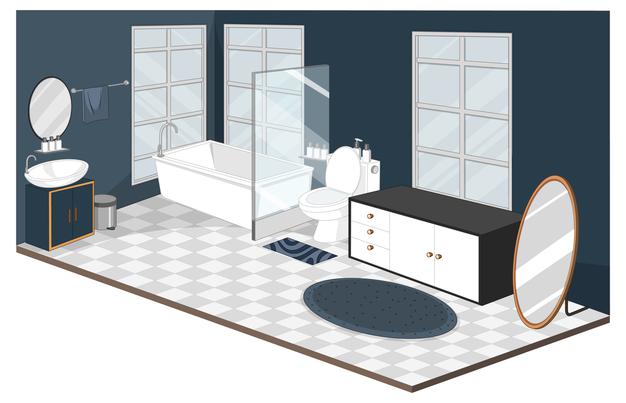
When you purchase mirrors for sale in Brisbane, you can add beauty and value to your home without paying full price. With a little research, you can find a large variety of stylish mirrors that will match the decor in any room of your home. From bathrooms to living rooms, you can find a large number of unique mirrors that will help you create the look you desire. In addition to making your home look better, mirrors also provide safety by ensuring that you can see who is in the mirror before you speak with them.

Frames and Frameless Mirrors

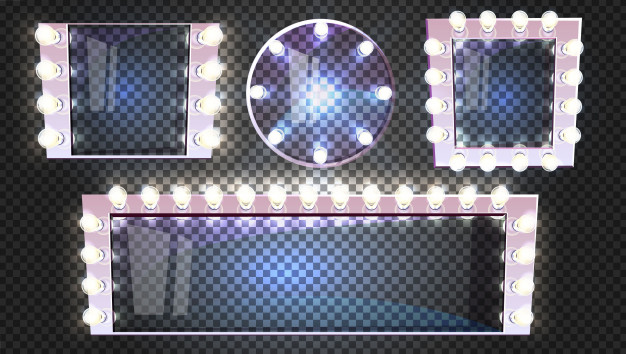
There are many styles of mirrors available, including those with frames and without. When choosing a frame-less mirror, you can be more creative in terms of creating the style you love the most. The frame-less mirrors are more contemporary in design, allowing you to be more flexible when it comes to styling your home. These are perfect for apartments, condos, and smaller homes. If you have a larger home, consider purchasing a custom-made frame-less mirror that fits your home decor exactly.

The Final Word

Your local retailer will be able to answer any questions you may have about mirrors for sale in Brisbane. Whether you are looking for a traditional mirror or a sleek and modern one, you can find exactly what you want by searching locally. Most retailers offer free home consultation or inventory services that allow you to view their entire selection before making a purchase.

This way, you can make sure that you are buying the right size and style of mirror that complements your home. Mirrors add warmth, beauty, and style to your home, so take the time to browse the options that are available in your area and choose one that suits your taste and style.

Read Also:

Content Rally wrapped around an online publication where you can publish your own intellectuals. It is a publishing platform designed to make great stories by content creators. This is your era, your place to be online. So come forward share your views, thoughts and ideas via Content Rally.

View all posts

Leave a Reply

Your email address will not be published. Required fields are marked *

Related

Drywall

Elevate Your Home With Unique Ceiling Textures

Drywalls are those construction materials that are used to create walls and ceilings in your home. Not all that, but drywalls also come in handy if you want to create design features like eaves, arches, or any mind-blowing architectural requirements!!! Do you know the best part about drywalls? These are super easy to install, highly durable, and only require simple repairs when damaged. So, drywall is a flat component composed of calcium sulfate dihydrate, typically between thick sheets of backer paper, and facer, used to construct interior ceilings. Let’s talk about the ceiling textures and the drywall options you can choose for your home!!! The Ceiling Textures And Your Drywall Options Decorating your home can be a real challenge for many !!! Therefore, choosing the right drywall finish or texture can prove to be a hard nut to crack. And it’s very natural to get in a state of indecision if you are handpicking it for your new home or renovation project. There are so many options that it feels like you are “searching for a pearl in an ocean.” Making up your mind about whether or not to go texturing your ceiling can be a tough job. And even if you choose to texture your ceilings, there are chances you’ll be confused about which one to go for!!!! And remember, getting the drywall right is the first step of tiling projects?”. But No Need to Worry!! This article will guide you in choosing the perfect texture and drywall option for your ceilings to look more elegant than ever!! 1. Sheetrock Texture: Old Is Gold Sheetrock ceiling texture is a drywall ceiling texture that has been famous since 1917. The reason this drywall texture is so awesomely renowned is because of the artistic look that it gives to your ceiling And the best part is you don’t need to use any sort of spray paint in this case. You can achieve this texture by using your artistic hand technique and without using any special brushes. This texture is perfect for any room. There are no restrictions on the use of this ceiling texture. 2. Stipple Brush Texture: A Test Of Your Skill This texture is not as easy as it seems. You need skills to create this texture. To create this texture, you need a roller and slap brush. The fascinating fact about this texture is it can cover the bumps and holes on your ceiling. And if you have the skills, then this texture can surely make your ceiling look gorgeous than ever!! 3. Swirl Texture: Creativity Taken To A New Level To achieve this texture, you need either a roller or sprayer. You can also do this by using a technique called “the basic swirl” method. But one thing that you need to keep in mind is while creating this texture, you’ll need a lot of patience to get the best result. And the difficult part is you need to create the pattern before the mud dries. So, make sure to have a helping hand by your side. Overall, the texture can really give that awesome look on your ceilings if you do it in the right way!!! 4. Orange Peel Texture: A Color Of Choice The name suggests all the colors of orange skin, but sometimes it’s also called “an eggshell” ceiling texture. If you really love this color, then this can be on the top of your favorite lists. To create this texture, you need to apply thin mud to the ceiling using a spray gun set at very high pressure. The more artistic mind you have, the more artistic look it has got!!!! 5. Smooth Textures: Choice Of Many If you are someone who wants the best at a cheap cost, then this texture is just the right choice for you. Moreover, you don’t need to have many skills to create this texture design. The look of this texture is just mind-blowing, and if you are someone who likes things to be consistently gorgeous, then this is the texture you can have for your ceiling. This texture is effortless to remove and is also perfectly suited for any room. 6. Tree Bark Texture: Beauty Of Nature If you are someone who loves nature and wants to bring the reflection of nature inside your home, then this textured style is just the option you can have. This ceiling has the look of a tree. You can create this texture just by using a heavy roller. The texture might look simply, but it’s very artistic and can surely catch the eyes of many. If you have a farmhouse, then this texture will double the beauty!!!!! 7. Slap Brush Texture: Slap The Beauty Out Artistic, gorgeous, beautiful, and elegant are the nicknames you can give to this texture. A complete package of beauty!!!! To get this texture, you’ll need a brush with very stiff bristles and thin mud. Firstly, you have to cover your ceiling with mud using a roller, then take the brush and slap the ceiling from the edge. This can be a hard nut to crack because if you don’t get it right on the first shot, the whole ceiling might end up looking messy. 8. Popcorn Texture: Cottage Cheese This texture, also known as the “cottage cheese” or “acoustic” ceiling texture, is probably one of the most famous ceiling textures ever!!! If you look closely, you’ll see it’s kind of a look-alike of “popcorn.” That’s why it’s called “popcorn texture.” To achieve the correct texture, you need to use a sprayer to apply to your ceiling. This contains Styrofoam with mud which gives that puffy effect. But it will require you to have a lot of skill to achieve this effect. That’s because the “popcorn texture” is both challenging to apply and remove. I hope this article will help you to know about the needs of ceiling textures and drywall options. And now I believe you’ll be able to get yourself the perfect texture for your ceilings. How Can I Remove Old Ceiling Textures Safely? Removing old ceiling textures can be a big job, but it doesn’t have to be intimidating! If you want to update your ceiling and get rid of that outdated texture, I’m here to help. No matter if you have popcorn, stipple, or another type of texture, this process takes a little bit of care, but don’t worry! Here’s a step-by-step guide on how to remove an old ceiling texture without breaking your back or the bank. Step 1: Test For Asbestos Before you get out any tools…safety first!  Remember, many older ceilings (especially those with popcorn texture installed prior to 1980) contain asbestos. Before doing anything else, have your ceiling tested for asbestos. You can hire a pro to test the ceiling or buy a self-test kit. If asbestos is present, halt all work and consult pros immediately. Asbestos removal is not a do-it-yourself job because it poses serious health risks if mishandled. Step 2: Clear The Room If there’s no asbestos present, it’s time to get the room ready. Cover all the furniture. You’d be amazed at how far a fine mist of water, compound, and paint can travel! Also, plastic should be removed from the floors, and tape should be around any ceiling fans or lights that are not being removed. I can personally tell you we didn’t do this. We found dried white dust on our bedspread when we were stripping the wallpaper in our bedroom, and we had to clean up all the residual dust a little too late. It was wild! Step 3: Soften The Texture For Better Finish Here’s where the fun starts! To make that texture easier to remove, you’ll need to soften it. Fill a spray bottle with warm water and mist the ceiling. You don’t want to drench it. If you put too much water on the ceiling, it could end up damaging the drywall underneath. Allow the water to sit for about 15–20 minutes or so, giving it time to penetrate and loosen up that texture material. Don’t rush this step. It’ll only cause more work for you in the long run. Step 4: Clean Your Work Grab a wide putty knife or scraper and start scraping off the texture. Do small sections at a time, and scrape at a shallow angle so that you don’t gouge the drywall underneath. If it’s not coming off well, spray some more with the water bottle and let it sit for a little longer. This step can be kind of messy and time-consuming, but have patience because, in the end, you will have a nice smooth ceiling. Step 5: Patch & Sand Once the texture is gone, you may notice a few dings or dents in the ceiling. Don’t worry! Just fill them with some joint compound, sand it smooth, wipe away any dust and you’re ready for a new ceiling. And that’s it! A fresh, smooth ceiling in no time! Read Also: Here’s How to Turn Your Garage into a Bedroom on a Budget! Turn your attic into a living space

READ MOREDetails
log cabin construction

Timber! 8 Facts About Log Cabin Construction You Should Know

Thought log cabins were a thing of the past? Think again. Today, log cabin construction has become a chic, upscale way to build a modern home with a unique look. In fact, some people have even built high-rise buildings that pull design elements from cabin construction. Log cabins have a solid place in modern architecture. They meld old-fashioned traditions that endure for a reason with popular modern elements like environmentally-friendly designs. Wondering what else you don't know about log cabins? Keep reading to learn more fascinating cabin facts! 1. You Can Calculate Exactly How Many Logs You'll Need How many logs does it take to build a log cabin? Turns out it's all a matter of simple math. For example, by determining the height of each wall, then the height of each individual log, you can calculate how many logs you'll use per wall. From there, it's simple to add up the number of walls in a room to get the total. Of course, other design aspects like the addition of doors or window can make things more complicated. When there's an opening in the wall, it will get flanked by shorter logs, which can increase the total number of logs used. If the roof is built of logs, that will also change the numbers. While you'll want to leave it to the professionals when it comes to deciding how many logs to order, it can still be fun to try your hand at calculating the number of logs in a cabin. 2. You Can Build from a Kit: Did you know that you can order a log cabin kit for a major DIY moment? With a log cabin kit, you don't have to be a pro to have a rustic cabin of your own. Most companies also offer plenty of customer service support, so you'll know where to turn if you run into problems along the way. It also doesn't take a lot of extra tools to work from a kit. Most people can get the job done with just a few basics (think drills and hammers). Since this is a more rustic form of the building, it appeals to many environmentally-savvy consumers. You're not bringing in heavy machinery to pollute the area and disrupt local wildlife. 3. Log Homes Stay Warm: Having trouble keeping warm in the winter? A log cabin just might hold the answer. Wood naturally keeps heat in -- that's why wood furniture tends to feel relatively warm, even if the rest of the room is cold. Many modern building materials, from concrete to sheetrock, get cold fast. This lowers the overall temperature of your home fast. With walls made of solid wood, your home actually soaks up and stores heat, dispersing it into the home over time. This helps your home stay warmer, while you save on heating costs. 4. Moisture Matters: When you're building a log home, one of the keys to success is keeping your logs completely dry. You can actually choose to buy logs with different levels of moisture content. The lower the moisture, the better, because you won't have to worry about what happens when the logs shrink and settle over time. You'll also need to take care to keep your home as dry as possible after it's complete. This can mean installing different design elements (read more here) to keep water away from the walls. Sturdy log cabins often include an overhanging roof or protective landscaping elements. You'll also need to take care to keep other sources of water, like an automated sprinkler, away from the log walls. 5. Log Homes Last a Long Time: There's a reason many historic log cabins from 100 or more years ago remain to this day. This is one of the most durable ways to build a home that will remain sturdy for years to come. Although American architecture doesn't date back so far, you can find homes and churches made of logs in Europe that have stood strong for many hundreds of years. This natural building material offers the perfect balance of strength and flexibility to withstand all kinds of threats. 6. Log Cabins Work Best in Shade: In addition to keeping your cabin away from moisture, you'll want to build it so it's shaded from the sun as much as possible. Sun won't destroy a log home, but it will mean you'll need to re-finish the logs more often to make them last. If you can build in a shady area that's guarded against moisture, your log cabin will require virtually no maintenance at all. 7. Log Homes Save Energy: In log cabin construction, it's super-important that you seal up the spaces between the logs carefully. But as long as that's done properly, you'll have an incredibly energy-efficient home to enjoy. Spaces, where energy can escape, include the connection between individual logs, the space between the foundation and the lower logs, and space between the walls and roof. But when those spaces get sealed, your home will be significantly more energy-efficient than most. The solid wood walls offer great insulation, so keeping your home warm or cool becomes far easier than with other materials. 8. Air-Dried Logs Work Best: Drier is generally better no matter what, but if you have a choice between air-dried and kiln-dried, opt for the first choice. Logs that get air-dried for the proper amount of time have already adjusted to the outdoor environment where they'll be placed. This reduces settling even more because the moisture content of an air-dried log isn't likely to change much further. Kiln-dried logs tend to absorb more moisture when they first get placed outside. Then, as they lose that moisture over time, they'll settle, creating a need for more home maintenance. Will You Try Log Cabin Construction at Home? Whether you build it yourself or hire the professionals, log cabin construction can give you a durable, unique, cozy home that you'll love. These tips will help you plan ahead for the best possible cabin construction. Once you build a log cabin, it's time to decorate the inside! For a rustic look that matches perfectly, try these cork board ideas. Read Also: Best Ways To Maintain A Shower Cabin Why Kiln Dried Wood Is Better For Furniture

READ MOREDetails
Mold Growth At Home

Mold Growth At Home: What You Should Know And What You Can Do

Molds are common problems in many homes. They can cause more than just unpleasant smells, though. These notorious fungi can also expose you to several health risks and damage your home's structure. Although their effects may not be noticeable at first, molds will eventually make their presence felt. By this time, however, the damage they have wrought could already be irreversible. What Is Mold?   Molds belong to the fungi family. They can be found in both your home and out in the natural environment. Outside, molds play a crucial role in the ecosystem by breaking down animal and plant matter. Molds inside your home, however, are a different story. These can cause serious health problems. This is especially true for people with vulnerable conditions like asthma. Where Do Molds Grow? Certain areas of your home are more susceptible to mold growth than others. The following should be included on your mold watch list: 1. Bathroom   According to deepwaterco.com, molds love the bathroom because the place is always damp, and many don't have adequate ventilation. Bathrooms practically have everything that mold spores need to grow and multiply. 2. Kitchen   Molds can attach themselves to kitchen surfaces such as countertops and sinks. Dishes that aren't washed properly are also good breeding grounds for molds. In the refrigerator, expired food items can likewise attract mold, so regularly check your fridge for any food that should already be thrown away. 3. Ceiling   Molds can grow anywhere in your home, and the ceiling is hardly an exemption. Mold growth in the ceiling, however, can be somewhat hard to determine, although if this has an earthy odor, it's a good sign that the fungus is present. What to Do With Molds at Home If you notice signs of early mold growth in your home, it's best to contact a mold removal specialist. Other than that, you can do the following:  1. Check for Leaks   Mold growth is primarily driven by moisture. Given this, you should inspect your home for water leaks from time to time. If you find one, it is important that you have it fixed immediately. This should stop molds from growing and cut down on your water bills at the same time. 2. Reduce Home Humidity   Mold growth is also affected by excess humidity in your home. To reduce this, you can open the windows, use a dehumidifier, turn on your exhaust fans, and hang the laundry outside. Additionally, the Environmental Protection Agency (EPA) recommends that your home's humidity levels should be set between 30% and 50% but should not go over 60%. 3. Limit Condensation   When the air cools to its lowest point, it can produce moisture and promote the growth of molds. You can prevent this by reducing the number of times that condensation takes place. To do this, you can open a window whenever you cook. It will increase the rate of airflow and also create better ventilation. 4. Maintain a Dry Bathroom   Molds thrive in moist areas like the bathroom. Work on keeping this part of your home dry and clean to ensure molds don't flourish here. The Role of Mold Damage Repair Experts At first, glance, removing molds from your home seems like a relatively easy job. This is not exactly correct because there's a proper way of getting rid of these fungi. It's best to let the professionals handle the job for the following reasons:  1. Mold Management Expertise   Mold damage experts have the knowledge and skills to determine the extent of fungi damage, the source, and the type of mold involved. For every mold type, a different approach is needed. 2. Proper Equipment   Dealing with molds requires proper handling, including using the correct tools. Mold experts have all these, along with the necessary protective gear and cleaning equipment. They will not only clean mold-infested surfaces but also remove mold spores from the air. 3. Effective Treatment   Mold remediation experts are completely trained to handle these fungi. They follow a thorough and rigorous process to ensure the problem doesn't get out of control. 4. Prevent Future Issues   Mold cleaning experts address the root cause of the problem to protect you and your property from the harmful effects of molds. This gives you the assurance that the same problem will not happen again. Key Takeaway   Molds are common household problems, but many are not aware that they have these fungi living inside their homes. The realization often comes only after serious damage or family members start to feel sick. If you believe you have molds at home but are unsure, there are several places you can check. Any home area rich in moisture is a potential mold breeding ground, with the kitchen and the bathroom being prime candidates. Contact companies that provide mold removal services if you find mold growth in these places. They are in the best position to resolve a nagging mold problem. Additionals: 5 Different Kinds Of Wood Used To Make FurnitureWhat You Need To Know Before Buying Grass CarpetsTop Useful Tips On How To Make Your Home Allergy-FreeMore Motivation, Less Distraction: How To Pack For Temporary Storage

READ MOREDetails