What Does Sound Dampening Mean?

by

26 May 2023

Home Improvement

Sound Dampening

Noise traveling to and from rooms can be distracting when trying to work, read, or enjoy some peace and quiet.

It can be hard to focus on what you are trying to do when you can hear music blaring, a loud television, or children screaming through the walls, not to mention a million other potential distractions.

Fortunately, there are ways to reduce sound transmitted through the walls, which can be invaluable when preventing sound transfer inside or outside a room. Felt Right has a unique way to achieve this. Depending on the materials you use for this procedure, you can obstruct more or less sound, even blocking the transmission of sound waves entirely, if you choose.

What is Sound Dampening?

Sound dampening is installing materials within a home, vehicle, or other location to absorb, reflect, or diffuse sound. This reduces the amount of noise that passes through and can also improve a roomโ€™s acoustics, which is why sound dampening is also known as โ€œacoustic treatment.โ€ It is a significant reason that recording studios make use of this technique.

Sound dampening can eliminate approximately 80% of the sound transfer, meaning that you can prepare a room for studying, work, hobbies, or mental health.

However, there is just enough sound to hear if there is an emergency in another room or someone yells for you. This is especially ideal if you have children in the house or others who may need your attention so that you can focus on what you are doing while still being accessible to others if required.

If you need even greater solitude, one option is to soundproof a room similar to sound dampening but endeavors to block any sound infiltration whatsoever completely. However, this process is far more intensive and to prove entirely successful generally requires planning in architectural design before room construction to ensure complete soundproofing.

What Materials Work Best for Sound Dampening?

When you sound dampen locations, you must decide which materials you wish to use. Different materials can prove effective to different degrees; some are external solutions, while others require installation within the walls or other surfaces.

Keep in mind if air can pass into an area, so can sound. For best results, address windows, spaces between and under doors, and other airflow conduits. No matter how effective your sound-dampening materials are, if air passes freely through such openings, you will have more noise.

Felt Tiles

One of the easiest methods for sound dampening is through the use of felt tiles. These panels have an adhesive back designed not to damage walls or paint, creating a plug-and-play solution. Felt tiles are versatile, coming in various shapes, sizes, and colors, so they are excellent choices if you wish to snazzy up the interior design of your room and enjoy the benefits of the feltโ€™s sound-dampening qualities.

Choosing felt tile designs to match your taste or set a professional tone can be invaluable when creating a relaxing atmosphere or environment conducive to work. A soothing, welcome decor has proven effective in improving mental health by reducing stress and anxiety. Having an attractive backdrop during work video calls provides an air of credibility to a home office space. In either situation, the reduced noise permeation is invaluable.
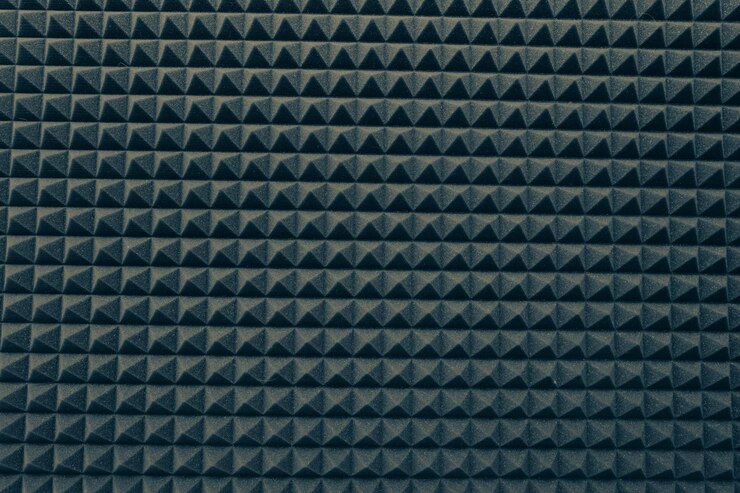
Polyurethane Foams

These polymer foams come in rolls or sheets and can serve as a suitable sound-dampening barrier, particularly when reducing high-frequency noises. However, low-frequency sounds are more likely to penetrate if the foam is not sufficiently thick, so keep this in mind if you want more effective noise reduction.

Also, be aware that polyurethane foams are flammable, so only place them in areas where they will not be susceptible to open flames or other fire risks. As a result of this quality, this type of sound dampening should be for home use in fire-safe locations rather than used in an industry setting, where there is a greater risk of inflammation.

Polyester Fibers

These dense materials are excellent for sound dampening in industrial settings or other noisy areas. They work best on high-frequency sounds and are often lauded for their strength and durability, making them incredibly resistant to general wear and tear and fire. Plus, it is a lightweight material, which makes it easier to transport and install.

Cork

This porous material is surprisingly effective as it can trap a significant quantity of air, which means it can catch sounds and convert them to vibrations, effectively deadening noise. Cork is effective even in thin sheets, and the material is incredibly lightweight. Furthermore, it is an accessible material to install and can be purchased in tile forms for easy customization.

Mass-loaded Vinyl

A popular choice because it is one of the least expensive sound-dampening options, mass-loaded vinyl is explicitly intended for sound dampening. It is easy to find and acquire this material, but remember that the denser the material, the more effective it will be. Mass-loaded vinyl does not have much elasticity, so it forms a solid barrier that sounds waves have trouble passing through.

Green Glue, Gaps, and Spaces

Remember that sound can pass through any space air can, so for better sound dampening, you need to find spaces where air can pass through, such as cracks or gaps within the walls. Green glue is an excellent choice for filling holes, blocking airflow, and reducing the noise that can enter (or exit) the room.

For areas you will not want to seal, such as windows, you can find sound-reducing curtains that can serve as sound dampening, combatting unwanted outdoor sounds such as those from traffic, industries, and neighbors.

For doors, sound dampening can be as simple as placing a blanket against the gap beneath. Alternatively, you can install a door stop, soundproofing rubber, or acoustic panels to block sound from entering.

The Bottom Line

When you want to keep from traveling in or out of a room, one of the most effective ways to reduce sound is to find appropriate materials that function as sound-dampening agents, placed along walls and wherever there are gaps or cracks in which sound can pass. Proper sound dampening can create an atmosphere conducive to work or relaxation or prevent televisions, music, musical instruments, and other loud forms of recreation from disturbing others.

Read Also:

Arnab is a professional blogger, having an enormous interest in writing blogs and other jones of calligraphies. In terms of his professional commitments, He carries out sharing sentient blogs.

View all posts

Leave a Reply

Your email address will not be published. Required fields are marked *

Related

Flooring Installation Process

Flooring Installation Process Transforming Your Space With Elegance

When it comes to renovating or building a new space, one of the most crucial aspects is the flooring installation process. The type of flooring you choose can significantly impact the overall aesthetics, functionality, and durability of your space. In this comprehensive guide, we will walk you through the intricate process of flooring installation toronto, providing valuable insights and tips to ensure a successful transformation. Selecting The Right Flooring Material The first step in the flooring installation process is choosing the right material. Whether you opt for hardwood, laminate, vinyl, tile, or carpet, each material has its unique features and benefits. Consider factors such as your budget, the room's purpose, and your design preferences when making this decision. Measuring And Preparing The Space Before the installation begins, accurate measurements of the room are crucial. This step ensures that you purchase the right amount of flooring material. Additionally, you'll need to prepare the space by removing any existing flooring, baseboards, and furniture. A clean, level surface is essential for a smooth installation. Acclimating The Flooring Many flooring materials, especially hardwood, need to acclimate to the room's temperature and humidity levels before installation. This process prevents the flooring from warping or expanding after installation. Follow the manufacturer's recommendations for acclimation time. The Installation Process Subfloor Preparation A stable subfloor is the foundation of a successful flooring installation. Ensure that the subfloor is clean, dry, and free of any irregularities. Repair any damaged areas and add an underlayment if necessary. Layout And Design Planning the layout of your flooring is crucial for achieving a polished look. Decide whether you want a diagonal, herringbone, or straight pattern, depending on your design preferences. This step is especially important for tile and hardwood installations. Cutting And Fitting Precise cutting and fitting of the flooring material are essential for a seamless finish. Use the appropriate tools, such as a saw or cutter, to trim the material to fit the room's dimensions accurately. Pay special attention to corners and edges. Installation Method The installation method varies depending on the type of flooring you've chosen. For example, hardwood may be nailed or glued down, while laminate often features a click-and-lock system. Follow the manufacturer's guidelines and use the appropriate adhesives or fasteners. Finishing Touches After the main installation is complete, it's time for the finishing touches. Install baseboards and transitions to create a polished look. Seal gaps and joints to prevent moisture and dirt from seeping underneath the flooring. Maintenance And Care Cleaning And Maintenance Proper maintenance is crucial to ensure the longevity of your new flooring. Regularly sweep or vacuum to remove dirt and debris. Use manufacturer-recommended cleaning products to maintain the flooring's finish. Repairing Damage Accidents happen, and flooring can get damaged over time. Whether it's a scratch on hardwood or a chipped tile, knowing how to repair minor issues can extend the life of your flooring. Consult with professionals for major repairs. The flooring installation process is a transformative journey that adds beauty and functionality to your space. By carefully selecting the right material, preparing the space, and following the installation steps, you can achieve stunning results that will stand the test of time. Read Also: How To Pick The Perfect Flooring For Your New Home How to Protect Your Wood Flooring in a Busy Household List of Most Durable Kitchen Flooring

READ MOREDetails
Foundation Moisture Maintenance

Foundation Moisture Maintenance: 6 Tips for Home Repair

Foundation maintenance is not something most homeowners plan for. It can be time-consuming, expensive, and complicated. It can also cause you great pain and aggravation if it is done incorrectly. Many homeowners make the mistake of trying to handle foundation repair on their own. You should also go towards the foundation maintenance services that help you to make your home safe and secure. Unfortunately, this can lead to even more problems than the original problems and can cost you much more money in the end. 1. Inspection: Foundation maintenance tips that include inspections are necessary because repairs can get costly if they are not done correctly the first time. This is because the damage could have been lessened if the repair was made properly. If you notice a crack that is slowly getting worse and appears to be getting worse, then you should call in an expert immediately. You should also make sure there are no other cracks that could be causing your home foundation damage. 2. Clay Soils: Another foundation maintenance tip involves inspecting your clay soils. Do you have clay soils in your yard? If so, you need to know what type of soil your foundation is built on and how to correct it. There are certain plants and trees that can actually damage your foundations and these should be avoided at all costs. 3. Repair Foundation Cracks: In addition to avoiding having your home foundation damaged, another way to avoid it is by repairing foundation cracks. There are different types of cracks including wooden cracks, concrete cracks, and more. Some homeowners prefer to repair their home foundation first and then worry about the type of cracks they have or the damages they may have incurred. It is important to repair any type of cracks that may be causing damage to your home. 4. Check Gutters and Sewage Systems: Along with foundation repairs, homeowners should also make sure their gutters, downspouts, and sewage systems are working properly. Gutters and downspouts should be checking on a regular basis to make sure they are not clogged with leaves, twigs, or other debris. Downspouts should be inspected for leaks that may cause damage to your home. There are many foundation maintenance tips for homeowners that include checking on the condition of these two vital components. 5. Hire Foundation Repairing Company: One of the most important foundation maintenance tips for homeowners is to hire foundation repair companies when it comes to checking for leaks around your home. Most of the time, leak detection can be completed without the help of an expert. One of the best ways to check for leaks around your home is to use an inexpensive non-intrusive infrared camera. If you find any areas around your home that appear to be leaking, this will be an excellent time to consult a foundation maintenance company. 6. Proper Drainage System: Homeowners should also make sure that they have a proper drainage system throughout their homes. Proper drainage allows materials such as liquids and grime to seep away from the foundation and stay away from being eroded by the soil. Many homeowners also underestimate the importance of proper drainage. Without the proper amount of drainage in place, there is a greater risk of foundation damage. A professional foundation moisture maintenance company will be able to determine if you do not have adequate drainage. Read Also: Improve Your Home With Concrete Lifting Services Why You Must Embrace Green Home Technologies? Safety Triangle: Three Things Your Soon-To-Be House Must Have

READ MOREDetails
Maintain Clear Windows

10 Tactics To Maintain Clear Windows

There is nothing as wonderful as sunshine to perk up your mood, create a sense of calm, or rejuvenate your spirit after considerable hard work. After all, hotel advertising utilizes actresses and actors walking out into the sun and smiling to instill a sense of relaxation, but scientific studies have shown that sunshine helps boost serotonin levels in your brain (the chemical that boosts your mood). But, in our busy lives, it isn't always possible to step outside for a dose of sunshine, leaving the majority of people to rely on their windows. And if that sunlight has to fight through dirt, smudges, and everything else that the weather (or children) have smeared over it, there just isn't as much of that mood-lifting light reaching you. Ideally, you should wash your windows twice a year, and despite the clear benefit, that is a daunting task. Here are 10 tactics to clean and maintain your windows. 10 Tactics To Maintain Clear Windows: 1. Gather Your Materials: It is important to have the right materials to clean your windows. Using the wrong ones will leave you with dirt and smudges regardless of your vigorous scrubbing. A squeegee is a superior choice over a rag, which will move the dirt from one part of the window to another. With a squeegee, you can pull all the dirt to the bottom without transferring a single spec. For small-paned windows, you may require a sponge instead of the squeegee to fit in tight spaces. And lastly, you will need several clean rags for sills, sashes, and drips. 2. Cleaning Solution: Next, you will need the right cleaning solution, two gallons of water mixed with 1 teaspoon of dish soap or equal parts water and vinegar. This amount of soap creates fewer suds and thus less soap residue to smear a clean window. 3. Pick the Right Day: Windows should not be cleaned on any day. It may seem sensible to pick a warm sunny one (after all, a little sunshine is beneficial), but the sun will dry up the cleaning solution before it can be wiped away. Therefore, a cloudy day will give you enough time to spray and wipe down your windows without any streaks. 4. Wash the windows: With a sponge or spray bottle, wet the windows with the cleaning solution. For tall windows, or windows on the second story, you may want a ladder, or you can attach the sponge to a long handle or broom. 5. Dry Immediately: And then dry the window with the rag or squeegee. For smaller windows, pull the squeegee straight down, but with larger ones pull the squeegee from side to side to clear off all dirt and cleaning solution. Make sure to wipe all drips as it is important to remove the water before the window dries to prevent streaks. 6. Clean the Rest of the Window: Make sure the clean the sills and sashes as well. They have taken just as much or a beating from the weather (and children) as the glass and deserve a little TLC. 7. Stubborn Stains: Occasionally, dirt takes a little extra work to clean off, but that doesn't necessarily mean scrubbing. Apply either straight vinegar and let it sit for 5 minutes or gently rub the stain with a mineral deposit remover before cleaning normally. 8. Saving Time: If all of this sounds like your whole afternoon, an afternoon that could be spent more enjoyably at the pool or more productively at the office, consider a window cleaning service such as Thistle Perth Window Cleaning. Let someone else do the difficult part for you, while you enjoy all the sunshine benefits. 9. Keeping Windows Clean: With all the strenuous work and cash spent on cleaning windows, maintain them by vacuuming blinds and window sills inside to keep dust from accumulating. 10. Enjoy: Now you can enjoy all the mood enhancements that sunshine brings. It is time to relax and enjoy the room. Or, if you are feeling an energy boost with the newfound light, perhaps it's time to conquer that junk drawer. Read Also: speedwrite Automatic Text Generator Review & Alternatives How to Plant Grass Seed on Hard Dirt? Is Other Consumer Services A Good Career Path In 2021?

READ MOREDetails