Moreno Valley Plumbing Pros: Your Reliable Plumbing Experts

Published on: 23 April 2024 Last Updated on: 14 October 2024
plumber moreno valley

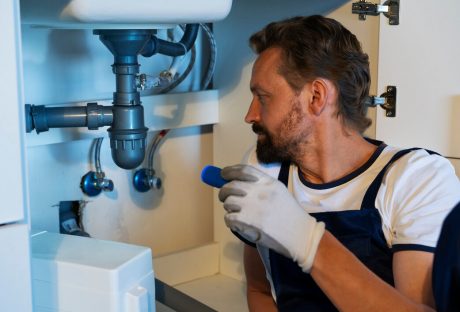
Having a reliable plumbing system is crucial for a comfortable and healthy home. Yet,

plumbing issues often strike unexpectedly, causing stress and inconvenience. In such scenarios, A plumber in Moreno Valley is your dependable solution for all plumbing needs.

With expertise and dedication, experts ensure your plumbing functions seamlessly,

alleviating the worry of potential problems.

In this blog, we delve into the benefits of entrusting your plumbing needs to professionals for residential plumbing services in Moreno Valley. And will decode why they are your trusted partner in maintaining a smooth-running plumbing system.

The Importance Of Reliable Plumbers In Moreno Valley

You may be surprised to know that a tap can waste up to 3,000 gallons of water in one year.

It is enough to fill a small swimming pool! Furthermore, the study and observations conducted by the Environmental Protection Agency (EPA) show that wrong plumbing upkeep can cause issues like sewage backups.

These troubles can bring several risks and cause widespread damage to your property. Consequently, you may have to spend thousands of dollars on upkeep.

Moreover, another study by the American Water Works Association (AWWA) estimates that an ordinary household persistently leaks 10 gallons per day, aggregating to a whopping 3650 gallons of wastewater annually.

How Expert Plumbers In Moreno Valley Deliver Exceptional Service?

Expert Plumbers In Moreno Valley Deliver Exceptional Service

An expert emergency plumber in Moreno Valley has the experience to diagnose the root cause of the issues and eliminate them swiftly.

Consequently, it minimizes the disruption to your home. And… congrats! You save lots of dollars by keeping costs down. However, they provide you with long-term recommendations. Ultimately, it can help you prevent future issues, saving you dollars on repairs.

For example, a professional plumber might suggest replacing an old, inefficient water heater with a new one. This energy-saving model may lead to significant savings on utility bills.

1. Clear Communication: 

First, he expert plumber in Moreno Valley begins by learning about your problems. They discuss your plumbing issue and provide a transparent estimate before beginning work.

2. Prompt And Reliable Service: 

Secondly, the plumber at Moreno Valley values your time. Moreover, they arrive on time and are ready to tackle any plumbing challenges because they are well-equipped… this is their added advantage. Furthermore, they also provide an emergency plumber in Moreno Valley.

3. Professional And Courteous Technicians: 

They usually have highly trained experienced and capable employees, respectful of your home, and maintain a clean work environment. However, good behavior is key to offering any services.

4. Guaranteed Quality Workmanship:

They stand behind their work and take full control and authority over it. Ultimately, they offer a warranty on all repairs and installations for peace of mind.

5. Cutting-Edge Technology: 

The Plumber Moreno Valley uses advanced tools like electronic leak detectors, video inspection cameras, and hydrojetting machines. Moreover, they use some other specialized plumbing software to understand the problems to the core. Thereafter they deliver the most efficient solutions.

6. Expertise You Can Trust: 

Moreover, the plumber in Moreno Valley has the necessary accreditations. This means they have undergone rigorous training and extracted adequate experience in handling various plumbing issues.

However, notable examples include leak detection and repair, drain cleaning, and replacement or Toilet Installation in Moreno Valley. However, some other notable examples include water heater installation and maintenance, fixture installation, and gas line repairs.

Technology At The Forefront

plumbing services, the involvement of high-end technology

In plumbing services, the involvement of high-end technology and state-of-the-art tools is key to accurately diagnosing real issues. Based on them, the expert’s services offer the most efficient solution. Here’s how it works:

Video Inspection Cameras: 

These high-tech cameras allow the plumbers to see the real issues inside the pipes. They’re used to pinpoint leaks and clogs accurately. However, based on these, they take measures. Ultimately, this helps the professionals in detecting pipe leak repair in Moreno Valley.

Electronic Leak Detectors: 

These tools help detect latent issues swiftly, minimizing property damage. Additionally, the plumber more valley uses sophisticated gadgets that make leak location a breeze and ease the work.

Hydro Jetting Machines: 

These powerful machines can help clear even the toughest sedimentation of clogs from drains and sewer lines. However, with these machines, the experts push air by using high-pressure water jets. It is touted as the long-lasting solution to stubborn blockages.

Plumbing Software: 

Plumbers use specialized software to track inventory and manage appointments. Additionally, they ensure efficient service delivery.

This technology streamlines operations and enhances customer service. Furthermore, this new technology group makes residential plumbing services in Moreno Valley more efficient and convenient.

In addition to it , the team comprises licensed and insured plumbers with extensive experience and training. They handle various plumbing issues, such as:

Leak Detection And Repair: 

The plumber in Moreno Valley uses the most advanced tools and techniques to pinpoint and fix leaks. It helps reduce damage to water and drain cleaning in Moreno Valley.

Toilet Repair And Replacement: 

Whether fixing a running toilet or other activities like installing a new low-flow model, the use of new technology ensures efficiency in toiled function. Ultimately, it helps save money on water bills.

Water Heater Installation And Maintenance:

Water Heater Installation And Maintenance:

Regular maintenance by qualified plumbers like the plumber in Moreno Valley extends the lifespan of water heaters. As a result, it saves them from costly breakdowns. In addition, they also offer guidance on the best water heater models that serve individual needs and water heater repair in Moreno Valley.

Fixture Installation: 

Professional plumbers ensure the correct installation of new fixtures. Moreover, they are highly trained in bathroom remodeling or replacing worn-out faucets. Finally, it ensures flawless functionality.

Drain Cleaning And Unclogging: 

From mechanical snakes to hydrojetting, they use different mechanisms to clear clogged drains effectively. Ultimately, it ensures lasting results after drain cleaning in Moreno Valley without harming pipes.

Gas Line Repairs: 

These are handled with the utmost care and precision. However, the clients get safety from licensed plumbers and adhere to the strictest of protocols to prevent hazards.

Finally, combining expertise with the most hi-tech machinery tools and technology, the plumbing service provides trustworthy solutions while reducing property inconvenience and damage.

Benefits of Hiring Professional Plumbers

While a quick YouTube tutorial might make a DIY plumbing project seem simple, the reality is that there’s a high risk of making costly mistakes. However, here’s how professional plumbers can save you time, money, and frustration:

Avoid Costly Mistakes

Studies show that 7 out of 10 DIY plumbing attempts result in needing to call a professional plumber in Moreno Valley to fix the problem. And often at a higher cost than if they had called a plumber in the first place. However, some of the most common DIY mistakes include:

Using The Wrong Parts Or Materials

Plumbing parts come in various sizes and specifications. Mismatched parts can lead to leaks, breaks, and further complications.

Misdiagnosing The Problem

A dripping faucet might seem like a simple fix, but it could be a symptom of a more significant issue like worn-out pipes or low water pressure. However, a professional plumber can diagnose the root cause of the problem and recommend the most effective solution.

Causing Further Damage To Pipes Or Fixtures

Improper techniques or tools can easily damage pipes and fixtures, leading to more extensive and expensive repairs.

Complexities Best Left to the Pros

Some plumbing problems are simply beyond the scope of a DIY project. For instance:

  • Slab leaks: These leaks occur beneath the concrete foundation of your home and require specialized equipment and expertise to locate and repair. Even a tiny slab leak can cause extensive damage to your foundation and need significant repairs.
  • Sewer line clogs: These stubborn clogs often necessitate powerful hydrojetting machines. Moreover, the work involves the use of video inspection cameras to diagnose and clear the blockage. However, improper attempts to fix a sewer line clog can lead to raw sewage backups in your home, posing severe health risks and causing an even bigger mess.
  • Gas line repairs: Working with gas lines is extremely dangerous and should only be attempted by licensed and qualified plumbers. A gas leak can lead to explosions and fires, putting your entire home and family at risk.

Conclusion

Please don’t gamble with DIY projects regarding your home’s plumbing system. Moreno Valley Plumbing Pros are your reliable partners, offering expertise, experience, and the tools to get the job done right – the first time.

The expert plumber in Moreno Valley takes pride in providing exceptional service at competitive rates.

For years, the experts have been committed to providing excellent service and ensuring your plumbing system functions smoothly and efficiently.

Don’t let plumbing problems disrupt your life. Contact your nearby residential plumbing services in Moreno Valley to book a consultation and experience working with a reliable and professional team.

Read Also:

Abdul Aziz Mondol is a professional blogger who is having a colossal interest in writing blogs and other jones of calligraphies. In terms of his professional commitments, he loves to share content related to business, finance, technology, and the gaming niche.

View all posts

Leave a Reply

Your email address will not be published. Required fields are marked *

Related

Drywall

Elevate Your Home With Unique Ceiling Textures

Drywalls are those construction materials that are used to create walls and ceilings in your home. Not all that, but drywalls also come in handy if you want to create design features like eaves, arches, or any mind-blowing architectural requirements!!! Do you know the best part about drywalls? These are super easy to install, highly durable, and only require simple repairs when damaged. So, drywall is a flat component composed of calcium sulfate dihydrate, typically between thick sheets of backer paper, and facer, used to construct interior ceilings. Let’s talk about the ceiling textures and the drywall options you can choose for your home!!! The Ceiling Textures And Your Drywall Options Decorating your home can be a real challenge for many !!! Therefore, choosing the right drywall finish or texture can prove to be a hard nut to crack. And it’s very natural to get in a state of indecision if you are handpicking it for your new home or renovation project. There are so many options that it feels like you are “searching for a pearl in an ocean.” Making up your mind about whether or not to go texturing your ceiling can be a tough job. And even if you choose to texture your ceilings, there are chances you’ll be confused about which one to go for!!!! And remember, getting the drywall right is the first step of tiling projects?”. But No Need to Worry!! This article will guide you in choosing the perfect texture and drywall option for your ceilings to look more elegant than ever!! 1. Sheetrock Texture: Old Is Gold Sheetrock ceiling texture is a drywall ceiling texture that has been famous since 1917. The reason this drywall texture is so awesomely renowned is because of the artistic look that it gives to your ceiling And the best part is you don’t need to use any sort of spray paint in this case. You can achieve this texture by using your artistic hand technique and without using any special brushes. This texture is perfect for any room. There are no restrictions on the use of this ceiling texture. 2. Stipple Brush Texture: A Test Of Your Skill This texture is not as easy as it seems. You need skills to create this texture. To create this texture, you need a roller and slap brush. The fascinating fact about this texture is it can cover the bumps and holes on your ceiling. And if you have the skills, then this texture can surely make your ceiling look gorgeous than ever!! 3. Swirl Texture: Creativity Taken To A New Level To achieve this texture, you need either a roller or sprayer. You can also do this by using a technique called “the basic swirl” method. But one thing that you need to keep in mind is while creating this texture, you’ll need a lot of patience to get the best result. And the difficult part is you need to create the pattern before the mud dries. So, make sure to have a helping hand by your side. Overall, the texture can really give that awesome look on your ceilings if you do it in the right way!!! 4. Orange Peel Texture: A Color Of Choice The name suggests all the colors of orange skin, but sometimes it’s also called “an eggshell” ceiling texture. If you really love this color, then this can be on the top of your favorite lists. To create this texture, you need to apply thin mud to the ceiling using a spray gun set at very high pressure. The more artistic mind you have, the more artistic look it has got!!!! 5. Smooth Textures: Choice Of Many If you are someone who wants the best at a cheap cost, then this texture is just the right choice for you. Moreover, you don’t need to have many skills to create this texture design. The look of this texture is just mind-blowing, and if you are someone who likes things to be consistently gorgeous, then this is the texture you can have for your ceiling. This texture is effortless to remove and is also perfectly suited for any room. 6. Tree Bark Texture: Beauty Of Nature If you are someone who loves nature and wants to bring the reflection of nature inside your home, then this textured style is just the option you can have. This ceiling has the look of a tree. You can create this texture just by using a heavy roller. The texture might look simply, but it’s very artistic and can surely catch the eyes of many. If you have a farmhouse, then this texture will double the beauty!!!!! 7. Slap Brush Texture: Slap The Beauty Out Artistic, gorgeous, beautiful, and elegant are the nicknames you can give to this texture. A complete package of beauty!!!! To get this texture, you’ll need a brush with very stiff bristles and thin mud. Firstly, you have to cover your ceiling with mud using a roller, then take the brush and slap the ceiling from the edge. This can be a hard nut to crack because if you don’t get it right on the first shot, the whole ceiling might end up looking messy. 8. Popcorn Texture: Cottage Cheese This texture, also known as the “cottage cheese” or “acoustic” ceiling texture, is probably one of the most famous ceiling textures ever!!! If you look closely, you’ll see it’s kind of a look-alike of “popcorn.” That’s why it’s called “popcorn texture.” To achieve the correct texture, you need to use a sprayer to apply to your ceiling. This contains Styrofoam with mud which gives that puffy effect. But it will require you to have a lot of skill to achieve this effect. That’s because the “popcorn texture” is both challenging to apply and remove. I hope this article will help you to know about the needs of ceiling textures and drywall options. And now I believe you’ll be able to get yourself the perfect texture for your ceilings. How Can I Remove Old Ceiling Textures Safely? Removing old ceiling textures can be a big job, but it doesn’t have to be intimidating! If you want to update your ceiling and get rid of that outdated texture, I’m here to help. No matter if you have popcorn, stipple, or another type of texture, this process takes a little bit of care, but don’t worry! Here’s a step-by-step guide on how to remove an old ceiling texture without breaking your back or the bank. Step 1: Test For Asbestos Before you get out any tools…safety first!  Remember, many older ceilings (especially those with popcorn texture installed prior to 1980) contain asbestos. Before doing anything else, have your ceiling tested for asbestos. You can hire a pro to test the ceiling or buy a self-test kit. If asbestos is present, halt all work and consult pros immediately. Asbestos removal is not a do-it-yourself job because it poses serious health risks if mishandled. Step 2: Clear The Room If there’s no asbestos present, it’s time to get the room ready. Cover all the furniture. You’d be amazed at how far a fine mist of water, compound, and paint can travel! Also, plastic should be removed from the floors, and tape should be around any ceiling fans or lights that are not being removed. I can personally tell you we didn’t do this. We found dried white dust on our bedspread when we were stripping the wallpaper in our bedroom, and we had to clean up all the residual dust a little too late. It was wild! Step 3: Soften The Texture For Better Finish Here’s where the fun starts! To make that texture easier to remove, you’ll need to soften it. Fill a spray bottle with warm water and mist the ceiling. You don’t want to drench it. If you put too much water on the ceiling, it could end up damaging the drywall underneath. Allow the water to sit for about 15–20 minutes or so, giving it time to penetrate and loosen up that texture material. Don’t rush this step. It’ll only cause more work for you in the long run. Step 4: Clean Your Work Grab a wide putty knife or scraper and start scraping off the texture. Do small sections at a time, and scrape at a shallow angle so that you don’t gouge the drywall underneath. If it’s not coming off well, spray some more with the water bottle and let it sit for a little longer. This step can be kind of messy and time-consuming, but have patience because, in the end, you will have a nice smooth ceiling. Step 5: Patch & Sand Once the texture is gone, you may notice a few dings or dents in the ceiling. Don’t worry! Just fill them with some joint compound, sand it smooth, wipe away any dust and you’re ready for a new ceiling. And that’s it! A fresh, smooth ceiling in no time! Read Also: Here’s How to Turn Your Garage into a Bedroom on a Budget! Turn your attic into a living space

READ MOREDetails
Best Heat Pump

How to Choose the Best Heat Pump for Your Home?

Heat pumps serve dual purposes. They heat the home when it is cold outside and cool it when the temperature rises. These units are energy efficient and good for the environment because they don't burn fuel. However, the homeowner needs to ensure they get the correct unit for the home.  The Concept Of A Heat Pump  The heat pumps are becoming more and more popular these days. If you still don’t know about them and are trying to look for more information before buying a heat pump for your house, then you have landed yourself on the right page.  An electric air source heat pump is an outdoor unit. You can use this unit to keep your home both heat as well as cool your home. This totally depends on the weather.  The heat pumps are a great alternative to your central air conditioner or your furnace systems. This technology is specifically used in a refrigerator or an air conditioner. The unit extracts heat from a specific source.  It can be from the surrounding air, nearby sources of water, or eleven geothermal energy. Once it is done collecting the heat, it further amplifies it and then transfers it to the space where it is necessary.     How Do Heat Pumps Work?  Most heat pumps pull heat from the air and move it to the desired location. When heating the home, the unit takes the hot air from outside and brings it indoors. When cooling the house, the unit removes hot air from the home and transfers it outside.  They use less carbon than other heating options and work best when set at a consistent temperature. To see the optimal results, homeowners must ensure their houses are properly insulated and sealed. What else should they know before requesting a heat pump installation?  Heat Pump Options Air-to-air heat pumps are the most common air-source heat pumps used in America today. They come in two forms.  Ducted air-source heat pumps function like central AC units. Treated air is distributed throughout the home with the help of ductwork.  Ductless or mini-split air-source heat pumps are the second option, increasing in popularity. No ductwork is needed when a homeowner selects this option. However, other options exist.  Geothermal heat pumps pull heat from the ground to warm a home and release heat into the ground to cool the house.  These systems are highly efficient, but they often cost more to install. Water-source heat pumps are similar to ground-source units but are installed at the bottom of a pond. Air-to-water heat pumps use a hot-water radiator system to distribute heat throughout the home.  The Benefits of Heat Pumps Heat pumps are easy to install and work in most homes. The mini-split system is ideal for those without ductwork because the house won't have to be modified during installation.  Moving to a heat pump will significantly reduce the owner's carbon footprint, and many areas offer subsidies for those who choose to upgrade to this type of unit.  Let’s learn about the benefits of the best heat pump:  Energy Efficiency  Many users have agreed that heat pumps show more efficiency than all traditional furnaces. These heat pumps help to move the heat from the outside air or ground into your home.  As a result, you can easily save a lot of money on the overall energy bills.  Improved Air Quality  The heat pumps can both filter and then deodorize the air. This helps you to reduce allergies as well as asthma.  Quiet Operation  The heat pumps are an excellent choice for your home and businesses as they generate less noise and are typically quieter than the other systems.   Easy Maintenance Process   The heat pumps do not require much attention and are very simple to manage. It does not need regular servicing.  P.S. Heat pumps can be expensive, and you may face difficulties installing the system. Otherwise, the system and its benefits make it a perfect long-term investment.  When Not to Install Heat Pump? A poorly insulated home or a leaky one will not benefit from a heat pump because drafts and cold spots are often an issue.  Homeowners must research their electrical service to ensure it can handle the heat pump load, as upgrading the electrical system to install this unit will add to the cost.  Finally, individuals in cold climates may find their heat pumps cannot keep up. The Department of Energy has established eight climate zones for the United States. In zones 7 and 8, homeowners need to consider other options.  Choosing a Heat Pump Homeowners must consider several factors when choosing a heat pump. You must consider the size and capacity of your space. If you fail to choose the best heat pump of the proper size, it will cost more to run. Moreover, it won't keep the home at the desired temperature.  The determination of the right size heat pump involves two kinds of measurements:  1. Manual J Load calculation  HVAC technicians widely use this specific kind of calculation. They consider certain factors that help them to understand how much heating and cooling your home needs before choosing the best heat pump. These factors are as follows:  The square footage measurement of your home Ceiling height  Insulation of your house  The climate type and the number of days you might need the heating or cooling  How often the space is being used?  The number of people who use the space The total number of heat-producing appliances that you have in your room  Number of windows and doors.  The technicians consider these values and further enter them into a formula to get the precise result.  2. Square Footage Calculation The calculator might seem a bit simpler, but it is not precise enough to calculate the required heat pump capacity.  For instance, if your total house space is around 1500 square feet, then you would need a 3-ton unit. BTUs, or British Thermal units further measure these ton units.  An experienced technician can help the homeowner determine the BTUs needed for the house.   Home size (sq. ft.)Size of the heat pump (in tons)Size of the heat pump (in BTUs)500 sq. ft.1-ton 12000 BTUs. 1500 sq. ft.3-ton36,000 BTUs2500 sq. ft.5-ton 60,000 BTUs Apart from these calculations, compressor type is important when choosing the best heat pump. Most homeowners choose a variable-speed compressor, which automatically adjusts to maintain the selected temperature.  Efficiency is also a consideration when choosing the best heat pump. Look for a high SEER rating to save on energy bills.  Learn about each unit's climate performance and research the noise level. Finally, the reliability of each unit must be considered to ensure the heat pump will work when needed.  Once a heat pump has been selected, choose a contractor. Ensure they are trained to handle this task and have been in business for a while.  Doing so ensures best heat pump will be installed correctly, and help will be available if problems arise. When homeowners take these steps, they will have peace of mind knowing their unit will work when needed. Additional Reading: Removing Air Conditioner Filters: A Guide Advantages Of Using A Water Heater At Home What Can An Air Conditioning Installation Expert Assist You With?

READ MOREDetails
Move Out Cleaning

How to Handle the Move-Out Cleaning

Changing home is a stressful and demanding endeavor itself, you have to think about so many things – packing, organizing transport, and of course, cleaning. You need to clean your new place unless someone was kind enough to do it for you, but still, a second-round might come useful. And of course, you need to clean your old home and leave it in decent condition for the new tenants.  Otherwise, you may not get your deposit back. In case you are selling your own place, it is also an important criterion which will make your former home much more attractive to the potential buyers. Unless you hire professional help, cleaning your old place is definitely not going to be easy, but there are a few things that can make the experience a bit less stressful and burdensome as recommended by move out cleaning professionals. Start from the Top A common mistake many of us make while cleaning is to start from the floors, as they usually do represent the biggest item on the list. However, if you start from the floors, and then move up to walls, corners, and surfaces, guess what – you will have to clean the floors all over again. So, be wiser than that and start this excruciating business from the top. This will save you a lot of time and energy. Also, when talking about directions, always start the cleaning from the back, that is from a wall towards the door, so you don’t end up stuck in one small uncleaned place, like on an island, having to cross all the wiped space to go back, and potentially soil it all over. It sounds funny, but this has certainly already happened to some of you, and you will definitely want to avoid it this time. Change the Approach When cleaning, everyone mostly likes to do the job room by room. However, this usually takes way more time than actually cleaning segment by segment, which is task by task. For instance, if you are wiping floors, it is better to do it in the whole house while you are at it, instead of moving to a different segment in the same room. This approach is much more efficient so take it into consideration once you start you moving out clean up. Have Everything at Hand In situations where time is really precious and you don’t have the liberty to take too long because a lot of other things are waiting, good organization is everything. You will definitely need different cleaning chemicals such as glass cleaners, disinfectants, baking soda, vinegar, and others, as well as cleaning equipment like cloths, vacuum cleaners, brooms, dustpans, brushes, and others. The first important step is not to pack any of these along with the rest of your stuff. The second is to actually know where they are and to organize them as much as possible so you don’t have to lose too much time searching for them. As professional home cleaners at Maid Easy say that good organizational skills can shorten the time it takes to clean the whole house significantly. “Dry” Cleaning First Make sure you first do the “dry” cleaning such as swiping, dusting, and vacuuming to remove all the dust and other dirt in that way. If you apply wet cloth or a brush, you will just make bog, rather than clean something. The best option is to dust all the corners and surfaces first, swipe any bigger mess, and then finally vacuum to give it the final touch. After this, you may proceed with “wet” cleaning activities. Once you are done with the old place, you can apply all these tips to your new home. Even if the previous tenants or owners have cleaned it, you will probably want to make sure it is spotless. Of course, if repeating the same process all over again is just too much for you, you can always ask the professionals for help, at least for one of these cleaning actions. Read Also: How Cleaning Helps Us Feel Better and Why We Don’t Do It 7 Advantages of Hiring a Residential Cleaner What You Need to Look for When Hiring House Cleaning Service

READ MOREDetails