How To Protect Yourself On Social Media?

Published on: 07 February 2023 Last Updated on: 04 November 2024
Social Media

Social media can be an excellent people finder tool if somebody wants to be found. The challenge is that it can also be a dangerous place.

Many people don’t realize that hackers use social media accounts to steal identities and perform other criminal tasks.

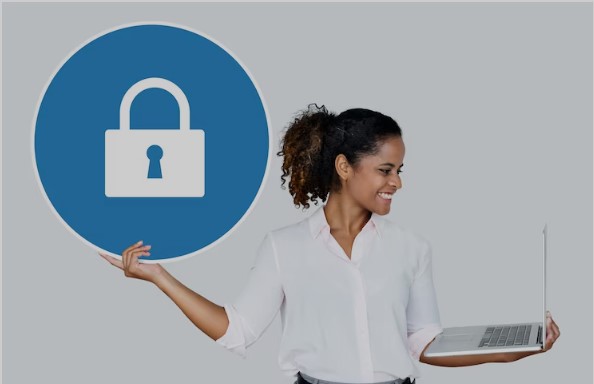
Everybody should take it upon themselves to understand how to protect their information.

7 Ways to Protect Your Social Media Presence

From checking your connection to having a strong password, choosing settings, and making intelligent decisions, here are the seven top ways to protect your social media presence.

1. Check Your Connection Is Safe

Internet security

Hackers can add malware or trojan horses to your account if your PC isn’t protected by anti-virus protection. These innovative virus-like programs can steal your login details.

Be mindful of accessing social media pages over a WiFi network in a coffee shop or internet cafe. It’s easy for hackers to access sites via these open networks.

2. Use a Creative Password

Some bots can guess passwords based on commonly used ones. Never use a person’s date of birth or mother’s maiden name, as they’re easily worked out.

A creative password that’s harder to hack consists of lower and uppercase letters, numbers, and special characters, with no recognizable words.

Consider a password security app that generates random passwords for each login.

An extra level of protection is to enable two-factor authentication, for example, a site password and a one-time password (OTP) on your smartphone.

3. Manage Privacy Settings

Privacy Settings

The default setting for any new social media account is ‘public.’ This designation means that anyone can see anything posted, and somebody doing a Google search for your name could bring up the post.

Popular settings are private, friends only, or custom. Think carefully about your intended audience.
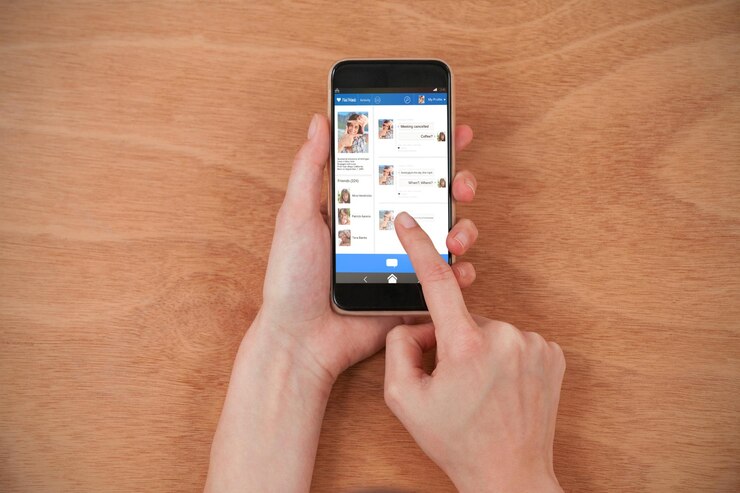
4. Approve All Tags

Friends love to tag each other, which is one of the social media’s many benefits. However, not everyone wants the world to know what they’re doing at any given time.

Most social media apps have an option for the person to allow or reject a post that includes them.

5. Don’t Automatically Accept Friend Requests

Accept Friend Requests

Many people like to build their friend lists on social media platforms, but there is a danger.

Accepting a request from a stranger could open the door to the site being hacked. Always check the profile of the person making the request; if it’s brand new with only a profile picture and nothing else, it may be a bot.

If a request comes through from someone who’s already a friend, it could mean they’ve been hacked. Before accepting it, contact them via another medium to confirm the new page is legitimate.

6. Think Before You Post

Before clicking the ‘post’ button, ask the question, ‘Would my grandmother like this?’ If the answer is ‘no,’ reconsider it.

Many people believe once something is deleted from the internet, that’s the end of it. Sadly, this isn’t true; things can be recovered.

Future employers may discover images and comments that paint a person in an unflattering light, so make wise choices.

7. Don’t, or Delay Sharing Location Data

Don't Sharing Location Data

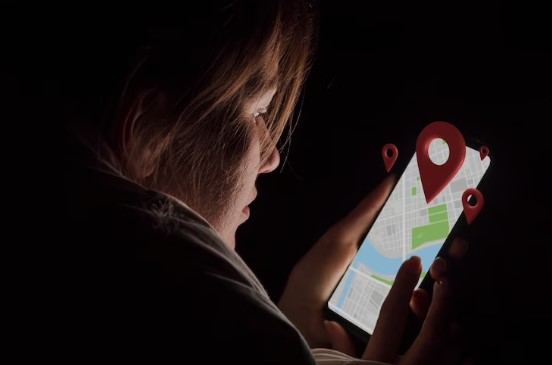
‘Check-in’ is a popular feature on many social media apps. While it’s fun to let everyone know where you are, it also tells others with bad intentions.

For example, checking into a shopping mall can let a stalker know where to find you. Alternatively, it can also let burglars know you’re not currently home.

Most smartphone cameras have a GPS function that stamps the image with the date, time, and location. A photo can give that data away even if you don’t use the ‘check in’ function.

Take the Time to Get Protected

As hackers get better at accessing people’s social media accounts, users can take steps to limit the chance of something happening.

Always be sure that the pages are being viewed on a secure network. Use strong passwords that aren’t easy to guess, and manage the settings early to decide who can access what.

Be vigilant about being tagged and accepting random friend requests. Think carefully about what gets posted, when, and from where.

Do these things, and there’s a fair chance a hacker will move on to an easier target.

Read Also:

Arnab is a professional blogger, having an enormous interest in writing blogs and other jones of calligraphies. In terms of his professional commitments, He carries out sharing sentient blogs.

View all posts

Leave a Reply

Your email address will not be published. Required fields are marked *

Related

How to Use Google Ads to Your Advantage

How To Use Google Ads To Your Advantage

Whether you're an experienced business owner or a newbie interested in raising brand awareness, it's time to learn how to use Google Ads to your Advantage. First Of All, Let's Define What Google Ads Is Google Ads is an online advertising platform. It allows companies to pay for ads that will appear on Google's Search Engine Results Pages (SERPs). By using the service, businesses ensure their ads will get in front of the desired audience. Now, do you know what a PPC is? It means pay-per-click. Every time a user clicks on your ad, you pay a fee. The difference between PPC and Search Engine Optimisation (SEO) is in the speed of delivering results. Experience has shown that if you only rely on SEO, it may take months before your content appears in SERPs' prime positions. On the other hand, PPC usually gives more immediate results. Of course, optimization is the key. Well-optimized ads can quickly appear above the organic search results. Is It Hard To Use Google Ads? Learning the basics of Google Ads is pretty straightforward. It only requires patience and consistency. Perfection takes time. People spend years creating the right concepts and incorporating them into their marketing strategies. Of course, Google Ads offers advanced features, but don't put pressure on yourself; you'll have the time to use them. Keywords Are The Foundation Of Google Ads Keywords are the words people type when searching for a particular product/service, seeking a solution to some problem, or having questions regarding, well, pretty much anything. Therefore, once you start creating a Google Ads campaign, make sure to create a list of keywords relevant to your business. Two factors determine whether your ad will win the prime position on SERPs : Bidding —The great thing about Google Ads is that you can limit how much you want to pay when a user clicks on your ad. This way, you'll prevent unnecessary costs. But, there's a catch — competitors. Remember, your competition will bid on the same keywords, and the higher you bid, the more likely your ad will appear instead of your competitor's. "Ad Rank" — Another vital component is Google's "Ad Rank" metric, based on ad quality and search context. Advantages Of Using Google Ads Paid ads on Google are a great way to get to the desired audience. However, that same audience shows animosity towards them. Still, one of the burning questions is, can the audience recognize when an ad is paid? A survey done by Deyan Darketing shows most respondents never recognize paid ads in search, a testament to the years of experience Google has in this domain. Google Ads is quite a beneficial platform from a business point of view. Here's why: PPC delivers fast results: and those who use it may expect almost an immediate increase in traffic to their websites. Google Ads can help you outperform the competition: Revising Google Ads reports give you insights if another business is outranking you on Google. To avoid unpleasant scenarios, you can set up target outranking automated bidding, giving Google Ads permission to lower or raise your bids, putting your ad in front of competitors'. Remarketing: allows businesses to show ads to users who have already been on your website's key pages. Serving ads to an interested audience increases the CTR (click-through-rate) and drives more traffic to your website. Google Ads offers valuable data: businesses use to adapt and improve marketing strategies. Information such as high-quality keywords and who clicked on your ad help advertisers make the right decisions regarding campaigns. Google Ads helps you increase brand awareness: Over two million websites, apps, and videos are on the Google Display Network, bringing more than 90% of internet users worldwide. It's Time To Establish How To Use Google Ads: Five Key Steps To Success It may sound daunting, but using Google's advertising platform is not rocket science. Give yourself time to learn, and before you know it, you will reap the fruits of success. Step 1: Create A Google Ads Account Creating a Google Ads account is relatively straightforward. Simply go to the Google Ads homepage and follow the steps for registration. Step 2: Define A Budget Plan Google Ads allows you to limit the amount of money you'll spend for bids on target keywords. All you should do is make a list of valuable yet affordable keywords and set a daily limit for each one. Step 3: Establish Your Goals It's revision time. Why do you want to use Google Ads? Do you want to drive traffic or raise brand awareness? Maybe both? Whatever the reason is, remember, the absence of a goal is a serious obstacle on your road to success. Step 4: Choose Your Fighter- A Winning Type Of Campaign To all the beginners out there: the 'Search Network Only' option is the most useful to start a PPC campaign. Also, don't forget to name your campaign. This step will help you track your results and keep everything in order. Step 5: Determine Your Target Audience Once you determine your target audience, it will be much easier to create relevant content. The goal is to attract people who have interests similar to your products or services. Once a user types your target keywords, your ad will appear, driving more traffic to your website. It's time to make ads. Create an ad that's relevant yet persuasive. It should have a unique headline and also be catchy. The final tip: Think about the URL. Remember, the display URL is the one you want users to remember so make sure it’s not overly long or complicated. Is Google Ads Suitable for My Business? It's safe to say Google Ads is a platform for almost every type of business. It is created to meet different budgets and goals and provide a variety of marketing solutions. Word of mouth is probably the best way to promote someone's business, but Google Ads is undoubtedly the second-best. The Power of Local Service Ads? While traditional Google Ads are a fantastic tool for most businesses, there’s an emerging trend specifically designed for local service providers.  Google Local Service Ads (LSAs). LSAs are a game-changer for businesses that rely on local customers, such as plumbers, electricians, or HVAC technicians.  What sets LSAs apart? Unlike regular Google Ads, you don’t pay per click. Rather, you only pay when a potential customer contacts you directly through the ad.   This means you’re not wasting money on people simply browsing; you’re getting leads from those ready to make a purchase or book your service. Plus, these ads show up at the very top of search results, even above PPC ads, increasing your visibility.  Why LSAs Matter?  In today’s competitive world, local businesses need every advantage they can get to stand out.   This is where LSAs come in!  LSAs provide trust signals like Google Guaranteed badges, which can help increase credibility. If your business serves a specific geographic area, not utilizing LSAs might mean missing out on potential customers who are actively looking for your services.  How to Get Started with LSAs  Signing up for Local Service Ads is simple. Head to the Local Services platform, enter your business information and choose the services you offer.   From there, set your weekly budget, and you’re ready to go. The best part? You don’t pay for clicks; you only pay qualified leads. More Resources: The Basics on Google Local Algorithm The Beginner's Guide to Small Business SEO 3 Major SEO Predictions for 2020

READ MOREDetails
Facebook orca error

How to remove pname com Facebook orca

If you have ever noticed the Facebook pop-up message on your Android device screen showing that pname com Facebook orca has stopped, then it is probable that you are on Google searching for a solution to this problem that is annoying. Do you wish to solve the pname com Facebook orca error today? This article, therefore, will fit in the picture-perfect solution for what your needs. In this write-up, you will get an explanation of all the info relating to the pname com Facebook orca error and katana. The meaning of pname com Facebook orca : Typically, pname com Facebook orca is the name of a package of Facebook messenger application on the smartphone. In simple terms, the orca folder belongs to the Facebook messenger application. In general, the orca folder acts as the storage for all images, files, videos, plugins, audios, videos, and cache from this app on the device. What is the connotation of pname com Facebook orca? Source It is possible that you have an alternative folder termed the com Facebook katana. Essentially, this folder belongs to the Facebook application. And just like the orca folder, the katana folder gets generated automatically after installing the Facebook application on the device. Katana is just like any other folder and does not have to be a source for your worries. Is pname com Facebook orca a malware? It is not malware at all. This Facebook orca folder is not a malware or virus. It is a folder that is just like other typical folders. It gets generated automatically after you install the Facebook messenger app on the device. Therefore, there is no need of getting worried or suspicious about anything. What if my pname com Facebook orca stopped? Majority of users of Facebook are faced with this problem. It is really irritating for the users when they have to deal with the pop-up message showing that Facebook has unfortunately stopped. Many people always ignore this message when it comes to the screen but it is good to note that it is never the right choice or solution. Since it will aggravate you over and over again by the message popping up, it is advisable to prepare to solve it eternally. Would you delete this folder? No, it is not necessary to delete the pname com Facebook orca folder. Because, even though you may delete this folder, it will just regenerate automatically and the errors will start popping up once again. Therefore, it is wise to leave this folder in the memory of your device and handle the problem. What is the importance or use of the pname com Facebook orca? This folder is extremely helpful when you have the desire of retrieving messages of Facebook that had been deleted or conversation from the Facebook messenger application that was erroneously deleted. You can only achieve this when you do it from the Facebook orca folder. Therefore, the pname com Facebook orca may be irritating but it is very helpful when you desire to retrieve the deleted Facebook Messenger tête-à-tête. One of the major utilities of the folder is that it restores your files of conversation in the same folder. And for that reason, the orca folder consumes so much space on the device when compared to other folders. The final solution to fixing the pname com Facebook orca folder problem : The first step is going to the option of settings found on the mobile device. You then go to the option of application then snap on the option of all apps. You will then have to locate the Facebook application and ensure that you clear data. After completing this, feel free to restart the Facebook application. When you follow this procedure, it will be possible to solve this issue since, in this practice; you are deleting the app data of the messenger. You just have to reset the application and you will not face this error any longer. What if you are being faced with a similar error after following this process? Yes, if you desire to fix this issue, you can try following another procedure and see if it will really function. Therefore, all you need to do is just uninstalling the Facebook application found on the device and then restart the device. After restarting the device, you will have to download the Facebook application again and then install it from the Google play store. For sure, it is now clear. The pname com Facebook orca error will be something of the past. In case you do not know the process of retrieving deleted conversations and messages by use of the orca folder, you will get the procedure to follow when it comes to retrieving deleted messages from the Facebook Messenger application. Methods of retrieving deleted messages from the pname com Facebook orca folder : Source The Facebook Messenger has so many ruses that very few individuals know about and this is yet another opportunity of seeing you mistakenly deleted messages from the platform of chat. What do you have to do? There are so many ways of recovering deleted texts from the Facebook messenger application. However, you will learn how to use the orca folder to recover your deleted messages. You need to follow these steps. The first step is going to the file explorer on the device. The explorer will assist you to explore folders on the device. If the device does not have the explorer, then you will have to go to the file manager or just type file explorer. Install it after downloading. After the installation, open the file explorer. Go the SD card at first. You will get an android file which has contents of all data relating to applications. Open the data folder and below it, you will get folders relating to all submissions. You will get the orca folder here and it belongs to the messenger. Click on it to open. You can now go to the name com Facebook orca folder. Inside the cache folder, you will see the FB temp folder. All backup copies of the messenger are here, and you can retrieve all the info you desire for both group and individual conversations you had through the application. You need to note that you can also retrieve that data minus using the file explorer application. For this, you just need to connect the phone to the computer by use of the cable and then find the pname com Facebook orca folder and then go to the folder to retrieve the info. The procedures above will give you the required understanding of clearing the pop-up error and you will enjoy using Facebook again. Conclusion : With all this information, you have all that is required to clear the pname com Facebook orca error. In case the problem persists, you can seek technical guidance from a reputable technician. Read Also : 10 Of The Best Facebook Pages To Follow Now The Definitive Guide To Market Your Business On Facebook Digital Marketing: Utilize Facebook To Support Your Hospitality Business

READ MOREDetails
Social Media Agency

How to Start Social Media Agency in India

If you are thinking of starting a social media agency, then you have to take care of some things which will give you benefits in future and you will be able to stay in the long term in the market. To begin any work, it is very important to do the right planning. This article talks about the social media agency, how to start it and some important legal registration. What Social Media Agency Do: A Social Media Agency is a Service Provide Agency which works for their customer and here some of their functions are given below Search Engine Optimization, it is very important because every time when you post anything on the Internet then you need of it because this will give you keywords, then you can use that keyword during uploading on Internet so it will reach to the maximum people. Social Media Advertising, Agency will promote your brand on Social Media, this is very important for any brand to reach maximum people on the Internet, social media agency will help you to promote your brand on social media. Social Media Audit, they will calculate your business on social media Competitor Analysis, they will provide you competitor analysis so you can use this for upgrading your business. How to Start Social Media Agency: The first step in starting a social media agency is creating of the website. You have to create a Website so people can see your profile and assign you to work. And with the website, you have to promote on social media so it will help you. You can also apply for Google Certification so you will avail many benefits from the Google. Pick up the Projects from the Freelancer, this is very easy and simple, you have to visit the Freelances website where you will find your customer and you can start work with them. Plan everything about your agency; planning is very important for staying in the market. Start a search for clients, and make good relation with them, a health-related is required for business. Set your Market price, because you have to compete with other agency also Create a good team and friendly environment is required for starting a social media agency so the team can work efficiently Legal registration with various laws is important because this will help you to take benefits from the government schemes and it will protect the rights of the agency. And also you have to make an entity for your business and have to register your business under Udyog Aadhar. Partnership Firm Registration: If you are planning to start a social media agency then you have to register your business also. If there is 2 or more partner in your agency then you can register your business with Partnership Firm. A Partnership Firm can be incorporated with the 2 or more person and it does not require the minimum capital contribution, you can start your business with any least capital. The process of Partnership Firm Registration is also easy and simple. You have to follow below-given steps First, you have to choose your Partnership Firm name, you can choose any name for your agency, a unique name will attract and you cannot copy other firm’s names so you have to choose a unique name for your social media agency. Then you have to make a deed/agreement for your partnership firm. In this deed, you have to mention each and every single detail of your social media agency and its partners. You have to mention rules and regulation of firm and details profit and a capital contribution of each partner. And this deed/agreement should be signed by all partners and notarized by a lawyer. The last step is optional, it is your choice whether you want to register your firm or not. If you want to register your firm then you have to apply for this under Register of Firm. It is very costly so it depends on you. Udyog Aadhar: If you are planning a startup then you should register with Udyog Aadhar. It is a unique number which is issued by the Ministry of Micro, Small and Medium Enterprises. After obtaining Udyog Aadhar Registration your agency will get many benefits like a loan on the minimum rate of interest or without interest, a subsidy from the government and many benefits from the governments. The process of registration is simple, you can apply for it online and it does not require any attachment of documents. After submission of the form, you will get your Udyog Aadhar number. Conclusion: If you are planning a Social Media Agency then you should register your business with Udyog Aadhar because it will give you many benefits, and also you should register with Partnership Firm because its incorporation is very easy and it does not require much compliance so you should consider above-given points in the article. Read Also: How To Market Your App Successfully Mobile App Marketing Agency This Is Why Social Media Is Essential In The B2B Sales Process

READ MOREDetails