Recover Your Lost Files from BitLocker Encrypted Drive

Published on: 11 May 2021 Last Updated on: 02 January 2025
Recover Your Lost Files from BitLocker Encrypted Drive

Data is an important pillar of modern society. This is why many people use third-party software to encrypt data and restrict any unauthorized access. Although this might offer high-level security to the data, at the same time, it adds difficulty at the time of data recovery.

Being a digital marketer, I ensure that nobody accesses my data. To do that, I use BitLocker to encrypt all my data. One morning when I was trying to access my photos, I found that the SD card was somehow damaged, and now I cannot access my photos.

This really startled me, as it was only a couple of days away or my clients’ photos were delivered. I Tried data recovery software to recover the inaccessible photos, but the efforts were in vain, as the BitLocker was resisting to do.

Fortunately, after several tries and integrating a couple of tricks, I was able to get back my photos. It was a great feat for me, and I thought that many individuals like me face the same problem. So, I took this opportunity to share my experience and how I was able to recover data from BitLocker encrypted drives.

How to Recover BitLocker Encrypted Files?

How to Recover BitLocker Encrypted Files?

Data recovery is a complicated and time-consuming process. There is data that can be restored or recovered from simple recycle bin recovery. The data recovery process is complex. I have come up with this solution to recover BitLocker encrypted data.

1. Recover Data from BitLocker Encrypted C: Drive:

As we know, C: Drive is the operating system drive.l the moment you start your system, new data keeps on adding to the system drive. So, the recovery of encrypted data depends on whether the lost un accessed files have been overwritten or not. In case of overwritten activity, you will not be able to get back your data. Instead, the data will stand corrupted.

However, if the data is not overwritten and is encrypted by the BitLocker, you can recover data by following the steps given below.

  • Once such a scenario occurs, stop using the drives to ensure data is not overwritten.
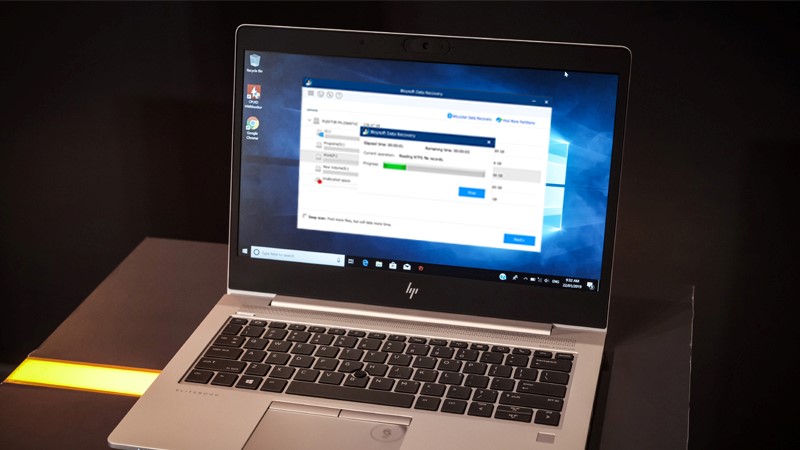
  • Download a data recovery software.
  • You will see the main interface with all the active drives in the system.
  • Select the targeted drive.
  • Initiate a scan.
  • Select the data you’re meant to recover and click “Recover”.

2. Recover Data from Encrypted Data Drive:

Data drives are the drives where you store data. The D: Drive and F: drive you to see are the data drive. If you cannot access these drives, you can follow the same process. The only difference will be that you will select the drive storage instead of selecting the system storage.

  • Download and install the data recovery software.
  • Select the BitLocker encrypted drive.
  • Run a scan.
  • Select the targeted data.
  • Click recover.

3. Recover Data from BitLocker Encrypted SSDs:

Today, instead of HDD, most systems have SSDs. While we use an SSD, we have no idea that it deletes data without our permission. I know this can surprise you. But that is the truth. Windows 7 or the other later ver5sion initiates an automatic TRIM on SSDs.

The only way to ensure your data is safe is to keep track of whether TRIM is enabled or not. Once you know that TRIM is Disabled, you can use the same steps to recover or access BitLocker encrypted data.

  • Download and install the data recovery software.
  • Select the BitLocker encrypted drive.
  • Run a scan.
  • Select the data you want to recover.
  • Click recover.

Conclusion:

To sum it up, yes, there are easy ways in which you can recover encrypted data. In this article, I have shared the methods I used to retrieve my data. I hope that these methods work in the same way as they worked out for me.

Read Also:

Content Rally wrapped around an online publication where you can publish your own intellectuals. It is a publishing platform designed to make great stories by content creators. This is your era, your place to be online. So come forward share your views, thoughts and ideas via Content Rally.

View all posts

Leave a Reply

Your email address will not be published. Required fields are marked *

Related

Cloud Recruitment Software

Transitioning To Cloud Recruitment Software: Benefits And Considerations

In the fast-paced world of modern recruiting, staying competitive and efficient is crucial. As technology continues to evolve, traditional recruitment methods are being replaced by more advanced solutions. One such solution gaining popularity is cloud recruitment software. In this article, we will explore the benefits of transitioning to cloud recruitment software and discuss the considerations that recruiters must keep in mind during the process. What Is Cloud Recruitment Software? Cloud recruitment software, also known as applicant tracking systems (ATS), is a SaaS-based solution that enables organizations to streamline their recruitment process by managing candidates, job openings, and hiring workflows in a centralized, online platform. This software eliminates the need for manual data entry, provides real-time updates, and facilitates collaboration among team members. The ATS is a particular type of onboarding software. It is available as on-premise systems and cloud-based software. Any application tracking system takes time to deploy (irrespective of the models). Ultimately, the process becomes quite efficient and fast, and experts opine that it saves time for every hire.  However, the cloud-based application tracking system gives a major advantage compared to the on-premise recruitment software.  Benefits Of Cloud Recruitment Software Cloud recruitment software has evolved as one of the most suitable recruitment techniques compared to existing systems. The following section discusses some of the core advantages of cloud software.  1. Enhanced Accessibility And Collaboration Cloud recruitment software breaks down geographical barriers and allows recruiters to access the platform from anywhere with an internet connection. This increased accessibility leads to better collaboration among hiring teams, ensuring that everyone stays on the same page throughout the hiring process. 2. Improved Candidate Sourcing And Management With cloud recruitment software, recruiters can easily source candidates from various channels, such as job boards, social media, and employee referrals. The software's candidate relationship management systems help in building and nurturing relationships with potential candidates, ensuring a robust talent pool for future requirements. 3. Time And Cost Savings Automating repetitive tasks and streamlining the recruitment process results in significant time and cost savings. Cloud recruitment software reduces manual paperwork, shortens the time to fill positions, and optimizes the hiring budget. 4. Data-Driven Decision Making The software provides in-depth analytics and reporting features that enable data-driven decision-making. Recruiters can track key metrics, such as time-to-hire, cost-per-hire, and source of hire, to assess the effectiveness of their recruitment strategies and make necessary improvements. 5. Scalability And Flexibility Cloud recruitment software is designed to accommodate businesses of all sizes, from startups to large enterprises. Its scalable nature ensures that it can grow alongside the organization's needs. Additionally, the software's flexibility allows for customization to align with specific recruitment workflows. 6. Quick To Deploy The cloud-based software deployment can be done within days or weeks compared to the existing or, say, the premise-based hiring system. The entire deployment of the system includes creating user accounts, migrating the data, and then customizing the features and tools. Also, many cloud-based systems are armed with chatbots and training elements that enhance the knowledge base of the seeker.  The particular resources are much more effective in providing the training. But in contrast to it, the premise-based software takes months to integrate into the system.  7. Technical Support Technical support is included in the premium services of the SaaS recruitment system. The best cloud recruitment software is integrated with the technical prowess to cater to the needs of the stakeholders. When you compared it with the existing software, it required a full in-house team to maintain data security. A full-fledged IT team was also required for the software update and security of data.  8. Security  With the help of the on-premise hiring software, you can not mingle between security and control. The HR recruitment software, if powered by the cloud-based vendor, offers a far more secure system compared to the existing technology.  Cloud-based technology is quite safe, and bulk data management is quite easy. You do not have to hire local servers to safeguard your data.   9. Integration The best recruitment software integrates with that of the recruitment tool. Some examples of IT include job board applications and onboarding software. The HR tech integration integration has traversed huge distances. Thus, hiring the tools integrated with the voluminous HR system. 10. Access To Mobile Phones  There is nothing better than mobile phone compatibility. The same is considered for the cloud recruitment software. With systems integrated with mobile phones, you can allow your recruitment HR professionals to work from home. It is, therefore, a major advantage compared to what was used previously.  Besides this, the cloud-based recruitment software enhances the experience as they always seek an easy-to-use system. This is why companies are slowly thinking of shifting from legacy software to that of the cloud system. Considerations For Transitioning To Cloud Recruitment Software Are you looking to transition from on-premise hiring to cloud recruitment software? Then, in that case, you will have to keep certain considerations in mind.  1. Data Security And Compliance As recruiters handle sensitive candidate information, data security should be a top priority. When transitioning to cloud recruitment software, ensure that the provider adheres to industry-leading security standards and compliance regulations. 2. Integration With Existing Systems Before making the switch, consider the compatibility of the new software with your existing HR or CRM systems. Seamless integration ensures smooth data flow and avoids duplication of efforts. 3. User-Friendly Interface And Training Choose a cloud recruitment software with an intuitive user interface that is easy to navigate. Proper training and onboarding for the recruitment team will accelerate the adoption of the new system. 4. Vendor Support And Upgrades Select a reputable vendor that offers reliable customer support and regular software upgrades. This ensures that your recruitment software remains up-to-date with the latest features and security patches. Final Thoughts Transitioning to cloud recruitment software can revolutionize your hiring process and bring unparalleled efficiency to your recruitment efforts. Embracing this technology allows you to stay ahead of the competition in the ever-evolving talent landscape. Remember to consider data security, integration, user-friendliness, and vendor support when making the switch. Read Also: CRMDialer: A Zoho Alternative 6 Top CRM For Small Businesses In 2019 Cold Calling Script For Successful Sales Persons

READ MOREDetails
Internet Speed Tests

5 Easy Ways of Improving Internet Access with Speed Tests

Speed tests are a very handy tool to have around. Most people just use them sporadically when experiencing internet issues. At most, they want to check what speeds they’re getting with their internet plans. Speed tests, as the name suggests, give you information on the upload and download speeds you’re getting with your internet connection. But did you know you can actually use that information to improve your internet access? This blog explores five ways you can use speed tests for a better internet experience. Improving Internet Access with Speed Tests Speed tests usually test the upload and download speeds as well as the ping on your internet connections. These days, when everyone is connected to the internet, almost every household experiences internet issues of some sort. People use speed tests at times like these to check their broadband, Wi-Fi and cellular speeds. But there’s actually a lot more than you can do with an accurate speed testing application like Ookla. Here are 5 easy ways you can use a speed test to improve your internet experience: Find the Fastest Internet Service, Provider Identify and Fix Dead Spots Around the House Confirming You Are Getting the Advertised Speeds Finding Places with the Best Internet Service Isolating Problems with Your Router or ISP Below follows more on these simple uses for a speed test you probably never thought of. Find the Fastest Internet Service, Provider Speed check is a great way to find the fastest internet service provider in your area. You will need the help of a few friends and family members with different service providers in your area. Get each person to run an Ookla speed test. Everyone should run the test on their internet connections at exactly the same time. Ask everyone to make sure their Wi-Fi is switched off when they run the tests. Share the test results with each other and compare them to figure out the fastest ISP in your area. After that, it is a simple matter of switching from your current provider to the fastest one. Identify and Fix Dead Spots Around the House A dead spot is a spot inside your home where Wi-Fi signals are patchy at best or dead at worst. Dead spots can be really annoying when you try to use the internet near them. Streaming, gaming, even working may face disruptions in Wi-Fi dead spots. Luckily, speed tests can help you identify and fix dead spots inside your home. Run a speed test in the areas you experience patchy network signals. This will tell you if you’re working in a dead spot or if your router is placed in one. Often enough, moving the router can fix most dead spots. However, if that is not a possibility, then look into Google WiFi or similar mesh systems for a better signal around the house. Confirming You Are Getting the Advertised Speeds Speed tests are a great way to test your internet connection to check if you are getting the speeds you paid for. Simply use an Ethernet cable to connect your computer directly to the router. Then run a speed test and see what speeds you get with a wired connection. Most internet service providers advertise speeds based on a wired connection to the gateway. This means the speeds you get over Wi-Fi may vary. But if you’re getting slower speeds on a wired connection, you should get in touch with your ISP right away. Use the speed test results as proof of not getting the speeds you are paying for. Finding Places with the Best Internet Service Let’s say you decide to work from home one day but your service is on the fritz. So you go to the nearest coffee shop only to find the Wi-Fi there isn’t working well either. Nightmare situation, isn’t it? You can’t miss your deadlines, so what should you do? Use speed tests at different places with free internet. This will help you locate a place that has the best internet service. Of course, public Wi-Fi speeds also vary according to the time of day. During crowded times like weekends, holidays or even lunch hours, there are more people connected to the same network. The more people use the same network, the more bandwidth splits and the slower the connection gets for everyone. Isolating Problems with Your Router or ISP When there’s a slow Wi-Fi connection, the problem could be with your ISP or with your router. 2 Speed tests can help you identify where the problem lies. For the first one, connect your computer directly to your router via Ethernet and run a speed test. Then disconnect your computer from the cable and run another test while connected to Wi-Fi. Bear in mind that Wi-Fi will always be slower than a wired connection. But if the difference in speeds is significant, you may need a new router. Most providers offer their own equipment. So it's better to call customer service, if your router is outdated or not working. Hopefully, this blog will have helped you with useful information to improve your internet experience at home. Let us know if you found this blog helpful. Read Also:  Unlimited High-Speed Internet Plans Of Charter Spectrum In The USA Quick Ways To Instantly Speed Up Your Home PC Network

READ MOREDetails
Practices for Visual Regression Testing on Cloud

A Beginner’s Guide To Playwright Inspector

As the world continues to shift towards a more digital landscape, the significance of quality web applications has become progressively apparent. Given the vast array of tools and technologies at the disposal of web developers, determining an appropriate starting point can prove challenging. Debugging is the method of identifying and fixing bugs or errors in software. It is a vital aspect of web automation testing as it contributes significantly to the dependability and precision of the automated test results. Playwright is an open-source cross-browser testing framework released by Microsoft in 2020. As stated by Systems Sciences Institute, the expenditure of addressing an error or bug discovered after product release was 4 to 5 times higher than pinpointing it during the configuration phase. The detected value during the maintenance phase can be exceeded by up to 100 times. Playwright developers operate at the API level and offer comprehensive tooling through the integrated Playwright Inspector. Playwright Inspector is a powerful tool that authorizes developers to efficiently test and debug their web applications. Also, it facilitates creating automation scripts by furnishing auto code generation capabilities. Playwright Inspector allows you to inspect the Document Object Model (DOM) structure of a webpage, interact with web elements, and inspect CSS styles utilizing the Playwright API. It authorizes stepping through tests, picking locators, editing live locators, and seeing actionability logs. This blog will dive into the basics of Playwright Inspector and explore its many features. So if you're ready to take your web development skills to the next level, buckle up and dive into the world of Playwright Inspector. Before that, let's have a brief understanding of Playwright. What is Playwright? Developed by Microsoft, Playwright is an end-to-end open-source web testing and browser automation framework. Playwright offers outstanding cross-browser compatibility and convenient features. This makes it a perfect choice for automation and quality assurance purposes. The playwright is a flexible, robust, and efficient framework. It supports multiple languages like JavaScript, Java, Python, C#, and TypeScript. Playwright utilizes a single automation API. This makes it steadfast and quick and produces consistent outcomes while running cross-browser testing. It provides a powerful set of testing features. These features can be utilized to simulate end-user interactions with the web application. Also, the framework authorizes testing complex scenarios such as file uploads, login flows, and other interactions. These test scenarios can be tough to test with other testing frameworks. The software platform furnishes developers with a comprehensive selection of standard and personalized locators. This facilitates the straightforward and effective identification of elements on web pages. These locators can pinpoint elements based on a variety of attributes, including text content, position on the page, and other distinguishing features. With Playwright locators, developers can confidently identify elements on the DOM, ensuring the creation of substantial and steadfast test suites. What is a Playwright Inspector? Playwright Inspector is a Graphical User Interface based tool that helps testers and developers record scripts and debug Playwright tests. The tool helps generate boilerplate code. This can be a suitable starting point for building codes. Also, it assists developers and the Quality Assurance teams save time when writing the test script from scratch. Software developers can utilize the time saved to comprehensively understand the codebase and make informed modifications, as required, to enhance the efficacy of the testing suites. The Playwright Inspector simplifies the process of debugging web applications. It is a browser-based development tool that facilitates developers to inspect, debug, and troubleshoot web applications. The tool authorizes developers to record user interactions, capture screenshots, and inspect HTML elements, CSS styles, and JavaScript code. Playwright Inspector furnishes a console for developers and testers to run arbitrary JavaScript code in the context of the inspected page. To scale Playwright Inspector, an AI-powered test orchestration and test execution platform like LambdaTest offers an online farm of 3000+ browser and OS combinations to execute the Playwright test. You can effortlessly test your application as its scalable cloud infrastructure enables parallel test execution where you can run test cases altogether. It can also integrate with your existing testing infrastructure. It effortlessly plugs into your Playwright tool, eliminating the need for complex configurations. LambdaTest's Playwright Inspector  empowers you to debug and analyze Playwright scripts effortlessly. Inspect element properties, verify page behavior, and optimize automated tests using this user-friendly tool. Installation and Setup Instructions Installation and setup instructions are crucial for any software tool, and Playwright Inspector is no exception. As a beginner, it's essential to follow these instructions carefully to ensure that you can start using the tool without any issues. To install Playwright Inspector, first, you need to make sure that you have Node.js installed on your computer or laptop. Once you have Node.js, you can install Playwright Inspector through npm by running the command "npm i -g playwright-inspector" in your terminal. Upon successful installation, the tool can be initiated by executing the command "playwright-inspector" in your terminal. You can also use Playwright Inspector with other browsers like Firefox and Safari by installing the corresponding browser extensions. Following these instructions will give you a smooth and hassle-free experience of using Playwright Inspector, authorizing you to debug and troubleshoot your web applications with ease. How to Inspect Elements in Playwright Inspector If you are new to Playwright Inspector, you may be wondering how to inspect elements within your web page. Fortunately, Playwright Inspector comes equipped with a number of useful tools and features to assist you in efficiently identifying and inspecting elements on your web page. To start, simply launch Playwright Inspector and navigate to the web page you want to inspect. Once you are on the page, right-click on any element within the page and select "Inspect element" from the context menu. This will bring up the Playwright Inspector pane, where you can view the HTML and CSS code for the selected element. You can also view any associated styles and properties. From there, you can use the various tools and features within Playwright Inspector to further inspect and manipulate the element, making it easier than ever to identify and troubleshoot any issues within your web page. Benefits of Playwright Inspector The Playwright Inspector tool presents lots of benefits. Let us consider a few pivotal benefits of the Playwright Inspector: 1. Easy Debugging: Playwright Inspector facilitates the process of debugging Playwright scripts by furnishing a visual interface. This authorizes developers to inspect the page, make alterations to its state, and swiftly identify the cause of issues. 2. Record and Replay: The tool presents a record and replay feature that authorizes testers and QA teams to record end-user activities on the page and replay them for debugging purposes. The record and replay feature can help pinpoint issues that may occur only during specific user interactions. 3. Robust Logging: Playwright Inspector presents robust logging abilities that authorize testers and QA teams to outline the execution flow of the test script. This helps swiftly determine issues and fix them, thereby enhancing confidence in the code and application itself. 4. Intuitive Interface: The Playwright Inspector boasts an intuitive and user-friendly interface that is simple to navigate and operate, even for testers and QA teams who are new to the Playwright platform. 5. Cross-Browser Support: The Playwright Inspector facilitates the testing and debugging of applications across various platforms as it supports multiple Chromium-based browsers such as Chrome, Edge, and Firefox. This enables developers to ensure their applications perform optimally on different browsers. 6. Breakpoints: The Playwright Inspector tool is designed to enhance the testing process for software testers and QA teams. With this tool, users can set breakpoints in their test scripts, enabling them to pause test execution at specific points and thoroughly investigate the page's state. This increased level of control and visibility allows for improved efficiency and effectiveness in the testing process. Best Practices for Using Playwright Inspector The Playwright Inspector tool furnishes developers with an intuitive solution for testing web applications at scale. With the help of Inspector, developers and testers can debug their web automation scripts, view page elements and attributes, and pinpoint issues that may be causing the tests to fail. To make the most out of this tool, it is paramount to follow the best practices for using it. Here are eight best practices for using Playwright Inspector: ●        Familiarize yourself with the Inspector UI. ●        Utilize the search feature to swiftly pinpoint page elements. ●        Utilize the highlight feature to visually locate elements on the page. ●        Utilize the console to test JavaScript code and interact with the page. ●        Utilize the network tab to inspect network requests and responses. ●        Utilize the performance tab to pinpoint performance issues. ●        Utilize the snapshot feature to capture a snapshot of the current page state for later analysis. ●        Utilize the playback feature to replay test scripts and identify errors. By following these best practices, you can utilize Playwright Inspector to its full potential and optimize your web automation testing process. Conclusion Playwright Inspector is a powerful tool that can help developers troubleshoot issues and enhance the quality of their web applications. With its user-friendly interface and wide range of features, Playwright Inspector is a prominent addition to any developer's toolkit. By following the steps outlined in this beginner's guide, you can start utilizing Playwright Inspector today and take advantage of its many benefits. Whether you are a seasoned developer or just starting out, Playwright Inspector is a must-have tool for anyone looking to enhance their web development skills. Read Also: Mobile Testing With Appium On Lambdatest 10 Reliable Free Currency APIs For Your Business Using Tracking Code, Google Analytics Can Report On Data From Which Systems?

READ MOREDetails