Things to Consider Before Relocating the Outdoor AC Unit

Published on: 10 August 2020 Last Updated on: 31 October 2024
Outdoor AC Unit

In some situations, relocating your outdoor AC unit sounds like a good idea. Perhaps it is in the way of some landscaping project you have in mind, or it is too close to the window, causing some noise, or you simply want to have it moved for aesthetical reasons.

Whatever your reason is, there are two things you need to be aware of. Yes, it is possible to move your outdoor AC unit, and you really need to consult HVAC professionals before doing anything about it.

We reached out to some experienced HVAC experts and asked them to share some insights into this topic.

The Relocation Isn’t Easy

Here’s the problem with relocating your AC unit – it’s not as simple as unplugging an appliance and moving it to a different place and plugging it back in. There are some parts of the HVAC system which are hardwired in your home and changing that may require a lot of work on your home.

So, before you definitely decide that you want to go for it, consider other options, like integrating the unit in your landscaping design or building a small fence around the unit at a reasonable distance from the unit itself.

Sensitive Equipment

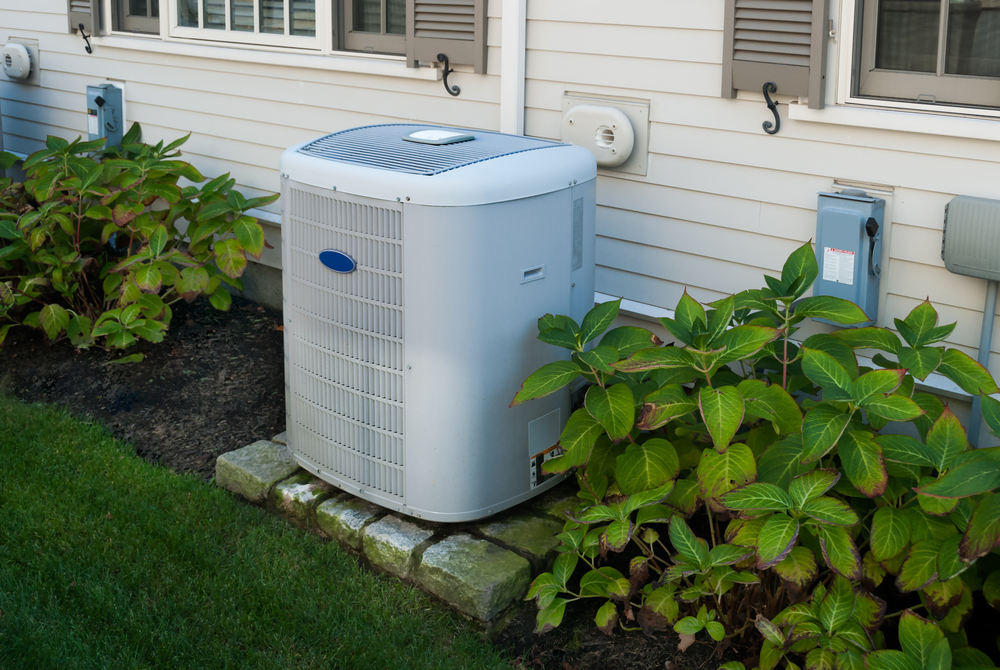
One of the biggest problems with relocating your AC unit is certainly all of the sensitive equipment inside the unit itself. Not only are the fins of the condenser very thin and can easily be bent and damaged, but there is a lot more inside the unit that you may not be aware of.

The refrigerant inside the condenser needs to be kept level in order to work properly, and some of the cables and lines, and especially the pump, are very fragile and need to be approached with care and expertise.

How It’s Done

If you have made up your mind and want to relocate your unit despite the difficulties, you will need to prepare your home and backyard first. As mentioned above, the outdoor HVAC unit needs to be level in order to function properly.

That means that you will need to prepare the place where you expect your unit to sit. Most experts will recommend leveling the ground and using a cement to ensure that the new location is flat and sturdy enough to support the hefty unit. However, as long as you can achieve the flat surface for the unit, it is not necessary to use cement.

There is also a matter of rerouting all of the hoses and pipes going from your house to the outdoor unit. In some cases, it can be fairly simple and straightforward, but if you are moving your unit a considerable distance, you may need to do some more extensive work on your home.

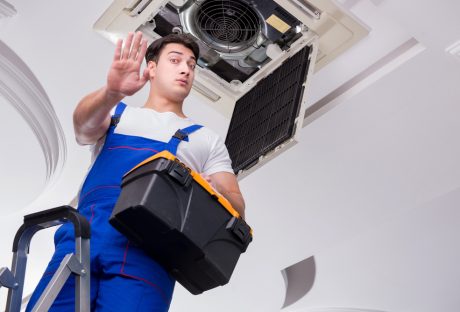
You Do Need HVAC Experts

In order to relocate your unit successfully and safely, you will need an HVAC technician to do it. Before you can do anything, you will need to pump out the refrigerant from the unit – something only a qualified HVAC expert can do safely.

The other reason why you shouldn’t handle this task on your own is the electricity – you will need to disconnect and reconnect the unit once it has been moved. If you’re not a qualified electrician, the chances of you doing this right are not very good.

Finally, once the unit has been relocated, you will need to inspect the unit and ensure that everything is working fine and that all of the connections are done correctly. Of course, the only person who can tell you that is a certified HVAC technician.

Consulting an expert before you go into a project can be very valuable, especially if you are operating under a strict budget.

Read Also:

Content Rally wrapped around an online publication where you can publish your own intellectuals. It is a publishing platform designed to make great stories by content creators. This is your era, your place to be online. So come forward share your views, thoughts and ideas via Content Rally.

View all posts

Leave a Reply

Your email address will not be published. Required fields are marked *

Related

Remote Working

Try These Mac Screen Recording Software For Your Next Webinar

Sometimes, it's better to show than tell. That applies perfectly to your webinar. Maybe you want to show webinar attendees how to use your new product. Or perhaps, you plan on showing graphs and charts to drive a specific point home. Sure, you can describe these to your audience with the Mac screen recording software. But wouldn't it be better to show them instead? And suppose you are planning on using automated webinars to promote your products or services, establish industry authority, and build trust between your company and your target consumers. In that case, you'll need to find the best screen recording tools for webinars. Here's a brief rundown of the best screen recording software to choose from. A Few Important Things To Remember Before You Record A Webinar In the last few years of the pandemic, teachers, for example, have been forced to become aware of online streaming platforms and webinars. They have to hold sessions, take classes, become part of conferences and more. A good idea would be to learn from webinars for teachers and get the necessary knowledge to do better when you hold one on your own. Before choosing a webinar  Mac screen recording software, you should understand a few things out of the way. First, new things incorporating are always good when you are well aware that your work’s software is becoming simpler. For starters, you need to decide whether you are just going to share your screen with your viewers or if you are going to show your face on the screen. Most screen recording tools allow you to show your face while you are sharing your screen. Deciding on this is critical. It may take some trial and error to set the best configuration if you choose to show yourself while sharing and recording your screen. Next, you'll have to decide whether you are going to share a slide deck with your audience or just yourself while doing a presentation. For the former, you'll need to use presentation software like PowerPoint and Keynote. Alternatively, you can just display images on a slideshow using software like Canva. Finally, you have to make sure that you have everything that you need to record a webinar, from a good microphone to the right location that's free from unwanted background noise and other distractions. 5 Top Screen Recording Software To Choose From With these prerequisites out of the way, it's now time to choose the right  Mac screen recording software for the webinar recording. Here's a brief description of each option. 1. Camtasia Camtasia is a screen recording software that works with both macOS and Windows. One unique advantage of this software is that you can work on a project on either operating system. For example, you can record your screen on your Mac and then have someone who's using a Windows computer edit and polish your recording. With Camtasia  Mac screen recording software, you can record your whole screen or just a portion of it. Camtasia is also available on mobile, enabling you to use media stored on your smartphone. Camtasia also has video editing capabilities, enabling you to polish your recorded webinar before publishing and sharing it with your target audience. 2. Screenflow Screenflow is another good  Mac screen recording software that is a perennial favorite of people who host webinars. And there are a few reasons why. For starters, the software is affordable, making it accessible to small business owners. The software is also versatile. Aside from using it to record your screen, you can also use it to record your webinars. Other notable features include annotations, filters for both audio and video, zoom and pan motions, and more. 3. Screencast-O-Matic Screencast-o-Matic is a browser-based screen recorder. Before you can use this software to record a webinar, you will need to download and install an application and get an annual membership subscription. After installing the software and creating an account, you can then record your upcoming webinar. Although the software has a few nifty features like zoom and drawing on the screen, you have to take note that you can't record your entire screen. Instead, you can only record an area on your screen. 4. Tiny Take If you're bootstrapping, Tiny Take is one option you should strongly consider looking into. Although this  Mac screen recording software used to record a webinar may seem basic to some people, it's free and does an adequate job of recording your screen. It comes with basic features like zooming, panning, and a bunch of special effects. 5. Zoom Over the past few years, Zoom has emerged as a popular platform for holding meetings online. But unknown to some users, you can also use Zoom to record your screen. Plus, it has a free screen recorder feature, perfect for smaller businesses looking to minimize their expenses. You can then save your recording in mp3 or mp4 format. Take note that mp3 is audio-only. Meanwhile, the mp4 format records both audio and video, which you can polish through video editing. Webinar Recording For Your Next Show And Tell Showing yourself in front of an audience is a great way to humanize your company. Instead of just showing a product or a service, your prospective buyers can see and identify with another person who faces the same problems as they have. But sometimes, showing yourself in front of the audience is not enough. To explain and make a complex idea more accessible or to back up certain points, you might need to use a robust Mac screen recording software for your screen. Read Also: Top 10 Apps for Team Communication and Remote Work Top Utility Tools You Need For Your Website Why You Should Always Use Special Effects for Video Productions

READ MOREDetails
PDF To JPG

How Should A Newbie Get Along With a PDF To JPG Converter

Since the digital space is increasing its presence in people's lives, people are trying to learn new techniques of using the internet in the best ways possible. There are several uses of the internet, which can make your life easy. The new generation that is being brought up is very well equipped with technology and the internet.  Most of the operations of various companies have also shifted online. However, people still struggle with small tasks such as converting documents from one format to another. If you want to get your work done, then you need to learn the techniques to convert PDF to JPG, PDF into Word, JPG into Text, and other such formatting skills. This guide can help you understand the working of PDF to JPG converters if you are a beginner. Open a conversion site First of all, you need to choose a conversion site for PDF to JPG converter, reliable and authentic. Check out user reviews to find which of the conversion sites provide the best experience and output. Once it is chosen, you need to open it on your desktop, laptop, or mobile screen. Select PDF for conversion The next step after identifying the conversion site is the selection of PDF that you want to convert into JPG format. It can be done by choosing "open files" or "browse files" whichever is present in the conversion site. Some websites even have the option to "drag and drop " the files for conversion along with the "get URL" option if you want to open the document from the link. Authorize a format for output Once the files have been uploaded on the conversion site, you need to authorize the format of the output. This format is the type in which the user wants to convert the PDF. Select the option of JPG under image conversions to convert the document from PDF to JPG. Choose the medium of download It may take a few seconds to get the documents converted into JPG, depending upon the length and size of the PDF. Many conversion websites have a bar on the extent that is permissible to be converted by. It is not so with the PDF to JPG converter. Select the number of pages for conversion Before the conversion gets started, you will get the option of selecting the pages that you want to convert. Two choices regarding this are available as - 'convert all pages' and 'extract single images.' You can tap on any of the icons as per your suitability to get the JPG. Download the converted files in the selected format Once the download is complete, you are good to go. There is an option available for direct download in the system or email it to your ID. You can get the converted JPG images in a Zip file also to keep them intact together. All these steps can help you to begin well with a PDF to JPG converter and learn more such techniques on the internet. Read Also: Top Five Alternatives to MegaUpload in 2016 Popular Apps for Downloading HD Videos

READ MOREDetails
routers

Best Performing Routers In 2021

The best routers are always the best option to get secure network connectivity. In 2021 the wireless routers are coming in many varieties and brands. The wireless features are always the best-required features of the routers. As in the modern generations, every gadget needs internet connectivity, software, and applications are becoming the essential part of every gadget. When you search for the best internet connection provider, the ISP’s names instantly come into your mind. For subscribing to the best ISP. You have to research for days on the internet near me. But after the subscription, if you do not have a good conditioning router. The internet connectivity is lacking the perfection level. 4 Best Wi-Fi Routers In 2021 These types of trouble for routers are common. There is only a single solution to recover the problem is to upgrade your home network. You have to configure a family value device in the network and provide it without the dead spot. Let’s have a look at the top four best wireless routers for 2021. 1. Compatibale TP-Link Archer AX600 In 2021 not only the roust feature routers are making the difference. Along with the features and the looks, the router’s compatibility issues are always playing significant roles. You are going through many devices features and, at last, can not fix your mind over the product for the compatibility issues. In the 2021 WIFI, six is the modern and the fastest iteration of Wi-Fi. So you should constantly shift into the Wi-Fi 6 routers. These router’s options are more compatible with smartphones and the iPhone SE. For higher configuration smartphones, you are going to need a more backward compatible connectivity. Your polder gadgets are getting faster when you are using this latest wireless router. Are you searching for the routers options which give you the maximum transmission speed with the highest range and the lowest latency level? Then take a look at the TP-Link Archer AX6000. And we can guarantee this has the most significant good report from the consumer’s feedback. 2. Budget-Friendly D-Link DIR-867 The next which comes to our popularity list is the D-Link DIR-867.iF you are searching for new wireless well-performing routers. But you have a limited budget. This router option is the best suitable for your choice. The DIR-86 7 is still the best router out of all routers we reviewed. When you are going to compare the work efficiency level and the budget of the routers, you are also going to agree with us. This router is an outstanding performer for both the qualifying parameters, the high-performance, and the real-world range checks. Moreover, you can enjoy the clock with the highest mean download rates in the 2.4GHz frequency spectrum, which is faster than the other routers. Even this router owned the 5GHz channel, which is quite a unique feature for any budget-friendly router. And you can see these features here and enjoy faster connectivity without spending a big budget.  3. High Performing Google Wi-Fi Google Wifi is one of the high performer routers on the list. When you are looking for the mesh router choices, these choices are coming to the top priority list of the users. This powerful, well-performing router is maintaining its standard for the past few years. The easy configuration part and the speedy connectivity both make these routers competitive. These routers are performing on the basis of the second genre follow-up. The routers are faster and widely used for mesh networking connectivity. The ranges extending features are making the routers unique and attractive for smart speaker users. The attractive features of the routers are you can do the experiment with multiple colors. It does not support Wi-Fi 6.some of the new cool features are not added to the packages. For example, the package does not include modern WPA3 protection and 4X4 MU-MIMO connections requirements. 4. The Gamers Choice Asus RT-AC86U For the game enthusiast, faster and robust connectivity is always required. This router choice is pretty tempting for professional gamers. However, when you often find an excellent compatible gaming router for your use, the pocket pinch is very high. Within $200, the router’s choices are very limited. But this 5GHz band Wi-Fi 5 router, the RT-AC86U dual-band router, is the outstanding performer on both ends. You will get a higher connectivity level within the $150 budget. This is one of the best latency check gaming routers in the market. The lower average ping for hundreds of speed tests makes the router unconditionally well-performing and prioritizes the gamer’s choices. This router is wifi six compatible. You will get many well-performing sophisticated network settings within your package. Among the dual-band router choices, very few are available within this budget and the features. This is the reason this router is widely prevalent among gamers. Bottom Line When you are looking for the best wireless routers often have certain essential features. According to the features and the compatibility issues, the prices and the functionality of the routers will be different. The main target is to get the network connectivity without interruptions. These four are the best available choices for you within your budget. Read Also: Quick Ways to Instantly Speed up Your Home PC Network Fax Over the Internet

READ MOREDetails