Review on Free Data Recovery Wizard Based on Photo Recovery

Published on: 11 December 2017 Last Updated on: 30 October 2024
Data Recovery Wizard

We all know the benefits of data recovery. It is always recommended to have a backup of every work that you do. But do you know that it sometimes these data recovery options also fail you? During these emergencies, you are left with handful options only and that includes recovery software.

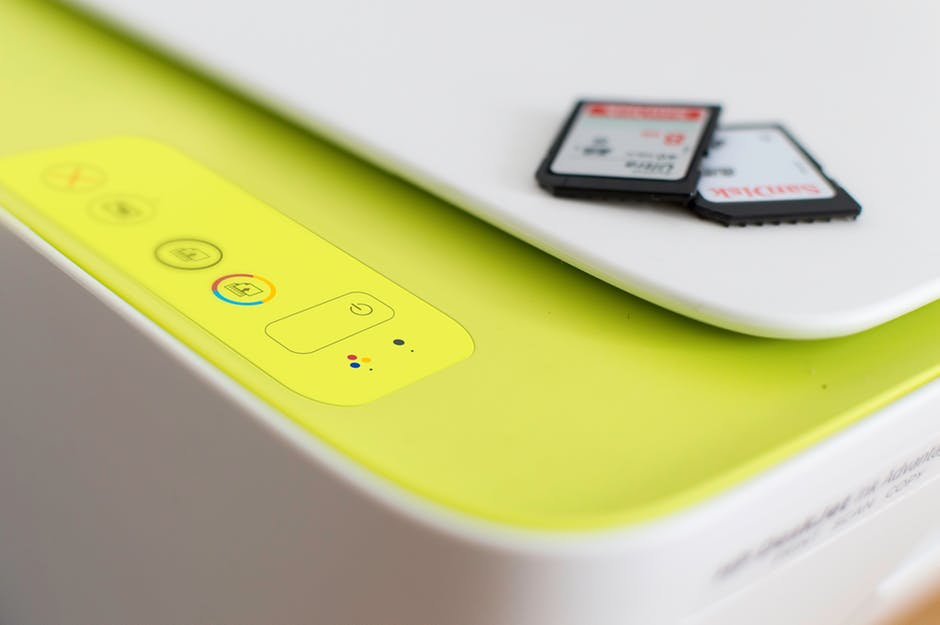
We all are in the 21st century and all of our work is done on digital appliances which include laptops, mobiles, desktops, tabs and many more. There is a hardware which has a storage device inside it but then sometimes due to infection from a virus or just due to mishandling, this storage fails or we can say corrupts this is the time when we say that our memory card or hard drive has failed us. Sometimes it happens that we lose a few photographs that were really close to our heart and this drives us crazy. In this article, we will see the possible ways due to which we could lose our photo and then we will find the solutions which could possibly eradicate the problem and help us regain the photo back.

Photo Recovery Software

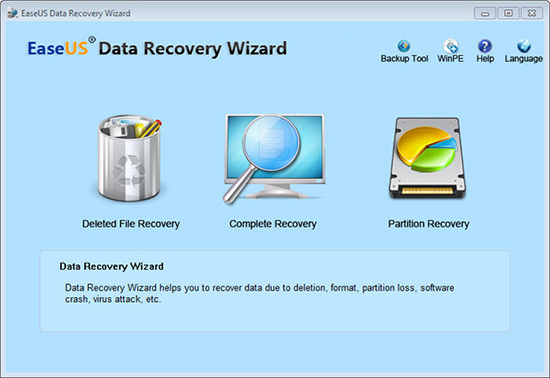
The process of recovering the data is called data recovery but when we recover the photos, it is known as photo recovery. We have a lot of software in the market that can do this stuff for you but EaseUS is the best in all those. It has a very userfriendly UI and while installing you will not find any problems in any step.

How You Can Lose Photography Data and How the Software Can Come in Handy

While you are using the camera to transfer the photos to some other device. There is a process going on in which the data is being coded and encoded from one place to another. If by chance in this process you tend to remove the memory card (the storage device) then you can face the problem of data loss and then the software Wizard of data recovery will be handy and can come in use.

While you are taking off the photo and the camera is switched off. You can lose a lot of memory at this time even.

Steps to Data Recovery

There more to this but when it comes to recovering data there are just 3 simple steps that you have to take before you could recover your data back.

The first step includes the launching part. You have to write or download the software in your desktop and launch it. There are no product key or ids that you will be asked.

The second step is scanning. All the files of your desktop will be scanned. This is really important to get the information of your complete system.

The third step requires the recovery part. Once your system is completely scanned and functional, you will have to just click on the recover button and then all the data will be recovered.

Why Use EaseUS Data Recovery

EaseUS data recovery wizard has an easy guide so that it would not build up to your sticking mind. This guide will help you recover photos from almost every system including SSD, USB, hard drive, digital camera, memory card until all the lost data is recovered.

You must be aware of ransomware, wannacry, valueless and many more cybercrime attacks. This software keeps you away and safe from all of them. But if in case you lose any data due to accidental deleting, formatting, hard drive failure, virus attacks and much more you can simply use this software by EaseUS to get back everything you lost in the nick of time.

So, getting you hands-on this helpful and good software will keep you and your precious photos safe.

Read More:

Content Rally wrapped around an online publication where you can publish your own intellectuals. It is a publishing platform designed to make great stories by content creators. This is your era, your place to be online. So come forward share your views, thoughts and ideas via Content Rally.

View all posts

Leave a Reply

Your email address will not be published. Required fields are marked *

Related

recovery software

Best Deleted photos recovery Apps for Android

tPhotos or pictures are one of the most beautiful things that remind people of their beautiful times. Capturing photos helps people to capture the sweetest times of their lives and also helps them to appreciate their lives by keeping their memories and moments alive. Recovery Software can make things easier for you. Every individual or a person wants to keep the photos with them for a whole life because it gives happiness, and helps in reminding the past and the most beautiful memories of lives. A person always wanted to keep various moments of life safe that’s why they store their photos in many storage devices like computers, laptops, hard drives, SD cards etc. Losing photos is the biggest fear of any person and can make them sad, unhappy and frustrated. Nobody wants to lose their photos but sometimes accidentally photos get deleted by virus attacks, user negligence, lost partitions, or system crash and can cause a major disturbance and sadness to a person. It is not very easy to restore or retrieve the deleted photos but now with the help of advanced software’s, it becomes possible to recover the deleted photos permanently. Much software’s are available for data recovery but only a few of them are worth using which can help in recovering the photos permanently. Below is the list of various best deleted photos recovery applications for Android on play store. Different Ways The Recovery Software Can Make Things Happen In Your Favor 1. Disk Digger Disk digger is one of the simplest and the most trusted recovery apps on play store. It is free software and works even with unrooted devices. It is very easy to use software and is compatible with Android 2.2 and more. This software provides two modes for restoring the photos from Android phones i.e. Full scan and Basic Scan. It also helps the user to identify the files from the preview screen generated before retrieving and also it informs the user about damaged files that can’t be retrieved. The restored photos can further be saved into storage devices and can be sent to drop max, Google drive, and emails. So, this is nice software and deserves the chance of being used at least once. 2. Wondershare Dr. Fone Wondershare is one of the topmost data and photo recovery software. This software works with Android, IOS, and various other platforms. I works with rooted devices and also has Dr. Fone wizard, which helps to transform unrooted devices into rooted devices. This software has various amazing features and the user interface of this application is very easy and user-friendly. It is compatible with Android 2.2 and more. This software is one of the trusted software’s on Google play store and also provides the user an advantage of saving the recovered photos and data by date and name. 3. EaseUsMovisaver EaseUsMobisaver is one of the newest software in the market but is growing rapidly because of its new and advanced features. This software was developed by Easus and helps the user to recover photos from Micro SD card or internal memory. This software is very easy to use and can prove to be a beneficial data or photo recovery software. 4. Dumpster Dumpster application is just like a recycle bin on a computer. This app creates a recycle bin on Android phones and the photos directly go into recycle bin and recovered from it if accidentally by any problem, they get deleted. Along with photos, this software helps to recover various other data formats and videos etc. This app has two versions i.e. free and paid. This software has amazing features and the free version is also so powerful and eligible that it can easily recover the personal data lost accidentally. So, we can say that this is one of the best apps and can be used with the utmost trust. All the above-mentioned software’s are one of the best software’s for photo and data recovery and definitely serves the purpose they are developed for. These apps are the best-rated apps on Google play store and are used by millions of people. So, in case of emergency, a person can use any of these apps as per their need and choice and can restore the photos from Android phones. Also, these apps are compatible with almost all the Android phones above 2.2 and can help is restoring the photos from internal and external memory. So, these apps are the ones which can remove the frustration and tension of accidental photos deletion. Read Also: Recover Your Data From SD Card Through EaseUS Data Recovery Software Erase Photos Form iPhone Without Any Possibility Of Recovery

READ MOREDetails
Camera Gimbal

6 Tips to Shoot Hyperlapses Quickly and Easily Using a Camera Gimbal

Hyperlapses are generally eye-catching. Traditionally, shooting a Hyperlapse video required you to attach your camera to a tripod as you carefully marked the ground distance. The ground was supposed to be an even one. However, this approach was slower and tiresome. Today, you don’t need a tripod. All you need is a DSLR camera gimbal or any handheld stabilizer that will work with your camera. The gimbal will allow you to shoot the Hyperlapses fast and easily. To achieve this, you need to observe the following 6 tips. 1. Set Your Camera Right: You start by fitting the camera firmly on the gimbal. This will enable you to shoot the Hyperlapses in a stable way. Then, you should adjust the digital camera to shoot either 4K videos or short-interval shots. Thee 4K setting is better since it allows you to add the ramping speed afterward. Lastly, If the footages are not stable, erase the tracking points. 2. Walk Cautiously When Shooting: Shooting with a gimbal doesn’t give you the freedom to walk unsteadily and fast during the production. You need to walk uniformly and slowly to ensure that the quality of the Hyperlapses is not compromised. Once you press record, you should walk towards your target with the gimbal level well-maintained. A handheld gimbal will deliver stable Hyperlapses provided that you don’t hurry the shots. 3. Shoot Longer than Necessary: For the sake of post-production editing, it’s important to shoot the Hyperlapses longer. You have to remember that Hyperlapses are often unpredictable. With longer footages, it becomes easy to omit the unstable parts and keep the stable ones. Moreover, the editing is fast-achieved. 4. Always Focus on a Fixed Point: You can do this by switching to the lock mode. The mode allows you to shoot the Hyperlapses easily and not to lose the focus. You shouldn’t lose your target as this may cause the gimbal to fail you. You just need to prioritize on achieving a better view during the entire shooting path. 5. Enhance Motion Blur with ND Filters: People in motion and blinking cars may interfere with your Hyperlapses by limiting your exposure. To enjoy longer exposures during a daytime shooting, you should enhance the motion blur. The best way to do it is to use the ND filters. While encouraging longer exposures, the filters enable you to shoot amazing still images that are good in quality and balanced. 6. Create Parallax By adjusting the Gimbal Settings: Finally, it’s important to create parallax if you want a different motion dimension in your shots. To create parallax, you should: Open the gimbal assistant software to access the control panel feature. Click on it and adjust the shutter speed to the lowest value possible (one second). Once you are done, you can press record and start to shoot. Put simply, a handheld gimbal can help you shoot quality and stable footages. The experience is enjoyable but you have to do it right. With the above 6 top tips, you can be able to shoot Hyperlapses comfortably with the stabilizer. This ensures that the post-production is also done seamlessly. Read Also: How To Pick The Best Trail Camera 2019 “Best Guide For The Users” What Is A CMOS Camera?

READ MOREDetails
picking a hard drive

5 Indispensable Things to Keep in Mind while Picking a Hard Drive

The modern era of technology has undeniably transformed the conventional ways of storing massive data.  The latest storage media such as hard drives and flash storage drives are capable of storing huge data without compromising on performance. Let's proceed to know the top things to know before picking a hard drive. There’s always a dilemma while choosing an appropriate hard drive for business as well as personal requirements. One needs to understand the basic difference in a Solid State Drive and a hard drive. 5 Indispensable Things to Keep in Mind while Picking a Hard Drive In this article, we’ll be discussing some aspects that one must consider while picking a hard drive. Analyze your Requirements If you are looking a hard drive for a computer system that you need for personal work, you must think about a disk drive instead of a Solid State Drive. In general, people do not have an idea about the basic difference between both the drives. SSD (Solid State Drive) vs. Hard Drive An SSD is superior storage media based on flash storage, which is comparatively fast than a hard disk. There are no rotating disks or moving parts on an SSD drive and is smaller and compact. Moreover, hard drive data wiping is faster in SSD as compared to HDD. Read also: How To Securely Wipe Your Confidential Data From A Hard Drive A hard drive, on the other hand, has moving parts and takes a lot of space in your system. Furthermore, a hard drive is many times slower than flash storage media. Physical Size Well, after you’ve got an idea regarding the basic difference between SSD and hard drive, the next thing is to choose the right size. You need not worry as there are only two sizes available. One is the 3.5-inch drive, and the other one is the 2.5-inch drive. The traditional disk drive contains a spinning mechanism that requires more space. The desktop hard drives are usually of 3.5-inch size with a maximum of 4TB space, whereas the laptop hard drives are of 2.5-inch with a maximum of 2TB storage. The size of the disk depends upon the number of disks in the drive. Interface The interface of a hard drive is usually a SATA connector for both SDD and HDD. There may be some portable hard drives that are connected through USB but can’t be used for a permanent drive on a laptop of the computer. Furthermore, one should ensure the interface of the hard drive matches their laptop or computer’s hardware specification. Performance People seeking a storage media for their business purposes must consider a flash storage drive instead of a conventional hard disk drive. An SSD drive delivers outstanding performance and has lesser downtime as compared to the regular disk drives. These drives are available in the same storage options as that of the conventional drives. You can choose the one according to your requirements. The primary benefit of an SSD drive is that it can deliver superior data transfer rate that you can’t expect from a hard disk. It is an ideal option for businesses that rely on massive storage of data. Internal or External Another important aspect to consider is the need for a hard drive. Sometimes people often get confused between picking a portable hard drive and an internal hard drive of a computer. If you are seeking a hard drive that can store your additional data apart from the system, you should think about a portable hard drive. A portable hard drive can be connected to your system’s USB port. Conclusion One should be very precise while picking a hard drive for their business use. There are numerous options available in the flash storage drives that can offer superior performance.

READ MOREDetails