Top Secrets That Slash Your Kitchen Remodeling Bill in Half

Published on: 11 September 2019 Last Updated on: 30 October 2024
kitchen remodeling

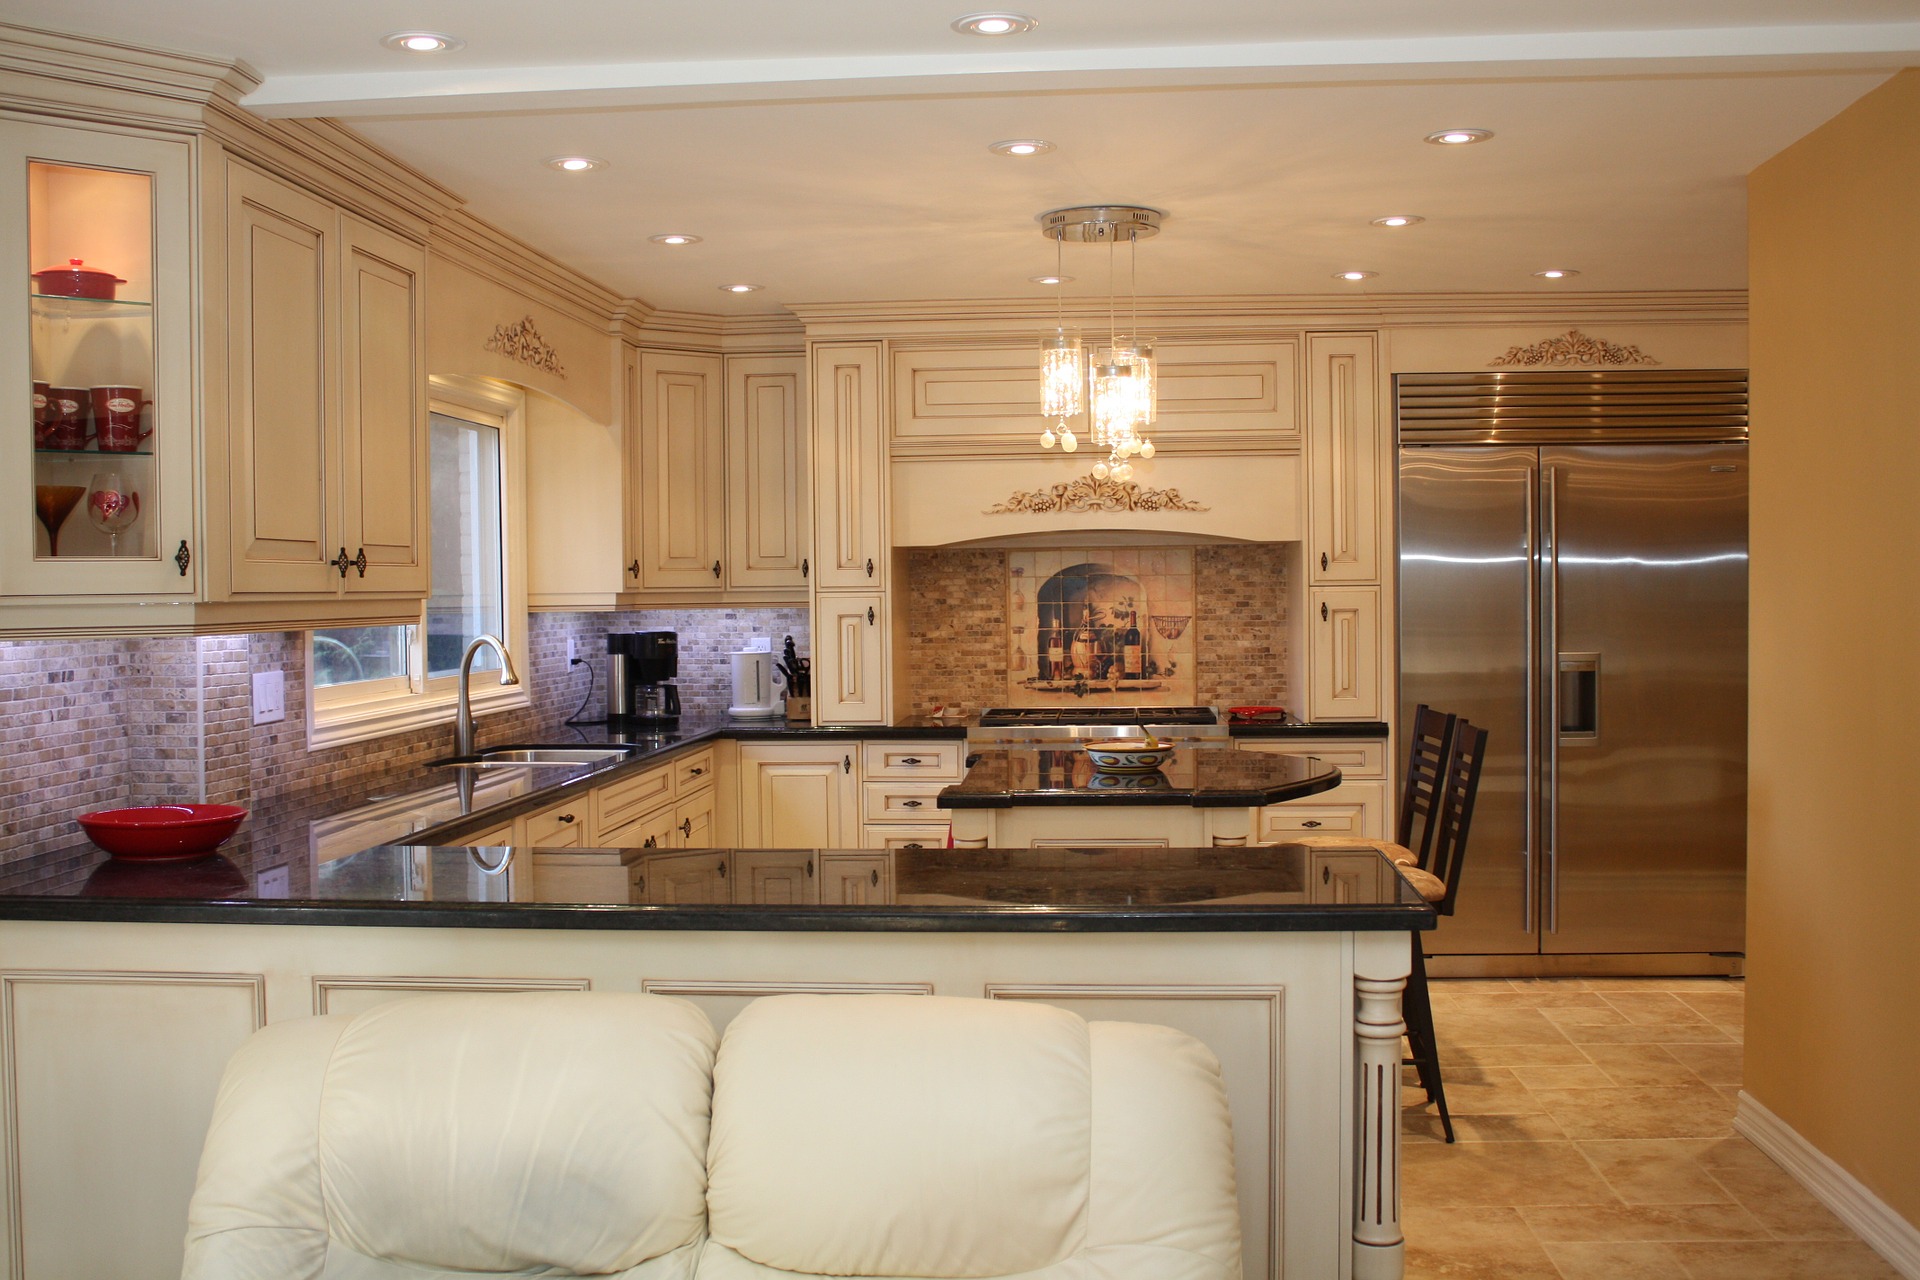
Budget is the scary word that bothers you when you undertake the work of kitchen renovation. It is one of the reasons only a few people can go ahead with the work as planned. No one can deny that the condition of the kitchen is a throwback of your living style. The thing that leaves you in dilemma is how to avoid making the project exorbitant in terms of money. Do you know where to indulge and how to mitigate the cost of renovation? Remember that the result of home renovation must not only create a glamorous look but also add value to your property. Unfortunately, it takes very little time for the cost to escalate in the Kitchen Cabinet Renovation project. Do you know that you can get the dream kitchen without splurging?

Keep your budget tight and make your kitchen the most favorable area of your home with ease.

Keeping the cabinets

The renovation or makeover of cabinets is one of the areas where you need to spend a major part of your finances. How about preserving the old cabinets if they are in good condition? You can just coast them with paint or resurface the cabinets to reduce the cost. Consulting with the experts will reveal better results, but having a mind of your own is a better way to ensure a beautiful result in the end.

Retaining the layout

The kitchen designer you hire may show eagerness to change the layout completely such as making it L-shaped, like a gallery or corridor, making it with a single wall. Unfortunately, the present layout may be perfect. The only thing you need to do during the renovation work is to arrange the things properly so that everything you want becomes readily available. If you leave the shape of the kitchen undisturbed, you can save a lot of money and stay within the budget you have created in the beginning.

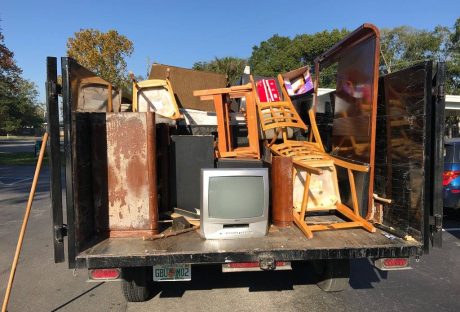
Discarding the things smartly

When it comes to the electrical items in the kitchen, you may not decide to keep a few of them such as the refrigerator, stove, and the chimney. If you decide to sell these items, try to get an estimate from the second-hand shops. You can also take photos of these items and post them in the online selling sites to find out if the option has the potential to fetch more money. If you are lucky enough to sell them at a good price, it can help you to buy a new appliance at half the cost and it is a good option to rely on.

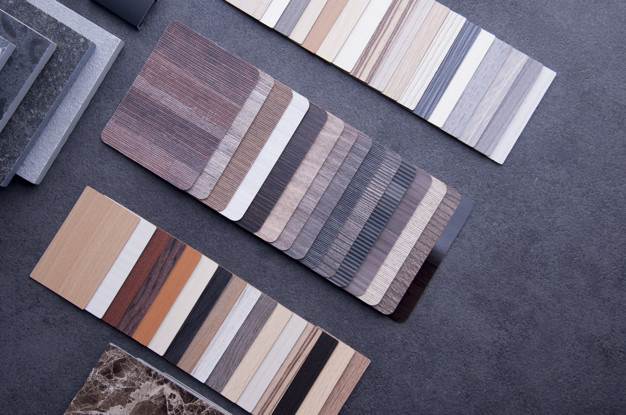
Choosing the countertop

The material to be used for the countertop can raise a few concerns, especially when you need to stay within the budget. Even though there is a wide range of options available with varying rates, combining two materials can help you to curb the cost. You can replace granite with a laminate that comes with stone-like appearance.

Flooring options

Kitchen is one of the places where the flooring needs to be considered carefully. When you do not have enough to spend on the renovation work, using a ceramic tile can fulfill your wish. It may not be as attractive as the other options, but it is highly durable. Alternatively, you can install laminate flooring over the current floor for the best results. The vinyl tiles are also cheap, so you may consider this option as well.

Buying from the internet

People love to shop from the internet nowadays, but that does not mean that you can buy anything online as the variance of prices can be unimaginably high or low. Find out which days are the best when you buy certain items online so that you can grab the discounts easily. You can also buy second-hand items from people you know such as a refrigerator that your friend has hardly used. Having enough time to buy the items you need for kitchen remodeling helps you to go for comparison shopping before you finalize the decision to purchase. There are plenty of options available when you want to reduce the cost of the kitchen items to half. The only thing you need to do is to find the right opportunity.

You can try to check the options of kitchen remodeling before going ahead with the project. Try to avoid indulging unnecessarily to make your investment worth the money you spend on a kitchen renovation.

Read Also:

Content Rally wrapped around an online publication where you can publish your own intellectuals. It is a publishing platform designed to make great stories by content creators. This is your era, your place to be online. So come forward share your views, thoughts and ideas via Content Rally.

View all posts

Leave a Reply

Your email address will not be published. Required fields are marked *

Related

Sewer Pipes

Who Is Responsible For My Sewer Pipes?

The basic guidelines are the same across the world, if the sewer pipes are on your property then you are responsible for them. The only real exception to this is if the sewer pipe going through your property is shared. This means it is the main connection to the public sewer line for several houses and happens to go across your yard. This generally happens when several houses are clustered together and set back from the main sewer line. It is simpler and cheaper to connect the houses together and then direct the sewage to the mains pipes. However, this doesn’t mean you are not responsible. Joint sewer pipes do not become the responsibility of the water board. Instead, the responsibility is shared between the houses the pipe serves. This is something you should be made aware of when you come t purchase a house as it can be more complicated organizing repairs and especially emergency plumber. The reason for this is that all homeowners should agree on the plumber chosen and the costs before one can be called. This ensures that everyone will pay their fair share. But, as mentioned, it can be much harder to negotiate this, the larger the group of houses the more difficult it is. The simple solution is to have a fund that deals with repairs, including sewer pipe issues. Blockages: If you have a sewer pipe blockage then it will probably be your responsibility to sort it out. The easiest way to ascertain this is to have a sewer diagram done. This will help you to confirm that the pipe is your sole responsibility or that it is shared. You can then assess where the pipes run and, by using a sewer camera you can locate the exact distance into the pipe where the clog is. This will make it easier to decide the best course of action to remove the clog. Don’t forget that the simplest way to confirm it is your responsibility is to check with your neighbors to see if they have a clog. If it is just your home then the clog is in your pipes and you need to resolve the issue. If the clog is affecting several homes you can call the water board who will handle the issue for you. Dealing With Issues: Clogs are generally a result of damaged pipes. This can happen over time, especially if you have been digging in your yard and the pipes are getting old. It can also be the result of tree roots getting into your pipes. This damages the pipes and causes a clog, creating an array of issues. Knowing where your sewer pipes run will help you to consider the likelihood of root damage as you can assess how close trees are to your pipes. Don’t forget, a good plumber will sort these issues for you in no time and will save you a lot of hassle. Even if you prefer to resolve issues yourself, you may find a professional is the best option when dealing with sewer pipes. Read Also: 5 Best Type of Plumbing Pipe 5 Important Tools For Pipe Recovery Operations

READ MOREDetails
Iron Clothes

How to Use Iron Clothes With Steam

Believe it or not, the amount of people that don’t know how to iron clothes is amazing. There’s no shame on it since most of us were thrown into society without really practicing skills that would definitely help us fight back as we become independent. These skills include things like cooking a proper meal before going to work, knowing what groceries to buy without spending all our money on unnecessary things, being able to pay bills accordingly without becoming a mess, cleaning the house every now and then, and of course, knowing how to use steam irons and what to do to properly iron our clothes to not look like folded toilet paper. Don’t worry though! In this guide, I’m going to teach you the essentials of how to iron, and how to deal with different types of fabric. To be honest, ironing is not something as complicated as many think. It’s all about knowing what to do, which is what most people lack. The process may require a little preparation and patience, though, so be prepared to practice with different pieces of clothing to get the main idea. One thing is sure, though. You have to be careful when using an iron because they can be harmful if dealt with without precautions! How to Prepare for It The first thing you’ll need is a flat surface where you can prepare your clothes to be ironed. Try to have everything neatly organized to avoid possible accidents, and if you can, try to do it on an ironing board. Some clothing is too delicate for the heat produced by the heated metal of the device, so have a piece of fabric to protect these. Read more: A Complete Guide on Using IRON on Transfer Paper Connect the Iron Irons can take some time before they are ready to be used. They usually show a sign that they are ready, so be sure to be attentive about them while you take care of the next step. Never try to do it before its ready, since it’ll lead to a slower and far less efficient process. Know the Differences Between Materials, and Sort Them Beforehand Depending on the type of fabric you are dealing with, you might want to change your approach while ironing. You can’t deal with a silk piece the same way you would deal with a cotton one, for example. Some pieces of clothing will require you to use the lowest setting of heat possible, while others may require even more heat. Separate silk, wool, rayon, and acetate to be dealt with the lowest settings. Wool clothes may require the protection of another piece of fabric that was previously dampened, so take that in mind! For polyester, go with the medium heat setting, and for cotton, you can go either medium and high heat setting. Both of them should be dampened to be protected from the heat. Before the iron is ready to go, you should have them sorted out. How to Iron Clothes When you deal with shirts with a collar, you should start with it. You can start with a pattern that follows the inside part of the collar, starting from the center of it, until you reach the edges. Then, fall back to the center, and keep moving between both sides. Once you’ve finished with it, you can work the outside. Lay down the shirt in a way that you can flatten it with the iron with simple movements. After that, you have to work your way down, slowly moving the shirt. Then, work the sleeves then the cuffs. Pants are much easier than shirts with a collar. You just have yo lay them down in a way that you can work both legs at the same time. Start with the waist, gently work with the pockets, and go your way down. Repeat the process until you are satisfied with the results, but make sure to be gentle and careful with the heat and the ironing. Considering that there are way too many types of clothing to teach all of the proper methods and techniques to iron them accordingly, you should check this guide on how to do it without fail. Safety Recommendations Ironing can be a pretty dangerous process if you are not attentive while you do it. If you don’t take safety measures, you might harm yourself or others, so make sure to pay attention to this part of the guide. The very first thing you should always make sure is that the iron is unreachable for children. Children can be curious and do things without knowing, so you will be the one to blame if you allow them to get closer while they are heated up. This is important even after you’ve finished ironing. These devices tend to remain heated up even after disconnecting them, so you should still be attentive to any possible situation. I recommend you to wait at least 10 minutes before taking your guard off. Remember to check just in case. While it rests, don’t leave it face down. You might burn something or damage the iron if you do. If an accident happens and you burn yourself or someone else gets burned, treat the burn with cool water for as much time as you can. 20 minutes should be more than enough. Don’t use things like butter or oil, since it might infect the injury. if the burn is too big, you should check yourself with a doctor. Read Also: How To Choose A Washing Machine? How to Pack Clothing Properly for Shipping Choose The Latest Collection Of Women Clothing For a Stylish Look 6 Benefits Of Buying Clothes Online – Why People trust online shopping

READ MOREDetails
TV Stand

The Top Five Ways To Decorate A TV Stand

Decorating a TV stand should actually be a fairly easy thing for you to do, but you need to make sure that you have done so in a way that will make sense for the room and your home.  All stands are different, and they can take on many different decorations that you might not have thought of.  It all depends on what you think your best options is when you are trying to find a way to make the house look better while working around the TV. The Top Five Ways To Decorate A TV Stand: 1. Staining: Staining a TV stand is a very simple thing to do, and you can match up colors to the house like the ones that you see at https://www.moderndigsfurniture.com/modernfurnitureblog.html?article=Modern-TV-Stand-Guide.  You need to make sure that you have found a simple way for you to get the stain on the stand, how to make it the right color, and how to do this across the whole piece of furniture. 2. Painting: You can paint the TV stand in a way that will be best for you, and you will be much happier when you have chosen something that you think fits the house.  You could paint the whole stand, and you could put the stand in a place where different colors all play off one another.  You have to be sure that you have chosen the proper paint style, sanded the stand, and even used a primer if needed. 3. Stencils: You can use stencils to be sure that you have found a pattern that will look nice on the TV stand.  You want the stand to look great, and you want it to have a way to show off your personal style even in something as simple as a TV stand.  If you have a choice of how to make the stencils look, you could layer their designs and use a spray can get the paint on the surface. 4. Fabric: You could actually put the fabric with the TV stand so that it has something soft to play off the wood of the stand.  You might actually put a skirt around the bottom as if it were a Christmas tree, or you could choose a fabric that will actually drape off the TV stand. 5. Glass: You could put glass doors on the TV stand, and you might even use glass to build the TV stand.  There are some lovely glass styles that you might like, and they look really modern because they have been made from the heaviest of all the glass that you could find.  This is a fun thing to use when you want the stand to look perfect. You have to be sure that you have found a very simple way to decorate your TV stand so that it will look its best.  You can use all these tips to make the house look great while showing off the style of the TV stand when you have it adorned in the right way. Read Also: Why ‘Breaking Bad’ Is The Best Ever TV Shows 5 Ways That Ensure That Your Home Is Safe For Living

READ MOREDetails