Utilising the Strength of Concrete to Protect Your Property

Published on: 14 November 2019 Last Updated on: 22 February 2020
Strength of Concrete

Concrete is a solid construction material. It is versatile and provides protection against wind, water and other elements of nature( Strength of Concrete). While wood and other natural materials give a warmer and homey feel to a residential building, they are more expensive. They will not provide adequate protection against strong winds, floods, and fire.

Fires often happen at the most unlikely of times. Developers and architects today have safety and fire prevention in mind when they design and construct structures and cities. Urban planners design cities to prevent fires from quickly spreading and most of all, they use concrete, which is considered as the strongest among the various construction materials.

Why use concrete?

Concrete can provide ample protection to people and properties as it is a strength of Concrete to Protect Your Property. It can stand temperatures of more than 1,000 degrees Fahrenheit. On the other hand, wood will start to burn when the fire reaches 375 degrees Fahrenheit.

It can contain fires. Concrete separation walls slow down or prevent fires from spreading quickly to other parts of a building.

Advantages of concrete

Concrete is widely used for construction around the world, as it offers many advantages that you cannot find in other construction materials.

  • It’s economical, and its production cost is low. The raw materials you need are readily available. To make concrete, you only need to mix water and aggregates with cement, in the right amounts.
  • It sets and hardens at normal or ambient temperature. You do not need high heat for it to set.
  • In its liquid state, concrete is malleable. Thus, you can pour concrete into your desired sizes and shapes using different formworks. By adjusting its mixture, you can cast concrete into complex configurations.
  • Producing concrete is energy efficient. It resists water, making it ideal for many uses, including submerged and underwater applications such as waterfront structures, canals, dams, linings, pipelines, and building structures.

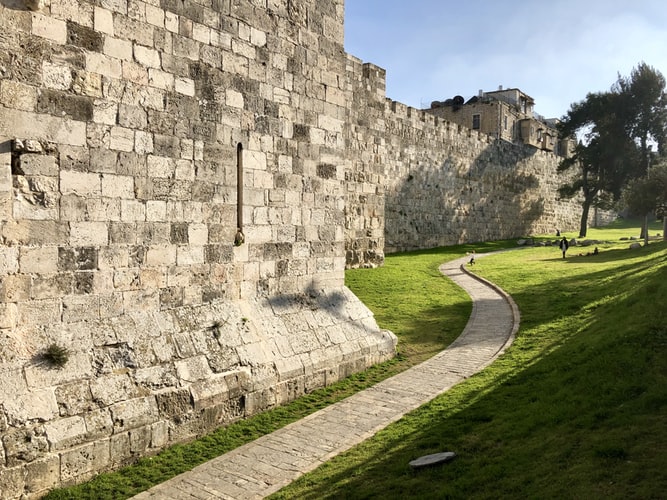
Concrete retaining walls(Strength of Concrete)

Concrete retaining walls

Concrete prevents soil erosion when used as a retaining wall. You need a retaining wall when your property is on a slope or uneven terrain. It protects your acreage by preventing soil from eroding over time. If you want to have more land, perhaps for a terraced garden, you can build several retaining walls. They are likewise used to reinforce your home or building’s foundation, walls, and other tall structures.

If you live near a highway or in a busy location where the noise level can be distracting, you can have a retaining wall as a sound wall or noise barrier. You’ll notice that along freeways, there are wall constructions as well. These are sound walls to reduce the noise from cars and trucks.

Today, the construction of concrete retaining walls is faster and easier, as manufacturers create precast retaining walls in the configuration that the client needs.

With the strength of concrete and the help of technology to create precast concrete walls, floor slabs, and others, you not only increase the security and protection of lives and properties but also increase the visual appeal of your home or building.

Read Also:


Content Rally wrapped around an online publication where you can publish your own intellectuals. It is a publishing platform designed to make great stories by content creators. This is your era, your place to be online. So come forward share your views, thoughts and ideas via Content Rally.

View all posts

Leave a Reply

Your email address will not be published. Required fields are marked *

Related

KICKER-11HS8-8-150W-Hideaway

Advantages of buying an underseat subwoofer

One of the first things that come to mind while accessorizing your car is the music system. When you want to add a good level of punch and depth to your music, an underseat subwoofer can be a great choice. Having a high-quality subwoofer fitted under your seat can definitely add to your experience of listening to music while enjoying a ride in your car. Compared to the large subwoofers, the small under-the-seat subwoofers can pack in quite a few competitive advantages. Let’s take a look at the key advantages of buying an under-seat subwoofer. An economical way to add bass to your sound system [caption id="attachment_3577" align="aligncenter" width="500"] Image source: bestheadunit.com[/caption] Buying a subwoofer that is designed to fit under your car seat is one of the simple and cost-effective means of increasing the bass of your car music system. These compact units usually come with built-in amplifiers. An underseat subwoofer unit may not be able to perform at the level of a trunk-mounted subwoofer, but it will definitely get the job done for you as long as you don’t expect it to produce a thunderstorm of bass to fill your car interiors. A compact solution to your music accessory space issues When shopping for a subwoofer for your car, size is a key consideration. If the lack of space in your car’s boot is coming in your way of powering up your music system with some extra bass punch, a compact subwoofer unit is exactly what you want. These small subwoofers are created to fit into tight spots and get the job done for which they are designed. In other words, with a subwoofer unit that easily fits under your car seat, you can enjoy your music without having to compromise on your cargo space in the trunk. Regardless of whether you own a compact vehicle, a sports car, or a small pick-up truck, such a subwoofer system will definitely appease your musical appetite. Easy to install and handle Due to the under-the-seat mounting location of the small subwoofers, they may seem to be a bit of a hassle to install. But the fact is that these units are usually lightweight and portable and are specifically built to be fitted under your car seat. This makes them convenient to handle and install. One key advantage of their lightweight nature is that they do not weigh down your vehicle. What’s more, you can also remove such units effortlessly and transport them out of your vehicle whenever the need arises. Moreover, most of these compact units come with remote control. This makes your job of listening to music all the more convenient when you are on the go. So, when you buy a subwoofer designed for under the seat mounting in your car, you get the benefits of reasonably good performance, low cost, and the ease of installation and removal (if and when required). On top of that, you do not have to allocate extra space for the subwoofer unit in your car trunk. What more do you want? Read also: Factors To Consider Before Purchasing An Amplifier What Leather Is Used In Leather Chesterfield Sofa How Do You Match Sofas With Accent Chairs?

READ MOREDetails
Install Cabling

Practical Guide to Install Cabling in Your New House

Cable installation is a complex process that requires a licensed contractor for successful completion. Doing it yourself is risky, as it may lead to faulty wiring. Proper planning will save you extra work, money, and time. Use the guide below to comfortably install cabling in your house. 1. Prepare high-quality cable products Before cable installation can commence, you need to source cable products. Currently, numerous companies make cables for sale. However, if you want the best quality cables, you need to consider Infinity Cable Products. These cable products are durable and contain more copper and material compared to others. 2. Contact a reliable company When installing cables in your new house, efficiency is critical. Cables supply communication services and vital electrical power, hence requiring great attention and time from the contractor. Ensure you contact a highly reputable company that is well-equipped with the necessary tools for installation. This will increase the accuracy, reliability, and durability of the cables. 3. Draw a wiring diagram It is crucial to have a plan for the cable installation process. Draw a wiring diagram that shows a clear and practical path of the cables to all outlets. The design will provide a reference point for the contractor as they work. 4. Install conduits Be sure to have the contractor install cable conduits in every place that may require wires. Cable conduits will allow you to run video cable, speaker wire, and network cable in the house. The best way to avoid wasting conduits is by running the longest wires in the walls first even if you don’t expect to use them immediately. Each wire should be set from upstairs and pulled through to the basement. This way you will avoid using a ladder to push the cables up between floors. An experienced contractor will know to leave at least a foot of extra wire to make it easier for you in case you want to change your house arrangement later. 5. Determine your outlet count Identify how many switches and outlets will extend to each circuit. This will aid in purchasing sufficient Infinity cable products for your new home. It is advisable to have six outlets per 110-voltage circuit in the living area. However, the kitchen has appliances with more wattage; hence requires not more than two outlets per circuit. 6. Drill cable holes Ensure you know what is on the other side before drilling through a wall to avoid damaging water pipes, ductwork, or more. The drilled holes provide a path that the cables will travel for connectivity throughout the house. Remember that more outlets provide for a safer home. 7. Pull the cables to the outlets Once the holes are drilled pull the cables to the outlets in the house. When attaching wires to outlets, use wire strippers to cut out the outer plastic coating. Infinity cable products come with instructions to help make the process easier. Are you prepared to install cabling in your new house? Now that you have read through the guide on how best to install cables in your house, you can begin the process. Remember to have the job tested after completion of the installation to ensure it is done to perfection. We wish you well as you convert your house into a comfortable home. Read Also: What’s a Good USB Cable? What is type c cable, and is it worth buying How Fiber Optic Cables Are Used

READ MOREDetails
Home Remedies

Top Home Remedies To Make A Floor Non-Slip

You may not realize that a floor is slippery until you or a loved one slips over it. This is often the case with entrance halls, or with the garage. With your shoes on, you probably have enough grip. But take them off, and it’s an accident waiting to happen. Why use epoxy for garage floors? Go for polyaspartic coatings for the ultimate protection from a sudden slip! Marble floors can also be an issue, as can garage floors. These are usually concrete but, once the concrete gets oil and other compounds on it you’ll realize that it’s also slippery. The good news is there are several home remedies that can reduce the slipperiness of the floor. Let's Check Out Top Home Remedies To Make A Floor Non-Slip: 1. Epoxy Coating This is the most expensive and time-consuming option. It involves layering an epoxy coating on top of an existing concrete floor or creating a new floor with epoxy. You can undertake this job yourself however if you want the best possible finish it’s best to use the professionals in epoxy floor coatings. They’ll do the job faster, and neater, and it will come with a guarantee. In fact, the cost in the long term is significantly cheaper than most options. This is because epoxy flooring is very tough and durable. You can also choose your color and even a pattern you want to emboss not the floor. This guarantees your epoxy flooring doesn’t just look stunning and offers a non-slip solution. It is also unique to your home. Related Resource: Use Floor Polishing for Keeping Your Flooring Looking New 2. Vinegar & Water Vinegar is a powerful cleaning agent. If you add some to warm water you’ll be able to mop your floor thoroughly. You should proceed when dealing with a hardwood floor, they don’t generally like moisture. The vinegar will remove all the debris on the floor, eliminating issues that can cause the floor to be slipperier. It should be noted that vinegar and water clean the floor to make it safer, it doesn’t add a non-stick coating. 3. Non-stick Products There are an array of non-stick products on the market. It’s worth noting that they are not all created equally. You’ll need to consider which products are designed for your type of floor. Then, it’s a good idea to look at different reviews to help you choose the one that suits your needs best. Once you have chosen a product you’ll need to read the instructions and do as it says. Some can be used neat, others require the addition of water. Apply them in accordance with the guidelines and, once they have been on for long enough, make sure you dry the floor thoroughly. 4. Use Rugs Another way to reduce slippery floors is to add rugs to the most dangerous spots. You’ll need to invest in rubber-backed rugs as these will stick to the floor where you put them. The rugs will then give grip and comfort to anyone walking over them, allowing people to move around the home in confidence. Don’t forget, before you apply any product to your floor it’s important to sweep it and then mop it. This removes the debris that could cause an issue. Read Also: Treatments and home remedies to tackle tinnitus 5 Tips on effectively picking a tile floor cleaning machine Ideas for Modern Flooring Designs for Home Improvement Plans

READ MOREDetails