3 Trendy Lighting Ideas for Your Kitchen Island

Kitchen Island

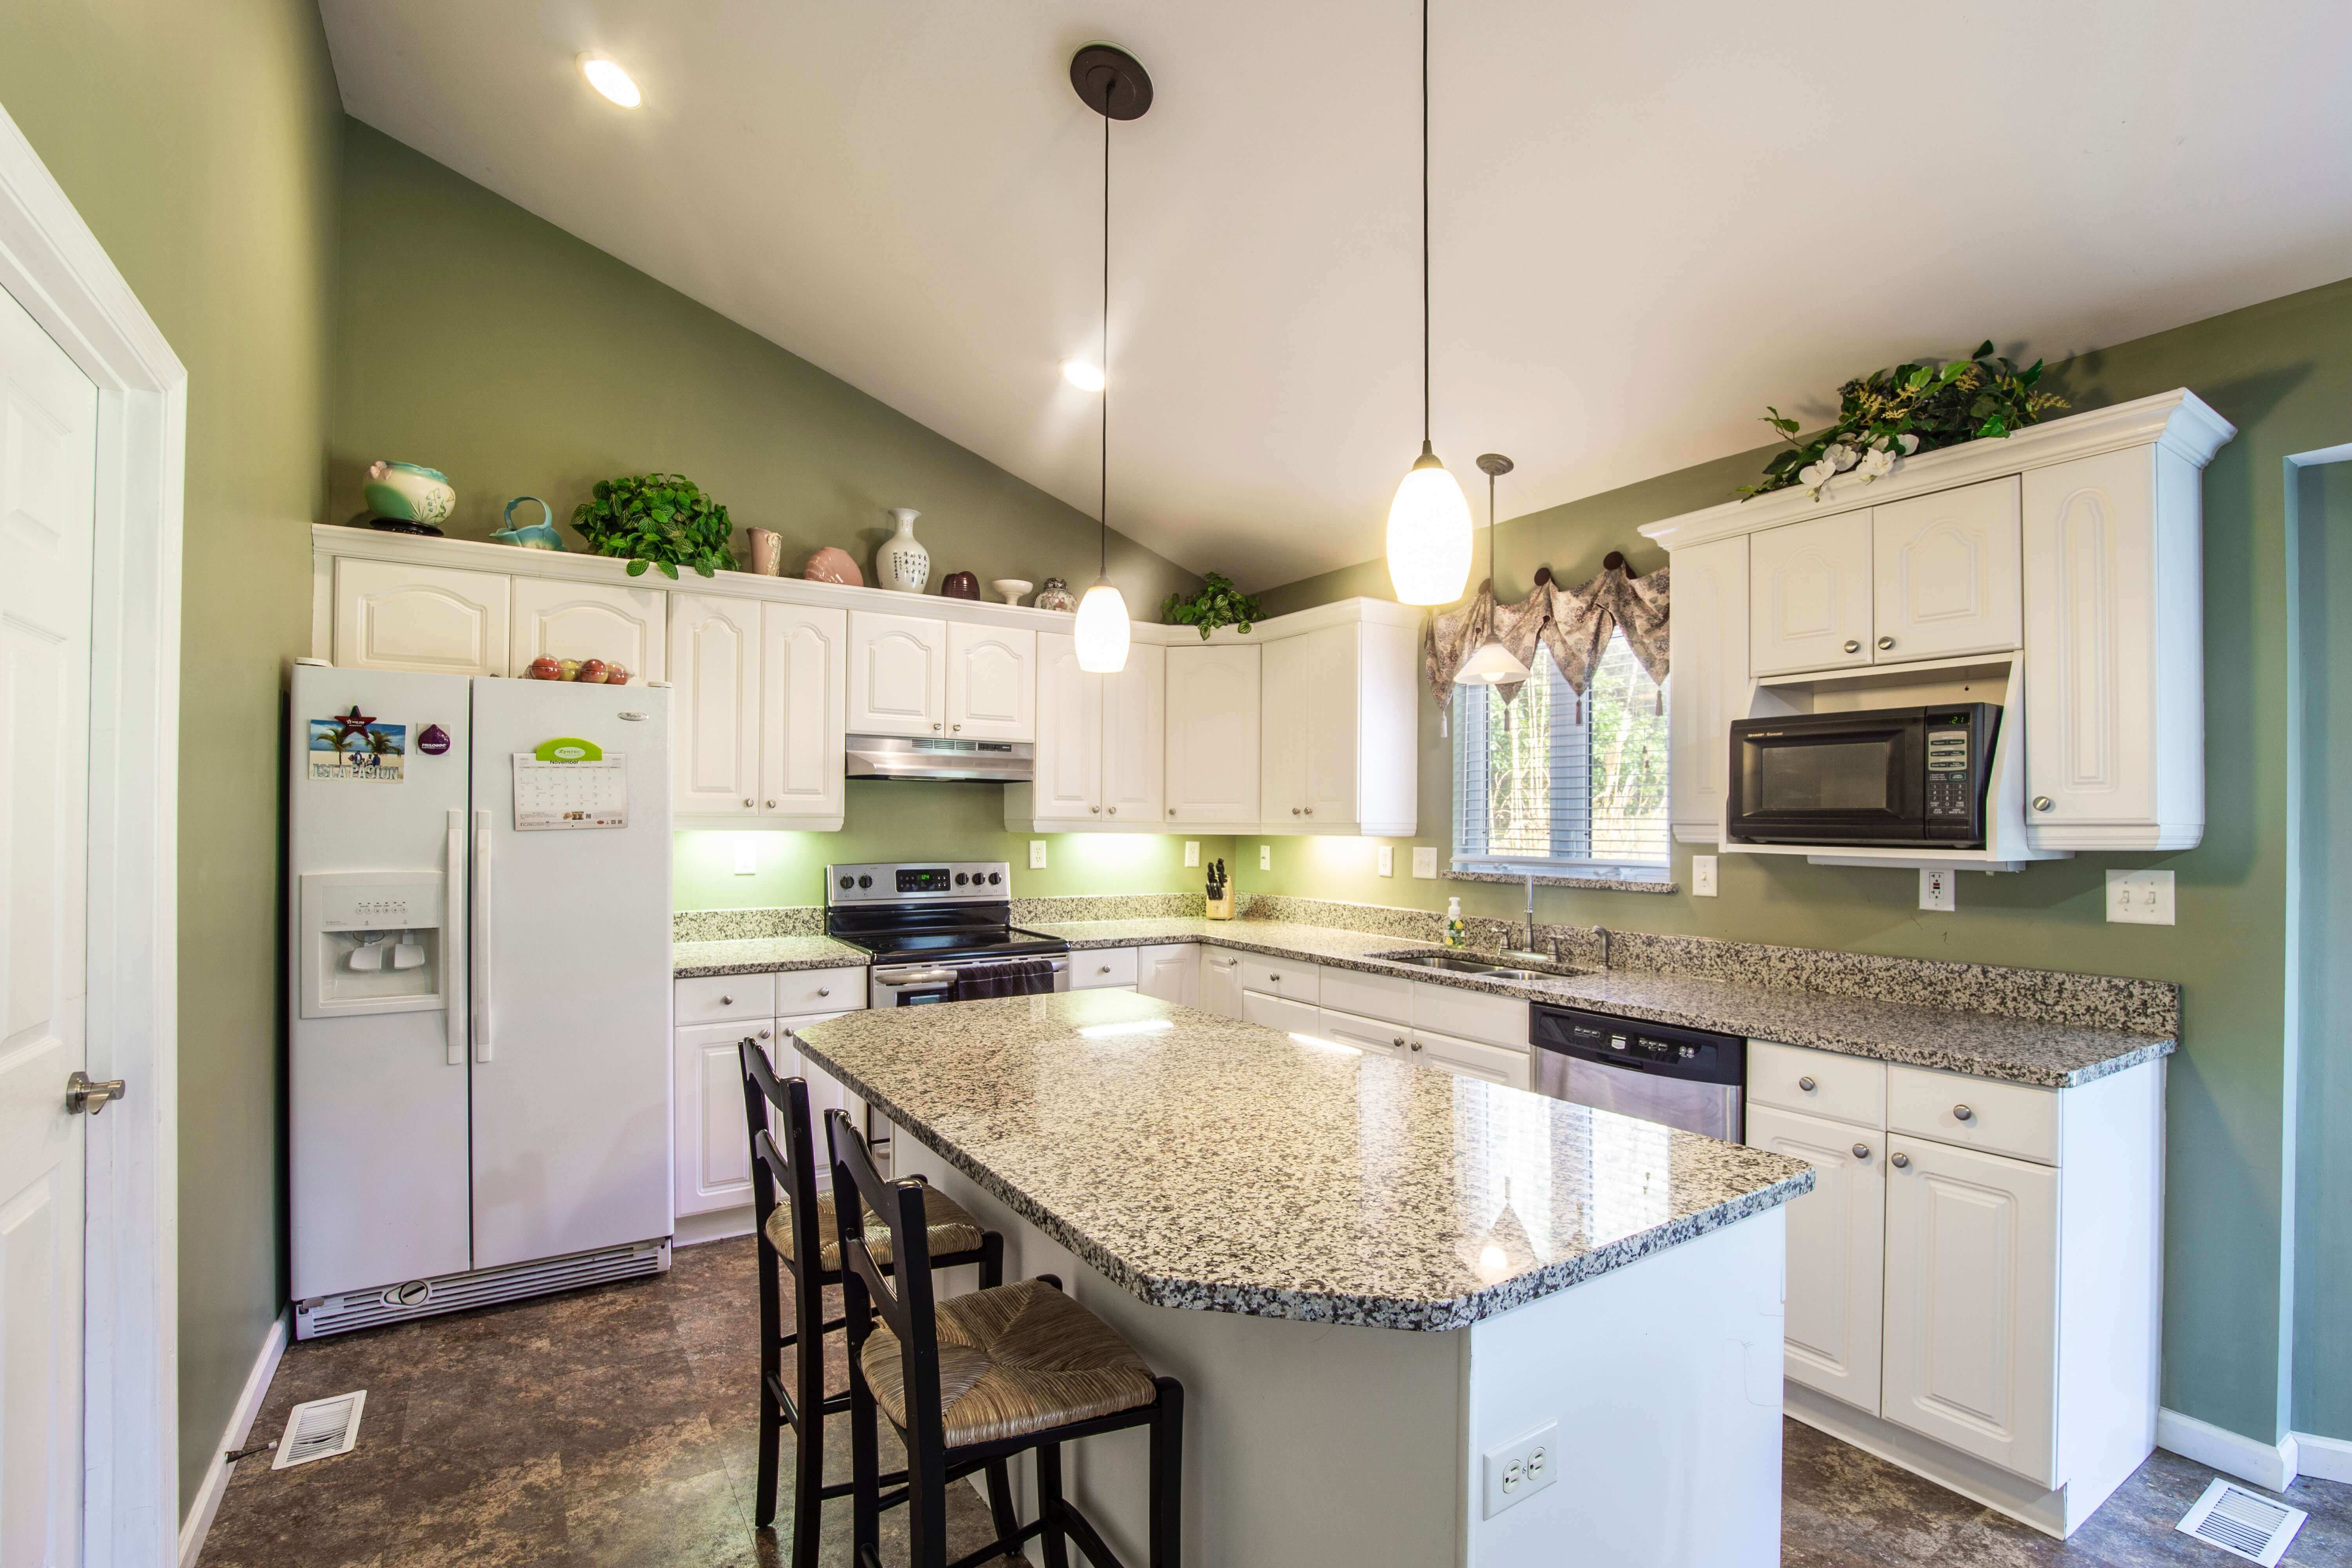
The kitchen island is where the joys of cooking preparation happen. It also involves the engagement of small talks which is why many consider the kitchen the heart of a home. Such a pleasing place only deserves the best of things! One of these things is lighting. With proper lighting, not only will it light up the entire room, but will add more appeal to your kitchen as well.

3 Trendy Lighting Ideas for Your Kitchen Island:

Listed below are the top 3 trendy kitchen lighting ideas that will surely achieve the desired design you have in mind!

1.  Pendant Lighting:

When it comes to choosing the right kitchen island lighting, pendant lighting is one of the latest trends. You can hang it from the ceiling which makes it the best choice for kitchen islands.

It is small and affordable. Additionally, it comes in different styles and sizes making it more convenient for your kitchen island needs.

These are the  top 7 pendant lightings that will work best for your kitchen islands:

● Mini Pendant Lighting:

Mini Pendant Lighting

Upon reading its name, you can already understand that this is the smaller version of a normal pendant. Just like its size, the mini pendant is incapable of intense lighting. It only works well as an overhead focused source of light that you can hang above eye level of your kitchen island.

● Bowl Pendant Lighting:

Bowl Pendant Lighting

The bowl pendant is one of the most popular pendant lightings of all time. You can often see it in movies scenes where they interrogate prisoners in a dark room. The only thing that lights up the whole room is the bowl pendant. It has a standard size which can cast enough light for your kitchen island.

● Drum Pendant Lighting:

Drum Pendant Lighting

Drum pendant earned its name because of its shape. It gently illuminates the whole kitchen island, due to its ambient feature. It is available in different colors and sizes. However, you must take note of the lighting rule, “the darker the color, the more watt you’ll need for the light to illuminate the area.” By this being said, we recommend that you only use light colors for your drum pendant.

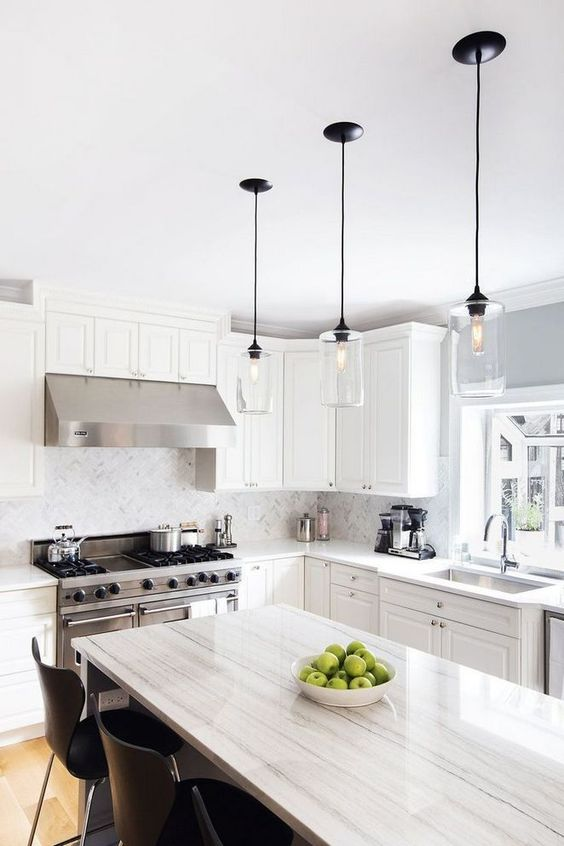
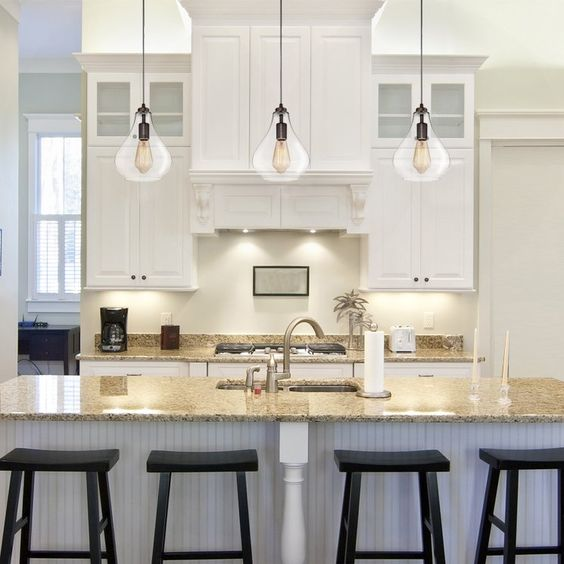
● Multiple Pendants Lighting:

Multiple Pendants Lighting

If you’re familiar with a chandelier with multiple lights, then the style of multiple pendants is not new to you. People usually hang and align them in a row above kitchen islands. Additionally, the use of multiple lights is designed to evenly distribute the lights to your kitchen island.

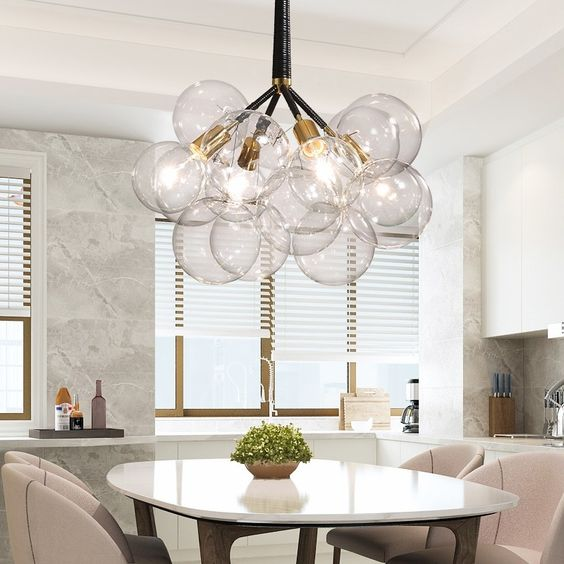
● Abstract Pendant Lighting:

Abstract Pendant Lighting

The abstract pendant is considered to be one of the most beautiful and artistic pendant lightings. The layers are styled to house the lightbulb inside. It’s the best design if you’re looking for lighting both to illuminate and decorate the area.

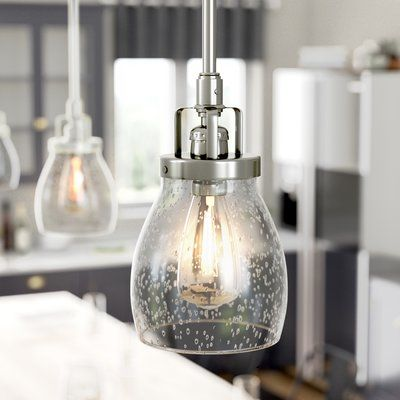
● Exposed Bulb Pendant Lighting:

Exposed Bulb Pendant Lighting

Exposed bulb pendant is basically a bulb pendant hanging above the kitchen island. It is one of the most affordable pendants on the market. You can even do a DIY for this lighting. Even if they are low-cost, they are still beautiful and functional because they can illuminate your kitchen islands.

● Globe Pendant Lighting:

Globe Pendant Lighting

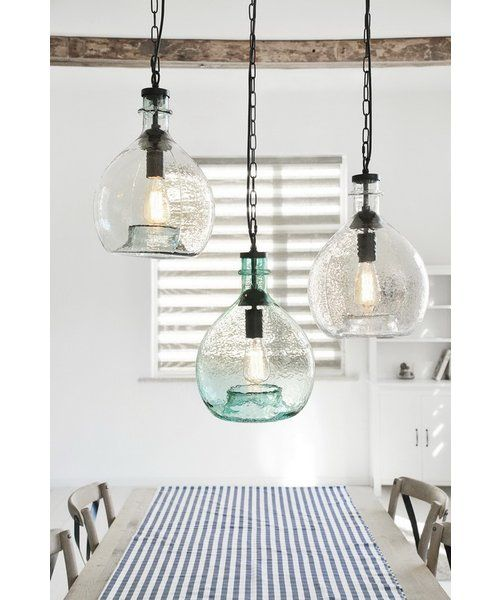
Globe pendants are based on its shape because they are round. They became popular around the 1950s and ‘60s. Apparently, globe pendant can still give you the vintage vibe that can outscore another pendant lighting for your kitchen island needs.

2. Chandelier Lighting:

Chandelier Lighting

Chandelier lighting is no longer new to everyone. You can see it almost anywhere, not just in the kitchen, but also throughout the whole house. With the modernized technology uprising today, chandeliers have lost some popularity due to its vintage look. However, chandelier lighting will never go out of style when it comes to your kitchen island needs.

They are in fact the most used lighting for kitchen islands due to their illuminating lights that are branched together.

3. Linear Suspensions:

Linear Suspensions

Linear suspensions are also affordable kitchen island lighting you can use. They still have the same lighting capacity with the other lighting ideas mentioned above. However, they are too plain and not stylish enough to be used as a decoration. The good news is, there are a lot of LED lights available on the market today. They can add more style if you opt for this kind of lighting. You just need to choose the high quality LED strip for longevity and better lighting.

Conclusion:

With all these awesome lighting ideas, you can surely find the one that best fits your kitchen island. Always remember to focus on the function and of course, the design! We all want a fully-functional kitchen that is pleasing to the eyes!

Read Also:

I enjoy writing and I write quality guest posts on topics of my interest and passion. I have been doing this since my college days. My special interests are in health, fitness, food and following the latest trends in these areas. I am an editor at Content Rally.

View all posts

Leave a Reply

Your email address will not be published. Required fields are marked *

Related

Glass and Wood

7 Unexpected Ways to Use Glass and Wood for your Home

When it comes to thinking about home decor, many homeowners are not always sure where to begin. They want something with personality and style that also makes it easier to use their home all year long. Many designers have stepped up to the challenge with different ideas. Classic materials like glass and wood are being re-imagined again and used in amazing ways. If you are looking for ways to update your home with help from woodglassgroup.com.au, you'll find lots of inspiration everywhere you look. New uses for wonderful, durable materials make it possible to delight the eye and amuse your guests. Consider these possibilities as you think about how to create a home that offers wonderful surprises at every turn. Here are 7 Unexpected Ways to Use Glass and Wood for your Home: 1. Beautiful Railing:Railings are a necessity in many homes. Railings provide a space for people to hold as they go downstairs and make it easier to avoid slipping on the stairs. Railings can also be used to add detail to any home. If you want to use railings in your house, you'll have your choice of materials. Think about using an unexpected wood like mahogany or bamboo. These woods are just as strong as standard wood and offer beauty at the same time. Glass railings can also be used for a short flight of stairs to help let light in dark places. 2. Lovely Doors:Doors are another home feature that deserves a lot of consideration. Doors set the tone for the rest of the home. When people step up and see a home for the first time, the first thing they note is the home's curb appeal. People are looking for homes that look wonderful. Homeowners can take advantage of this fact by using interesting materials for the doors in their home. For example, one homeowner might decide they would like to put in a front door that makes use of many elements including brass and wood.Another area to think about the use of door materials is the bathroom. Glass doors in the bathroom help add extra space. Think about using a frameless glass door in a small bath. It will help open up additional interior space in the room and make it feel larger. 3. Fascinating Flooring:Flooring is another area that warrants careful thought and consideration. Wood floors have many advantages. They're easy to use in any room, offer lots of colors and are very durable. Wood can also be sanded down and refinished to remove scratches and make the floors look brand new again. When thinking about the kind of wood to use, buyers will find many possibilities. Classic choices such as maple, pine, and oak offer beautiful colors and patterns. They're also a good choice for places that get a lot of wear and tear such as the living room.Think about using glass as a flooring material in some spaces. For example, if you have a home with a basement, bring in more light down there with a single area of glass tiles on the next floor. The glass can be incorporated into the overall design and serve as an interesting detail in the room above the basement at the same time. 4. Glass Sink:All homeowners need to have at least several sinks. Sinks make it possible to contain water and keep the floor safe from excess moisture. Designers today are thinking about the classic sink in new and unexpected ways. One such way is by considering new materials for the sink. Glass sinks are increasingly being seen in many upscale homes. Glass fits in well in a bathroom as it has the general light feel that buyers want in such enclosed spaces. Glass works well with other materials used in the bathroom such as tiles. Add even more detail to the glass sink with a faucet in an unexpected shape and color. A glass sink can be paired with modern metal faucets for a unique look. Make sure the sink is fitted carefully in the space in order to avoid potentially destructive leaks. 5. Innovative Shelving: Storage space is one of the most important considerations when it comes to thinking about a home's design. Buyers need space that lets them keep their important possessions in order and ready to use all the time. They also need to have storage space that looks good at the same time. Now is the time to think about ways to add storage space that allows the buyer to use all areas of their home and add a touch of personality at the same time. One way is with the use of glass shelving. Glass shelves are delicate but add heft. Use them in spaces like the kitchen that need lots of storage that lets you do many things at the same time. 6. The place to Sit: All homes need places to sit. Glass and would make wonderful materials that hold up any varied weather conditions and can be shaped into almost any imaginable form. When choosing the seat, wood makes a marvelous choice that works indoors and outside. Wooden benches can be placed at varying intervals outside to provide enough seating when you're giving a party or just when you want to eat outside. Pair them with glass tables that are easy to clean and can be moved around the yard as needed to accommodate multiple people. 7. Wood Backsplash: The backsplash serves to protect the kitchen walls from spills and stains. A backsplash can also be a way to add additional color and interest to any kitchen. Wood has long been used for kitchen cabinets, flooring, and tiles. It's also being used to create a lovely backsplash. If you are redoing your kitchen or thinking about a new home, consider wood tiles and wood panels in this part of the kitchen. Modern finishes make the backsplash easy to keep clean. Look for wood in colors that match the color scheme of the entire roof for a beautiful, unified look.Read Also:7 Secrets To Keeping Your Lawn Tidy And Green 7 Tips To Increase The Value Of Your Home 7 Ways To Add Character And Style To Your Home

READ MOREDetails
how to install faucets

How To Install Faucets And Sinks

Installing a new sink is an uncomplicated and quick task. The process is relatively easy, and you can do the installation part by yourself with a bit of experience. Then how to install faucets? Though some complicated kitchen faucets require professional installation, many of the kitchen fixtures can be installed easily. Here is a guide on how to install faucets and sinks.  Materials Needed  In order to install the kitchen faucet and sink set, you will need the following list of things:a sink, a faucet or tap, a basin wrench, a strainer set, pump pliers, a screwdriver, a crescent wrench, a spatula, plumber's putty, silicone sealant, a bucket, a flashlight, and a set of towels. How to install faucets, and this reason is nearby if you wish to enlarge the opening within the countertop. It is also necessary to know how to clean bathroom sinks to maintain hygiene.  Step By Step Guide To Install Faucets And SinksIf you are looking for durable, sturdy, and premium quality faucets, it is best to choose Oltsw taps. Here, we have mentioned the steps to know how to install faucets and sinks.  Step 1: Measure and mark the layout of the kitchen’s sink Place the counter's back edge in the center of the sink within its cabinet. If the sink contains a template, align it along the mark on the counter. This is the first step of how to install faucets. Place the back edge one and a half inches parallel to the counter. Trace around it; proceed to the subsequent degree.If there is no template, use 2-inch tape to stipulate the sink location. Mark the middle of the sink on its back edge. Lay the sink inverted on the counter. Align the mark on the sink and the one on the counter together.  Step 2: Mark the cut lines on the counter The cut line marking is the second phase of how to install faucets. The employing a straightedge to attach the marks, you will find yourself with an oblong outline on the counter of the sink's hole. To approximate the radius of the corner of the sink, round off the corners by hand.Take a slightly wider bit than the jigsaw blade (½-inch bit is typically enough). Then, at each junction of the cut-out lines, make sure to drill a hole inside the radius.  Step 3: Use a jigsaw to cut the sink opening Place a jigsaw blade into a front hole and cut along the marked line to the back hole. Repeat on the opposite side. Lay a scrap of wood some inches longer than the cut-out across the sink area. Screw through the piece and into the cut-out waste to stop it from binding the saw blade or falling.Cut along the cut lines marked at the front and back and remove the cut-out piece. Make sure that the fit of the sink in the countertop is set. If it is necessary, trim the opening with the jigsaw.  Step 4: Install the kitchen faucet Set the sink the wrong way up on a padded sawhorse or counter. Then, feed the tap's supply tubing and tailpiece through the gasket, which helps seal the faucet to the sink. Screw the washers and mount them on the lower side sink deck. This is the pre-final step of how to install faucets.Just make sure that the tap can swing for a whole area across the sink deck before tightening mounting nuts.  Step 5: Attach The Strainer Over Applied Putty Put the sink up, apply a thick roll of the plumber putty under the strainer edge, and push it up through the sink's drain hole. Slip the housing (if your strainer has one), gasket, and washer onto the filter and against the lower side of the sink. Dab the pipe-joint compound and expose the opening threads. Thread the locknut onto the strainer by hand, then tighten it with pliers while holding the filter in situ. Fit the gasket onto the tailpiece of the sink drain and attach it to the strainer through its slip nut. Tighten the nut using a hand while holding the filter.  Step 6: Set the sink and connect the water supplyRemove the tape, and pull it toward the center of the hole. With the sink still, the wrong way up, press a bead of silicone tapping around the lower side of the sink's brim. Turn the sink upright and set it on the hole of the countertop. Make sure that the front of the sink is parallel with the front fringe of the countertop. Adjust it, if necessary. Next, use the corn-head supply tubes or the braided stainless-steel hoses to connect the tap and shut off the valves. Now, attach the required sprayer hose to the faucet's threaded tailpiece.  Step 7: Connect The Drain Pipes Assemble the trap adapter on top of the sink-drain tailpiece. Cut and dry-fit the length of the PVC pipe and attach the trap adapter to the trap and the drain elbow to the waste line. Then slide the web on the tailpiece to finely tune the length and alignment of the pipe. Take the drain pieces apart. Clean the cut ends with a utility knife. Use a PVC primer to coat it and its mating pieces. Let it dry and hold for 30 seconds. Now you are finishing the process of how to install faucets. Conclusion The essential features of kitchens and bathrooms are the sink and faucets. The sink and faucets need to be installed properly to avoid any damage and issues later on. Taking this into account, we have mentioned how to install faucets with significant steps to be followed while installing sinks and kitchen faucets.Additional reading:Small Kitchen Storage Ideas Know About The Type Of Kitchens According To Different Size Different Types of Conversions to Make the Most of Spare space 

READ MOREDetails
google bubble level

Best Ways To Complete Google Bubble Level In 2023!  

It is not always possible to carry a toolbox everywhere you go, and if you need to measure something quickly, I am here to help you. These days with the help of modern technology, there are a lot of tools available which help in performing such tasks.In this article, I will be talking about some of the best applications which also function as measuring tools and will be of much use to you.Keep reading till the end to find out more information about Google bubble level and other similar applications!What Is A Bubble Level?  A Bubble Level or a Spirit Level is an instrument that is designed to indicate whether a surface is vertical or horizontal or even vertical. There are different types of spirit levels that may be used by stonemasons, bricklayers, carpenters, millwrights, and also during some video graphics or photographic work.How To Use Google Bubble Level?  Google has many widgets known to appear on the "search results" page, like a measuring tool, Google search games, and even a metronome. As it turns out, a Google Widget is the easiest option for a bubble level. There is iphone level pre-installed on Apple devices – I would only be talking about accessing spirit level on Android.For accessing a bubble level or spiritual level, on Android devices, one simply needs to install the Google app on the phone and then search for "bubble level." A user searching for this tool can also try speaking into the mic after opening Google Assistant as well. Or a user might also just type in google bubble level and the search results would show up.Using of this tool would be like using an actual tool. Just align the phone against a plain surface vertically or even horizontally to see how the level actually is. To get help in measuring, one must see how many degrees are off from zero. One must also watch the plus icon to ensure everything stays flat.Tips: You do not need to install Level for iphone, as they already come pre-installed on Apple devices.Other Useful Tools  Here is a list of some of the other tools that can be used to utilize your phone as a toolbox:Measure  Utilizing of AR (augmented reality) to provide measurements of everyday normal objects is a very useful way of creating a digital tape measure, which is exactly what Google's Measure application does. It is one of Google's great applications.With this application's help, one can measure the length, distance, and height using their camera. This application is very simple to use, unlike other related apps. It is also a very user-friendly app as well.To get started with it, one would first need to scan the area with the application to detect the vertical or horizontal plane. Then one would need to select the measurement mode they want to use on their screen. One can even adjust the lines to the desired points, and the application would estimate the object's size.Smart Ruler  This is a very simple tool as well. The Smart Ruler is known to act as a ruler meant for taking only small measurements. A user needs to put any object of their choice for measuring on the screen of the Android device, then touch the corner for detecting the length and width.You are also bound to find a variety of applications available, but Smart Ruler is different because it has a very easy interface.Sound Meter  This application is known to measure the decibel values of the surrounding environmental noise. To help with guidance, the Sound Meter also provides various examples of similar noise levels for differentiation.For instance, the thirty-decibel range of sound is very similar to the volume of a whisper, while on the other hand, seventy two decibels is closer to very loud music.Laser Level  Laser Level is a leveling application that is a handy tool just like google bubble level that features an incredibly useful bubble level/spirit mode. This basically means that with the application, it is possible to measure angles and determine whether or not a surface is "level" in various ways. Even better, it includes a built-in clinometer for those who want to measure angles precisely.Metal Detector  My phone's metal Detector level performs exactly what it says it will. Based on the magnetic field, it utilizes the smartphone's sensors to find the presence of metals. This can really aid in finding all the metal studs in the wall or even help in searching all the possible pipes in the ground.CalcKit: All-In-One Calculator  Even though CalcKit is not a traditional tool like a hammer, it is still an incredibly helpful tool as a conversions and calculator app for artisans and contractors. This application is well renowned for containing a large range of conversion tools that make it extremely applicable to a huge range of professions. For quick computations on the fly, even those in science-related fields could benefit from using it.This application includes everything from mathematical equations to more complex and electronic calculations. It has lots of features and can even do fuel efficiency volume metric calculations.Tool Box  The tool Box application by Maxcom is a very lightweight and simple collection that consists of many related tools. This application includes features such as a decibel meter, leveler, barcode reader, protractor, and magnifier.If you want a manageable all-in-one toolbox application, then this application is the perfect choice. Its tools are pretty basic as well, but this essentially means that the app takes very less storage space on the phone.Smart Kit 360  The Smart Kit has a very appealing look, and that gives it a very sleek and modern look. It also has one of the most extensive collections of different tools amidst all of the other toolbox apps that are available for Android.It is also known to include tool replacements, such as a compass and a leveler. And It is also known to have a few modern tools, such as phone management and storage tools and a heart rate monitor. There are also a fair share of tools that one doesn't get to see often in other similar apps available out there.To Wrap It Up!  Of course, the bubble level google app cannot replace an actual tool. If you just want to check the alignment of your things at home for fun, you can surely try out the Google bubble level tool for measurement.Thank you for reading up till here. I hope you found the information useful. Let me know in the comments your thoughts on the same.More Resource:What Does Sound Dampening Mean?Pros And Cons Of Mini Splits For Cooling3 Best Indoor Plants For The Dining Room

READ MOREDetails