Use Floor Polishing for Keeping Your Flooring Looking New

Published on: 06 April 2016 Last Updated on: 30 July 2021
inner-img

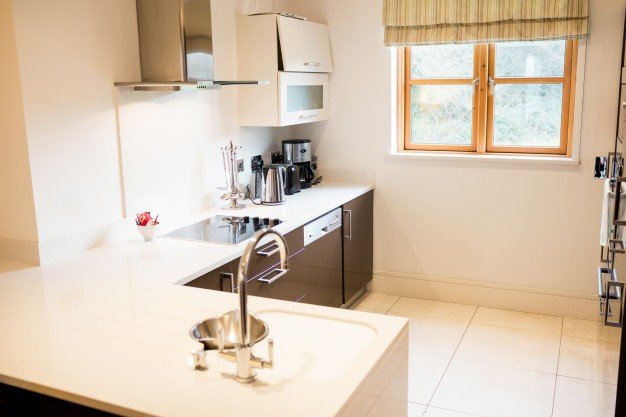
It is very easy to take floors in the commercial buildings in Melbourne from looking absolutely dull to shining with the help of floor sanding and polishing Melbourne which gives them extra shine. A lot of commercial as well as industrial properties owners who have cleaners already understand that the industry professionals are a wonderful addition to the janitorial supplies.

In addition to floor polishing, you can always use floor scrubbers for daily maintenance and upkeep. These can be handled by the cleaning department and prevent the accumulation of serious dirt, grime, and filth on the floor surface. Floor scrubbers are a simple, effective, and cost-affordable solution to help keep your floors shining, clean and proper. These are ideally suited for large commercial floors.

Reasons why people are considering floor polishing

  • Using the industrial flooring machines many times brings a lot of shine as well as sparkle to the floors of the building. Renting out commercial polishers will help you wax or polish your floors often. However, purchasing a machine for your personal use would offer you a lot of flexibility by helping you to conduct regular clean-ups of the floor as your schedule allows. This, in turn, would help in converting to the low cost of cleaning by eradicating the whole need of outsourcing the job to the contractor. Investment in industrial polishers helps in paying for itself each time.
  • The latest machines and tools are very convenient and handy to be used. Gone are the days when you had to use huge, difficult-to-control machines. The modern-day machines are extremely light in weight, very easy to be controlled, and very simple to be used for maximizing the experience of the users. You just need to add polish or wax into the machine and then plug it into the socket. Some of the models even feature multiple motors which help in applying the wax at different levels of speed for maximizing finish and shine.
  • With the help of the industrial polishing machines which you can buy in Melbourne, you can easily protect as well as safeguard your flooring from any kind of long-term damage. The tiny particles like dirt and dust might stay on your floorings even after they have been swept. The foot traffic would grind the debris into the flooring, causing irreversible and huge damage eventually like permanent scratches as well as marks. With the help of these polishers, you can give a protective coat to your flooring. This would help in keeping the flooring from being damaged or scraped. Along with hygiene as well as safety, the flooring machines would also maintain the exterior of the surfaces as well as floorings.

Because of all these reasons, people prefer this option

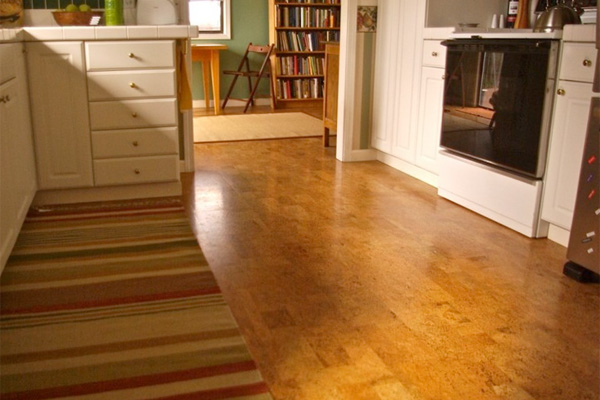
The flooring of the property is the very first thing that people see as soon as they enter. Thus, for ensuring that they leave a good impression on the visitors, you need to use different kinds of floor polishing tools that are easily available in Melbourne. You should use them regularly so that they are protected. They would look their absolute best with the help of these tools.

Conclusion

Floor polishing helps in keeping the floorings look new and shiny always. You should keep using them regularly so that the flooring may be safeguarded from long-term damage.

Read More:

  1. Interior Designing: A Great Art To Make Your Home Look Beautiful
  2. 6 Expert Tips For Finding The Right Home To Buy
  3. Best Office Design Trends For 2018
  4. Pressure Washing- Why It Is Necessarily Important For Your Home?

Abdul Aziz Mondol is a professional blogger who is having a colossal interest in writing blogs and other jones of calligraphies. In terms of his professional commitments, he loves to share content related to business, finance, technology, and the gaming niche.

View all posts

Leave a Reply

Your email address will not be published. Required fields are marked *

Related

Heating-Service-Experts

5 Features That Any Heating Service Should Have!

It is less likely you will come up with unusual tips to guide you hire a good heating service Bergen County NJ. While some might ask you to go by the company goodwill, there will be some who will make you check the packages. However, there are several elements that make any service better than the others. It is imperative for you to go through them carefully before confirming on the services of any heating and cooling professionals. Here are 5 most essential qualities that any heating service Bergen County NJ should have: 1. Work Certification: It is important that you have only certified professionals to take a look at your HVAC unit. You cannot risk the comfort and health in your home or office. The heating units crafted for the residential purposes are different from the commercial ones. When you have certified professionals they are capable of providing assured services to any problem in your unit. You should be looking out for “HVAC certification”. Additionally, you should be looking out for the legal requirement that your state has laid down for the functioning of the services. 2. Quality: It is best to track the company’s record. This will help you know if the heating service Bergen County NJ has the right experience to handle the unit issue. Only a company that believes in offering quality service will come and offer a thorough evaluation of your unit. According to their evaluation, they will suggest you the solution. Only a good service provider will suggest you with honest solutions and help you fix the issue on time. 3. Work Contracts: When you are looking forward to hiring a heating service Bergen County NJ, go for the work contracts. Apart from the regular repairs, you will need such services for maintenance. Keeping the units well-conditioned can help them perform efficiently. Additionally, you will not have to worry about major damages or repair work. A trustworthy company will not hesitate in getting the contract ready and signing it. Hence, you should be looking out for a company that believes in working only with a signed contract that has all the agreed terms and conditions. 4. Insurance: It is important that the heating service Bergen County NJ has professional liability insurance. While working on the heating or the cooling units, it is possible that there might be an accident. The insurance takes care of the damages that incur upon the property. At the same time, it even covers the repair or hospitalization expenses if necessary. Hence, instead of just going by the goodwill of the company, you should be looking out whether the company is certified and insured to undertake the maintenance and the repair work. 5. Referrals: The best and assured way to know if you are looking for the best service in the town is to ask for the referrals. This is a tested way that will help you know if the professionals of the heating service Bergen County NJ are experts and experienced in handling your queries and resolving them. You can get in touch with their previous clients to learn about their work policies. This will help you to 5 Safety Precautions That Heating Services Should Take! Heating services involve working with heating equipment such as furnaces, boilers, water heaters, fireplaces, and space heaters. These equipment can pose various hazards such as fire, electric shock, gas leak, carbon monoxide poisoning, and burns. Therefore, heating services should take the following five safety precautions to prevent accidents and injuries: Install and maintain smoke detectors and carbon monoxide alarms: These devices can alert the heating service workers and the homeowners of any potential fire or gas leak. They should be tested monthly and replaced every 10 years. Wear personal protective equipment (PPE): Heating service workers should wear appropriate PPE such as gloves, goggles, masks, hard hats, and boots to protect themselves from heat, sparks, flames, chemicals, and dust. Follow electrical safety rules: Heating service workers should use insulated tools, avoid wet or damp areas, and turn off the power supply before working on any electrical components of the heating equipment. Avoid flammable objects and materials: Heating service workers should keep the heating equipment at least three feet away from any combustible items such as curtains, furniture, paper, or aerosol cans. They should also store and dispose of any flammable liquids or gases properly. Ensure proper ventilation: Heating service workers should work in well-ventilated areas to prevent the buildup of carbon monoxide, a deadly gas that can cause headache, nausea, dizziness, and death. They should also check the vents, chimneys, and flues of the heating equipment for any blockage or damage. Final Word In case you wanted to know about heating services and why you should take them, I hope that this blog has been of help to you. If there are nay other queries that you might have related to the same, please feel free to let me know. All that you need to do is scroll down till you reach the bottom of the page. Then leave your comments and queries in the box below. And I will be there to answer them all for you! Read More:  Additional Ways To Keep Your Home Warm Five Efficient Uses Of Propane In Your Home

READ MOREDetails
how to harvest lettuce

How to Harvest Lettuce: A Step-by-Step Guide for Fresh and Crispy Salads

Since lettuce plants grow best in cool growing seasons, most lettuce varieties are classified as spring or fall greens. However, if the longer days are keeping your lettuce plant producing leaves well into the summer and it hasn't bolted yet, here are some excellent tips to follow to maximize your harvest. Taking individual leaves off the plant is one way to increase its yield. Alternatively, you could sow in succession every two weeks in the early spring or fall to continue the harvest. To offer lettuces shade and protection from the hot summer sun and high temperatures, a third method is to interplant with a taller crop. Lastly, cultivators should seek out cultivars known for their slow bolting, like the looseleaf varieties "Slobolt" and "Sierra." Here is how to harvest lettuce so you can eat some leaves right away and encourage the plant to continue growing more. How To Harvest Lettuce? If you want to harvest lettuce and do not know how to go about it, here are all the details. Follow the steps closely to get the healthiest and crispiest lettuce for your salads and sandwiches. Plant Looseleaf Varieties Your lettuce variety should be ready to harvest in 35 days, according to the seed packet, which means you should have large enough leaves to pick a little more than a month after planting. By regularly picking the outer leaves, you may be able to extend the harvest until late June if you sow seeds in March or April. Begin Harvesting Early in The Season Young lettuce plants will be harmed by light frost, but mature plants can withstand it. If you live in an area where there is no winter frost, you can plant early and begin harvesting the outer leaves when they get to be 4 or 6 inches long. Your harvest can last up to 30 days longer if you plant and harvest early. Pick Lettuce in The Morning It is ideal to harvest lettuce early in the day to avoid the leaves wilting due to the intense heat. The leaves are crispest and flavorful in the morning because they contain the most water. Look For Plants with Large Outer Leaves The center of the crown is where the new growth starts on the lettuce. You must remove the largest, oldest leaves that are about 4-6 inches long. You will find these leaves on the outside of the plant. Cut or Pinch The Outer Leaves At 1/4 to 1/2 inch from the base, pinch off each outer leaf. To break the leaf off the crown, apply just enough pressure with your thumb and forefinger. Another option is to use a sterile, sharp scissor or snipping tool, though there is disagreement about whether doing so accelerates the browning of cut edges. Harvest Until it Flowers When older, mature leaves are consistently removed, the lettuce plant is encouraged to grow new leaves in their place. Harvesting individual leaves is possible until the plant produces a flower stalk, which indicates that it is ready to bolt and set seed. Lettuce turns bitter once it bolts. When to Harvest Lettuce? As soon as the lettuce is large enough to pick, it can be harvested. A seed packet will typically tell you how many days it will take to harvest. For the "cut and come again" method of harvesting loose leaves, standard-size varieties are the most effective. When outer leaves are 4 to 6 inches tall, that's the best time to begin harvesting. There are many varieties of lettuce seeds available, including blends and mesclun mixes. The best varieties to plant for a continuous harvest are called bi-colored, spotted, or loose-leaf lettuces in green and red or burgundy tones. The following are some varieties you might want to try: Black Seeded Simpson Green Salad Bowl Freckles Lolla Rossa Gourmet Mesclun Blend Deer Tongue Garden Leaf Blend Loose leaf lettuce varieties yield the best results from the cut-and-come-again method. Red, green, and oak leaf lettuce are a few examples. Additionally, you can wait to pick until a full head has matured or harvest early leaves from loose-heading varieties like butterhead and romaine. When and How to Gather Lettuce Heads The growth habit of head lettuce is akin to that of cabbage. In order to form a dense, rounded, or clumped shape, younger leaves emerge from the center, and older leaves form layers. There are two types of head lettuce: loosehead (similar to romaine) and crisphead (like iceberg). Let the crisphead varieties mature for a single harvest and keep an eye on them in accordance with the days to harvest specified on the seed packet. When the heads are dense and the appropriate size, they are ready to be picked. If you remove the outer leaves once or twice, loosehead lettuces will still head. However, the size of the fully mature head may decrease as a result. These lettuces can produce a head of looser layering or wrapping leaves (butterhead) or a clump of tall, straight leaves (romaine). Remove crispheads by chopping off the stem just below the center. Loose heads can be trimmed similarly or removed, with roots and subterranean stems cut back to the leaf base, depending on size. What Happens If a Flower Stalk Bolts A lettuce plant will eventually shoot up a flower stalk in the center, a sign that it has reached the end of its life and is ready to bolt, or bloom, and set seed. Though they might still be edible, the lettuce leaves are starting to get tough and bitter. There is no stopping flowering once this process has begun. Throw away the plant and plant again if the weather permits. Types of Lettuce There are four types of lettuce you can choose from when choosing which to grow: leaf, butterhead (loosehead), romaine, and head lettuce. When it comes to cultivation and harvesting, the main distinction is that leaf lettuce crops yield several harvests, whereas head lettuce varieties, such as iceberg, romaine, and butterhead, only yield one harvest. Leaf lettuces are, therefore, a favorite among home gardeners since you can grow them in raised beds, on the ground, or in patio containers. Keep in mind that lettuce is a cool-season crop, so you should schedule your harvest for the spring when the temperature is still cool. Such temperatures are usually around 70 degrees. Find out when the first frost occurs in your area each fall and plant appropriately. Starting fall crops from seed indoors and moving them outside as the weather cools down may be the best option. Seek out head lettuce cultivars such as Crisphead and Iceberg that you can grow from seed. In roughly six weeks, the lettuce will reach maturity and be ready for harvest after the seeds have germinated in 10 to 21 days. One loose butterhead variety that you can grow from seed or seed tape is called Buttercrunch. It takes 65 days to be ready for harvest. Vivian is one of the romaine varieties that yields soft, flavorful leaves. Directly sow seeds in the garden in the spring. Start seeds indoors in the fall and transplant them to your garden. Varieties of loose-leaf lettuce grow quickly and are enjoyable to experiment with in salads, sandwiches, and other culinary creations. Look for mesclun mixes and heirloom cultivars such as "Black Seeded Simpson." Many come in simple-to-grow seed tapes that can be harvested in roughly seven weeks. How to Harvest Leaf Lettuce? When the weather gets chilly, you can harvest salad from a leaf lettuce crop in your home garden whenever you're ready to eat. You can harvest an entire crop of lettuce at once by waiting for it to mature. However, cutting fresh lettuce leaves off as they grow is the easiest way to prepare them for consumption at any time. Depending on the variety, lettuce leaves should be harvested when they reach a length of 3 to 6 inches. Gather leaves continuously until the lettuce plant "bolts." This indicates that the plant has focused its energy on developing seeds and flowers, and as a result, the leaves typically develop tough stems and a bitter taste. How to Harvest a Full Head of Lettuce? A lettuce plant can continue to grow until it produces a full head of leaves. Use the "one and done" approach when harvesting head lettuce. Just make a clean, above-soil knife cut across the entire head of lettuce at the base of the plant. For this, a harvest knife comes in handy. Remember the seed packet and note the maturity or harvesting days. As your plants get bigger, keep an eye out for indicators of maturity, which are typically firm, full heads. Harvest in the spring before it gets too hot, usually when the daytime highs hit 70 degrees Fahrenheit. The bitter taste of the leaves and the mushy head of lettuce can result from warm weather. How to Store Lettuce? When the lettuce is inside, you can use a colander to wash the leaves and thick cotton towels to dry them so you can use them in salads and sandwiches. In case you cultivate a lot of lettuce, investing in a salad spinner would be wise. It helps dry and wash Lettuce quickly. Lettuce leaves without water should be refrigerated. For most greens, store the leaves in a loose plastic bag for approximately a week. When the salad greens are ready to be eaten, give them a good rinse in several runs of cold water and then pat dry. How to Harvest Lettuce Microgreens? Microgreens are incredibly simple to harvest! When the first true leaves appear, after ten to fifteen days of planting the seeds, they will be ready. When the microgreens are two to three inches long, harvest them if you are measuring them by height. Investigating the flavor profiles of the microgreens at various heights is enjoyable. Cut the entire plant ½ inch above the soil line with a pair of scissors or grass shears. If you need more inspiration, check out our many other interesting gardening tips for growing microgreens, like growing lettuce microgreens! How to Harvest Romaine Lettuce? The leaves of romaine lettuce (also known as cos) have the perfect amount of crunch or crispness. The lettuce plant's outer leaves can be harvested as it grows. The leaves can be chopped off one to two inches above the ground. Gathering these tender green leaves now will give the lettuce more time to ripen before full plants can be harvested. Before Romaine lettuce reaches maturity, it can take 55–70 days to grow from seed. To determine when the lettuce is ripe, examine it directly. When the romaine lettuce leaves are 6 to 8 inches tall, the ribs are firm and juicy, and the leaves have formed a tightly compacted head, the lettuce is ready for harvesting. To test if the lettuce head is firm, squeeze it. Overripe head lettuce will be tough, while young head lettuce will be soft. Harvest by making a cut an inch above the ground, saving the crown for a subsequent harvest. You can harvest the lettuce head by digging up the entire plant if it is nearing the end of its garden lifespan. Read More: Everything You Need To Know About Harvesting Basil! Loose Leaf lettuce The harvest window for leaf lettuce varieties is quite broad. After planting, the young, baby lettuce leaves can be harvested 25 days later, and the plant will mature fully in 50–60 days. Make sure your crop is harvested prior to it bolting. Since you can harvest loose-leaf lettuce more than once during the growing season, it's ideal for repeated harvesting. You can chop the entire lettuce plant 1-2" above the soil line once the leaves reach 4".  In 10 to 15 days, fresh leaves that have sprouted from the base will be ready for harvesting again if the crown is left intact.  Try spreading out your seed sowings and doing multiple sowings to ensure a consistent harvest all season long. If you want to preserve the crisp flavor of the young baby greens, you should sow them again. Another method of harvesting involves leaving the inner leaves to grow while pruning the young leaves on the outside of the head for greens. When the plants are 4 inches tall, you can begin harvesting lettuce by cutting them just above the soil line. Crisphead Lettuce When grown locally, crisphead or iceberg lettuce makes for incredibly tasty salad greens.  You might not get a whole head of lettuce, but this can be a cut-and-come-again harvest.  A single harvest is more appropriate for this green lettuce. After planting, there is a 50 to 75-day window for harvest. Iceberg lettuce can be harvested as soon as the head appears before the outer leaves turn brown and as soon as the center feels firm, and the leaves are compacted tightly. Before the crisp lettuce starts to open and the seed stalk starts to form, harvest it. More importantly, if you see the lettuce beginning to bolt—a common issue in hot weather—or the seed stalk, harvest it right away. Harvesting iceberg lettuce is best done by digging up the entire plant and then cutting off the stalk. Because of its thick stem, this lettuce plant can be challenging to harvest while it is still in the ground.  If you decide to harvest the lettuce while it's still in the ground, please take care not to harm it.  You can cut the stem just below the leaves by lifting the lettuce upwards. Wrapping Up Nothing compares to the sheer satisfaction of harvesting and regrowing fresh, new lettuce from the same plant. You are far superior to other lettuce owners if you can figure out how to harvest lettuce correctly so that it keeps growing. Thus, if you want to become a rich lettuce farmer, make sure you constantly and meticulously follow all the above steps! If you have thoughts to share or questions to ask about how to harvest lettuce, then please leave a comment below. We would love to hear from you. Read Also: Some Facts You Need to Know About Rainwater Harvesting Asparagus 101: When, How, And How Often To Harvest? Exploring Ideas For A Biophilic Home Design

READ MOREDetails
how to harvest sunflower seeds

How To Harvest Sunflower Seeds: A Fun And Easy Activity For The Whole Family

Sunflowers are not only beautiful and cheerful, but they also produce delicious and nutritious seeds that you can enjoy as a snack or use in various recipes. Harvesting sunflower seeds is a fun and easy activity that you can do with your whole family. It is also a great way to teach your kids about nature, gardening, and healthy eating. In this article, I will show you how to harvest sunflower seeds in a few simple steps, as well as some tips and tricks to make the most of your sunflower harvest. If you enjoyed reading my blog on harvesting lettuce, you will enjoy reading this one! So, if that is what you are interested in knowing, I have you covered! Keep reading this blog till the end to learn more… How to Grow Sunflower Seeds: A Simple and Rewarding Gardening Project? Sunflowers are one of the most iconic and cheerful flowers in the world. They are also one of the easiest and most rewarding plants to grow from seeds. Sunflowers can brighten up your garden, attract pollinators, provide shade, and produce edible seeds that you can harvest and enjoy.  In this part of the article, I will show you how to grow sunflower seeds in a few simple steps, as well as some tips and tricks to make the most of your sunflower growing experience. How to Choose Sunflower Seeds? The first step to growing sunflower seeds is to choose the right seeds for your garden. Sunflowers come in a wide range of sizes, colors, shapes, and types. Some of the most common types of sunflowers are:  Giant sunflowers These are the tallest and largest sunflowers, reaching up to 15 feet in height and 12 inches in diameter. They produce huge and heavy flower heads that are filled with large and plump seeds. They are ideal for creating a dramatic and impressive display in your garden, as well as for harvesting large quantities of seeds. Some examples of giant sunflowers are Mammoth, Titan, and Kong. Dwarf sunflowers These are the smallest and shortest sunflowers, growing up to 3 feet in height and 6 inches in diameter. They produce smaller and lighter flower heads that are easier to manage and maintain. They are ideal for growing in containers, pots, or small spaces, as well as for adding a splash of color and charm to your garden. Some examples of dwarf sunflowers are Teddy Bear, Sunny Smile, and Little Becka. Colored sunflowers These are the most diverse and colorful sunflowers, ranging from yellow, orange, red, pink, purple, brown, and even green. They produce medium-sized flower heads that are attractive and eye-catching. They are ideal for creating a vibrant and varied display in your garden, as well as for cutting and arranging in bouquets or vases. Some examples of colored sunflowers are Autumn Beauty, Moulin Rouge, and Lemon Queen.  Things to Consider While Choosing Sunflower Seed When choosing sunflower seeds, there are several things that you need to keep in mind. For instance, you should also consider the following factors: Climate and season of your area Sunflowers are warm-season plants that need full sun and warm temperatures to grow and bloom. They are best planted in late spring or early summer, after the last frost, when the soil is warm and moist. If you live in a cold or frost-prone area, you can start your seeds indoors and transplant them outdoors when the weather is favorable. Soil and water conditions of your garden Sunflowers are adaptable and tolerant plants that can grow in most types of soil, as long as they are well-drained and fertile. They prefer slightly acidic to neutral soil with a pH of 6.0 to 7.5. They also need regular watering, especially during the germination and flowering stages. However, they can withstand some drought and dryness once they are established. Space and support available in your garden Sunflowers are large and sturdy plants that need ample space and support to grow and thrive. They should be planted at least 2 to 3 feet apart from each other and from other plants, to avoid overcrowding and competition. They should also be staked or tied to a fence, a trellis, or a pole, to prevent them from bending or breaking under their own weight.  How to Plant Sunflower Seeds? Once you have chosen your sunflower seeds, you can proceed to the next step. Planting sunflower seeds is a simple process that involves preparing, sowing, and caring for the seeds. Here is how to do it: Prepare the Soil Prepare the soil by loosening it with a fork or a spade. Ensure that you remove debris, weeds, or rocks. You can also enrich your soil by adding some compost, manure, or fertilizer, to boost its fertility and drainage. Make sure the soil is moist but not soggy, and has a temperature of at least 50°F. Sow the Seeds Sow the seeds by making holes or furrows in the soil, about 1 to 2 inches deep and 2 to 3 feet apart. You can use a ruler, a stick, or your finger to make the holes or furrows. Drop one or two seeds in each hole or furrow, and cover them lightly with soil. You can also sprinkle some water over the seeds to help them settle in the soil. Nurture Care for the seeds by watering them regularly, but not excessively, to keep the soil moist but not wet. You can also mulch the soil with straw, grass clippings, or leaves, to retain moisture and prevent weeds. You should also protect the seeds from birds, squirrels, or other animals, by covering them with a net, a cage, or a cloche. You should also thin the seedlings when they are about 4 to 6 inches tall, by removing the weaker or smaller ones, and leaving only the strongest and healthiest ones.  How to Grow Sunflower Seeds?  After planting your sunflower seeds, you can watch them grow and enjoy their beauty and bounty. Growing sunflower seeds is a rewarding and satisfying experience that requires minimal maintenance and care. Here are some tips and tricks to grow sunflower seeds successfully: Water Water your sunflowers regularly, but not excessively, to keep the soil moist but not wet. Sunflowers need about 1 to 2 inches of water per week, depending on the weather and the soil conditions. You can use a hose, a sprinkler, or a drip irrigation system to water your sunflowers. You should water them in the morning or evening, and avoid wetting the leaves or the flower heads, to prevent fungal diseases. Fertilizer Fertilize your sunflowers occasionally, but not excessively, to boost their growth and flowering. Sunflowers need a balanced fertilizer that contains nitrogen, phosphorus, and potassium, such as a 10-10-10 or a 20-20-20 formula. You can apply the fertilizer once or twice during the growing season, following the instructions on the label. You should avoid over-fertilizing your sunflowers, as this can cause them to grow too tall and weak, and make them prone to pests and diseases. Pruning Prune your sunflowers occasionally, but not excessively, to improve their shape and health. Sunflowers do not need much pruning, as they are naturally self-pruning and self-cleaning. However, you can prune them to remove any dead, damaged, or diseased leaves, stems, or flowers, to prevent infection and improve air circulation. You can also prune them to control their height and spread, by pinching or cutting off the tips of the main stem or the side branches. You should use clean and sharp scissors or pruners to prune your sunflowers and do it in the morning or evening when the plants are less stressed. When to Harvest Sunflower Seeds? The first step to harvesting sunflower seeds is to know when they are ready. Sunflowers typically bloom in the summer and their seeds mature in late summer or early fall. You can tell when your sunflowers are ready to harvest by looking at their appearance and feel. Here are some signs that your sunflowers are ready to harvest: Petals have fallen off or turned brown. The back of the flower head has turned yellow or brown. Seeds have developed black and white stripes. The seeds are plump and firm to the touch. If you are not sure if your sunflowers are ready to harvest, you can do a simple test by rubbing your thumb over the seeds. If they come off easily, they are ready to harvest. If they are still attached to the flower head, they need more time to ripen. How to Harvest Sunflower Seeds? Once you have determined that your sunflowers are ready to harvest, you can proceed to the next step. Harvesting sunflower seeds is a simple process that involves cutting, drying, and storing the seeds. Here is how to do it: Cut the flower heads from the stems using a sharp knife or scissors. Leave about 12 inches of stem attached to the flower head for easier handling. Place the flower heads in a dry and well-ventilated area, such as a garage, shed, or porch. You can hang them upside down or lay them flat on a screen or rack. Make sure they are not touching each other to prevent mold and rot. Let the flower heads dry for about two weeks or until the seeds are completely dry and hard. You can check the dryness by biting or cracking a seed. If it is crunchy and not moist, it is dry enough. Remove the seeds from the flower heads by rubbing them gently with your hands or a soft brush. You can also use a fork or a spoon to scrape them off. Discard any debris, such as petals, leaves, or insects. Store the seeds in an airtight container, such as a glass jar, a plastic bag, or a metal tin. Label the container with the date and the variety of sunflower. Keep the container in a cool and dark place, such as a pantry, a cupboard, or a basement. How to Enjoy Sunflower Seeds? Now that you have harvested your sunflower seeds, you can enjoy them in various ways. You can eat them raw or roasted, salted or unsalted, shelled or unshelled. You can also use them in salads, soups, breads, muffins, granola, trail mix, pesto, butter, and more. Sunflower seeds are rich in protein, fiber, healthy fats, vitamins, minerals, and antioxidants. They can help manage high cholesterol, blood pressure, and inflammation and boost your immune system, brain function, and mood. Here are some tips and tricks to enjoy your sunflower seeds: Roast To roast your sunflower seeds, spread them in a single layer on a baking sheet and bake them in a preheated oven at 300°F for about 15 to 20 minutes, stirring occasionally, until golden and crisp. You can season them with salt, pepper, garlic, onion, paprika, cumin, or any other spices you like.  Shell To shell your sunflower seeds, you can use your teeth, your fingers, or a nutcracker. You can also soak them in water for a few hours to make them easier to shell. To remove the shells, you can blow them away with a fan, a hair dryer, or your mouth, or you can shake them in a colander or a sieve. Sunflower Seed Butter To make sunflower seed butter, you need to blend the shelled and roasted sunflower seeds in a blender until it turns smooth and creamy. You can add a little oil, honey, salt, or vanilla to enhance the flavor and texture. You can use sunflower seed butter as a spread for toast, crackers, or fruit, or as a dip for pretzels, celery, or carrots. Pesto To make sunflower seed pesto, blend roasted and shelled sunflower seeds with fresh basil, garlic, olive oil, lemon juice, salt, and pepper in a food processor or a blender until smooth and thick. You can use sunflower seed pesto as a sauce for pasta, pizza, or sandwiches, or as a dressing for salads or roasted vegetables. Wrapping It Up! Harvesting sunflower seeds is a fun and easy activity that you can do with your whole family. It is also a great way to enjoy the beauty and bounty of nature, as well as the health benefits of sunflower seeds. By following the steps and tips in this article, you know how to harvest sunflower seeds in a few simple steps, as well as enjoy them in various ways. I hope you found this article helpful and informative. If there are any other queries related to the same, please feel free to let me know. All that yo need to do is scroll down till you reach the bottom of the page. Then leave your comments and suggestions in the box below. And I will be ether to answer them all for you!  Learn More About: Best Material for Garden Sheds: A Guide for Everyone Asparagus 101: When, How, And How Often To Harvest? Best Gardening Tips For Beginners: Adopting A Relaxing Hobby

READ MOREDetails