The Impact Of Vanity Size On Bathroom Design And Functionality

by

01 December 2023

Home Improvement

Vanity Size On Bathroom Design

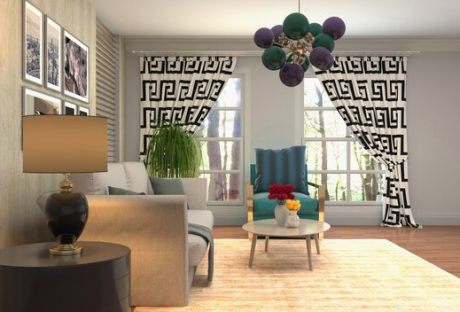
Today, clothing sizes often lead people to believe they are smaller than their actual size. This is called “vanity sizing”. For instance, “a size 8 dress today is nearly the equivalent of a size 16 dress in 1958,” according to a report

Because clothing can create the illusion of a slimmer appearance, many people now desire larger bathrooms as well. The trend of vanity sizing is influencing the design and functionality of bathrooms. From wider toilet stalls to more spacious showers, bathrooms are being changed to match people’s distorted self-image.

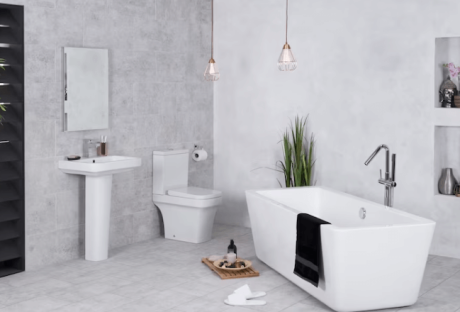
What is Vanity Sizing For Bathrooms?

Vanity sizing is when something is made bigger than normal to make people feel better about themselves. Just like size 6 jeans that actually fit someone who usually wears size 8 jeans.

In bathrooms, vanity sizing means making the room and fixtures bigger than what works for real bodies. Such as extra-wide shower stalls, two-person bathtubs, or oversized sinks. They make us feel skinnier, but take up a lot of space!

Factors To Consider When Choosing Vanity Size

Factors To Consider When Choosing Vanity Size

The main thing you should consider when choosing your vanity is the size of your bathroom which is a major factor in changing the look and feel of your bathroom. So, carefully review common bathroom vanity sizes and measurements before selecting. Look at the data below that shows the common vanity width that fits the bathroom sizes: 

Data Source: Forbes

1. Consider Floor Space

Will counters, cabinets, and toilets still squeeze in if you supersize your bathroom? Make sure giant fixtures don’t crowd out other necessary stuff!

2. Watch Door Openings Too

That cool two-person tub won’t do you any good if it gets stuck trying to fit through the bathroom doorway! Double-check entrances.

3. Check Plumbing Locations

Expanding your bathroom means dealing with pipes inside walls too. Make sure water lines still reach sinks or toilets when they move.

4. Price For Extreme Upgrades

Going big in bathrooms means spending big bucks too! Make sure your wallet can handle all that bonus tile, lighting, high-tech toilets, and other swanky stuff before pulling the trigger.  

5. Future Homeowners Too

What seems huge and perfect for your family now may scare off buyers down the road. Keep future practicality for the next folks in mind.

6. Consider Resale Value

Even if you adore your 47 jet massaging tub, will someone else want to pay big money for your over-the-top bathroom later when you sell?

7. Extra Cleaning Responsibilities

The bigger the bathroom, the longer the cleaning day takes! Make sure you want to put in elbow grease for giant showers and his ‘and her everything.  

8. Watch Wet Floor Safety

Oversized sinks and tubs mean leaks or splashes cover larger areas. Pay attention to slip-proof surfaces so no one goes crashing down.  

9. Visiting Guest Comfort

Even if space permits, older relatives may feel uneasy navigating a huge bathroom with their walkers or canes. Consider all who will use it.

10. Separate Private Toilet Room

Rather than one giant open space, smaller vanity bathrooms with a separate water closet for the toilet allow privacy.

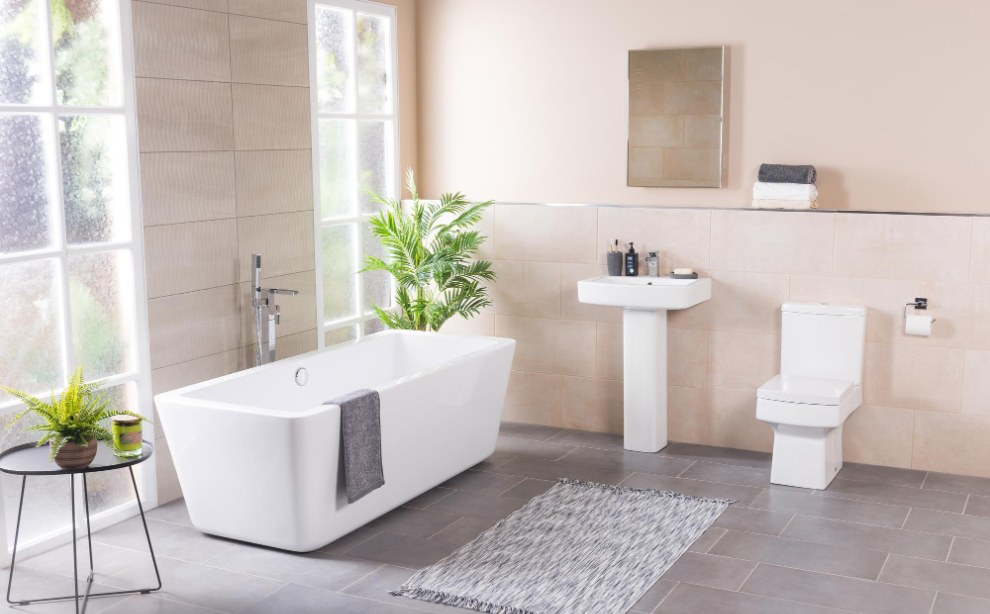
Choosing The Right Vanity Size For Your Bathroom’s Look

The dimensions of your bathroom vanity change how open, crowded, or balanced your space appears. An overgrown vanity makes small rooms feel stuffed. But one too tiny turns your bathroom into a messy pile-up of products without enough organizer drawers or counter area.

Here’s how to get vanity sizing just right for your ideal bathroom design style:  

In Itsy Bitsy Bathrooms

When dealing with snug powder rooms or half baths, keep your vanity narrow in the 24 to 30-inch range so it doesn’t hog up the entire floor. Any wider starts making moving around impossible! Select wall-mounted styles instead of boxy cabinets to save precious inches. Or opt for floating vanities that have air rather than chunky boxes below to give the illusion you have more breathing room. 

Another decorating trick for a petite bathroom is going big with mirrors or using reflective tiles and chrome finishes. When tiny rooms sparkle and shine, they seem to double in size instantly! Just avoid dark paint shades, clutter, and heavy fabrics that make small salons feel even more closed in.  

For Middle-of-the-Road Bathroom Sizes  

If your washroom dimensions fall somewhere in that just-right not-too-big, not-too-small middle zone, standard vanity widths from 30 to 48 inches tend to fit nicely without limiting movement. This gives your average family plenty of surface space to spread out self-care must-haves each morning and store all those lotions and potions in handy drawers below.  

When organizing your cabinet and counter goods, be sure to keep at least 9 to 12 inches of space around the vanity perimeter. You’ll still need elbow room to get in there for clean-ups without bonking walls, doorway frames, or light switches! Beyond functional inches, defining your vanity area with cool lighting designs or eye-catching tile shapes helps contain the space in a neat square for a balanced, soothing aesthetic.  

When You’ve Got Room to Spare

Lucky enough to be working with a big old bathroom complete with soaring ceilings and a giant footprint? Then you’ve got options to install his and her double-wide vanities ranging from 60 to a whopping 72 inches. This creates the dramatic appearance of dual stations without the need for significant construction to physically divide your spacious room into two separate spaces.

FAQs:-

Q1. What is the standard width of a bathroom vanity?

Ans: The standard width for a single-sink bathroom vanity is 24 to 48 inches. For a double sink vanity, it’s 60 to 72 inches.

Q2. How do I choose the right vanity size for my bathroom? 

Ans: Consider your existing bathroom size, number of users, and required storage space when selecting the ideal vanity. Allow proper clearance between the vanity and walls. 

3. What are some common mistakes to avoid when choosing a bathroom vanity size?

Ans: Avoid sizing too small and creating limited functionality or choosing an oversized vanity that makes the bathroom feel confined. Failing to measure properly and allowing adequate wall clearance are also common mistakes.

Conclusion

Vanity dimensions significantly influence the visual enhancement and practical use of any bathroom. By factoring in room size, user needs, and required storage, you can achieve an optimally designed and functional space that suits your lifestyle beautifully. By paying attention to critical measurements and clearances, you can avoid common mistakes. With some planning and foresight, you’ll love your new bathroom for years to come.

Additional Reading:

Content Rally wrapped around an online publication where you can publish your own intellectuals. It is a publishing platform designed to make great stories by content creators. This is your era, your place to be online. So come forward share your views, thoughts and ideas via Content Rally.

View all posts

Leave a Reply

Your email address will not be published. Required fields are marked *

Related

curtains

Everything you need to know about glamming your home with curtains

Considering drapes or curtains but stuck on which style and design to choose? Well, this article is for you. We shall delve into all the details that you ought to know when looking for curtains for your home. Sheer curtains The sheers are made from a translucent fabric that softly filters light. These curtains do not darken the room, but they allow plenty of natural light to fill it. The sheer curtains also ensure that passers-by cannot get a glimpse of your house hence protecting your privacy. It is for this reason that sheers make great living room curtains. Pair your sheers without blackout curtains for an unmatched level of privacy. The custom curtain combination gives you complete control over light levels and helps in regulating room temperature due to the insulating blackout fabric. Curtain fabric The fabric is the first to consider when purchasing curtains. The choice of fabric will determine their functionality in your home. You should choose various fabrics for different rooms. The patio curtains offer the best fabric. Blockout curtains These curtains are also referred to as blackout curtains and are primarily predominant in Australian homes. These curtains prevent light from entering through the windows hence resulting in a darker room. They also help in insulating your home. During the winter months, the thick-lined fabric gets your home warm, while during the hotter ones, the fabric prevents hot air from passing via the windows. Linen curtains It is regarded as one of the best fabrics you can select for your home despite being overlooked. These fabrics have several practical advantages. For starters, linen is a durable and robust fabric making it a worth trying investment. It has an anti-bacterial fabric with hypoallergenic features and is exceptionally absorbent. For this reason, it is the best for anyone in the family who is prone to allergies. Curtain length One of the essential steps in getting suitable curtains is ensuring you have the correct measurements. Poorly installed or ill-fitting curtains will make even the most stylish of rooms look unattractive and disorganized. Walk with an expert to determine the length of your curtain. You will have a sit down with him to know what you want to achieve in your home. Provide a sense of height to a room by hanging a fabric higher than the window. For a classic look, go with curtains that skim the floor. Curtain color Take all the time when choosing a color for your curtain since it is an investment for your home. There are a variety of drapes and curtains with different beautiful colors that can you can select. The living room area should have bright colors since it the eyes of everybody. White and grey curtains are the most popular choices. Summary Curtains literally “add life” to your home. Get a professional who will guide you in determining all the above-shared information, and you will bring happiness to your home. Read Also: Remodeling Tips for New Homeowners How to Keep Your Bathroom Clean All the Time How Do You Match Sofas With Accent Chairs?

READ MOREDetails
Drywall

Elevate Your Home With Unique Ceiling Textures

Drywalls are those construction materials that are used to create walls and ceilings in your home. Not all that, but drywalls also come in handy if you want to create design features like eaves, arches, or any mind-blowing architectural requirements!!! Do you know the best part about drywalls? These are super easy to install, highly durable, and only require simple repairs when damaged. So, drywall is a flat component composed of calcium sulfate dihydrate, typically between thick sheets of backer paper, and facer, used to construct interior ceilings. Let’s talk about the ceiling textures and the drywall options you can choose for your home!!! The Ceiling Textures And Your Drywall Options Decorating your home can be a real challenge for many !!! Therefore, choosing the right drywall finish or texture can prove to be a hard nut to crack. And it’s very natural to get in a state of indecision if you are handpicking it for your new home or renovation project. There are so many options that it feels like you are “searching for a pearl in an ocean.” Making up your mind about whether or not to go texturing your ceiling can be a tough job. And even if you choose to texture your ceilings, there are chances you’ll be confused about which one to go for!!!! And remember, getting the drywall right is the first step of tiling projects?”. But No Need to Worry!! This article will guide you in choosing the perfect texture and drywall option for your ceilings to look more elegant than ever!! 1. Sheetrock Texture: Old Is Gold Sheetrock ceiling texture is a drywall ceiling texture that has been famous since 1917. The reason this drywall texture is so awesomely renowned is because of the artistic look that it gives to your ceiling And the best part is you don’t need to use any sort of spray paint in this case. You can achieve this texture by using your artistic hand technique and without using any special brushes. This texture is perfect for any room. There are no restrictions on the use of this ceiling texture. 2. Stipple Brush Texture: A Test Of Your Skill This texture is not as easy as it seems. You need skills to create this texture. To create this texture, you need a roller and slap brush. The fascinating fact about this texture is it can cover the bumps and holes on your ceiling. And if you have the skills, then this texture can surely make your ceiling look gorgeous than ever!! 3. Swirl Texture: Creativity Taken To A New Level To achieve this texture, you need either a roller or sprayer. You can also do this by using a technique called “the basic swirl” method. But one thing that you need to keep in mind is while creating this texture, you’ll need a lot of patience to get the best result. And the difficult part is you need to create the pattern before the mud dries. So, make sure to have a helping hand by your side. Overall, the texture can really give that awesome look on your ceilings if you do it in the right way!!! 4. Orange Peel Texture: A Color Of Choice The name suggests all the colors of orange skin, but sometimes it’s also called “an eggshell” ceiling texture. If you really love this color, then this can be on the top of your favorite lists. To create this texture, you need to apply thin mud to the ceiling using a spray gun set at very high pressure. The more artistic mind you have, the more artistic look it has got!!!! 5. Smooth Textures: Choice Of Many If you are someone who wants the best at a cheap cost, then this texture is just the right choice for you. Moreover, you don’t need to have many skills to create this texture design. The look of this texture is just mind-blowing, and if you are someone who likes things to be consistently gorgeous, then this is the texture you can have for your ceiling. This texture is effortless to remove and is also perfectly suited for any room. 6. Tree Bark Texture: Beauty Of Nature If you are someone who loves nature and wants to bring the reflection of nature inside your home, then this textured style is just the option you can have. This ceiling has the look of a tree. You can create this texture just by using a heavy roller. The texture might look simply, but it’s very artistic and can surely catch the eyes of many. If you have a farmhouse, then this texture will double the beauty!!!!! 7. Slap Brush Texture: Slap The Beauty Out Artistic, gorgeous, beautiful, and elegant are the nicknames you can give to this texture. A complete package of beauty!!!! To get this texture, you’ll need a brush with very stiff bristles and thin mud. Firstly, you have to cover your ceiling with mud using a roller, then take the brush and slap the ceiling from the edge. This can be a hard nut to crack because if you don’t get it right on the first shot, the whole ceiling might end up looking messy. 8. Popcorn Texture: Cottage Cheese This texture, also known as the “cottage cheese” or “acoustic” ceiling texture, is probably one of the most famous ceiling textures ever!!! If you look closely, you’ll see it’s kind of a look-alike of “popcorn.” That’s why it’s called “popcorn texture.” To achieve the correct texture, you need to use a sprayer to apply to your ceiling. This contains Styrofoam with mud which gives that puffy effect. But it will require you to have a lot of skill to achieve this effect. That’s because the “popcorn texture” is both challenging to apply and remove. I hope this article will help you to know about the needs of ceiling textures and drywall options. And now I believe you’ll be able to get yourself the perfect texture for your ceilings. How Can I Remove Old Ceiling Textures Safely? Removing old ceiling textures can be a big job, but it doesn’t have to be intimidating! If you want to update your ceiling and get rid of that outdated texture, I’m here to help. No matter if you have popcorn, stipple, or another type of texture, this process takes a little bit of care, but don’t worry! Here’s a step-by-step guide on how to remove an old ceiling texture without breaking your back or the bank. Step 1: Test For Asbestos Before you get out any tools…safety first!  Remember, many older ceilings (especially those with popcorn texture installed prior to 1980) contain asbestos. Before doing anything else, have your ceiling tested for asbestos. You can hire a pro to test the ceiling or buy a self-test kit. If asbestos is present, halt all work and consult pros immediately. Asbestos removal is not a do-it-yourself job because it poses serious health risks if mishandled. Step 2: Clear The Room If there’s no asbestos present, it’s time to get the room ready. Cover all the furniture. You’d be amazed at how far a fine mist of water, compound, and paint can travel! Also, plastic should be removed from the floors, and tape should be around any ceiling fans or lights that are not being removed. I can personally tell you we didn’t do this. We found dried white dust on our bedspread when we were stripping the wallpaper in our bedroom, and we had to clean up all the residual dust a little too late. It was wild! Step 3: Soften The Texture For Better Finish Here’s where the fun starts! To make that texture easier to remove, you’ll need to soften it. Fill a spray bottle with warm water and mist the ceiling. You don’t want to drench it. If you put too much water on the ceiling, it could end up damaging the drywall underneath. Allow the water to sit for about 15–20 minutes or so, giving it time to penetrate and loosen up that texture material. Don’t rush this step. It’ll only cause more work for you in the long run. Step 4: Clean Your Work Grab a wide putty knife or scraper and start scraping off the texture. Do small sections at a time, and scrape at a shallow angle so that you don’t gouge the drywall underneath. If it’s not coming off well, spray some more with the water bottle and let it sit for a little longer. This step can be kind of messy and time-consuming, but have patience because, in the end, you will have a nice smooth ceiling. Step 5: Patch & Sand Once the texture is gone, you may notice a few dings or dents in the ceiling. Don’t worry! Just fill them with some joint compound, sand it smooth, wipe away any dust and you’re ready for a new ceiling. And that’s it! A fresh, smooth ceiling in no time! Read Also: Here’s How to Turn Your Garage into a Bedroom on a Budget! Turn your attic into a living space

READ MOREDetails
Wood-burning Stove

5 Great Reasons Your Home Needs a Wood-burning Stove

When autumn begins to fade into winter, the temperature starts to reduce and gets even colder. The need to keep the house warm also arises. You definitely have some other form of heating your home since this won’t be your first winter. But your being here means that you are considering an alternative heating method. The efficiency of wood-burning stoves is one of the many reasons one should be the alternative on your mind. But there are also so many other reasons and they would all be discussed in this article. But first, what are wood-burning stoves? What Are Wood-burning Stoves? Wood-burning stoves are home appliances that are made of metals like steel or cast iron and are used for heating the house. As the name implies, wood is the fuel for the stove and it is burnt inside a fire chamber that is usually enclosed. The gases and fumes they produce have to be taken out of the room either through a flue or a chimney just like a traditional fireplace. Although these stoves have existed for a long time, they only just rose in popularity. And this is because more people have begun to appreciate their benefits. But what are these benefits? Let’s find out below. Reasons You Should Get a Wood-burning Stove The following are the major reasons a wood-burning stove is a great heating system for the home… 1. Efficiency The heat that this heating system produces is very impressive. Your home gets to enjoy a great form of heat output with one of these burner stoves. This means that the house will get warm effectively and a lot more quickly. They come in various sizes and energy levels, this way you can select one that will adequately suit your home’s size 2. Stylish and Decorative They not only get your house adequately warm, but they also provide aesthetics as they look so great. When one is placed in a room in the home, it is sure to become a new point of attraction by adding style and character to the room. There are a lot of styles to choose from like contemporary or classic and so much more. You simply need to be deliberate when you shop for the burner and ensure you get one that will match the home’s décor. 3. Gives Your House a Homely Ambiance When the weather is chilly and bent on making everyone miserable, one way to beat the weather is to get cozy at home. And a wood burner is sure to provide that homely ambiance that is much needed during this time. The cozy heat from the burner and the roaring flames inside the fire chamber provide a calm and soothing visual impact that will leave you comfortable in no time. Visit https://apnews.com/article/a53e297b6fbc4481a0c917dc41c3842f to find out other ways you can stay comfortable during the cold season. You can sit in front of the fire with a cup of coffee while watching the flames dance. 4. Good for the Environment We are in an age where eco-awareness is at its peak and a lot of people are trying their bests to do right for their environments. One way to contribute towards this goal of a better environment is a wood burner. How is this burner environmentally friendly you may ask. Well, it is because wood which is the fuel of this type of burner is carbon neutral even though it releases carbon dioxide. The amount of carbon dioxide that is produced equals the amount that is consumed by trees which takes the carbon dioxide and then releases oxygen. This way, the burners do not impact the carbon dioxide level in the environment. 5. Cost-Efficient Energy price is constantly going up and people are beginning to find it more expensive heating up their homes with electrical and gas means. Wood burners on the other hand are very energy efficient and thus help you save money that would otherwise have been used on the energy required by other home heating systems. You will surely find this heating method a lot more economical as you will notice an obvious reduction in your heating bill. The heating bill is reduced and not cut off because you may still have to make use of the central heating where you haven’t placed a wood stove. The initial cost of getting the burner bought and installed may be on the high side compared to other heating systems. But, we assure you that it would only be a matter of years for this cost to be gotten back through the energy-saving nature of the burner. If you need to learn about more of its benefits, you can check here. Conclusion Getting a wood-burning stove may very well be the best decision you may make when it concerns heating your home. This article discusses 5 great reasons why this heating system is great for your home. Read Also: 5 Things You Should Know About Heating and Cooling Tiny Homes Advantages Of Using A Water Heater At Home

READ MOREDetails