9 Feng Shui Tips for a Calmer Kitchen

Published on: 04 May 2018 Last Updated on: 09 August 2019
Calmer Kitchen

Everybody wants a little more health and prosperity in their lives.

Kitchen feng shui is one of the ways to do it and it isn’t as difficult as you might think.

In feng shui, the kitchen symbolizes wealth and prosperity. As the place where your food is prepared, it also symbolizes nourishing and sustaining life.

Try incorporating these 9 kitchen feng shui tips into your home. With good Chi energy flowing, things just might take a turn for the better.

1. Location :

If your house is already built, you can’t do much about the location of your kitchen. But if you’re building a new home or planning to remodel, keep these location-related kitchen feng shui tips in mind. If you’re remodeling in anticipation of a sale, read this blog for more ideas.

The best location for the kitchen is not the same in every home. Feng shui principles consider the age of the home and the direction (on the compass) that the house is facing. They even consider astrological elements at the time of the home’s construction.

Because of this complexity, choosing the right location can be very difficult. It is best to ask for the recommendation of a reputable feng shui practitioner.

2. Colors :

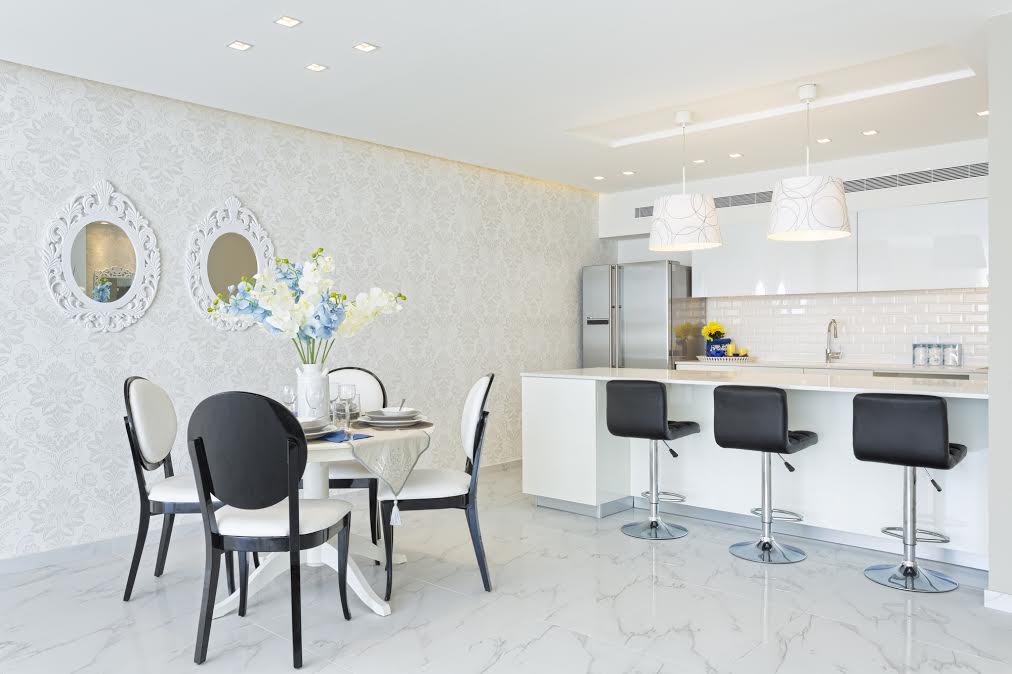
Feng shui has something to say about the color scheme that you choose for your kitchen. You want your kitchen to have a warm, inviting feel and good energy to it. An easy way to accomplish that is to pick the right colors.

Yellow is an excellent kitchen feng shui color as it is thought to be good for digestion. Choose a shade anywhere from soft butter to vibrant squash.

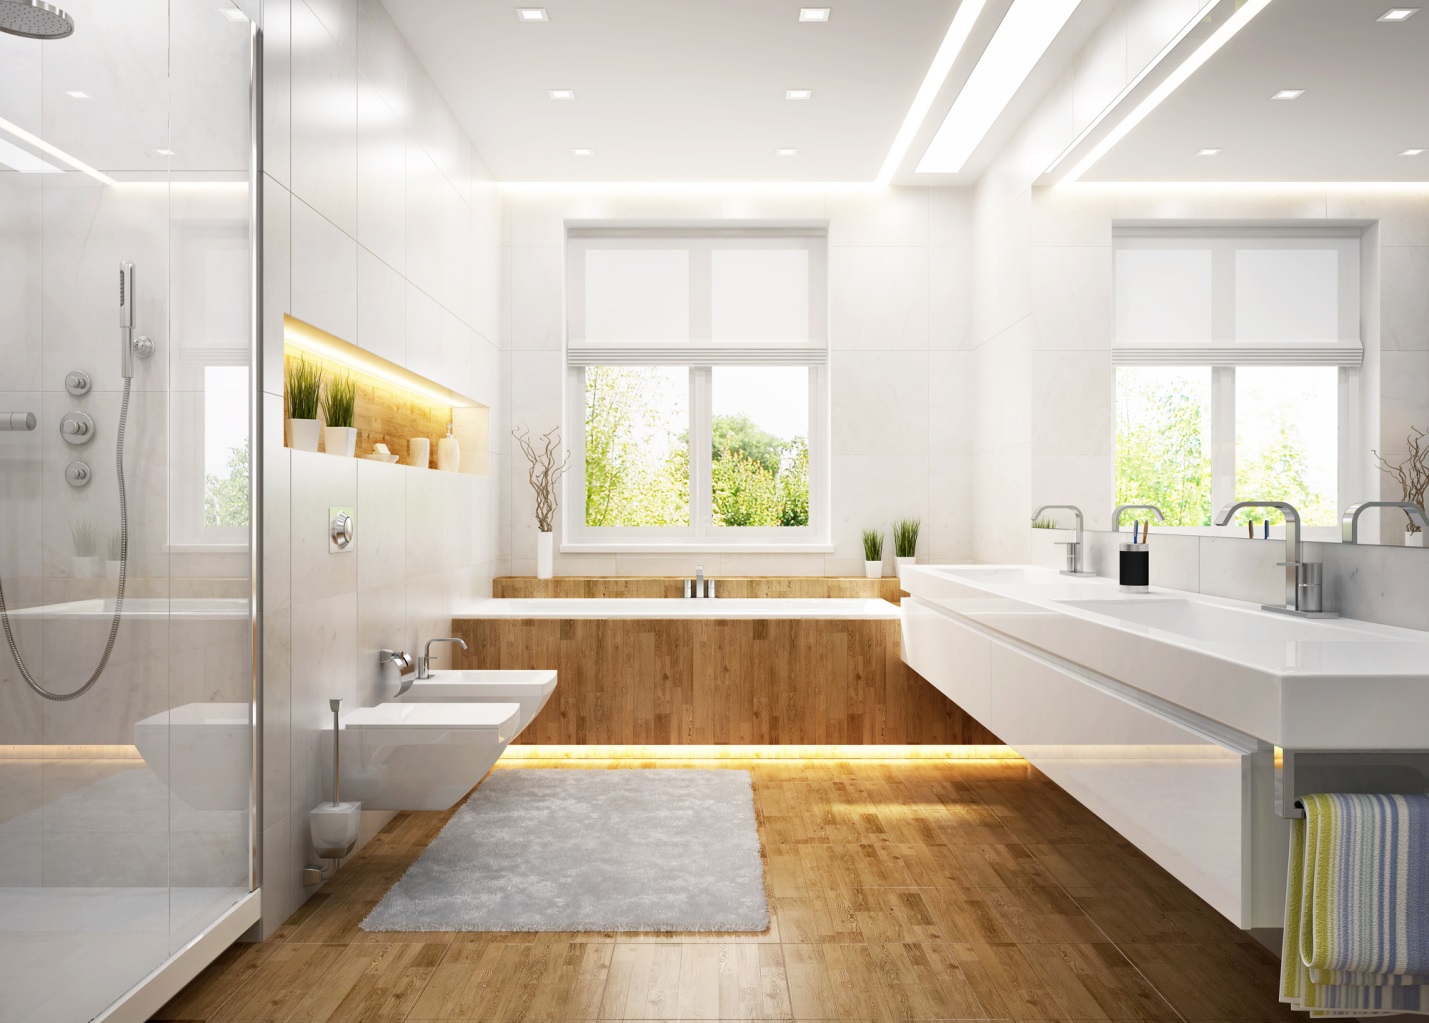
Many people like the freshness of a white kitchen. You can do it, but make sure you balance it with something warm, like warm wood tones.

Earth tones make great, soothing kitchen colors as well. For an energetic pop, try combining earth tones with a gentle sky blue. It’s easy to overdo the blue, though so take care.

In an existing kitchen, it’s easy to repaint the walls. And something as simple as adding your own tile splashback (in the right color, of course) can really change how the room looks.

3. Balance the Elements :

The materials that you use when building your kitchen are important. In most kitchens, 4 of the 5 Chinese elements will appear naturally. These are:

  • Fire
  • Earth
  • Metal
  • Water
  • Wood

The stove brings fire and granite or tile countertops bring the earth. Many appliances are made of metal and there’s water running from the sink.

If you have real wood cabinets, you’ve got all 5. If you don’t, it’s as simple as bringing in a potted plant to balance them all.

4. Keep Things Working :

The golden rule of feng shui is to ensure that Chi energy is flowing well. This is the universal life force and it is the power behind feng shui.

In order to keep the energy flowing well in your kitchen, keep things working. If you have a leaky faucet, fix it. Check to make sure cabinet doors swing open properly.

You should even take it so far as to throw out chipped bowls or cracked dishes. Plus, make sure your knives are sharpened. Taking care of your things helps good energy flow and helps you take care of yourself.

5. Keep it Clean :

Along the same vein, you should keep your kitchen clean. There are several important tasks you should do every day.

Keep the counters cleared off and clean. Only store appliances you use every day on the counter.

We’ll talk more about this in a minute, but your stove is important in feng shui, so keep it spotless. Wash the sink often and keep the fridge clean.

On occasion, you’ll need to do a deep clean. Pull everything out of your cabinets and clean out the back corners. You may even want to put down new shelf liners if necessary.

6. Keep it Orderly and Organized :

As you put everything back, organize it. Put similar things together. For example, put sweet spices together on one side of the cupboard and savory on the other.

Adjust the shelves to make the most of your storage space. Put taller items together in a tall space and fill a short space with little items.

If you don’t already have them, add some space savers. Lazy susans, stacking shelves and tray racks are all helpful items.

Toss out items that you don’t use any more. What is the point of cluttering up your cupboards with unnecessary stuff?

7. Fill It Up with Healthy Food :

Promote health and wellness by filling your kitchen with healthy food. Organic, fresh fruits and vegetables are excellent choices.

Not only is the nutrition good for you, but also they bring healthy healing vibrations from the earth. This type of energy is very good for your body.

8. Add Some Life :

Bring life into your kitchen by setting out something living. This helps to bring positive energy into the mix. A petite potted plant, a vase of fresh blooms, or a bowl of fruit all work nicely.

9. Use a Mirror Over the Stove :

In feng shui, the stove is a very strong symbol. Not only does it represent fire, but is a very powerful symbol of wealth. Treat your stove with respect by keeping it clean. Promote the flow of Chi energy by using all of your burners.

To further magnify the effect, hang a mirror over your stove. This is a great way to effectively “double” your store’s presence in the kitchen.

Proper Kitchen Feng Shui :

Proper kitchen feng shui is an important element in feng shui for your home as a whole.

Thankfully, just following these simple tips will help Chi energy to flow more freely, enriching your home and your life.

Try a few and let us know how it works out in the comments. We’d love to hear from you!

Don’t forget to check out our home and garden section for more great tips!

Read Also :

Content Rally wrapped around an online publication where you can publish your own intellectuals. It is a publishing platform designed to make great stories by content creators. This is your era, your place to be online. So come forward share your views, thoughts and ideas via Content Rally.

View all posts

Leave a Reply

Your email address will not be published. Required fields are marked *

Related

Pest Control

10 Pest Control Tips to Keep Pests Away This Summer

Summertime in Miami, Florida is an experience like no other. The sun is out, the beaches are breathtaking, and there is excitement around every corner. However, the summer rains and humidity also lead to a growth in insect activity around South Florida, which can quickly turn a great moment into a stressful one. Luckily, practicing the following tips can prevent pesky pests from ruining your plans this summer. Luckily, practicing the following tips can help in rodent control and also keep pesky pests in control from ruining your plans this summer. Tips for Having a Pest-Free Summer: Keep your homes and lives pest free this summer with these ten excellent pest control practices. 1. Seal off their entry into your home Your first line of defense should be to repair any holes and cracks that could let in unwanted pests. Check your doors and windows for gaps, your screens for holes, and restore window stripping when necessary. 2. Keep your home clean A pile of crumbs on your kitchen counter or spill on the floor is a goldmine to ants, cockroaches, and other insects.  Neglecting to keep your home clean can make getting rid of pests harder and may even be the source of your problem. To avoid this problem, regularly disinfect your counters, put food away immediately, and take out the trash. 3. Empty out any standing water Standing water is a breeding ground for pesky mosquitoes, which carry diseases like the Zika fever, West Nile virus, and Malaria. You should regularly walk your property to drain water from areas near rain spouts, your air conditioning unit, and any pots around your home. 4. Maintain your landscape Keeping your front and backyard maintained can help you avoid overgrowth that attracts pests. You should trim trees and bushes close to your house, collect any debris, and get rid of weeds. 5. Inspect playsets and outside furniture Another good tactic to keep pest away this summer is regularly checking the chains and corners of your patio furniture to remove spider webs and egg sacks. If you have to bring an outside toy, chair, or table inside you should thoroughly wipe it down first. 6. Avoid throwing away meat too soon You should avoid throwing away meat in your outside garbage unless it will get collected around the next 48 hours. This tip will prevent the combination of the summer heat and rotting meat attracting pests to your property. 7. Ventilate stuffy rooms on your property Attics and basements are notorious for providing a dusty and confined environment that attracts various types of insects. Try cleaning dusty corners and opening windows in tight areas that often attract termites and spiders. 8. Grow some plants Putting certain plants on your patio or around your home can repel insects. Try growing rosemary, mint, lavender, and lemongrass to keep flies and mosquitoes away. 9. Use a fan Fans are perfect for the summer. Not only will they keep your home cooler, but they will also make it harder for winged insects to fly into your house. 10. Invest in a pest control service The best way to prevent an infestation is to hire a local pest control expert to spray your home for bugs and rodents regularly. A professional pest control company can take note of your specific issues to create a personalized pest control plan for you. Ward Off Seasonal Pests: Pest control in Miami during the summer is essential. The rise in temperature, rain, and humidity this season makes South Florida a bug's paradise. Keep these tips in mind to retake control of your yard and have a pest-free summer! Read Also :  What You Should Expect From A Pest Control Visit 5 Summer Garden Maintenance Tips And Tactics You Have To Know

READ MOREDetails
Drywall

Elevate Your Home With Unique Ceiling Textures

Drywalls are those construction materials that are used to create walls and ceilings in your home. Not all that, but drywalls also come in handy if you want to create design features like eaves, arches, or any mind-blowing architectural requirements!!! Do you know the best part about drywalls? These are super easy to install, highly durable, and only require simple repairs when damaged. So, drywall is a flat component composed of calcium sulfate dihydrate, typically between thick sheets of backer paper, and facer, used to construct interior ceilings. Let’s talk about the ceiling textures and the drywall options you can choose for your home!!! The Ceiling Textures And Your Drywall Options Decorating your home can be a real challenge for many !!! Therefore, choosing the right drywall finish or texture can prove to be a hard nut to crack. And it’s very natural to get in a state of indecision if you are handpicking it for your new home or renovation project. There are so many options that it feels like you are “searching for a pearl in an ocean.” Making up your mind about whether or not to go texturing your ceiling can be a tough job. And even if you choose to texture your ceilings, there are chances you’ll be confused about which one to go for!!!! And remember, getting the drywall right is the first step of tiling projects?”. But No Need to Worry!! This article will guide you in choosing the perfect texture and drywall option for your ceilings to look more elegant than ever!! 1. Sheetrock Texture: Old Is Gold Sheetrock ceiling texture is a drywall ceiling texture that has been famous since 1917. The reason this drywall texture is so awesomely renowned is because of the artistic look that it gives to your ceiling And the best part is you don’t need to use any sort of spray paint in this case. You can achieve this texture by using your artistic hand technique and without using any special brushes. This texture is perfect for any room. There are no restrictions on the use of this ceiling texture. 2. Stipple Brush Texture: A Test Of Your Skill This texture is not as easy as it seems. You need skills to create this texture. To create this texture, you need a roller and slap brush. The fascinating fact about this texture is it can cover the bumps and holes on your ceiling. And if you have the skills, then this texture can surely make your ceiling look gorgeous than ever!! 3. Swirl Texture: Creativity Taken To A New Level To achieve this texture, you need either a roller or sprayer. You can also do this by using a technique called “the basic swirl” method. But one thing that you need to keep in mind is while creating this texture, you’ll need a lot of patience to get the best result. And the difficult part is you need to create the pattern before the mud dries. So, make sure to have a helping hand by your side. Overall, the texture can really give that awesome look on your ceilings if you do it in the right way!!! 4. Orange Peel Texture: A Color Of Choice The name suggests all the colors of orange skin, but sometimes it’s also called “an eggshell” ceiling texture. If you really love this color, then this can be on the top of your favorite lists. To create this texture, you need to apply thin mud to the ceiling using a spray gun set at very high pressure. The more artistic mind you have, the more artistic look it has got!!!! 5. Smooth Textures: Choice Of Many If you are someone who wants the best at a cheap cost, then this texture is just the right choice for you. Moreover, you don’t need to have many skills to create this texture design. The look of this texture is just mind-blowing, and if you are someone who likes things to be consistently gorgeous, then this is the texture you can have for your ceiling. This texture is effortless to remove and is also perfectly suited for any room. 6. Tree Bark Texture: Beauty Of Nature If you are someone who loves nature and wants to bring the reflection of nature inside your home, then this textured style is just the option you can have. This ceiling has the look of a tree. You can create this texture just by using a heavy roller. The texture might look simply, but it’s very artistic and can surely catch the eyes of many. If you have a farmhouse, then this texture will double the beauty!!!!! 7. Slap Brush Texture: Slap The Beauty Out Artistic, gorgeous, beautiful, and elegant are the nicknames you can give to this texture. A complete package of beauty!!!! To get this texture, you’ll need a brush with very stiff bristles and thin mud. Firstly, you have to cover your ceiling with mud using a roller, then take the brush and slap the ceiling from the edge. This can be a hard nut to crack because if you don’t get it right on the first shot, the whole ceiling might end up looking messy. 8. Popcorn Texture: Cottage Cheese This texture, also known as the “cottage cheese” or “acoustic” ceiling texture, is probably one of the most famous ceiling textures ever!!! If you look closely, you’ll see it’s kind of a look-alike of “popcorn.” That’s why it’s called “popcorn texture.” To achieve the correct texture, you need to use a sprayer to apply to your ceiling. This contains Styrofoam with mud which gives that puffy effect. But it will require you to have a lot of skill to achieve this effect. That’s because the “popcorn texture” is both challenging to apply and remove. I hope this article will help you to know about the needs of ceiling textures and drywall options. And now I believe you’ll be able to get yourself the perfect texture for your ceilings. How Can I Remove Old Ceiling Textures Safely? Removing old ceiling textures can be a big job, but it doesn’t have to be intimidating! If you want to update your ceiling and get rid of that outdated texture, I’m here to help. No matter if you have popcorn, stipple, or another type of texture, this process takes a little bit of care, but don’t worry! Here’s a step-by-step guide on how to remove an old ceiling texture without breaking your back or the bank. Step 1: Test For Asbestos Before you get out any tools…safety first!  Remember, many older ceilings (especially those with popcorn texture installed prior to 1980) contain asbestos. Before doing anything else, have your ceiling tested for asbestos. You can hire a pro to test the ceiling or buy a self-test kit. If asbestos is present, halt all work and consult pros immediately. Asbestos removal is not a do-it-yourself job because it poses serious health risks if mishandled. Step 2: Clear The Room If there’s no asbestos present, it’s time to get the room ready. Cover all the furniture. You’d be amazed at how far a fine mist of water, compound, and paint can travel! Also, plastic should be removed from the floors, and tape should be around any ceiling fans or lights that are not being removed. I can personally tell you we didn’t do this. We found dried white dust on our bedspread when we were stripping the wallpaper in our bedroom, and we had to clean up all the residual dust a little too late. It was wild! Step 3: Soften The Texture For Better Finish Here’s where the fun starts! To make that texture easier to remove, you’ll need to soften it. Fill a spray bottle with warm water and mist the ceiling. You don’t want to drench it. If you put too much water on the ceiling, it could end up damaging the drywall underneath. Allow the water to sit for about 15–20 minutes or so, giving it time to penetrate and loosen up that texture material. Don’t rush this step. It’ll only cause more work for you in the long run. Step 4: Clean Your Work Grab a wide putty knife or scraper and start scraping off the texture. Do small sections at a time, and scrape at a shallow angle so that you don’t gouge the drywall underneath. If it’s not coming off well, spray some more with the water bottle and let it sit for a little longer. This step can be kind of messy and time-consuming, but have patience because, in the end, you will have a nice smooth ceiling. Step 5: Patch & Sand Once the texture is gone, you may notice a few dings or dents in the ceiling. Don’t worry! Just fill them with some joint compound, sand it smooth, wipe away any dust and you’re ready for a new ceiling. And that’s it! A fresh, smooth ceiling in no time! Read Also: Here’s How to Turn Your Garage into a Bedroom on a Budget! Turn your attic into a living space

READ MOREDetails
Roofing- Pros and Cons

Close Look at Top 5 Roofing Materials – Pros and Cons

There’s no dearth of options for those mulling a new roof installation. Choosing the correct roof for your home is imperative to ensure that you get full functionality and lifespan. The final decision should be taken after considering different factors such as the owner’s location, the roof’s weight, and the cost, warranty, and lifetime of the product. This blog post discusses, five popular roofing options for homeowners taking time to look at their advantages and shortcomings: 1. Asphalt shingles Asphalt shingles are unarguably the most common roofing option for homeowners in US, all thanks to their affordable nature and ease of installation. Moreover, many roofers also follow the practice of reinforcing shingles with organic materials or fiberglass, which has a positive impact on their durability and moisture resistance. Pros Asphalt shingles come in different sizes, shapes, and colors. They are easily available and the most economical roofing option available on the market. Cons Asphalt has a short lifespan when compared to other materials, and also incapable of providing proper insulation. Best suited house styles: Traditional sub-urban houses Cost: The cost of installing asphalt shingles can be anywhere between $70 to $120/sq.ft. and they can last for 20-25 years with proper maintenance. 2. Clay and concrete tiles The use of clay adds to the roof’s texture and elegance, enhancing its aesthetic appeal. Clay and concrete tiles are heavy roofing materials and should be installed by professionals to avoid accidents and damage to property. Pros Clay and concrete tiles are highly durable and fire-resistant. They are also known for their energy efficiency. Installing a concrete roof can, therefore, help you lower energy costs. Cons Both clay and concrete are heavier than other roofing materials and usually require additional framing to function smoothly. The materials are also expensive and you may have to shell out a considerable amount of money to install clay/concrete tiles.  Best suited house styles: Mediterranean, Southwestern, and Spanish-style homes. Cost: Prices fluctuate in the range of $300-$500/sq.ft. Concrete tiles have a lifespan of 40-50 years provided you follow maintenance schedules without fail. 3. Metal roof Metal roofs are available in two types, panels, and shingles. Some of the common metals used by roofers who specialize in metal roofing are aluminum, copper, stainless steel, and zinc. If you’re considering a metal roof, it is advisable that you first consult your provider on the type of metal you should use after considering all the important factors. Read also: Avoid these 4 Mistakes during Multi Family Housing Renovation Pros Metal roofs are highly resistant to temperature fluctuations and also offer better protection against solar radiation. They are also long-lasting and recyclable. Cons Installing a metal roof can be a costly decision and you may have to shell out anywhere between $100-$800/sq.ft. to install a metal roof. Best suited house styles: bungalows, cabins, and contemporary and cottage-style homes. Effective life: With proper maintenance, metal roofs can last anywhere between 40-75 years. 4. Slate Opting for a slate roof is a prudent decision if you need to avail a variety of designing options. Slate roofing comes in different colors like black, green, grey, red, and purple. It lends a touch of style and elegance to your roofing. Pros Slate roofs are durable and equipped with fire-resistance properties. You can also recycle slate to reduce costs and save the environment. Cons Apart from being expensive, slate is also heavy, making any plans for a DIY approach strongly inadvisable. Moreover, the quality of the materials can vary if you plan to use imported slate. Cost: $600/sq.ft. And above. The effective life of slate roofs can extend up to 100 years and more. 5. Wood shingles and shake Wood shingles are handmade and available in attractive shades of gray. When opting for wood roofing make sure the material is class a certified and includes shingles with a fire-resistant coating. Pros The use of wood shingles lends a rough yet artistic look to your roof. The shingles are made from natural materials like cedar, and redwood and are environment-friendly. Cons There are high chances of the roof sustaining significant damage when exposed to moisture, high temperatures, and rainfall. Moreover, fire codes in some states may prohibit the use of these materials. Best suited house styles: Cape Cod, cottage, Craftsman and Tudor-style homes. Cost: $100-$150/ sq.ft. You can expect the roofing to last around 25-30 years. The blog discusses five popular roofing choices available to homeowners. You should, however, not limit yourself to these choices. Consider exploring other options before making a final decision. Consult your contractor and ask them to share their thoughts on your choice. You must also factor-in the maintenance costs and schedules associated with each option before you.

READ MOREDetails