Published on: 16 August 2016
Last Updated on: 04 September 2024
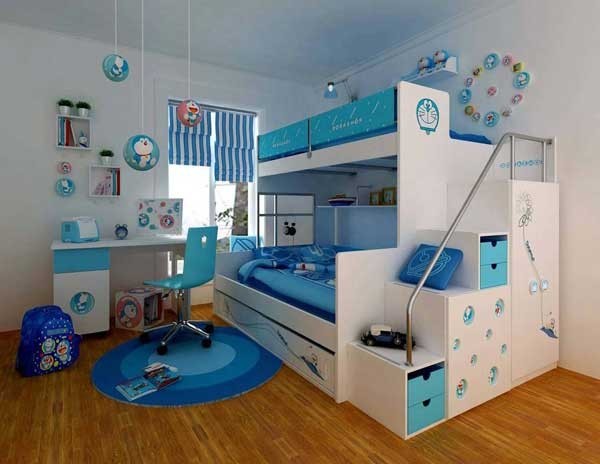
Your bedroom is your shelter, harbor, and heaven. Many people want a cozy surrounding in the bedroom and want to shut eyes in a cozy and peaceful environment for achieving a perfect night sleep. If you want to revamp your bedroom decoration and create a cozy look, but stuck from where to start? Use these seven simple ways of creating a cozy environment in the bedroom.
1. Bed For The Bedroom
The bed is the central furniture item in any bedroom. Search for some attractive and luxury bed. Use these tips:
If you have a small bedroom go for the storage bed such as ottoman storage bed.
If you have to share a room then bunk bed is a good choice. You need to search for cheap bunk beds in case of low budget. Alaska is one cheap bunk bed which adds luxury in your bedroom décor.
2. Get Some Candles
Installing some candles in your bedroom, not only improve the decorative quality of your bedroom but also provide a peaceful environment for goof night sleep. Fragrances candles are also provided in the market nowadays, you must go for this option. A fresh scent at night offers you a comfortable night sleep. You must need to blow a few candles an hour before bed, then blowing them out before going to bed.
3. Try To Keep The Temperature At Lower
For a cozy bedroom, keep the temperature constant or at a lower degree. The temperature takes a lot and contributes to better night sleep. Try to set the thermostat low and warm-up ahead of mattress pad that will provide you extra comfort and softener feelings.
4. Don’t Create Any ClutterOn The WallsOr Don’t Jumble Your Bedroom Walls
Remove all the bedroom clutter for making your bedroom cozier. For keeping the bedroom walls clean and neat try not to clutter all of your free space with accessories, ornaments and hanging items that will cover every square inch of blankness. Try to décor the walls with two or three decorations piece which give the room an elegant look.
5. Renovate Your Mattress
You must need to change your mattress every five years. If you are looking for renovating your mattress but having a low budget and don’t want to purchase a new mattress, then go for the second-hand mattress. Bedding must be soft and neat. Install some extra pillows and cushions for providing extra comfort during sleeping.
6. Invest In Cozy Curtains
Curtain made from sturdy and soft material in another useful and easiest way for giving up the cozy factor of the bedroom. Sturdy and soft curtains not only give your room a luxurious and attractive look they also help a lot in blocking out the natural light that may impede your sleep in the morning.
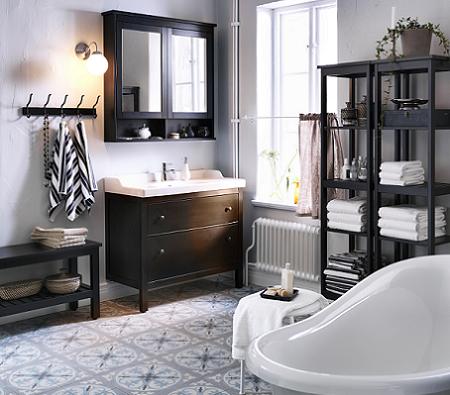
7. Beautiful Painting, Good Mirror, Wide Window
Painting: Use a light color for your bedroom, which throws a good effect on your mind.
Mirrors: Using the mirror in the bedroom give it a natural look. The visually long mirror helps in increasing the size of the room and also serve as an elegant decoration piece.
Window also creates a cozy environment in any room. It helps in bringing natural light into the room.
Abdul Aziz Mondol is a professional blogger who is having a colossal interest in writing blogs and other jones of calligraphies. In terms of his professional commitments, he loves to share content related to business, finance, technology, and the gaming niche.
Animals might be cute, furry, and very pleasing to look at but they can seriously be destructive to your field, some of us may enjoy their company, others might want to kill them instantly! Either way, if you do not take care of who enters your garden, your plants may not thank you. Check out the rest of the article to understand what kind of animals can spoil your garden and how to restrict their movement.
Who are these animals?
Some of the most common garden animals include chipmunks, squirrels, skunks, mice, moles, rats, and opossums. To learn more about possums, click get rid of possum. These animals dig holes into the ground, eat your fruits and vegetables, multiply or lay eggs in your garden, and generally wreak havoc. Other larger animals include dogs, deer, birds, snakes, etc. Just having them run around the garden can cause large-scale destruction.
Ways to get rid of animals in your garden
There are several ways to control the entry of animals in your garden. Some are more effective than others. To learn more about these methods, read on.
1. Identify the creature :
The best way to control animals is to identify them first. This way you would know exactly how to deal with them by understanding their behavior and ways of living or multiplying. You can then target the animal with exactly the right technique that is needed to get rid of them. It is necessary to identify the animal to learn about its habitat, control them, and devise an effective solution.
2. Make your garden animal proof :
By making your garden attractive to animals, you will invite more pests into it. Therefore, certain methods need to be adopted to make sure that the animals stay away. One such method is to cut down on places that can house such animals, like tall grass, bushes, or a pile of leaves. Some animals can even crawl under your deck or porch.
Minimize any food sources, like birdbaths and seed booths, where animals like squirrels may come to feed. Moreover, you should cover your compost pile that attracts raccoons and fruit and vegetable patches with nets to avoid dogs, cats, deer, etc.
3. Fences, nets, and traps :
Fences are a great option to help minimize the entry of animals. For smaller animals, like rats, squirrels, rabbits, and more, small fences around your garden are enough. But for larger animals, like dogs and deer, larger and taller fences are required. Putting up taller fences can go a little heavy on your pocket, so securing plants is probably a better option.
Nets are a great way to prevent animals from actually feeding on your produce, like fruits and vegetables. Just adding a mesh or net around your patches can make a huge difference. Traps can be placed throughout the garden to catch animals with the help of baits. Use some food, like cheese, crackers, or biscuits, to lure animals into the trap, which then slams shut. Animals are also not harmed this way. It’s easy to catch possums, rats, squirrels, etc. with the help of traps.
4. Repellents :
Some animals can be repelled using auditory techniques, like certain sounds, and repellents that smell a certain way, thus driving or scaring away the animal out of your garden. Some examples of repellents are - predatory urine, garlic clips, and castor oil. But these repellants need to be applied and monitored on a regular basis to make sure they are effective. Some of these repellents, however, can be toxic to humans, so be careful, which repellents you choose.
Auditory repellents include motion-sensitive water sprayers, ultrasonic repellers, and visual scare devices, such as reflective tape. The only problem with these repellents is that pests may become immune to these methods, and therefore they may decrease in effectiveness over time. Make sure you read all the directions given on any repellants or products before using them.
5. Do on the spot management :
For example, when moles create boroughs in your garden, you can place mothballs in the holes to repel them. Moles don’t eat your garden produce but their tunnels can cause your plants to die since plants may not find space to grow underneath the ground with enough nutrients.
If certain animals have entered your garden, immediately introduce the predator species into your gardens, such as cats and dogs, to scare away the pests. Cats and dogs prey on animals, like mice and rats. In some cases, you can hand aluminum foils with strings in your garden. The shiny material can scare away the animals. Again, the effectiveness of this method may die with time.
Pests are destructive to your garden and should definitely be identified and eradicated. However, there’s no need to kill these animals in order to get rid of them. You can also use humane ways to get animals out of your garden. Use the methods given above in order to get rid of animals, including possums, from your garden. This will help you get a more secure and flourishing garden in no time!
Read Also :
5 Summer Garden Maintenance Tips And Tactics You Have To Know
Grow These Flowering Plants In Your Home Garden To Remove Vastu Related Problems
How long does celery last? Do you know about Deadheading Petunias? Celery lasts for as long as any other quick expiring ingredient in the recipe. Many individuals consume celery stalks, but the leaves are also beneficial and edible. They make an excellent addition to soups and stir-fries.
You can find celery seeds either in extract form, whole seed form, or ground up, with its impressive health benefits. In many parts of the universe, people grow this plant because of its beneficial seeds. When you crash them, you can use the seeds as a spice because it contains a unique oily compound called apiol. The spice is good for providing flavor and also has medicinal benefits.
Celery facts:
Celery has a cholesterol-lowering power that makes it useful for maintaining heart health. The seeds contain a unique compound called BuPh that has lipid-lowering properties. However, researchers believe that this plant contains many other beneficial compounds that are still under research.
In a recent study, rats feeding on celery continuously for eight weeks recorded lower lipid levels in their blood compared to those that did not feed on celery. This group of rats also experienced reduced serum cholesterol, triglyceride concentrations, and low-density lipoprotein cholesterol.
Celery also contains polysaccharides and antioxidants that act as anti-inflammatories, especially polyphenol and flavonoid antioxidants. They support the overall health of individuals as they age by fighting free radical damage that causes inflammation. Inflammation causes chronic diseases like heart disease, arthritis, cancer, and much more.
Researchers have come up with several antioxidant types from celery which is beneficial like ferulic acid, caffeic acid, and phenolic acid, as well as flavors like quercetin. These acids make celery the right solution for treating inflammatory conditions like joint pain, liver and kidney infection, gout, irritable bowel syndrome, skin disorders, and urinary tract infection.
When you consume celery, and you have high blood pressure, the risk of high blood pressure reduces. These seeds help in controlling the chronic levels of blood pressure. The seeds contain aqueous ethanolic, methanolic, and hexane extracts that lower inflammation improves blood circulation, and help in controlling blood pressure.
These seeds also help in reducing bloating and boosting digestion with the aid of the NBP oily compound that contributes to detoxifying the body. The digestive benefits result from its diuretic effect. If you want to lose weight, consuming celery is vital because it has vital nutrients that help in regulating lipid metabolism.
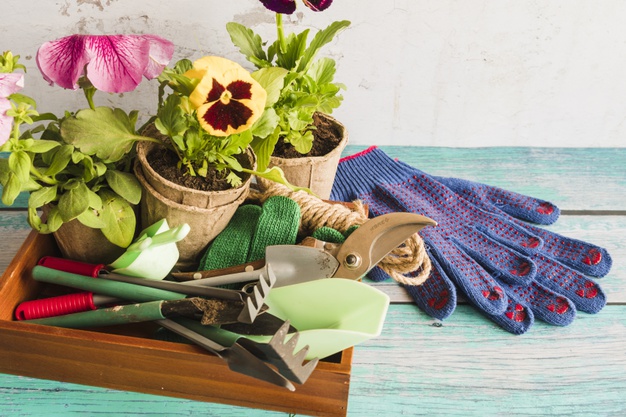
How do you prune Deadheading petunias blooms?
Many garden tips will guide you on how to deadhead petunia. You need to allow your flowers to start blooming. You need to wait until the plant spends about six hours in the sun and are full of blooms. Once the flower starts dying, it is the right time to deadhead. You will also have to get a sharp pair of scissors and pruning shears. Give the plant a sharp cut when you use scissors. You will then have to pick the petunia stem gently with many blooms. You need to aim at the area that contains the most spent blooms and cut with your shears. Even though you need to cut back healthy sections of the plant to encourage new growth of Deadheading Petunias, pruning your plant extends your season of growth and helps produce more blooms.
It is recommended that you prune one stem per week on a small plant and eight stems for the large hanging basket. Regular pruning will help you avoid pruning the whole plant at once. On some occasions, you will have to prune a healthy-looking bloom so that the plant looks healthy for an extended period. If you cannot do it on a weekly basis, it is advisable to wait for the mid-summer season to make it bloom for long. You need to keep fertilizing Deadheading Petunias every two weeks.
Read also:
Smart Fun Gardening: How To Take Care Of A Money Tree
5 Good Luck Plants That Deserves A Place In Your Home
Rubbish disposal is a crucial issue to address. Its proper implementation can control pollution, conserve natural resources and prevent diseases.
There are several different methods of waste disposal, including incineration and landfill. However, each method has its own drawbacks. For example, incineration releases harmful greenhouse gases into the environment.
What Are The Importance Of Proper Rubbish Disposal?
Rubbish disposal often causes unbelieving harm to nature. So for keeping the city safe for any living beings. Every industry should maintain proper guidelines for rubbish disposal.
Hazardous Materials
Hazardous waste is any material that, when improperly managed, could pose a threat to human health or the environment. It can take the form of solids, liquids, or sludges.
Hazardous waste is usually produced from industrial manufacturing processes but may also come from other sources. Some hazardous rubbish disposal is toxic, flammable, or explosive. Others are reactive or corrosive.
Products such as paints, oils, batteries, pesticides, and cleaners can be dangerous when disposed of wrongly. They can leak, explode, irritate the skin or lungs, cause fires, poison the water supply, and pollute the air. This is why it is important to make sure these items end up disposed of properly. You can visit https://www.ridly.com.au/ for more information.
Some leftover products that are flammable, explosive, or toxic may be classified as household hazardous waste (HHW). Many communities have year-round HHW collection programs to reduce the risk of exposure to these chemicals.
The materials must be separated from non-hazardous wastes and placed in specialized landfills designed for these hazardous substances. This is to protect garbage collection workers and the surrounding community from exposure to hazardous waste.
In most cases, contaminated HHW is unrecyclable.
Health Hazards
When it comes to rubbish disposal, there are several health hazards that can be associated with the waste. These include infections, respiratory problems, neurological disorders, and cancers.
Symptoms of exposure to hazardous waste can range from a mild headache, dizziness, or stomach discomfort to unconsciousness and death. Although most symptoms are short-term and won’t last, it is important to take precautions to prevent these conditions from occurring.
There are many different types of waste that may be a health hazard, including pharmaceuticals, medical equipment, radioactive materials, and household chemicals. All of these should be collected separately and safely.
A comprehensive review of the literature on health effects from residential exposure to waste sites reported that the evidence is limited for cancers and overall congenital anomalies.
The evidence to conclude different exposure in the oil industry releasing high concentrations of hydrogen sulfide waste in highly crowded illegal dumping sites. These illegal dumpings are often associated with general acute symptoms such as lung diseases, skin and digestive system complaints, and neurological symptoms.
Hazardous waste is a complex mixture of contaminants that can have several effects on human health, depending on the type and level of exposure. This is particularly true for air pollutants and pesticides that can cause respiratory diseases or other health problems, such as cancer, heart disease, and neurological disorders. You can visit this site to learn more about neurological disorders.
It is therefore important to understand the health hazard associated with particular kinds of rubbish disposal, as this will help you choose the best way to dispose of it. It is also a good idea to follow the recommendations of your local government and/or environmental agency, as these can help you determine whether it is safe to dispose of certain types of rubbish in your area.
Environmental Hazards
Household waste is a major source of pollution because it contains harmful chemicals, toxic substances, and pollutants that can be leached into waterways. This can lead to health problems for residents of areas where garbage is disposed of in open drains.
In addition, waste that is buried in landfills can produce methane gas which has been linked to climate change. Landfills also attract vermin and cause litter.
It can also harm the health of waste collection workers, who exposed to hazardous materials found in the rubbish they collect. This leads to accidents and musculoskeletal disorders.
The health hazards associated with rubbish disposal can be reduced through better recycling practices and the use of alternative waste management methods. This will not only help protect the environment but will reduce the amount of waste that needs to be thrown away in the first place.
People who handle hazardous waste may become infected with hepatitis B or hepatitis C and other diseases that are transmitted through contact with contaminated waste. These diseases can be fatal if they are not treated properly.
Another hazard is the release of nitric oxide and nitrogen dioxide gas into the atmosphere. These gases are dangerous for human health and can affect plants, animals, water, and air quality.
Moreover, the emissions of these gases can be a source of respiratory infections and bronchitis for people who live near rubbish dumps or landfills that are leaking these gases into the atmosphere.
Poor waste management, ranging from non-existing collection systems to ineffective disposal, has significant impacts on air, water, and soil pollution. This can lead to serious environmental problems, such as air and water contamination, disease outbreaks, and the loss of biodiversity and habitats.
Recycling
Recycling is the process of breaking down waste into reusable materials, such as metals and plastics, which can then be used to manufacture new products. It saves natural resources, energy, and water while reducing pollution.
It reduces the amount of rubbish sent to landfill sites. It also prevents waste from going into incineration plants, which release a lot of harmful air and greenhouse gases.
Recyclable materials include paper, glass, metals, plastics, textiles, and tires. These are often collected from homes or businesses and then delivered to a recycling facility, where they're sorted, cleaned, and reprocessed into new raw materials for making products.
Most recycling facilities are designed to sort through the recyclables using various technology. These processes include rotating trommels that filter out unwanted materials, vacuums, and magnets. But some rubbish disposal, such as polystyrene and contaminated materials, cannot be recycled.
Some recycling plants also accept biodegradable waste, which can be made into compost. But this is a complex process because it's hard to determine the chemical makeup of organic materials.
The best way to make sure your rubbish disposal goes to a good place is to practice good recycling habits. You can do this by separating your waste into bins, containers, or bags that are labeled for recycling and disposing of them according to the proper guidelines.
If you're unsure about what goes where check with your local government. They should have a list of what they accept and may even have a searchable database.
You can also call a recycling company and ask them to pick up your waste. They'll be happy to take your trash off your hands for you, but they might charge a fee.
Most cities and towns have a list of what they accept for recycling, which you can use to learn what can go in your green or blue bins. However, certain items are not accepted because they can get tangled in machinery or because they are too contaminated to be processed.
Bottomline: Create A Better Green World!!!!
Practicing good recycling habits is not hard and can be beneficial to the environment and our communities. There are many ways to make the recycling process more efficient and reduce the amount of waste that goes into landfills.
Rubbish needs to be disposed of in the best and safest method in order to ensure the health of humans, animals, and the planet.
Read Also:
How Do Iot Devices Improve Warehouse Management?
Who Is An Intrapreneur? Definition, Characteristics, Pros/Cons, More
The Ultimate Commercial Cleaning Checklist: Everything You For A Spotless Workspace