Improve Your Home With Concrete Lifting Services

Published on: 24 March 2021 Last Updated on: 27 December 2024
Concrete Lifting Services

As a homeowner, keeping your home safe, comfortable, and attractive will be important. However, problems can sometimes make it difficult for you to achieve this.

Certain issues can affect many aspects of your home, from the aesthetic appeal to the safety levels. So, getting these problems addressed by a professional with specialist knowledge and tools is important. One of the problems you may experience at your home is areas of sinking concrete.

Most such homes consider taking help from concrete lifting companies. However, as a homeowner, it’s common to worry about whether you should opt for one or not. Here’s an article that’ll help you –

Sinking Concrete & How It Might Affect Your Home

Sinking concrete can affect many areas of your home, such as the sidewalk, the steps to the property, the patio area, and more. Once these issues arise, you must ensure they are sorted out quickly. Otherwise, your home could suffer.

You also need to consider the cause of the sinking concrete, which could indicate serious foundation issues. Finding a reputable concrete lifting company will enable you to resolve the issue and improve your home. In this article, we will look at how an experienced professional can help to improve your home.

About Concrete Lifting

Concrete Lifting or Concrete Leveling is a process of leveling or lifting up sunken concrete slabs out of the ground. The process involves injecting concrete material beneath the concrete slab to lift it up or level it. Typically, the material used fills up the void created under the slab. When it solidifies or dries, it creates a strong surface under the slabs.

There are different concrete lifting methods, and the most common ones include –

  • Polyurethane foam concrete lifting
  • Stone slurry grout concrete lifting
  • Mudjacking

How Is Concrete Lifting Done?

Concrete lifting is a heavy-duty task. But, with the right skills, tools, and training, concrete lifting is an easy and straightforward process. It also requires a basic understanding of the matters in use and the method utilized for lifting up the concrete slabs.

Here’s the detail of the process –  

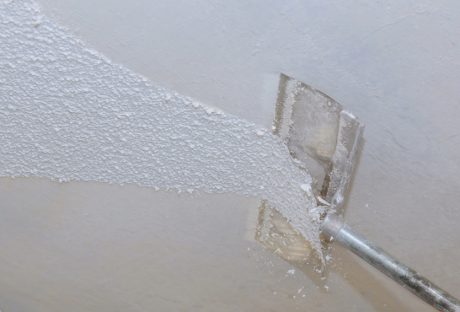
  1. First, the holes are drilled in different locations strategically.
  2. Then, it involves pumping a component through the holes and underneath the concrete slabs, where it fills any voids and creates enough backpressuback pressure to cause the concrete to rise.
  3. They patch the drill holes when the concrete is in a specific place.

Different Types Of Concrete Lifting

While the process may involve using different types of concrete materials, the lifting process can also require different methods beyond the three we mentioned above.

Stone Slurry Grout Concrete Method

Lifting Compound: In this process, a mixture of crushed agricultural limestone is used with water. The mixture forms a strong and dense base under the newly lifted concrete. Sometimes, they add Portland cement to the mix using extra strength.

Drill Hole size: the drill hole used for this leveling method is close to 1 inch in diameter.  It can also be about the size of a quarter.

Polyurethane Foam Concrete Lifting

Lifting compound: The lifting compound for this method includes two-part polyurethane foam as the lifting substance. When they inject it under the concrete slab, the substance can lift up the concrete slab. Then, that expansion puts pressure on the slab that’s settled on the ground.

Drill Hole Size: The drill hole size that’s needed for foam concrete leveling is close to ⅝ inch in diameter.

Mudjacking

Lifting Compound: Mudjacking is a process that includes water, soil, and sand as a mix and they are pumped at a high pressure and speed to lift up the settled concrete. You can also use Portland cement and add it to this mixture to make it stronger and more stable.

The drill holes have to be bigger in size for there to be a high pumping pressure. Typically, the Mudjacking drill Holes are 2 inches in Diameter.

Some of the Benefits of Having the Work Done-

Some of the Benefits of Having the Work Done

There are lots of ways in which you can improve your home by getting concrete lifting carried out. This will help you strengthen the affected areas around your property and also increase its longevity. Some of these are:

Improving Safety Levels:

As mentioned earlier, a range of safety issues can arise when you have to sink concrete in your home. The main issue you are likely to experience is people tripping and falling because of the uneven floor surfaces.

As areas of your floors start to sink further, they can become very uneven and difficult to walk on. This can create serious difficulties for some people, such as those who are elderly and at increased risk of falling.

In addition, those with mobility issues and even younger kids could be at increased risk of trips and falls that could cause all sorts of serious injuries. Having your sinking concrete addressed will help you improve safety levels at your home by reducing the risk of trips and falls.

Increasing Aesthetic Appeal:

Another thing that will happen when you have this work carried out is that you can improve the aesthetic appeal of your home.

When you have areas of sinking concrete, it can have a really damaging impact on the appearance of your home.

Sinking concrete can make your property look out of condition and unattractive, which is something that any houseproud owner wants to avoid. By getting the concrete lifted, the affected areas of your home will look far more attractive.

Improving Scalability:

It is also important to try and improve the salability of your home in case you decide to sell in the future. This is something that lifting concrete can do. If you have people viewing your home, they can be put off by lots of areas of sinking concrete, and this could cost you your sales.

These are some of the ways in which you can improve your home with concrete lifting services.

Read Also:


A passionate writer and an avid reader, Soumava is academically inclined and loves writing on topics requiring deep research. Having 3+ years of experience, Soumava also loves writing blogs in other domains, including digital marketing, business, technology, travel, and sports.

View all posts

Leave a Reply

Your email address will not be published. Required fields are marked *

Related

burner

A Guide in Choosing the Perfect Brewing Burner

A brewing burner is unquestionably the first major investment you make once you venture into home beer brewing. Acquiring a high-quality home brewing burner is imperative. A substandard one will not only compromise the taste and quality of your beer, but it will also turn into an exciting hobby into an annoying nightmare. An excellent brewing burner guarantees uniform heat distribution, and it’s instrumental in preventing scorching. It also hastens the boiling process, substantially lowering the amount of time you spend waiting around. Here are considerations to make when purchasing the best brewing burner. 1. A number of BTUs Generated: BTUs are units for measuring the amount of heat generated by the burner. Generally, one BTU adds one degree Fahrenheit to a pound of water that is at room temperature. You will find burners with BTUs of between 55,000 and 210,000. Bear in mind that a bigger burner doesn't always translate to a better operation. While high BTU output is ideal for all kinds of grain brewing, certain lower output models are more reliable due to their ability to distribute heat more efficiently. Read more reviews about your prospective burner before making a purchase decision. 2. Quality of Metal Used: All models of brewing burners are built from either cast iron or stainless steel. Cast iron is a bit thicker and tougher but weighs more and can rust easily. Thus, cast iron models are not suitable for outdoor brewing. However, if you are looking for a lighter model or you want to do lots of outdoor brewing, then a stainless steel model will serve you well. 3. Windscreens: If you expect to do a lot of outdoor brewing, you should go for a model that has a durable windscreen. It will shield your flame and keep it lighting even when a strong breeze comes. Windscreens guarantee a smooth boil and make home beer brewing a sensational experience. 4. Height: Outdoor propane burners tend to have longer legs compared to your traditional stove. The long stand allows you to brew your beer comfortably without compromising the health of your back. However, you should go for a model that sits nearer to the ground, if you will be dealing with a huge batch of boiling wort. Models with shorter stands are sturdier than those with longer stands. Top 3 Brewing Burners: 1. Edelmetall Bru Burner: This burner has lovely copper accents and stylish nameplate. It is made of refined stainless steel and copper. It produces a maximum of 72,000 BTU per hour. This burner boils a huge kettle of wort within a few minutes. 2. Bayou Classic KAB4 Banjo Burner: This brewing equipment offers a high amount of uniform heat. It generates more than 100,000 BTU, which is sufficient heat to boil a couple of gallons within minutes. Its 22-inch cooking surface can accommodate most brew kettles. It comes with a 4 ft rubber hose, a brass control valve, and 30-PSI regulator. 3. Dark Star 2.0: This propane burner can generate about 65,000 BTU of heat an hour. This burner is easy to use, and it can heat a maximum of 15 gallons of brew. This 6-inch diameter burner comes with an adjustable regulator, a wind guard, and lighter power. Choosing the best brewing burner is all about addressing your needs. Look for a model with features that are most crucial to you. Other than quick boil times, a quality burner offers a big surface area that can comfortably hold large brew pots.   Read More: 5 Best Stimulant-Free Fat Burners. 10 Unique Kitchen Hacks to Save your Time in Kitchen and Cooking

READ MOREDetails
Bedroom Makeover

3 Tips on How To Plan The Best Cheap and Fabulous DIY Bedroom Makeover

Tired of the current look of your room but don’t have a budget for renovations? It’s time for you to take a breather and read this guide for a thrifty chic’s way in achieving a bedroom makeover! No girl would want to keep the same look for her room in ages. And from time to time a girl would need to change their style. From the all pink room to modern and mature, but it is not an easy process at all. Changing a whole room setting will take time and a lot of brainstorming. Read also: Kitchen Renovations Must Be Done At Regular Intervals Choose What You Like In choosing your desired style, there is a number of choices. The color choices may range from neutral color styles to a preppy college girl’s choice. But sticking to your interest is the best call, and from there you can start planning which theme you desire the most. Do you want your room to have a bigger bed? Or maybe a bigger space? New closet? The planning is really up to you. After that, you can start thinking of what bedroom furniture do you want to buy, keep and throw away. Changing your bedroom style is best when you are cleaning up. You can easily clear spaces as you segregate your stuff and that spare space could be for decorating the room. Read also: Avoid These 4 Mistakes During Multi Family Housing Renovation Don’t Throw It All A basic rule when doing any home makeover is not to throw things away for they can still be of use to you. Well, of course, you would first need to clean up the clutter in your room and carefully assess if your trinkets, furniture, clothes, papers, and other stuff can help your room’s “new look” or not. The reason why you are not advised to throw anything away is that of DIY (Do-It-Yourself) projects that would need recycled materials. DIY has become popular with millennials today as it can show a person's creativity. But if you lack the artistic talent for such, DIY projects also have tutorials and are easy to do. Other than that, DIY projects cost less. Take Control Another tricky part of doing a bedroom makeover is taking control. Well, of course, you have control on which furniture will be at the best place, but other than that you have to take control of mixing and matching. Mixing and matching the patterns and colors is important for a mismatch of colors and stuff can bring disaster to your room. Don't make it too floral or colorful because it would look suffocating and stuffy. Instead, you should pick a maximum of three color tones that creates harmony when combined. The pillow population also matters, because even though it is cute to have a lot of pillows on your bed, it shouldn’t take half your bed space only. Two sets of the right size of bed pillows and a body pillow or a neck roll are all you need. Don't forget to consider your room lighting too. It can be in any shade of your liking. The lighting may be a bit dark, medium light or too light. Takeaway Doing makeovers is fun. Doing it for your room is exciting because it can be all about you. Remember not to be afraid when doing redecoration and renovations because freestyling for your room is not a  crime as long as you are comfortable with it.

READ MOREDetails
Iron Clothes

How to Use Iron Clothes With Steam

Believe it or not, the amount of people that don’t know how to iron clothes is amazing. There’s no shame on it since most of us were thrown into society without really practicing skills that would definitely help us fight back as we become independent. These skills include things like cooking a proper meal before going to work, knowing what groceries to buy without spending all our money on unnecessary things, being able to pay bills accordingly without becoming a mess, cleaning the house every now and then, and of course, knowing how to use steam irons and what to do to properly iron our clothes to not look like folded toilet paper. Don’t worry though! In this guide, I’m going to teach you the essentials of how to iron, and how to deal with different types of fabric. To be honest, ironing is not something as complicated as many think. It’s all about knowing what to do, which is what most people lack. The process may require a little preparation and patience, though, so be prepared to practice with different pieces of clothing to get the main idea. One thing is sure, though. You have to be careful when using an iron because they can be harmful if dealt with without precautions! How to Prepare for It The first thing you’ll need is a flat surface where you can prepare your clothes to be ironed. Try to have everything neatly organized to avoid possible accidents, and if you can, try to do it on an ironing board. Some clothing is too delicate for the heat produced by the heated metal of the device, so have a piece of fabric to protect these. Read more: A Complete Guide on Using IRON on Transfer Paper Connect the Iron Irons can take some time before they are ready to be used. They usually show a sign that they are ready, so be sure to be attentive about them while you take care of the next step. Never try to do it before its ready, since it’ll lead to a slower and far less efficient process. Know the Differences Between Materials, and Sort Them Beforehand Depending on the type of fabric you are dealing with, you might want to change your approach while ironing. You can’t deal with a silk piece the same way you would deal with a cotton one, for example. Some pieces of clothing will require you to use the lowest setting of heat possible, while others may require even more heat. Separate silk, wool, rayon, and acetate to be dealt with the lowest settings. Wool clothes may require the protection of another piece of fabric that was previously dampened, so take that in mind! For polyester, go with the medium heat setting, and for cotton, you can go either medium and high heat setting. Both of them should be dampened to be protected from the heat. Before the iron is ready to go, you should have them sorted out. How to Iron Clothes When you deal with shirts with a collar, you should start with it. You can start with a pattern that follows the inside part of the collar, starting from the center of it, until you reach the edges. Then, fall back to the center, and keep moving between both sides. Once you’ve finished with it, you can work the outside. Lay down the shirt in a way that you can flatten it with the iron with simple movements. After that, you have to work your way down, slowly moving the shirt. Then, work the sleeves then the cuffs. Pants are much easier than shirts with a collar. You just have yo lay them down in a way that you can work both legs at the same time. Start with the waist, gently work with the pockets, and go your way down. Repeat the process until you are satisfied with the results, but make sure to be gentle and careful with the heat and the ironing. Considering that there are way too many types of clothing to teach all of the proper methods and techniques to iron them accordingly, you should check this guide on how to do it without fail. Safety Recommendations Ironing can be a pretty dangerous process if you are not attentive while you do it. If you don’t take safety measures, you might harm yourself or others, so make sure to pay attention to this part of the guide. The very first thing you should always make sure is that the iron is unreachable for children. Children can be curious and do things without knowing, so you will be the one to blame if you allow them to get closer while they are heated up. This is important even after you’ve finished ironing. These devices tend to remain heated up even after disconnecting them, so you should still be attentive to any possible situation. I recommend you to wait at least 10 minutes before taking your guard off. Remember to check just in case. While it rests, don’t leave it face down. You might burn something or damage the iron if you do. If an accident happens and you burn yourself or someone else gets burned, treat the burn with cool water for as much time as you can. 20 minutes should be more than enough. Don’t use things like butter or oil, since it might infect the injury. if the burn is too big, you should check yourself with a doctor. Read Also: How To Choose A Washing Machine? How to Pack Clothing Properly for Shipping Choose The Latest Collection Of Women Clothing For a Stylish Look 6 Benefits Of Buying Clothes Online – Why People trust online shopping

READ MOREDetails