Published on: 12 April 2021
Last Updated on: 27 December 2024
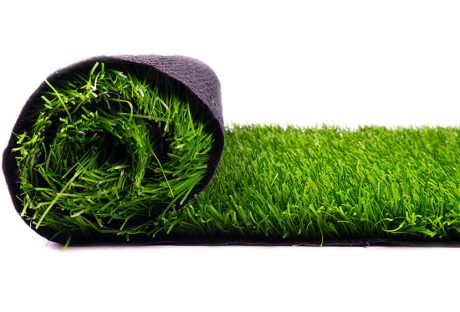
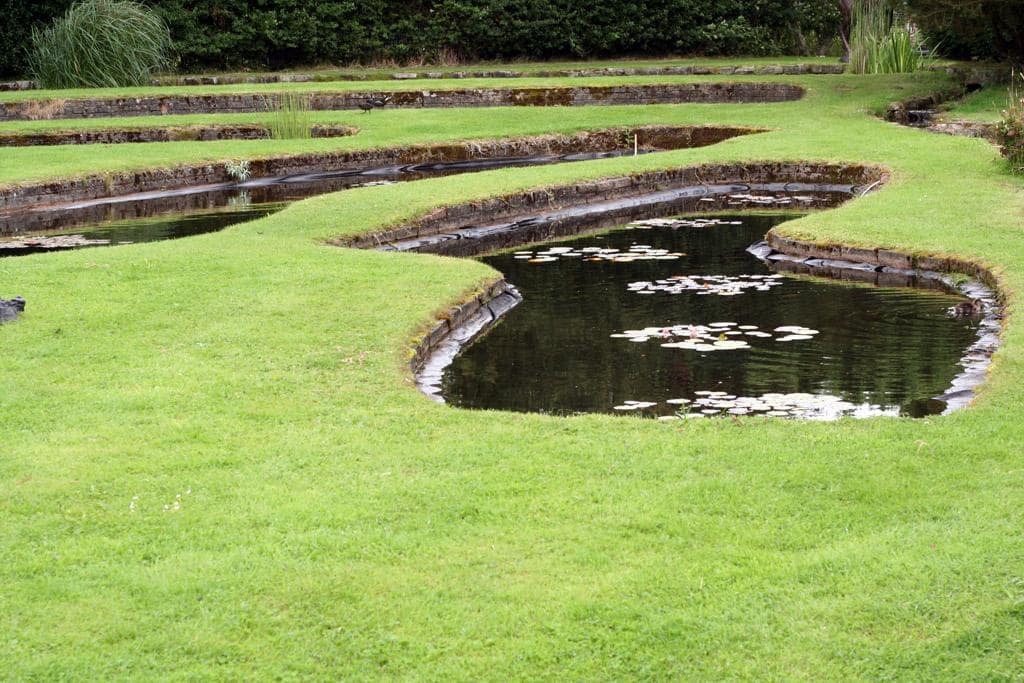
Edging offers a beautiful touch to your garden, but many people think of edging as expensive and time-consuming. It also protects the flowerbeds, lawns, and other plants by creating a boundary for them. Edging makes the perennials and annual flower beds look clearer and more polished. Also, you can paint the brick and concrete edging to create a color theme for your garden.
However, you need to consider the plan and design of the garden before creating an edging, and it can be challenging for beginners. Let us know more about edging for beginners that they can use for their home garden.
Consider the available space:
The amount of available space plays a special role in designing garden edging. For instance, it would not be good to choose large slabs of boulders to create an edging in a small garden. Small brick edging, metal sheets, and plastic sheets are more suitable to use as edging in small gardens.
However, if you have sufficient space or a large garden, you can go with any type or style.
Make your garden look new by using the most creative edging solutions. Once you are able to decide on what will work best, you will be able to completely transform the garden space and wow everyone who sees it.
Plan your budget:
You need to plan the budget for your garden because it's a way to narrow down your options. Planning your budget also helps you to save time as you will exactly know what things you can buy within your budget. Now let us know various types of edgings that you can use in your garden.
Edging trees might look simple enough, but a lot of things can go wrong if you are not familiar with the processes. If you are looking to make the most out of your budget, you can consider Tree Service Arlington for garden edging. They are professionals that will get the best work done so that you do not have to keep thinking and worrying about overgrown trees on your property. Using funds and spending them on experts will also help you save on expenditures over the long run.
Steel, Aluminum, and Plastic:
The simplest and most subtle edge of the landscape that effectively separates a lawn from a garden is made of steel, aluminum, or plastic strips 4 inches deep. The metal lawn edge easily bends into beautiful, smooth curves and prevents grassroots from spreading.
However, painted aluminum and steel provide the most elegant and sophisticated look of garden edging as it almost disappears into the grass and garden bed. Plastic garden edge types have a prominent black bump on the top edge. They all work best on a reasonable basis; If you have a lot of drops and climbs, it's easy to install a paving edge.
Plastic edging:
The plastic aging may not look so glamorous, but it is relatively simple and highly convenient to install. As it's available in small sections, you can easily stall one part at a time that requires you to dig the ground with a trench to sink in the edge. The primary benefit of plastic edging is that it is inexpensive and long-lasting.
Paver stones:
Concrete pavers are another form of material that have a long life and are nearly indestructible. One disadvantage of paver stones is that they are heavy to handle and take time to install. So, you need to take off from work for a few days to perform heavy digging and installation of paving stones. Paving stones are durable and last longer than any other material available for edging.
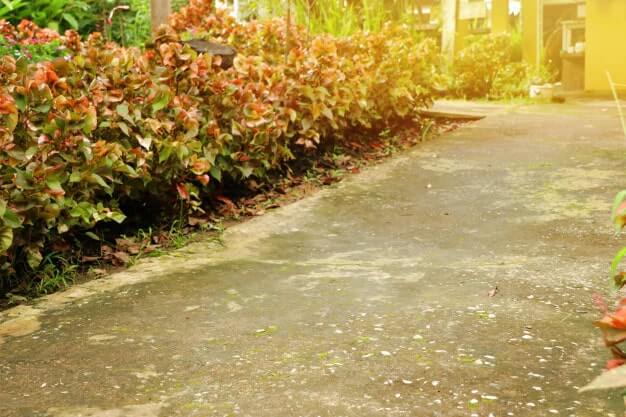
Natural rock:
Mother durable material after paving stones that you can use to create an edging. They are available in a variety of shapes, sizes, and colors. They are very easy to install as all you need to do is the edges of each garden bed.
However, as they have irregular shapes, you need to choose rocks of similar shape and size to create the most pleasing visual impact. You can visit a garden center for a nursery to buy natural rocks for your garden.
Flagstone:
Black stones are available in a variety of shades and thicknesses. You can directly place the flat species of flagstone along your garden edge or stack them to create a retro-style look for your landscape. Most local nurseries and garden centers offer some varieties of flagstones. They look pretty in your garden and last for years to come.
Brick:
Bricks are easily available in every area and are very convenient to install any landscape. All you need is to lay the bricks keeping their wide side down. The challenging part of the installation of bricks is to level them right. A simple way to level them is to use a string or line level or a rubber mallet. Bricks last longer and are relatively cheaper than other materials.
Mazzega's landscaping offers premium-quality landscaping materials for residential and commercial use in Kelmscott. If you are located in or near Kelmscott, they can help you in choosing a suitable garden edging solution and offer landscaping materials. In addition to a physical store, they also have an online shop where you can order products on their website.
Final Words:
These were some garden edging tips for beginners. Creating garden edging is not difficult if you take help from a professional landscaping service. The difficulty level of installation depends on the type of material you choose for landscaping. Following these tips can help you to create a garden edging for landscape owners.
Content Rally wrapped around an online publication where you can publish your own intellectuals. It is a publishing platform designed to make great stories by content creators. This is your era, your place to be online. So come forward share your views, thoughts and ideas via Content Rally.
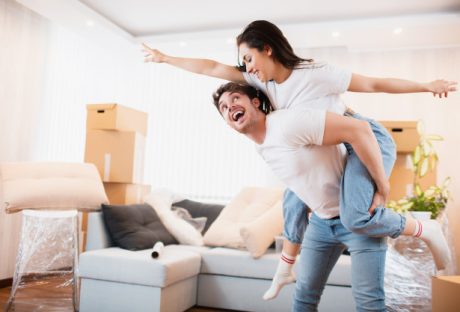
A home is more than just four-wall confinement to provide shelter. Sense of security, range of emotions, the commemoration of establishments, symbol of status, and more, all are some of the many aspects related to becoming a homeowner.
There are certain risks to achieve the absolute benefits of homeownership. It covers several social, personal, and financial advantages over monthly renting. Owning a house should represent your financial stability, emotional success, and community contribution.
The National Association of Realtors (NAR) reveals about 60% of Americans have homeownership. This lofty percentage is due to continued economic expansion with surging educational access. Settling for a home directly is thus more appealing for conscious people like yourself.
Concerning the monetary facts, you’re sure to enjoy an extended number of benefits. You can learn more at https://paradisedevelopments.com/blog/communities/renting-vs-buying-in-toronto/, the expert suggestions, practical ideas, and in-depth details are sure to relieve your headache associated with homeownership.
Financial Requirements Of Homeownership
Almost every person understands the financial prerequisites of owning a home. In fact, it appears to be the most invigorating point of homeownership. Initial investment requires you to spend an incredibly high amount of money. But the outcome is sure to make a satisfying payoff with time. The pointed facts should explain the obvious advantages in brief.
Building Equity: The possessed value of any given asset is represented as equity. In fact, monthly mortgage payment lets you establish equity for your house. Direct contribution to the physical asset explicitly differs from monthly rental payments to landlords.
Long-Term Saving: Equity happens to initiate certain savings for your financially stable future. There are a number of strategies available to tap into equity. Even a minimal saving per month will aggregate massive savings after several years. Several studies indicate peak outcomes on your retirement ages to suggest retiree savings.
Building Wealth: The value of properties is burgeoning right now. Therefore, it will help you sell the home for a notable profit after years of use. Although short-term use can’t exactly have a significant payoff; however, long-term consideration, like 30 years plus, will provide you with a great profit.
Expense Control: There are different uncertainties involved in rental living. But ownership lets you skip the issues with less fixed payments. The amount lets you reimburse the overall expense for every month. And you can initiate absolute control over your costs.
Financial Education: Ownership immediately starts to develop a personalized understanding of your financial knowledge. Likewise, you’ll have to deal with many financial aspects. It becomes easy to predict the probable costs, letting you plan ahead of time. The educational skills regarding its management will surely help future generations.
Taxation Aspects Of Homeownership
Attractive tax breaks on ownership are sure to give you definite relief from complex regulations. Many deductions should occupy your applicable Federal Tax rules following the purchase. Check out the benefits closely to understand their viability.
Property Tax Deduction: Distinctive jurisdiction allows you to check the deduction of property taxes. There are several regulations regarding the aspect. It requires your attention to the usable points.
Home Sales Profit: Exemption in capital gain tax can cover thousands of dollars on selling. Though taxation eligibility requires you to occupy the benefits. It should follow the sale of homeownership.
Reduced Mortgage Interest: Almost every payable home mortgage interest remains tax-deductible. Therefore, the curtailed mortgage interest triggers a particular deduction of your taxable income.
Imputed Home Rent: Every landlord that provides rental living space has to pay taxes on the income. But it has nothing to do with homeownership. You can skip the hassles of additional tax regulations.
Credit Builder: There are many direct or indirect factors that contribute to your credit score. Owning a home improves the average credit account length. And it simply manages to push the score forward.
Additional Aspects That Remains Underrated
Alongside the benefits, there are several other factors to consider. The extra aspects often remain neglected, ignored, or unnoticed.
Inflation Hedge: Rental costs or housing payments keep pace with the ongoing inflation rate. Continued inflation obviously affects your overall expense.
Borrowing Power: Superior home equity results in further eligibility of borrowing money. A credit line or particular load on home equity suffices for a second mortgage. And the loan can provide financial support. It can include, medical bills, tuition fees, home improvements, or additional purchases.
These are all the monetary benefits of homeownership. There are several social benefits to ownership as well. You don’t have to deal with landlord permissions or restrictions on any change. The emotional and financial security you get from owning a home provides great relief. There remains no uncertain rental stay. Possessing a home becomes a symbol of personal accomplishments to raise the status. Freedom of full customization lets you check the possibilities towards further development.
Encountering The Risks
Talking about homeownership, the discussion remains incomplete without discussing its risks. You must consider the current financial aspects to back your expensive investment. In fact, high maintenance costs are likely to give you trouble. It’s particularly true for houses that feature minimal facilities. A poorly maintained home can also reduce the property value.
More Resources:
Benefits of Investing in City Centre Property
Buy to Let Mortgage Explained
What are the key pillars of a profitable Airbnb business?
Biophilic design has become a popular global interior design trend. Pinterest Business reported a 100% increase in searches for "biophilic design bedroom" between 2019 and 2021.
This design approach is rooted in biophilia, humans' innate affinity with the natural world.
Moreover, it has practical applications in design. Research indicates that it can positively affect productivity and well-being.
For instance, a study showed that people spent 11% more time in biophilic-inspired hotel lobbies.
Similarly, schools in Washington State saw a 5% increase in student test scores and a 15% reduction in absenteeism with a biophilic design approach.
Let us explore what interior designers suggest for a biophilic home and ideas that you must explore!
Understanding Biophilic Home Designs
The modern world of technology has taken a new direction towards nature. Robotics, AI, and the Internet of Things (IOT) have caused urban architects to incorporate biophilic designs.
These designs involve greenery and natural elements. It helps to improve air quality, airflow, circadian rhythm, heart rate, and human health.
Biophilic designs stimulate visual connection and enhance the multi-sensory experience using indoor plants and natural patterns.
Stephen Kellert and Edward O. Wilson, who founded biophilic designs, have made nature feel more accessible at home. He incorporates plants, sunlight, natural materials, and fresh air.
How To Make Your Home Biophilic?
Given below are the different aspects that you can add to your home for a biophilic design—
Add Plenty Of Greens
Integrating plants into your interior design can create a natural and inviting ambiance. Adding greens helps enhance the aesthetic aspects of a biophilic home, ensuring a calming environment. Moreover, indoor plants help purify the air inside your home.
However, this does not necessarily mean you must go overboard and transform your home into a tropical paradise.
You can opt for potted plants, hanging baskets, or even a simple vase with fresh-cut flowers. Match your live elements with the color scheme of your decor. Most home designing experts advise you to get more succulents for your home. These plants require less watering but look amazing in every setting.
Alternatively, nature-inspired artwork, botanical prints, or murals can bring the outdoors in.
The idea is to create a synergy between the artificial environment and the natural world. This home design can positively impact your mood, health, and well-being.
Therefore, incorporating natural elements into your interior design can create a more harmonious and balanced living. This biophilic element can be functional and beautiful at the same time.
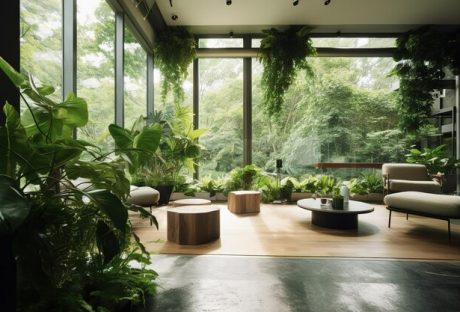
Enable Natural Lighting
Incorporating natural light into interior spaces has numerous benefits.
Biophilic design emphasizes the connection between humans and nature. Therefore, it prioritizes light and space to create a healthier, harmonizing, and more comfortable environment.
Biophilic home designs use different components of warmth and sunlight. Natural light can blend the boundaries between the interior and exterior of a space.
For instance, large windows and skylights can allow sunlight to stream in, making a space more open and inviting.
Additionally, glass roofs and walls allow you to save electricity with natural lighting during the daytime.
If you can reduce your exposure to artificial lighting, you say goodbye to stress and fatigue. It helps invigorate the body and mind.
Therefore, we can design spaces incorporating biophilic principles to improve our well-being and strengthen our connection to nature. It creates spaces that promote well-being and encourage a greater appreciation for the natural world.
Use Organic Decor Items
Biophilic design is a concept that aims to connect people with nature by incorporating natural elements into the built environment.
To create a peaceful atmosphere and promote a sense of well-being in your home, incorporate natural materials like leather, wood, and stone for your decor items. This brings a natural touch to the textures, colors, and forms around your home.
Furthermore, using subdued and organic color schemes can also help to enhance the calming and stress-reducing properties of biophilic design. Handcraft your decor with jute ropes,
Therefore, you can create an affordable and easy-to-maintain space with these decor items. That is aesthetically pleasing and enhances your physical and mental health.
Maintain The Patio
Biophilia is an evolutionary concept that suggests humans have an innate affinity for nature. This idea is gaining traction in outdoor architecture and design as well.
Biophilic design is a concept that aims to create a connection with nature and its resources. To achieve this in your outdoor space, you can incorporate some major additions like the following:
Eco-friendly composite decking.
Vertical gardens.
Green screens in small spaces.
Native plants can help support wildlife and blur the boundaries between the territory and nature. Therefore, it is essential to consider factors such as sunlight exposure and irrigation when selecting plant species for your patio.
Furthermore, incorporating water elements like fountains or cascades can help create a tranquil atmosphere.
It is also important to choose outdoor furniture inspired by nature instead of plastic. Install fire pits made of natural materials like stone or metal. This can help create a comfortable and inviting outdoor biophilic space.
Let The Air Flow
Achieving a biophilic home design involves paying attention to the air circulation within each room.
You can start by determining the direction of the wind around your home. Next, open your windows accordingly to facilitate the flow of fresh air.
Additionally, you can enhance the airflow in your home by ensuring that your rooms are spacious and free of clutter.
Consider using furniture that provides ample storage space to keep your rooms organized and uncluttered. This allows the air to circulate freely throughout your home.
By creating a well-ventilated and spacious environment, you can enhance the biophilic design of your home. Therefore, bring nature indoors and improve your overall well-being.
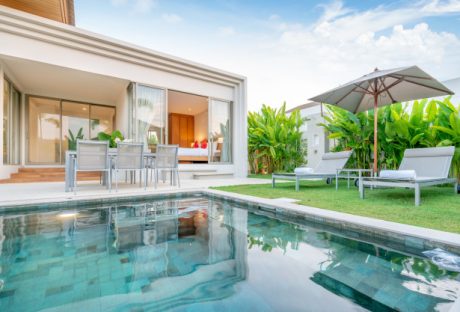
Add Water Features
Adding water features like cascades, fountains, or reflecting pools to your outdoor space can incorporate a biophilic design. It helps create a serene atmosphere.
The sound and sight of water can instantly transport you to nature and induce a feeling of tranquility and relaxation.
You can go for a small pond or stream in your backyard if you have a generous budget. This addition can create a more natural and immersive experience.
However, a small water fountain in your garden, patio, or deck can do the trick if you prefer a simpler option.
It's a quick and easy way to add elegance and calmness to your outdoor space!
Wrap It Up With A Fire Pit
Adding a fire pit to your outdoor space can significantly impact its ambiance and appeal.
By creating a warm and inviting atmosphere, fire pits can make your outdoor area a more comfortable and enjoyable place to spend time.
Furthermore, fire is a natural element that can uniquely evoke feelings of tranquility and connection with nature.
Therefore, incorporating a fire pit into your outdoor design can help create a biophilic environment that promotes relaxation and well-being.
Read Also:
Enhancing Spaces With Greenery: The Art Of Plant Styling In Interior Design
6 Interior Design Tips to Make Your House a Home
Top 5 Interior Designers from Singapore
A house with many family members is hard to manage as everyone loves to have their own space. But the limited space can make it crowded by giving your home giving an ugly look. All thanks to modern ideas which have introduced several ideas for crowded families. It makes the house look arranged while keeping in mind adjustments. The look involves the latest trends and lifestyles to develop my sense of styling while keeping my mind comfortable. Apart from these comes your pets, for whom a small kennel door with a dog door could be placed on the lawn of your house. In this article, we will discuss modern home design ideas for crowded families.
Ideal space for Teenagers
A crowded family must have children and teenagers who demand their own space. However, providing each one of them with their separate rooms may not be possible. To overcome this solution, the idea of the shared bedroom can be considered. The design of the bedroom should focus on the needs of children according to their age. To create more space, bunk beds are the most flexible options, leaving you with some empty spaces to play around.
Nowadays, study stable comes with multiples shelves fixed from the wall and can be closed when not in use while creating a good space-saving idea. These shelves are useful hacks for putting their stuff, toys, and books in a proper place. The sofa cum bed could also be turned on into a great option. The beds also come with lots of storage box options where new things, including sports or musical instruments, can be put on. Lastly, the wardrobe cabinet with multiple small shelves and space for hangers will store all their clothes methodically. If there are both boys and girls in a room, try keeping a neutral color of walls like calm grey, which would look pleasant without overly decorated.
Give a multi-dimensional look to your dining room.
For a home with a large number of people, there is much need for multifunctional spaces. The dining spaces could be transformed into a games room or a corner used as a reading place. You can place an armchair with bookshelves placed on the walls. One needs to focus on the preferences of family members for doing so. A television set could also be placed on the other side of the wall there with a lounge for entertainment purposes. You can add some masterpiece painting, vases, or wallpapers to give a modern look in your room. Place a dining table where your family can fit in have a meal together. The buffet tables or smart dining tables with extendable chairs are a great way to save space.
Go for an open kitchen
You can plan your dining room entrance just before the open kitchen as it will save a lot of space in the kitchen. The open kitchen doesn't make it look congested, and the dining room's access will recreate more space into it. It would be easy to serve food and won't create a mess around long pathways. You can place a covered shelves box or drawers in the wall and arrange all your cutleries there for storage options. Make sure to build cabinets below the kitchen slabs where you can store multiple ingredients along with a cylinder at the corner. Put your microwave in one corner and attach extended shelves or cabinets on the walls for keeping more utilities there. A larger counter place would eliminate high trafficking in a home where more than one person works. You can create a specific station in the kitchen for getting your work more organized.
Turn out your lawn into a place to get together
For having a good time, a lounging area can be considered an entertainment room option. The large family tries to do everything together, so the lawn or balcony could be placed with comfy diwan and sofa sets. One could turn it up as a garden by putting up many plants, and the place would be great for a mini picnic spot. You can also add bean bags or swings and decorate them with warm lighting to create a unique evening look. The place would be great for barbeques, or a small get-together. If you don't have much space, you can create a window seat and do partitions using some fabrics to create a visual barrier.
Create congenial public spaces
For your living thing, the best would be to go with L-shaped sofas. They are useful to handle the long stream of guests and can be placed with some more small seaters around. If you have a larger living space, you can break it into shorter sitting with cushions for private conversations. Make sure to use durable surfaces that would be durable and easy to clean the mess in a busy family. This setup will give a warm and comfortable space. You can also place a wall red sea aquarium to use the best of areas. Placing a wall aquarium will consume less space and it will be a center of attraction for everyone.
Conclusion
To avoid the mess, place a standard shoe stand. You can also use the garage's extra space as a storeroom by putting up the different things there. Utilize the basement of your house for this purpose. You can save more space by having shared bathrooms placed between the bedrooms.
Read Also:
7 Ways to Add Character and Style to Your Home
5 Tips For Designing a Tiny House
Design your Kitchen According to Your Budget and Work in Organized Manner
How to Make Your Home Look Like You Hired An Interior Designer
How to Make your Home Look Beautiful in the Upcoming Holidays


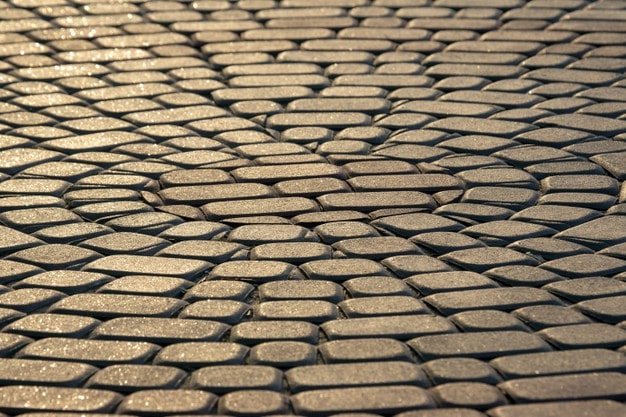 Concrete pavers are another form of material that have a long life and are nearly indestructible. One disadvantage of paver stones is that they are heavy to handle and take time to install. So, you need to take off from work for a few days to perform heavy digging and installation of paving stones. Paving stones are durable and last longer than any other material available for edging.
 Black stones are available in a variety of shades and thicknesses. You can directly place the flat species of flagstone along your garden edge or stack them to create a retro-style look for your landscape. Most local nurseries and garden centers offer some varieties of flagstones. They look pretty in your garden and last for years to come.