Planting & Harvesting Mint

Published on: 30 June 2021 Last Updated on: 03 January 2025
Mint

Mint is a wonderful plant that practically cultivates itself. So fast is its growth that it can threaten to spread across and take over your entire yard or garden. One way to battle this is to confine its growth by planting it in a pot or a separate bed. However, once you have this plant, you will be glad, because it has properties that make it fruity and a great addition to tea and foods.

As can be seen here, it is also quite useful in health remedies that can aid digestion and relieve headaches. We know you already feel enthralled by this herb and would like to know more. So, why don’t you read on and discover more amazing things about mint…

What Mint is All About

What Mint is All About

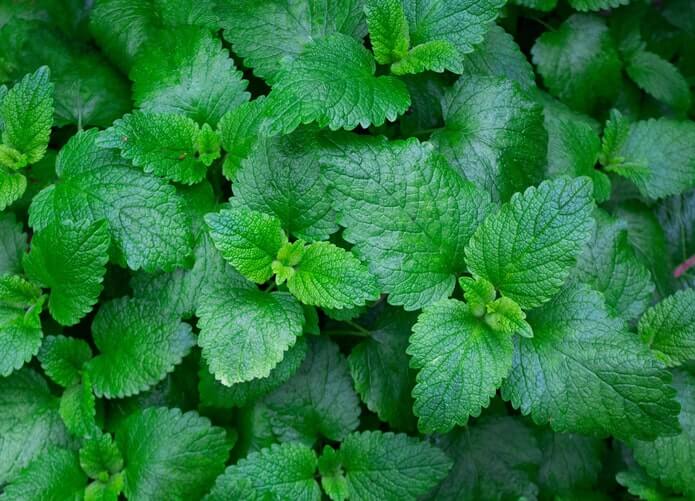
Mint is an herb that is perennial and has a very wonderful fragrance. Its leaves are toothed and may have tiny pink, white, or purple flowers. Mint has so many variants from crinkled or smooth, to fuzzy or shiny. However, one thing is constant despite what kind of variant it is; all mints have that wonderful fragrance.

Hence, whenever you pick up any variant of this great herb and roll it in your fingers, you would get the same smell that will make you either think of sweet teas, candy, or mint juleps.

Aside from being a wonderful kitchen companion, this herb is also used as ground covers, garden accents, herbal medicines, and air fresheners. Mints are functional as well as beautiful and can grow either in shades or under the sun.  However, as we already said, this plant is a vigorous spreader; therefore, unless you want to have too much than you need, you have to be very deliberate about planting it.

Uses

Uses

We have already stated several things that mints can be used for, but there are still so many more benefits of this wonderful herb. Below are some of these benefits:

  • Can be used to make mint tea. To do this, simply put the leaves in a cup of hot water and then leave it to sit for some minutes.
  • Make tasty ice cubes with it by freezing the leaves with raspberries and cranberries.
  • Add it to a salad dressing, marinades, or fruit salad.
  •  Use it to relieve headaches by applying It’s oil to the temples.
  •  It can also be used to relieve anxiety and stress.

Yes, mints have many other health benefits, but though not a practical use, it is also used as a virtue symbol.

Planting Mints

Planting Mints

If you decide to plant mints in your garden or yard, then below are some important things that you have to know:

  • They flourish in light earth which has good drainage.
  • Their original habitats are stream banks, so, the site you plant them should imitate stream bank soils. That is to say, ensure the soil you plant your mints is moist but also well-drained.
  • Variegated mints should not be planted in direct sun as they require a bit of shade.
  • Mints typically grow to become one to two feet tall.
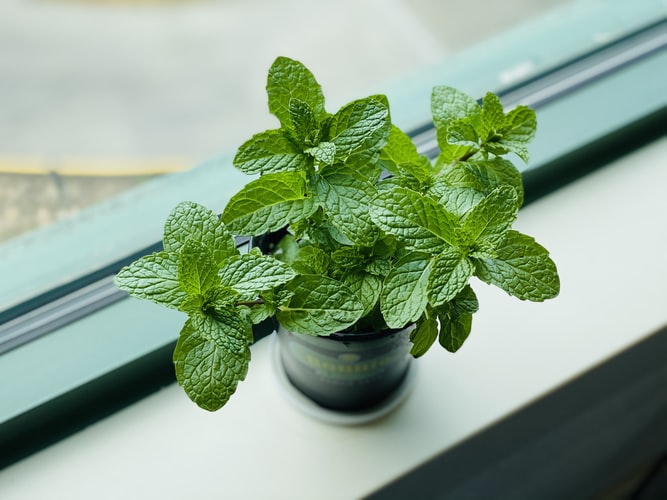
  • If you plant them in a container or pot, then you would need to topdress them with organic or compost fertilizer once in a few months.
  • If you plant mints in your garden, ensure to plant them next to tomatoes or cabbages, this will help contain their spread and prevent them from stealing your crops’ nutrients.

Care

Mints do not require that much care; however, you should consider the following points when caring for them:

  • If planted outdoor, use light mulch. You can visit https://www.thespruce.com/what-is-mulch-1402413 to read up more on mulch. The light mulch will ensure the soil remains moist and also help the leaves to stay clean.
  • If planted indoors, then ensure you water them often to help the soil stay evenly moist.
  • Mints should be picked and pruned regularly. Like we have stated many times already, these guys are fast spreaders, therefore, you would need a lot of pruning to stop them from taking over everything. This should not worry you since their roots are shallow making it quite easy to drag them out of the soil.

The Propagating

You do not need to do a lot to propagate mint. The perfect way to go about this is to find the plant which you like and then cut out of it. Ensure the cutting is at least 6 inches and has ample roots attached. Then plant them in the soil horizontally.

You can always get a cutting from a gardening friend, so this is nothing to worry about.

Harvesting and Storing

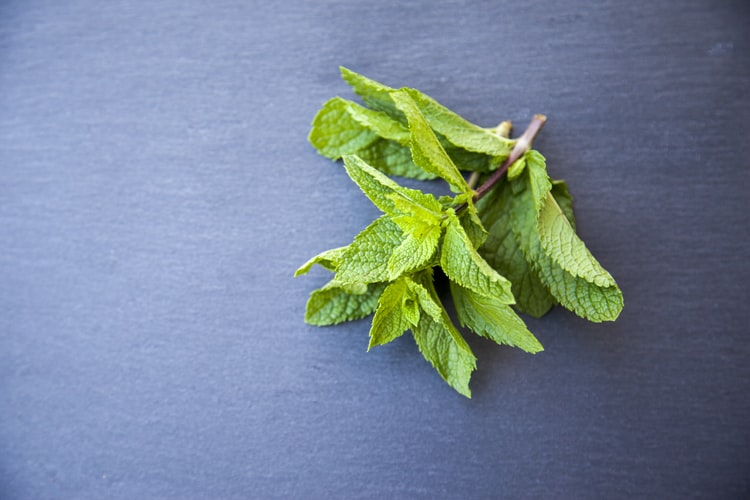
To learn how to harvest mint is quite easy, it typically does not involve any special skill. You may either pick the leaves individually, or you may use shears to prune the plant and then take off the leaves from the stem you had cut off.

Despite the harvesting process being relatively easy, you need to remember a few things when you harvest your mints:

  • Frequent harvesting will keep the plant at its best.
  • The younger leaves have a better flavor than the old ones.
  • You can pluck the leaves whenever you need mints.
  • If you need dry mints, then pluck the leaves before flowering and then save them in an airtight container.

You can also store fresh mints that you do not immediately have use for. To do this, put water in a glass and then put the stems inside the water. The mint will stay fresh for 3 to 7 days this way. You may equally put the mints inside a rubber bag and then store them in your refrigerator. This should keep it fresh for at least a week.

Conclusion

Mint is an herb that would make a very great addition to your garden or yard. But, without proper knowledge about the plant, everything may spiral out of control. Therefore, you must have basic knowledge about planting, caring for, and harvesting this plant before you farm it.

 Read Also:


Content Rally wrapped around an online publication where you can publish your own intellectuals. It is a publishing platform designed to make great stories by content creators. This is your era, your place to be online. So come forward share your views, thoughts and ideas via Content Rally.

View all posts

Leave a Reply

Your email address will not be published. Required fields are marked *

Related

Student Apartment

How to Make Your Student Apartment Feel Like Your Own House?

Feeling a bit homesick while away at college is pretty common and almost everyone goes through it at some point. And, if you are a student living abroad in student housing, it might be even more difficult for you.  Feeling a bit homesick while away at college is pretty common, and almost everyone goes through it at some point. And, if you are a student living abroad in student housing, it might be even more difficult for you.  After all, being in a different environment, like student apartments, can sometimes make you feel disconnected from home. First things first, you might need to find apartments near campus so that you can at least save some commute time.  The good news is — there are several other strategies that’ll help you make your new place feel just like your own house.  Let’s keep reading to know more about it. Let’s keep reading to know more about it. 1: Add a Little Bit More Light Improving the brightness of your living space is essential for comfort and health. Dim or insufficient lighting can create a dreary atmosphere, making your student accommodation feel cramped and less inviting. Enhancing the illumination may also create a curious illusion of spaciousness, akin to the roominess of your bedroom back home.  If your current light fixtures aren't effective, consider investing in stylish lamps to brighten up your place. Not only will this boost the ambiance, but it'll also revive the space, making it feel more lively and homely. Choosing lamps that align with your personal style will not only add a touch of flair but also bring back the cozy feelings of home that you're missing. 2: Instill Life in Those Lifeless Walls  If your new apartment has plain white walls and feels a bit empty, bringing in cherished photos or posters can liven up the space.  Whether it's capturing your family moments or displaying images of beloved sports icons, incorporating these elements, can personalize your living area.  Consider engaging a professional house painter in CT or a painting company in Prospect, CT, to introduce more depth and texture to your walls with a fresh coat of paint. 3: The Plants… Don’t Forget Them If you enjoy plants but lack the time or skill for care, consider placing a few low-maintenance plants in your student apartment.  They can bring color, improve air quality, and enliven your living area effortlessly.  However, if you don't have the time or inclination for plant care, there are a lot of attractive artificial plants available that can still lend a sense of style and coziness to your new home. 4: Blankets, Rugs, and Pillows Can Be Your Best Friend Simple tile, carpets, or hardwood floors might lack excitement.  To spruce things up, consider adding stylish throw rugs to your apartment—they not only enhance decor and color but also bring comfort and a personal touch.  Additionally, throwing blankets and vibrant pillows on sofas and chairs might further elevate your space with a touch of flair. 5: Gather Your Favorite Food and Stuff Food serves as a strong cultural link and a way to bring people together, although it can also spark heated debates like the pineapple pizza controversy. It holds significant value in our lives, often tied to cherished family recipes.  Exploring those recipes with loved ones can be a wonderful experience. Yet, not all favorite dishes originate from family recipes; some hail from local restaurants.  Recreating these meals can be achieved through copycat recipes found online or by purchasing specialty sauces or dishes from these establishments. If all else fails, discovering new eateries can lead to new culinary favorites and create fresh memories. 6: Make Your Space Smell Better Is there a particular aroma that evokes the feeling of being home? It could be the comforting scent of your mom's Sunday morning cinnamon buns or the nostalgic fragrance of garden flowers from your childhood bedroom.  Whatever brings you that sense of security, consider finding ways to incorporate that smell into your space. If burning candles isn't an option in your apartment, there are alternatives like oil diffusers, wax melts, and candle warmers that can help recreate that familiar scent. 7: Have a Motivating Study Space In college, studying is inevitable. While some apartments offer study rooms, you might opt to carve out your own study nook within your place.  Thankfully, the additional room in an apartment lets you craft a cozy workspace to ease the studying grind. Locate a peaceful corner with minimal interruptions. Then, deck it out with a comfy chair, a quality reading lamp, and enjoyable stationery to amp up your study vibes. 8: Cozy and Ambient Lighting Fluorescent lights commonly found in dorm rooms might not be appealing. Instead, opt for a stylish desk lamp for your study area or a larger floor lamp to illuminate the entire space.  You could also think about getting a budget-friendly light timer to automatically switch on your lamps in the evening.  Walking into a softly lit room late at night creates a much more inviting atmosphere than entering a completely dark space. FAQs - Frequently Asked Questions Q: How can I personalize my student apartment on a budget? Personalizing on a budget is possible! Consider using affordable decor items like posters, string lights, and inexpensive furniture. DIY projects and second-hand stores are also great options. Q: What are some easy ways to add a personal touch to my living space? Incorporate items that reflect your personality, such as photos, artwork, or memorabilia. Adding throw pillows, rugs, and curtains in your favorite colors can also make a significant difference. Q: How can I maximize storage in a small apartment without making it feel cluttered? Optimize vertical space with shelves and organizers. Use under-bed storage bins, wall-mounted hooks, and multi-functional furniture like ottomans with hidden storage to keep things organized. Q: Can I paint the walls of my student apartment, or are there alternative options for adding color? Check with your landlord first regarding painting. If not allowed, use removable wallpaper, wall decals, or large fabric panels to add color and personality without causing damage. Q: How can I create a productive study space within my apartment? Choose a quiet area with good lighting and invest in a comfortable chair and desk.  Personalize the space with motivating quotes, plants, and organizational tools to make it conducive to studying. Q: Are there any low-maintenance plants that are suitable for a student apartment? Yes, consider plants like snake plants, pothos, or succulents that require minimal care. These can add a touch of nature to your space without demanding too much attention. Q: Any advice for maintaining a clean and organized apartment? Develop good habits, such as cleaning up after yourself daily and having a designated place for everything. Regular decluttering sessions and a cleaning schedule can help maintain a tidy and organized living space. Read Also: How To Quickly Rent  An Apartment In New York? Things You Can Do to Your Apartment to Raise Its Value 7 Expert Hacks for Downsizing to a Smaller Apartment

READ MOREDetails
cleaning-381089_960_720

Run Cleaning in Dallas: Why a Professional Cleaner is Better

Have you tried deep cleaning your carpets such as using solutions in order to remove stains? Vacuuming is fairly easy and anybody can do it. But with the complexity of cleaning your rugs, the dirt, stains, and all that, leaving it to a professional is better. You do not know what lurks under those rugs. Why do you need to hire a professional cleaner? The who are specialists in many types of fibers. They know the type of cleaning material to use for any type of fiber. Their technician will simply have to inspect the rug to be treated and teach you ways to prolong the life of your rug. Read also: Use Floor Polishing For Keeping Your Flooring Looking New Benefits of Rug Cleaning in Dallas Time Saver Cleaning your carpet and rugs by yourself is time-consuming. It might even result in a disaster if you do not know what you are doing. By hiring a professional to do the work, you can save a lot of time. Whenever you hire professionals, they will also be the ones to move the furniture and put them back. This is also another convenience because you do not have to do the moving. It can be quite exhausting. Extend Your Rug's Life A rug cleaning in Dallas, when done by professionals, can extend the life of your carpets and rugs. With regular cleaning, your rugs will look as good as new. A professional cleaner will always perform a better job than hiring an amateur without so much experience. You can expect that every inch and fiber of your rug will be cleaned without damaging them. Preserve Indoor Air Rugs and carpets trap a lot of bacteria that you are not aware of. These can pollute your house and might cause allergies. Regular cleaning will prevent the growth of bacteria and allergens that can make you sick. By maintaining clean rugs, you will also preserve a dirt-free surrounding. Feeling Clean and Comfy Have you ever felt good walking into a house that is clean? Chances are, you know the feeling of a newly cleaned house. This is pretty much the same when you have a newly cleaned rug. There is that smell of freshness and your rug feels good on your bare feet. Certification Professionally trained cleaners are certified in all types of fibers. They know how to clean your rugs and spot any other necessary treatments to prolong the life of the rugs. While it is true that professional rug cleaners cost more than an amateur, DIY or rentals, in the long run, you are still able to save more. A professional cleaner knows what to do with dirty and stained rugs. They know the chemicals to use without damaging the rug.  They are also equipped with the necessary tools and cleaning solutions that are effective than those found in stores. You can be sure that with professionals, your rugs will not get destroyed as opposed to doing everything yourself and not knowing the precautions on the use of chemicals.

READ MOREDetails
kitchen-2619008_960_720

Installing A Kitchen Tile Splashback – The Basics

Adding wall tiles to a backsplash can be a really simple and effective way to spruce up your kitchen sink area, as well as protecting the surface as well. Here we look at the basics. Home improvements needn't be expensive, all it takes is a little research and time and you can make a significant difference to the house you live in. Choosing tiles for a kitchen splashback can be a really simple and effective way to spruce up your kitchen sink area, as well as protecting the surface as well. For a project like this, you are likely to need little more than a couple of days to complete it, and a minimal amount of money to achieve a great result, depending on the equipment you already have. Before You Start Prepare The Wall Before you start, clear everything out of the way that may obstruct the job and/ or get broken or damaged while you work. You should also check that the wall is good for tiling as well – chances are you will choose porcelain tiles, which are heavier than more traditional ceramic tiles so the walls need to be up to support their weight. If there is any level of condensation you must wait for the wall to completely naturally dry out before you begin tiling. If the drywall you're working with isn't sound, you must repair it before you do any tiling. Plan The Design You'll need to plan your design before you can purchase your equipment or begin the project. Measure how high you want the backsplash to be from the countertop and consider the type of tiles you would like to use. If you are unsure, take a look at sites like Pinterest for inspiration. Get Your Equipment When buying your equipment, especially your wall tiles, try to start with more than you need. With porcelain floor tiles or wall tiles, it is always good to have extras in case some get damaged during the job or even years after and you need a replacement tile that matches. In order to determine how much tile requires you need to measure the length and width of the area, you are putting a backsplash on. Simply multiply the length by the width to get your desired wall tile amount. If you don't know what type of equipment you need for the job, speak to an advisor at the shop or warehouse and they will be able to advise you on the best tools for the job. Read also: Close Look At Top 5 Roofing Materials – Pros And Cons Install Once you have done all the correct preparation, it's time for you to install your backsplash. Safety First The first thing you need to do is make the area you are working in safe. All electrical appliances nearby should be either turned off if they are permanent fixtures, or moved away if they are temporary. Read also: Making Your Office Safer For Workers Clean The Area Using a clean cloth, gently wipe the area with warm water and let it dry naturally. Apply The Adhesive Using the manufacturer's instructions, apply your tile adhesive using a tile trowel. Make sure the adhesive is spread thinly and only apply enough adhesive for the area you are tiling, or it will dry before you have applied all the tiles. Lay The Tiles Place the first tile at the bottom of the backsplash in the middle. Firmly push the tile on to encourage it to settle into the adhesive and use a level to make sure it isn't wonky. Use a spacer or piece of cardboard on each corner of the tile and push them into the adhesive well. Continue to lay the tile's row by row, taking care to remove any adhesive that pushes up through the tile gaps. Ensure you are leaving enough room for grout and checking constantly that the tiles are level. Cut Tiles Away In A Separate Area Depending on the equipment you are using, you need to ensure you follow all safety procedures to ensure you are working safely. Ensure you only score tiles where the scored section won't be showing, and only score tiles when you need to, as the measurements needed may change as the job progresses. Wipe Once all the tiles have been laid you can wipe away any adhesive that has seeped out using a clean, damp cloth. Leave The Tiles To Dry You must leave the tiles to dry according to the time stated by the adhesive manufacturer. Trying to skip this process will result in an uneven backsplash and tiles that will not remain stable. Grout When mixing grout you should be wearing appropriate safety equipment such as gloves, goggles and a mouth mark. Grout the tiles precisely and carefully, taking care to wipe away any excess once it becomes firm. Once the grout has dried, you can then wipe the tiles off completely. Well Done! You should now have a fancy new backsplash to enjoy in your kitchen! Remember, if you take the time to do the job right, you should end up with a well-done backsplash that will look fantastic and last for years to come.

READ MOREDetails