Published on: 12 July 2021
Last Updated on: 10 January 2025
Sometimes, it's better to show than tell. That applies perfectly to your webinar. Maybe you want to show webinar attendees how to use your new product. Or perhaps, you plan on showing graphs and charts to drive a specific point home. Sure, you can describe these to your audience with the Mac screen recording software. But wouldn't it be better to show them instead?And suppose you are planning on using automated webinars to promote your products or services, establish industry authority, and build trust between your company and your target consumers. In that case, you'll need to find the best screen recording tools for webinars.Here's a brief rundown of the best screen recording software to choose from.
A Few Important Things To Remember Before You Record A Webinar
In the last few years of the pandemic, teachers, for example, have been forced to become aware of online streaming platforms and webinars. They have to hold sessions, take classes, become part of conferences and more. A good idea would be to learn from webinars for teachers and get the necessary knowledge to do better when you hold one on your own.
Before choosing a webinar Mac screen recording software, you should understand a few things out of the way. First, new things incorporating are always good when you are well aware that your work’s software is becoming simpler.
For starters, you need to decide whether you are just going to share your screen with your viewers or if you are going to show your face on the screen.
Most screen recording tools allow you to show your face while you are sharing your screen. Deciding on this is critical. It may take some trial and error to set the best configuration if you choose to show yourself while sharing and recording your screen.
Next, you'll have to decide whether you are going to share a slide deck with your audience or just yourself while doing a presentation.
For the former, you'll need to use presentation software like PowerPoint and Keynote. Alternatively, you can just display images on a slideshow using software like Canva.
Finally, you have to make sure that you have everything that you need to record a webinar, from a good microphone to the right location that's free from unwanted background noise and other distractions.
5 Top Screen Recording Software To Choose From
With these prerequisites out of the way, it's now time to choose the right Mac screen recording software for the webinar recording. Here's a brief description of each option.
1. Camtasia
Camtasia is a screen recording software that works with both macOS and Windows. One unique advantage of this software is that you can work on a project on either operating system. For example, you can record your screen on your Mac and then have someone who's using a Windows computer edit and polish your recording.With Camtasia Mac screen recording software, you can record your whole screen or just a portion of it. Camtasia is also available on mobile, enabling you to use media stored on your smartphone.Camtasia also has video editing capabilities, enabling you to polish your recorded webinar before publishing and sharing it with your target audience.
2. Screenflow
Screenflow is another good Mac screen recording software that is a perennial favorite of people who host webinars.And there are a few reasons why. For starters, the software is affordable, making it accessible to small business owners.The software is also versatile. Aside from using it to record your screen, you can also use it to record your webinars.Other notable features include annotations, filters for both audio and video, zoom and pan motions, and more.
3. Screencast-O-Matic
Screencast-o-Matic is a browser-based screen recorder.Before you can use this software to record a webinar, you will need to download and installan application and get an annual membership subscription.After installing the software and creating an account, you can then record your upcoming webinar.Although the software has a few nifty features like zoom and drawing on the screen, you have to take note that you can't record your entire screen. Instead, you can only record an area on your screen.
4. Tiny Take
If you're bootstrapping, Tiny Take is one option you should strongly consider looking into.Although this Mac screen recording software used to record a webinar may seem basic to some people, it's free and does an adequate job of recording your screen. It comes with basic features like zooming, panning, and a bunch of special effects.
5. Zoom
Over the past few years, Zoom has emerged as a popular platform for holding meetings online.But unknown to some users, you can also use Zoom to record your screen. Plus, it has a free screen recorder feature, perfect for smaller businesses looking to minimize their expenses.You can then save your recording in mp3 or mp4 format. Take note that mp3 is audio-only. Meanwhile, the mp4 format records both audio and video, which you can polish through video editing.
Webinar Recording For Your Next Show And Tell
Showing yourself in front of an audience is a great way to humanize your company. Instead of just showing a product or a service, your prospective buyers can see and identify with another person who faces the same problems as they have.But sometimes, showing yourself in front of the audience is not enough. To explain and make a complex idea more accessible or to back up certain points, you might need to use a robust Mac screen recording software for your screen.Read Also:
Content Rally wrapped around an online publication where you can publish your own intellectuals. It is a publishing platform designed to make great stories by content creators. This is your era, your place to be online. So come forward share your views, thoughts and ideas via Content Rally.
Are you tired of sharing the same server with other websites? The number of visitors to your website is growing, and you fear that your website will slow down.
Of course, you need more storage space as your website needs are outgrowing the present shared hosting plan. It’s time that you have thought about subscribing to dedicated server hosting.
With a dedicated hosting plan, you can have entire server space for your eCommerce store or website and applications - it is dedicated to you exclusively.
You don’t have to share your server and its resources with others. Instead, it allows your business to have an optimal workload and be in complete control of it.
With several dedicated server hosting providers online, you can find a suitable one with the best plans for both managed and self-managed servers. Upgrading from shared hosting to dedicated server hosting offers ultimate experience, reliability, scalability, security, and high performance.
What Is Dedicated Server Hosting?
When you hire a physical server for your website to use to itself, you call it dedicated hosting.
Other than not having to share the space with other websites, you don’t share the RAM, bandwidth, and disk space with others. You can optimize the server depending on your business needs.
By choosing the best hosting provider, you can have the ultimate dedicated server power, which can deal with the heaviest workloads. They can also support you with advanced hardware and protection against malware for guaranteed performance.
With dedicated hosting, you can choose any server management level, like managed, managed-pro, and self-managed. Through managed and managed-pro servers, the service provider takes care of the application installation, upgrades, backups, email configurations, patch management, and technical support.
As with managed pro servers, you get additional services related to the customization of database software and installation of anti-malware tools.
By opting for unmanaged hosting, you are provided only the initial software setup, and the rest of the things are managed by you based on your requirements.
Some Benefits Of Choosing A Dedicated Server Plan
Your business is developing and your website receiving more and more organic traffic. right?
This is the right time to upgrade your hosting plan to a dedicated server for completer access to system resources and benefits.
Some prominent benefits include:
Overview:
High speedInstall anything you wantHave advanced securityQuick scalability
1. High speed
With a single-tenant infrastructure, your website will experience high speed. There are no other websites to slow down your website when there are traffic spikes.
You also get to benefit from some hosting providers offering the fastest storage using SAS technology that spins the disk at 15000rpm. It helps load web pages ten times faster than before.
Your website’s performance will affect when traffic spikes and if you fail to use an appropriate hosting service. With a dedicated server, you can easily deal with sudden traffic spikes and avoid site downtime and revenue loss.
2. Install anything you want
With complete root-level access, you are permitted to install any plug-ins, library, applications, and server components. Thus you can change the hardware and software configurations by adding more storage space, processing power, and bandwidth and customize the server to suit your website requirements.
3. Have advanced security
If you want customers to come again to your website, you need to ensure that your website is secure. Opting for a dedicated hosting service, you get to have advanced security.
Most hosting service companies offer Distributed Denial of Services (DDoS) protection, which safeguards your online store or website from downtime.
4. Quick scalability
A dedicated server allows you to shift to a larger server space, as well as a smaller space, seamlessly without moving files and reconfiguring applications.
To conclude, if your business profits from shifting to a dedicated server, you should consider it.
Additionals:
SEO Website Design Tips for Small Businesses7 Advantages of Using Website Design TemplatesThe Beginners Guide To Dealing With Website DowntimeHow do you choose an SEO-friendly theme for your website?
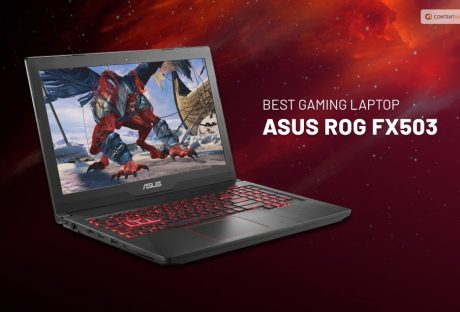
Are you in search of the best gaming laptop at an affordable price? If your answer is YES, then you must have thought about the ASUS ROG FX503 laptop. If yes, and are currently trying to search for information, then you have reached the right place.
In this blog, I will be talking in detail about the laptop that claims to be the best laptop for gaming on a budget. So, keep reading this blog till the end to learn more…
ASUS ROG FX503
If you are trying to look for a cheap or low-budget gaming laptop that is efficient and functional, you need to try out the ASUS ROG FX503.
The Asus ROG FX503 has excellent features at a low price. This gaming laptop performs incredibly well. The ROG FX503 is powered by an Intel Core i5 processor, a standout graphics card, 8GB of RAM, and 1TB of storage.
Let’s take a deeper look at the design, specifications, and features of this laptop…
Design And Looks
This laptop has a decently ergonomic design, although it isn't particularly beautiful to look at. From the top, it appears to be a rather straightforward laptop. The screen's side bezels don't appear to be overly thin.
The top hood, with its screen, is notably thin, though. Considering that it is a performance-heavy laptop, it is surprisingly small. Many laptop users may like this small form factor because they travel with their equipment.
It is pretty durable in terms of construction. Given that it's an Asus laptop, which has always kept its laptops quite stable, this was to be expected.
One of its primary highlights is the decent keyboard. As a "low-profile" anti-ghosting keyboard, it is advertised. As a result, it makes less of the typical "clicky" noise made by mechanical keyboards. Additionally, the 1.8mm key travel makes it simpler to press. The keyboard also includes an n-key rollover, which improves the smoothness of registering several keypresses simultaneously.
Features
Here are some of the gaming laptop features that you need to look at before planning to get your hands on it. Here they are:
1. Keyboard
The keyboard of the FX503 is meticulously made, just like the rest of the device. The scissor-switched, low-profile keys have 1.8mm of travel for tactile typing and are backlit in bright red for convenient use day or night.
In addition, the FX503 boasts a highlighted WASD key group, N-key rollover, a spacious space bar, isolated arrow keys, and 0.25mm keycap curves, which make it possible to handle the device quickly, precisely, and comfortably—essentials for prolonged gaming sessions!
2. Battery life
Most medium to high-performance laptops frequently ignore battery life. This is among the factors that make a desktop PC preferred for gaming. Under typical conditions (web browsing, watching YouTube videos, Netflix, and relaxing), the Asus ROG FX503 battery will last for about 4 hours. However, when using graphically demanding software or playing games, this time will be cut in half to just 1.5 hours.
The fact that it features a dual-channel heat dissipation and cooling system with copper pipes is a positive, though. As a result, this laptop stayed cooler than comparable gaming laptops even after three hours of nonstop gaming.
3. Performance
The reliability of the ASUS ROG FX503 is on par with the Intel i5 CPU that powers the laptop. It excels in routine tasks. With some of the 5th-generation Intel processor-powered laptops on the market, it is responsive, quick, and even maintainable.
4. Connectivity Ports
All of a laptop's required i/o ports are present on the Asus ROG FX503. It contains 3x USB 3.0 Type-A connections and an HDMI port for adding an additional monitor. Additionally, it includes a standard 3.5mm audio jack for connecting your headphones.
The USB 3.2 Type C ports, which are gradually taking over as the industry standard for USB devices, are what's lacking. Instead, you will receive an SD card reader. As a result, you won't need a separate SD card reader to store your favorite camera-taken photos.
5. Intelligent Cooling
The ASUS ROG FX503 uses two copper heat pipes and a dual-fan system to independently cool the processor and graphics card. This prevents system throttling even after prolonged periods of vigorous gameplay. The FX503 provides the stability required for all workloads thanks to the added Fan Overboost option, which maximizes cooling effectiveness.
Specifications
OSWindows 10 HomeDisplay15.6” FHD LED Display (1080p)Processor7th generation Intel Core i7 7700HQ (2.8GHz, boostable up to 3.8GHz)Graphics CardNVIDIA GeForce GTX 1060 4GBRAM8 GB (2400MHz, expandable upto 32GB)Storage1TB HDD (7200 RPM)Connectivity Ports3x USB 3.0 Type A Ports1 x RJ45 LAN Jack1x HDMI 1.4 Port1x SD card ReaderBatteryLi-On battery, 4 Cells 64 Whrs Polymer BatteryKeyboard & TouchpadBacklit Keyboard, Buttonless TouchpadSpeakers2x 2w speakersICEpower TechnologyCamera720p HD webcamDimensions (WxDxH)39cm x 27cm x 2.5cmWeight2.5kgs (6 lbs)Memory speed2666 MHz
What Is Good And What Can Be Better?
There are a number of things that are great about the gaming laptop. And at the same time, there are a number of things that can be made better about this laptop. Here are some of the good things and bad things about the ASUS ROG FX503 gaming laptop that you need to keep in mind before buying it.
PROSCONSScalable memory and storageRestricted storage (only 256GB SSD))For a gaming laptop, it is affordableLacking a Thunderbolt 3 portRed WASD keys on a backlit keyboard with a 1.8mm travel distance.Only a meagre 4 hours of battery lifeWide viewing angle Full HD monitor with anti-glare coatingOptical drive absentOptimal heat control and dual fan designSpeakers of poor quality and volume
Wrapping It Up!
In case you were searching for the ASUS ROG FX503 gaming laptop, I hope that this review blog has been of help to you. If there are any other queries related to the same, feel free to let me know. All that you need to do is scroll down till you reach the bottom of the page. Then leave your comments in the box below. And I will be there to answer them all for you!
More Resources:
Laptops With Best Battery Life In 2026: Work, Travel & Study Without Worry
Location And Layout Of Laptop Stores In UK
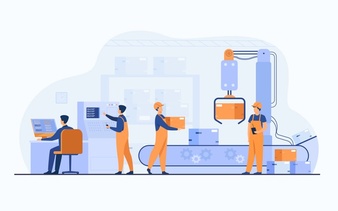
Business intelligence is the only factor that will prepare business foundations to face modern challenges by applying modern strategies. If you want to calculate the accurate business intelligence factor of any business, just you need to check how much it has utilized modern technology factors in it that is really compulsory to make it effective for all. Modern It gadgets are the most important factors that will definitely improve business intelligence factor as compare to utilizing the manual solution. Almost every successful business has utilized the same solution in which it could have gained a lot more appreciation that is actually the best thing by all means.
No doubt, modern It gadgets are very much impressive and accurate solution providers to any type of business. These gadgets will definitely drag the business to the front in an open market. the best solution to use these devices is to use them in business events. Modern It gadgets are very much helpful in the attendee’s engagement process. You can better attract them towards your information desk in a business event. Here we will let you know how modern IT gadgets are helpful in increasing the Business Intelligence factor through their efficiencies.
Smart Gadgets With Having Business Intelligence Factors:
1. Ipad The Incredible Solution
No doubt, an iPad hire is one of the best and incredible solutions that will definitely provide the business to improve its intelligence factor in a better way. You can frequently perform any type of official task through it and it will provide complete support to the business industry by all means. Moreover, you can efficiently utilize it in the business event as well. It will provide you all those facilities that you may not get from any other It devices respectively. In the olden days, when there is no use of information technology and its gadgets in the field of business, only a manual working solution was the only source to tackle all types of business intelligence. It was the right solution according to the available resources of that time but still, there is a need for something better and advance solution by all means.
2. Virtual Reality
Virtual Reality is another futuristic It device which is commonly utilized in the field of business. You can better see its usage in business events where it is taking people closer to reality. It is the best source that can frequently transform your ideas into reality and you really need not explain further in this regard. You can better explain every single point of your presentation rather than utilizing the printed papers respectively.
3. Pico Projector
It is a refined solution to the old trend projector and it has transformed with interactive solutions as well. You can better utilize it in business events where you really need to explain things briefly to the attendees. In olden days the respective solution was not clear in view and you can only provide the limited solution which is not the best option at that time. Now, with the improvement in modern technology, everything has transformed efficiently. Pico Projector can define your ideas and solution through it incredibly and it is the best pocket move solution as well. You can frequently move with it anywhere you want without any hassle. It will also elaborate on your business intelligence as you will completely find it effective in use by all means.
4. Google Glasses
Google Glasses is yet another amazing solution that is being utilized in the field of business respectively. it is a kind of a projector with having a mic and speaker option in it. It will easily get adjusted in front of your eyes through which you can better get to see the whole thing in a better way. after iPad hire solution, experts recommend Google Glasses for business presentations as both of these gadgets are the best solutions we have today. Both of these gadgets are considered the futuristic devices that will definitely transform the business industry in a professional way.
Conclusion:
Make sure to utilize these IT gadgets for business use and these gadgets will definitely provide you the best and informative solution that will also improve business intelligence like a pro. You can better use these gadgets in business events as well. There is an impressive solution for you, if you ever need to get these devices bulk in quantity it will be the best solution to utilize IT gadgets rental solution. It is the finest solution that will never make you feel regret by its choice ever.
Read Also:
How To Find A Locksmith To Trust With Your Home Security, Locks & Keys
5 Intelligent Sources To Boost Business Strategies All Over The World
Comparium The Best Cross Browser Web Testing Option
5 Things You Should Know About Safety Alerts


 In the last few years of the pandemic, teachers, for example, have been forced to become aware of online streaming platforms and webinars. They have to hold sessions, take classes, become part of conferences and more. A good idea would be to learn from webinars for teachers and get the necessary knowledge to do better when you hold one on your own.
Before choosing a webinar Mac screen recording software, you should understand a few things out of the way. First, new things incorporating are always good when you are well aware that your work’s software is becoming simpler.
In the last few years of the pandemic, teachers, for example, have been forced to become aware of online streaming platforms and webinars. They have to hold sessions, take classes, become part of conferences and more. A good idea would be to learn from webinars for teachers and get the necessary knowledge to do better when you hold one on your own.
Before choosing a webinar Mac screen recording software, you should understand a few things out of the way. First, new things incorporating are always good when you are well aware that your work’s software is becoming simpler.
 With these prerequisites out of the way, it's now time to choose the right Mac screen recording software for the webinar recording. Here's a brief description of each option.
 Showing yourself in front of an audience is a great way to humanize your company. Instead of just showing a product or a service, your prospective buyers can see and identify with another person who faces the same problems as they have.
But sometimes, showing yourself in front of the audience is not enough. To explain and make a complex idea more accessible or to back up certain points, you might need to use a robust Mac screen recording software for your screen.
Read Also:
Showing yourself in front of an audience is a great way to humanize your company. Instead of just showing a product or a service, your prospective buyers can see and identify with another person who faces the same problems as they have.
But sometimes, showing yourself in front of the audience is not enough. To explain and make a complex idea more accessible or to back up certain points, you might need to use a robust Mac screen recording software for your screen.
Read Also: